How to Get Started with Amazon WorkMail?
This guide illustrates the process of getting started with Amazon WorkMail service in AWS.
How to Get Started with Amazon WorkMail?
To get started with the Amazon WorkMail service to create a network inside the organization with multiple users on the cloud. Simply go through the following guide to start using the Amazon WorkMail service:
How to Create Users With Amazon WorkMail?
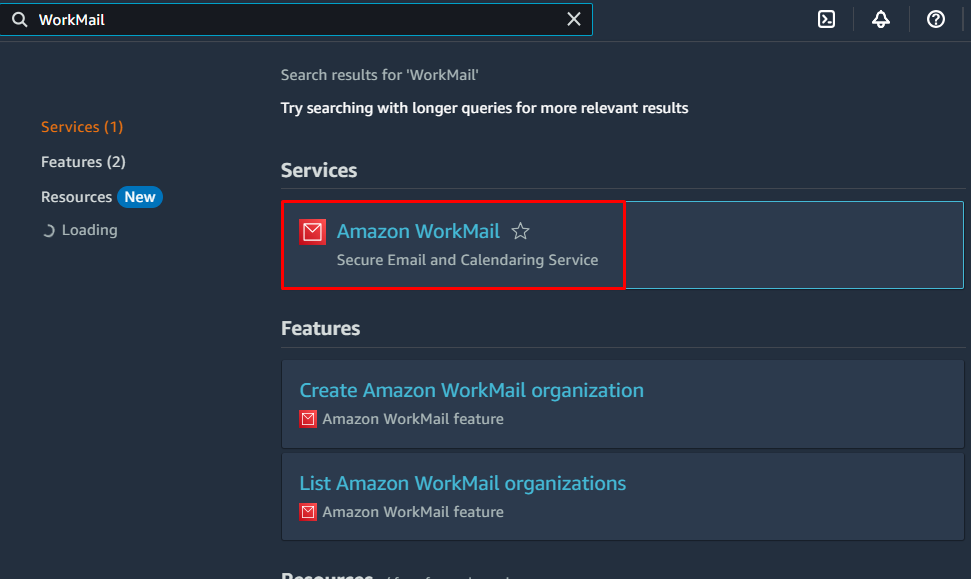
Firstly, sign into the AWS account and search WorkMail from the console to head inside the “Amazon WorkMail” dashboard:
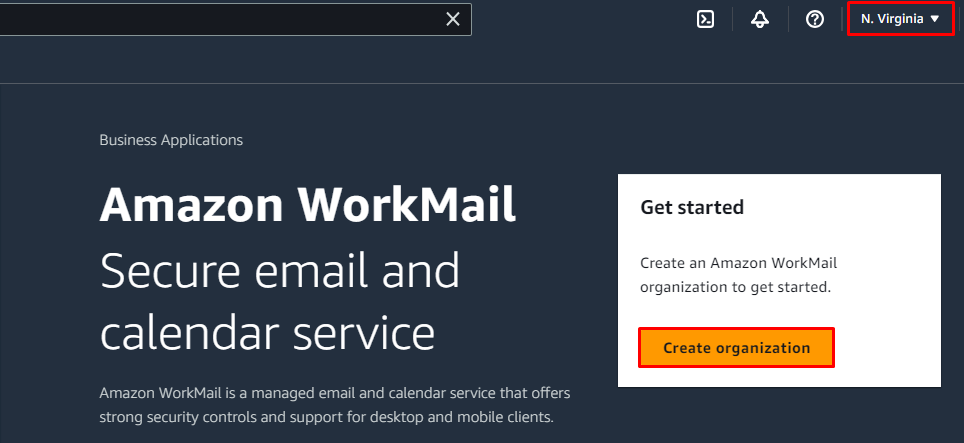
Select the region that supports the service and click on the “Create organization” button:
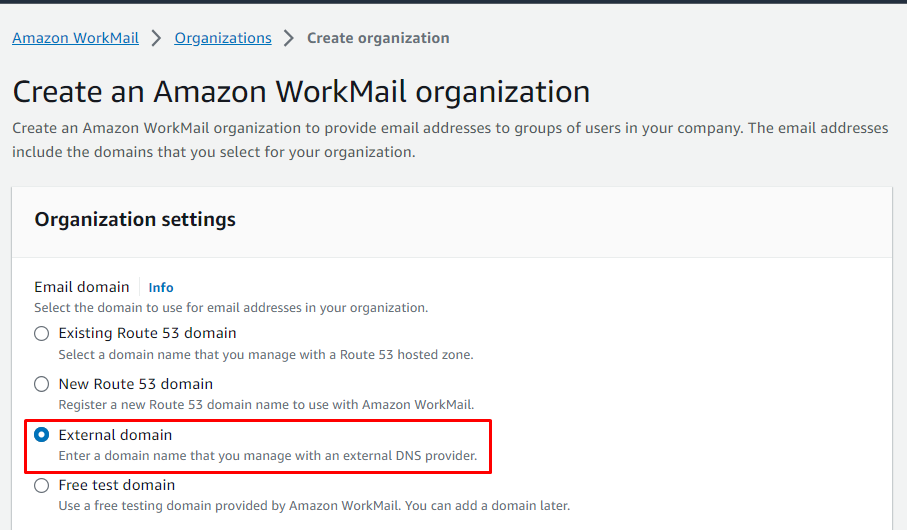
After that, simply select the domain options for the email from the “Organization settings”:
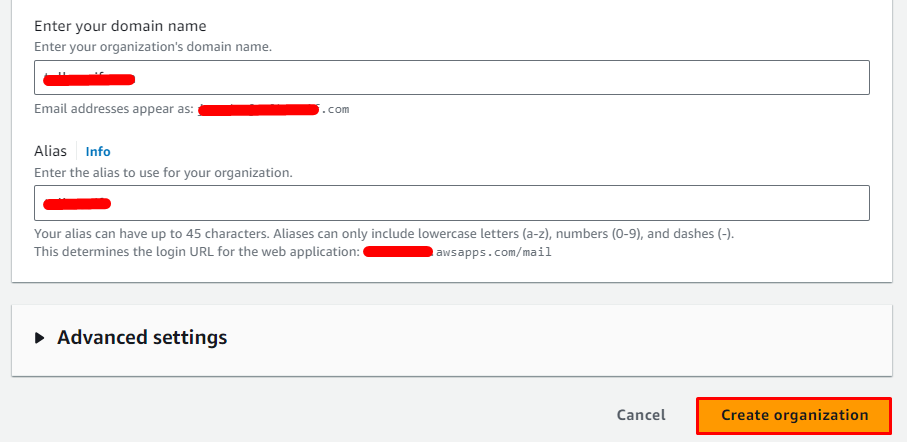
Now, type the name of the domain with its Alias before clicking on the “Create organization” button:
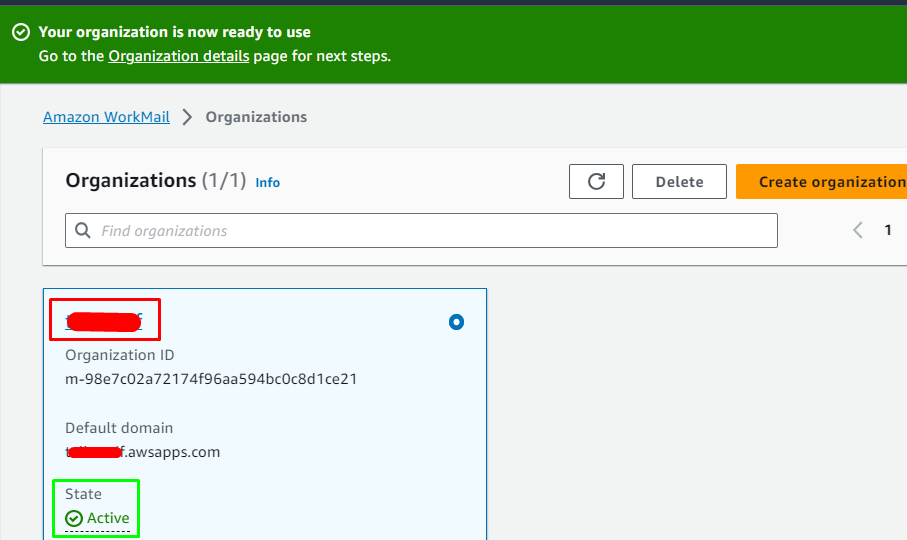
The organization has been created with the domain name and it is in an “Active” state as the following snippet displays:
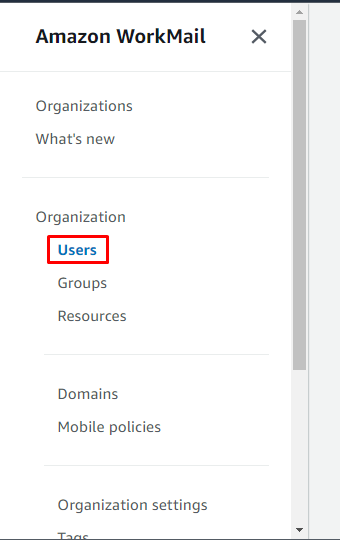
Navigate the “Users” button from the “Organization” section on the left panel:
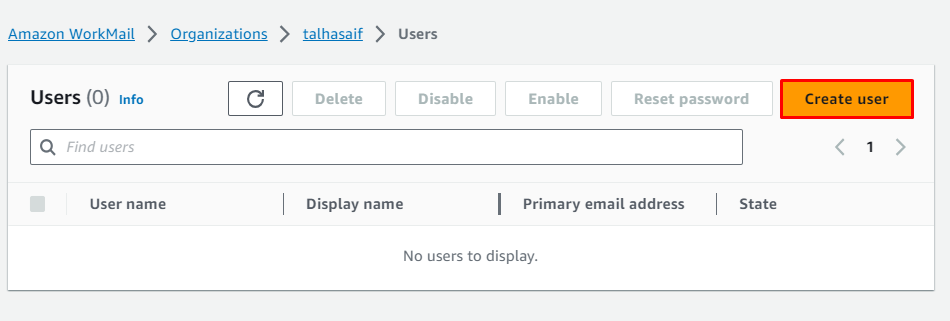
On this page, start the process of creating the user by clicking on the “Create user” button:
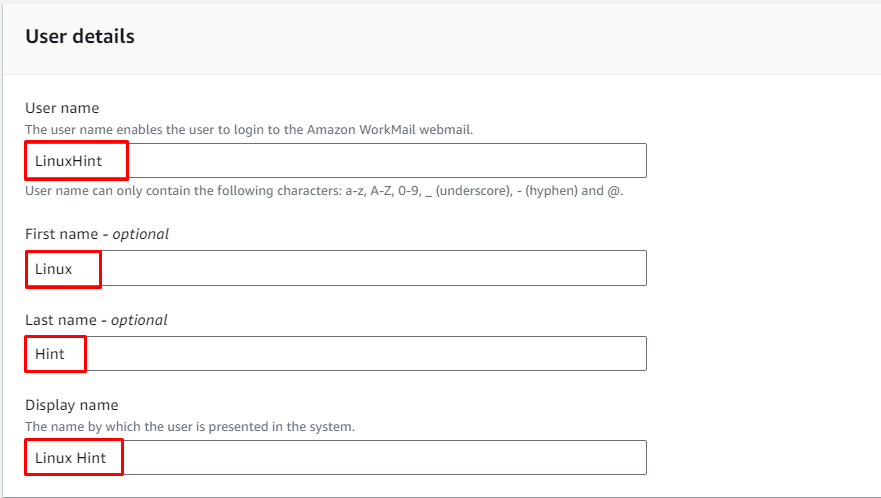
Start configuring the user by typing the name of the user and the display name for the user to identify the profile for each user in an organization:
After that, scroll down the page to write the email for the user with the password for the profile and then click on the “Create user” button:

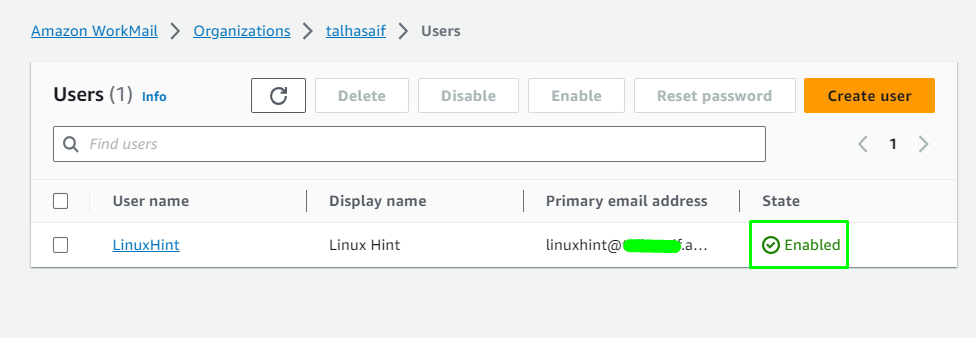
The user has been added to the organization in an “Enabled” state as the following screenshot displays:
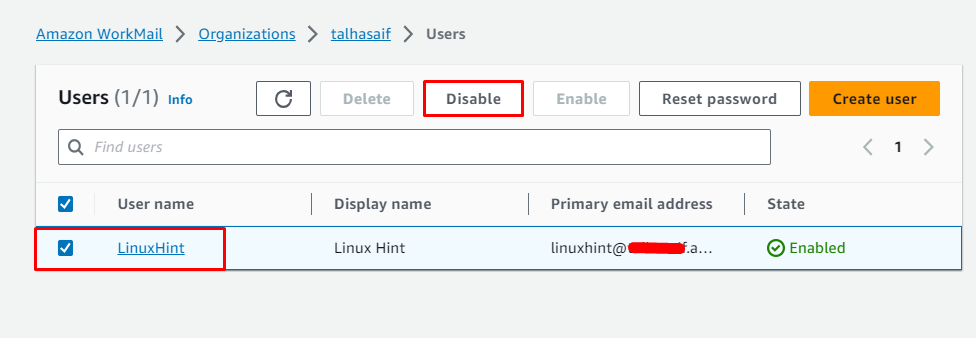
How to Disable User With Amazon WorkMail?
The user can also disable if it is not being used by selecting the user and clicking on the “Disable” button:
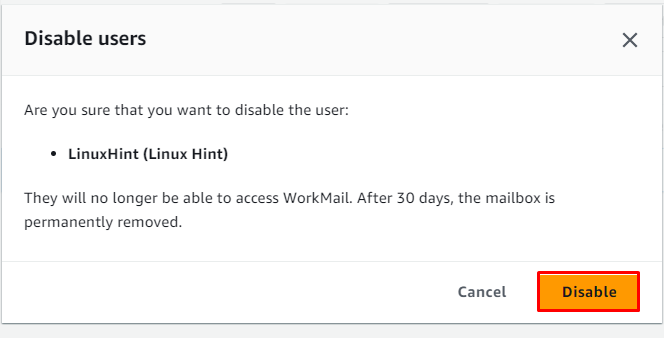
Confirm the process by clicking on the “Disable” button from the confirmation window:
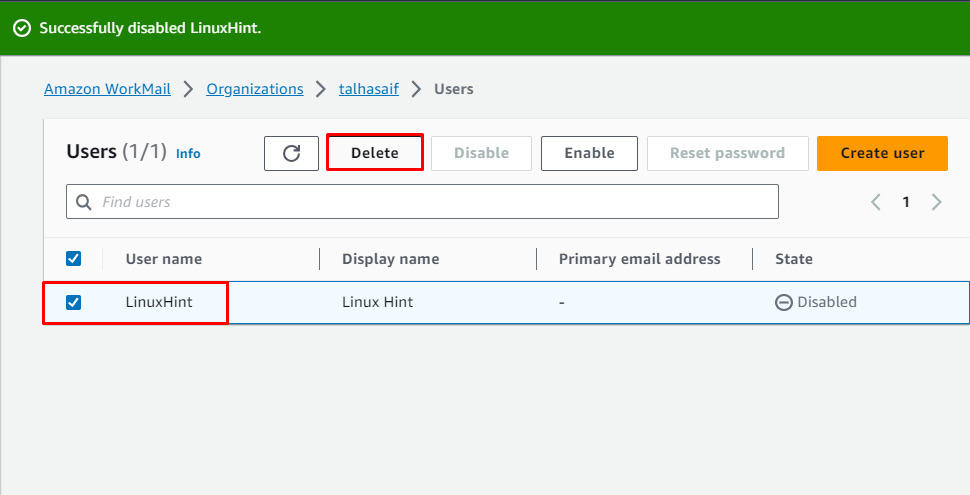
How to Delete User With Amazon WorkMail?
After disabling the user, simply delete the user by clicking on the “Delete” button from the Users page:
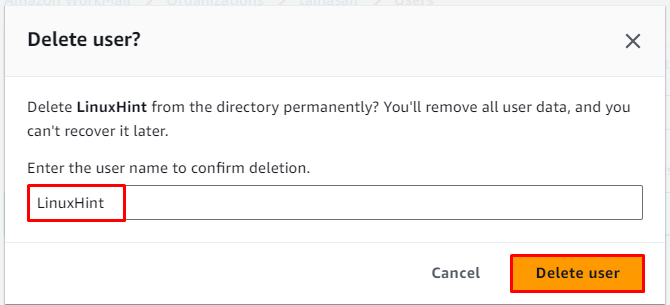
Confirm the deletion process by typing the name of the user and clicking on the “Delete user” button:
That is all about getting started with the Amazon WorkMail service.
Conclusion
To get started with the Amazon WorkMail service, navigate to the dashboard of WorkMail service from the AWS Console after signing into the account. After that, set up its organization by providing an email for the domain with its name to add multiple users to the organization. Multiple users can be added by configuring the settings for each user as this guide has explained the process in detail.
Source: linuxhint.com