How to Get Hex File from Arduino IDE
How to Get Hex File from Arduino IDE
Arduino IDE uses Hex file format to store C/C++ code into hexadecimal form. This Hex file is commonly referred to as machine code. Microcontroller cannot understand normal C language; it only takes instruction in the form of 1 and 0 also known as Binary. Arduino IDE transfers these instructions to microcontroller RAM and EEPROM through Hex file.
By following the steps described below we can get the Hex file of Arduino sketch.
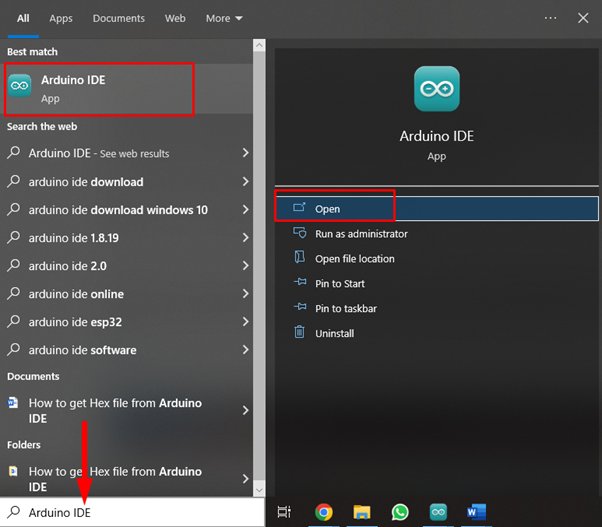
Step 1: Open Arduino IDE software on PC.
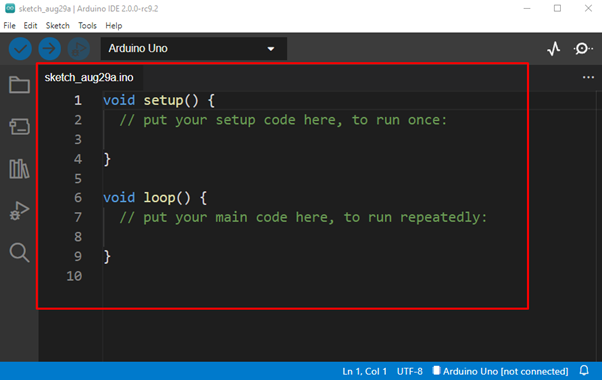
Step 2: New window will open showing us the Arduino IDE interface. Here one can write his own code or load an example sketch from IDE. We will continue with the LED blink example and try to extract its Hex file.
Step 3: Now open the LED blink example, go to: Files>Examples>Basics>Blink:

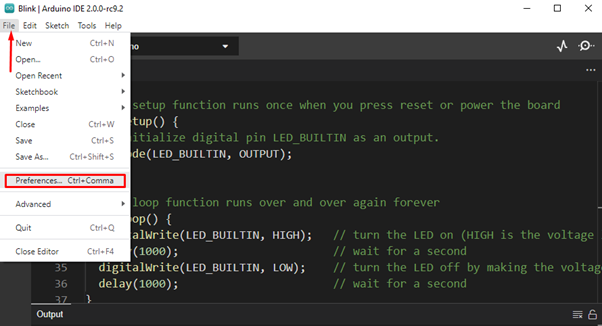
Step 4: After opening the LED example a new window will open. If you are writing your own program, recheck all the Arduino sketches. To generate a Hex file, we need a location where the Hex file is stored. To get Hex file location follow below steps. Go to: File>Preferences or press ctrl+comma.
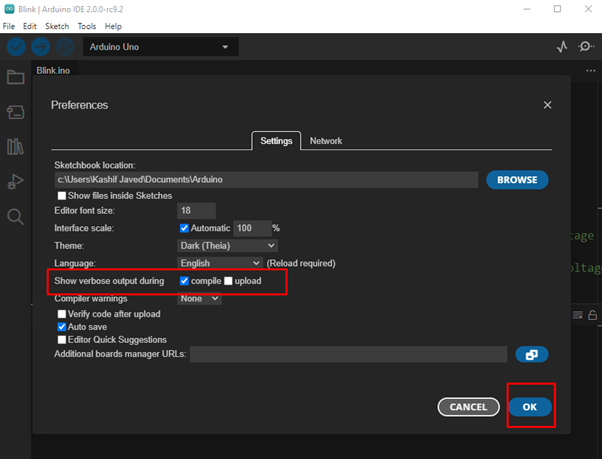
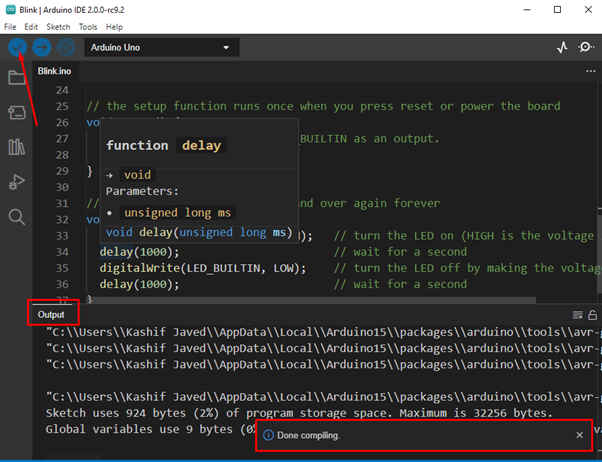
Step 5: When you click the preferences option a new window will open here tick the Compilation option in the verbose output section. After selecting it press Ok to continue. This will help us to extract Hex file location from the Output section once the program is compiled.
Step 6: Now compile the Arduino program using the tick sign at top right window. Once the program is compiled successfully, a “Done compiling” message will appear in the output window.
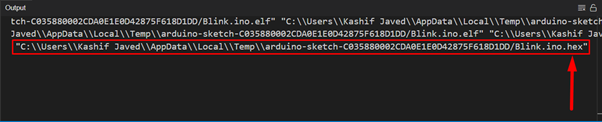
Step 7: In the output section find the “.hex” file of the compiled Arduino program. Last line of verbose output is the Hex file.
Step 8: Copy the path to the Hex file.
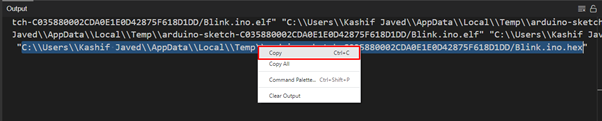
Step 9: First remove the Hex file name from the path copied.
Open My PC, select the address bar and paste the file path here then press Enter. You will see a file with .hex extension This is the required Hex file we are looking for.

Note: If the address copied from the Hex file is not working try to remove double Backslash ( \ ) symbols which are repeated in Hex file address.
Conclusion:
Here we have discussed all steps required to extract a Hex file from Arduino IDE. The Arduino board uses this Hex file to run instructions. Sometimes when we connect an Arduino board directly with a PC and upload code to Arduino it does not create a Hex file, so using the method explained above we can easily get a Hex file and use it in any Arduino project.
Source: linuxhint.com