How To Flush the DNS Cache on Ubuntu 22.04
The objective of DNS is to resolve names to numbers. To be more specific, it resolves URLs to IP addresses. If someone types google.com in the address bar of their browser window and hits enter, the DNS will resolve this URL to “142.250.179.142” by checking within its database and matching the URL with the IP address. Once your machine has this IP address, it can connect with Google and display the website’s contents. To avoid the communication between your computer and the server and minimize the load times, these entries are stored on your computer in a local cache, i.e., DNS cache.
What is a DNS cache
As discussed, it helps your computer network with servers more efficiently. In large setups, resolving domain names to their respective IP addresses can consume a fair amount of time and bandwidth. That’s where a DNS cache comes in handy.
It stores the resolution of your recently queried URLs on your computer, eliminating the need to communicate with the server every time.
You can find the details in our post “What is a DNS Cache?” for a more in-depth explanation of the DNS cache and its purpose.
Why Flush the Cache
Coupled along with the apparent advantages are some disadvantages. For instance, storing a copy of a resolution for later use and the original changes will leave you with bad data in your local cache and will not direct you to the intended location. Many malicious actors can also target your local cache to redirect you to harmful web pages.
Therefore, you must frequently flush your DNS cache to avoid such problems. So, how do you flush your DNS cache? If you are running Ubuntu 20.04, you can find a step-by-step guide here.
How To Flush the DNS Cache in Ubuntu 22.04
Now, if you are on Ubuntu 22.04, the “system-resolved” method will not work for you anymore. Let’s check the size of your cache currently. Open up your Ubuntu terminal and run the following:
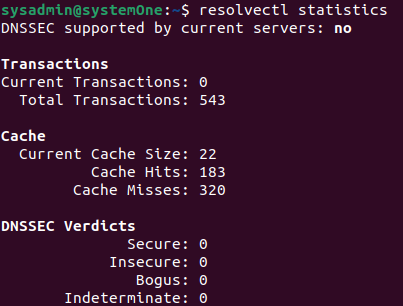
Now, let’s flush the DNS cache of your Ubuntu system:
![]()
Depending on the size of your cache, the process will take some time. As you see, the size of the shown cache wasn’t much. It was completed instantly. Now, let’s check the stats once more to ensure this has been completed successfully.
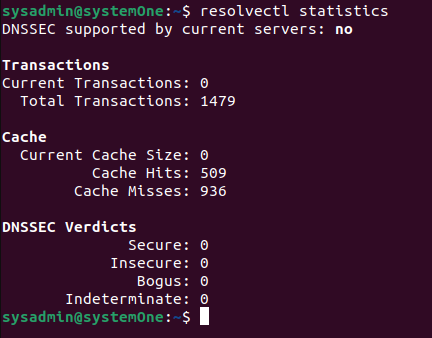
As you see that the Current Cache Size is down to 0, it means that the DNS flush was successful.
Conclusion
In this guide, we learned what a DNS (Domain Name System) is, the benefits of having a local DNS cache, why it’s essential to flush the DNS cache, and how you can manually flush the DNS cache.
We also discussed how you could flush the DNS cache on Ubuntu 20.04 and Ubuntu 20.04, along with how you can view the statistics regarding your cached data.
Fortunately, the process has gotten fairly straightforward in Ubuntu 22.04.
Source: linuxhint.com