How to Flush DNS in Windows 10
DNS stands for Domain Name System which converts domain names into IP addresses. If you are having difficulty accessing a web page, it means that the DNS record stored on Windows is either outdated or corrupt. In that scenario, DNS must be flushed to access that specific web page. More specifically, in case of having problems accessing the internet, flushing DNS can help you out.
This write-up will offer multiple methods to flush DNS in Windows.
How to Flush DNS in Windows 10?
DNS Flushing can be performed by utilizing these techniques:
Method 1: Flushing DNS Using Command Prompt
The first approach to flush the DNS is using the command prompt. For that reason, check out the instructions given below.
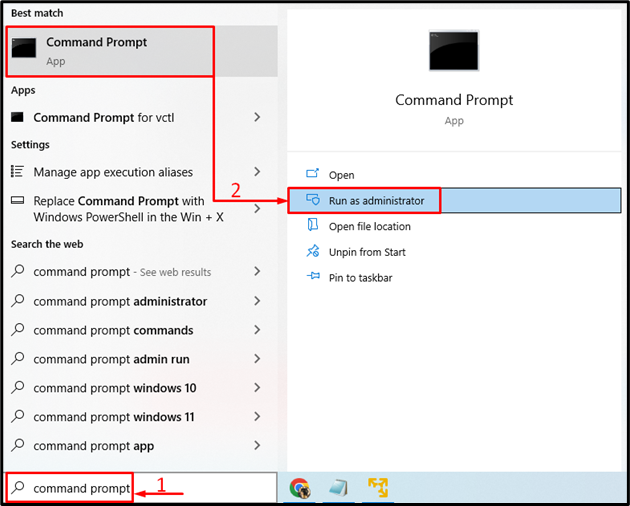
Step 1: Launch CMD
First, open “Command Prompt” via the Windows Start menu:
Step 2: Flush DNS
The “ipconfig” command is mainly utilized for displaying all current TCP/IP network configuration values and refreshes the DNS or DHCP settings. However, adding the “/flushdns” option will assist in flushing the DNS settings:
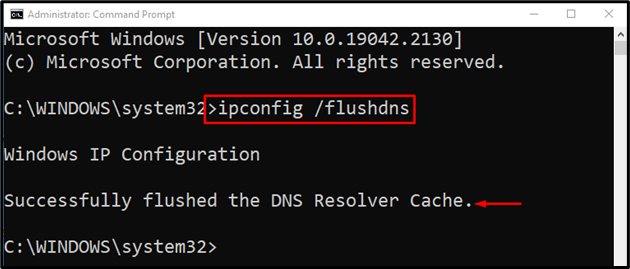
It can be observed that the flushing of the DNS has been completed.
Method 2: Flushing DNS Using PowerShell
The other method to flush DNS is by using PowerShell. For that purpose, follow the stepwise instructions given below.
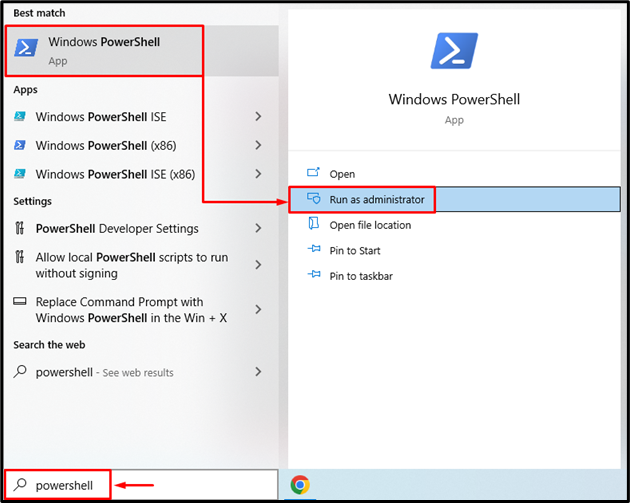
Step 1: Launch PowerShell
First, open PowerShell via the Start menu:
Step 2: Flush DNS
Execute the same “ipconfig” command in the PowerShell console to flush DNS:
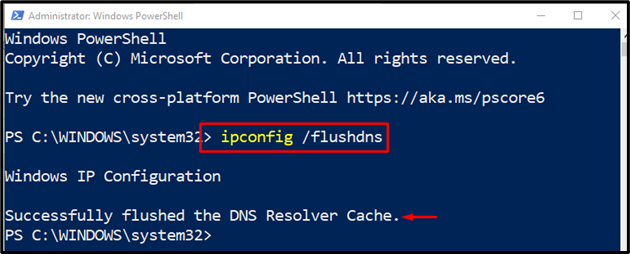
The given output signifies that DNS has been flushed successfully by using PowerShell.
Conclusion
Flushing of the DNS is performed to fix the network-related problems. On your Windows system, the DNS can be flushed with the help of executing the “ipconfig /flushdns” in the Command Prompt or PowerShell console. This blog provided a detailed guide to flush DNS in Windows.
Source: linuxhint.com