How to Fix “Wireless Mouse not Working” on Windows
This article will discuss the approaches to sort out the issues with the wireless mouse in Windows 10.
How to Fix the “Wireless Mouse not Working” Issue in Windows 10?
To resolve the “Wireless Mouse not Working” issue in Windows 10, consider the following fixes:
- Restart the PC/Laptop.
- Disable the Fast Startup Functionality.
- Reinstall the Mouse Driver.
- Run the PC/Laptop in Clean Boot Mode.
- Configure/Adjust the Power Management Settings.
- Check for the Latest Windows Updates.
Fix 1: Restart the PC/Laptop
Restarting the system does wonders in fixing a lot of issues. Therefore, perform this operation and see if the wireless mouse’s malfunction is still there. If so, proceed to the next fix.
Fix 2: Disable the Fast Startup Functionality
The “Fast Startup” feature boots the PC/Laptop quicker than the normal boot. Disabling this feature can also resolve the malfunction in the wireless mouse. To carry out this fix, go through the below-given steps.
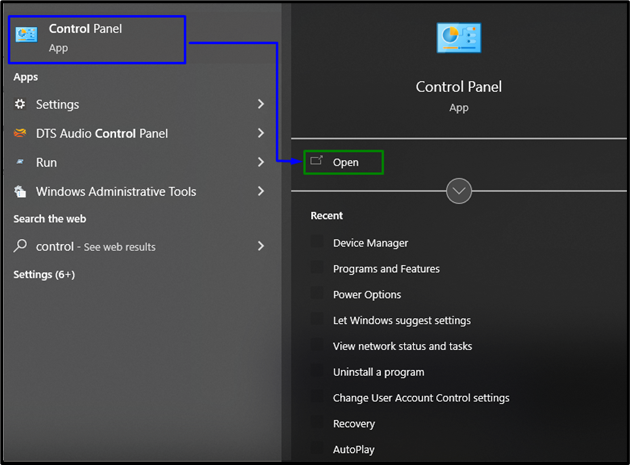
Step 1: Open “Control Panel”
From the Startup menu, open up the “Control Panel”:
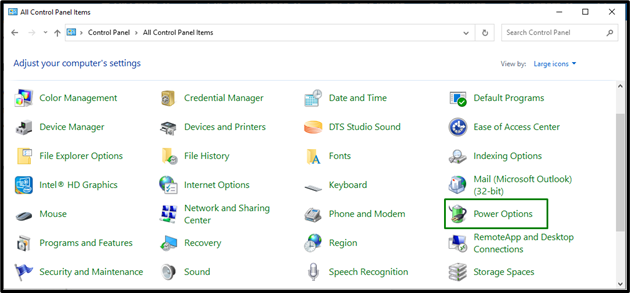
Step 2: Redirect/Navigate to “Power Options”
Now, switch to “All Control Panel Items-> Power Options”:
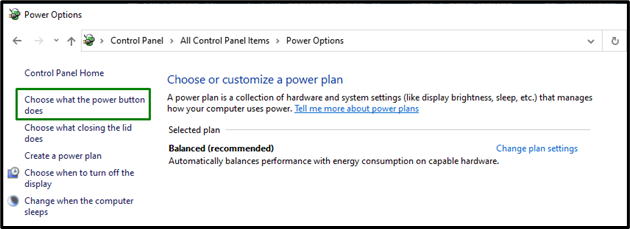
From the opened window, opt for the “Choose what the power button does” settings:
Step 3: Disable the “Fast Startup” Feature
Here, click “Change settings that are currently unavailable” and disable the fast startup feature by unmarking the selected checkbox:
After applying all the steps, restart the PC. Now, all the drivers will be initialized on startup, so the time needed to start the PC/Laptop might be longer.
Fix 3: Reinstall the Mouse Driver
The issues on the hardware end can be resolved by reinstalling the relevant driver. Implement the below-listed steps to do so.
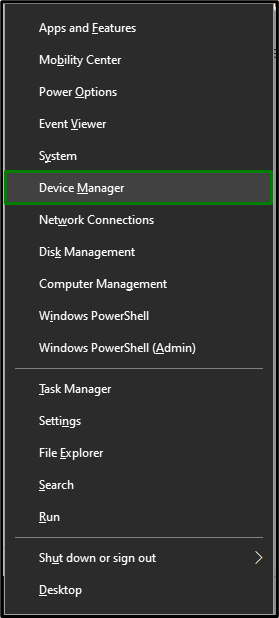
Step 1: Open “Device Manager”
First of all, hit the “Windows + X” keys and opt for “Device Manager” to open the Device Manager:
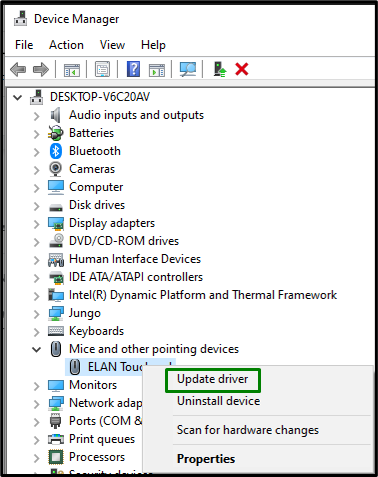
Step 2: Update the Mouse Driver
Now, expand the “Mice and other pointing devices” option, right-click on your driver and select “Update driver”:
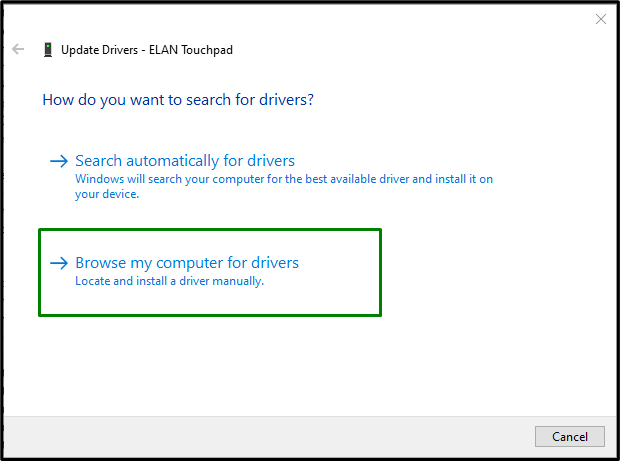
Step 3: Browse for the Mouse Drivers
Here, select the second option to locate and install the mouse driver manually:
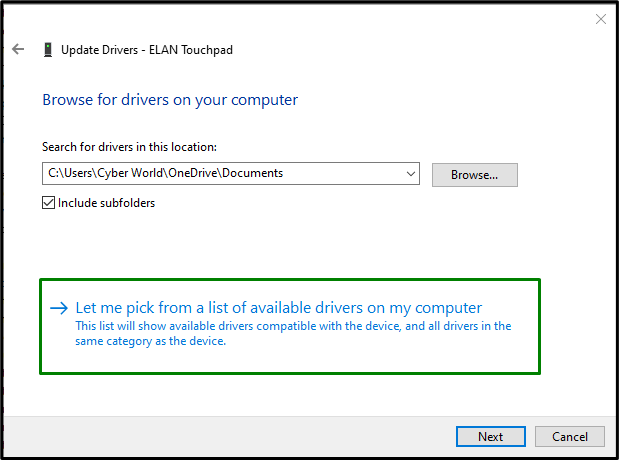
Step 4: Nominate the Driver
Now, opt for the highlighted option to search for the available drivers from your PC/Laptop:
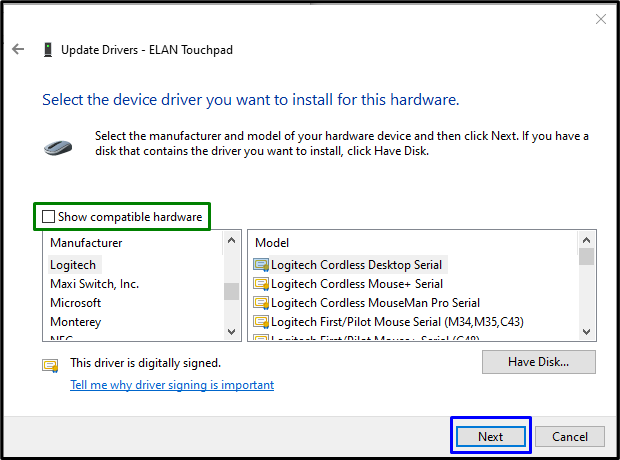
Step 5: Install the Mouse Driver
Lastly, make sure that the “Show compatible hardware” checkbox is unmarked. After that, opt for the mouse driver from the given list and hit “Next” to install the driver:
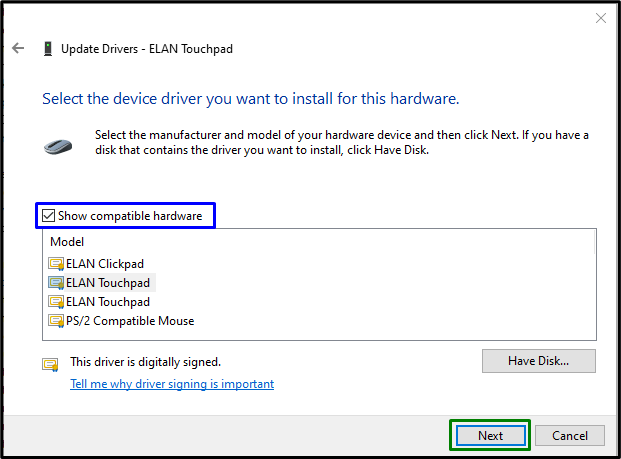
After doing so, restart the PC and repeat all of the above steps till you reach the following window. Here, mark the “Show Compatible hardware” checkbox. Also, opt for the correct driver for the PC/Laptop and hit “Next”:
After applying this approach, check if the encountered issue is streamlined now. Otherwise, move to the next approach.
Fix 4: Run the PC/Laptop in Clean Boot Mode
The “Clean Boot” mode runs Windows with limited resources to locate a background program interfering with a program. Hence, implementing this approach also assists in getting rid of the discussed error. For this purpose, utilize the below-provided steps.
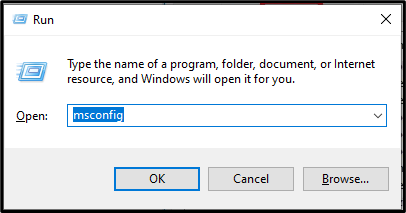
Step 1: Switch to “System Configuration”
Type “msconfig” in the Run box to open “System Configuration”:
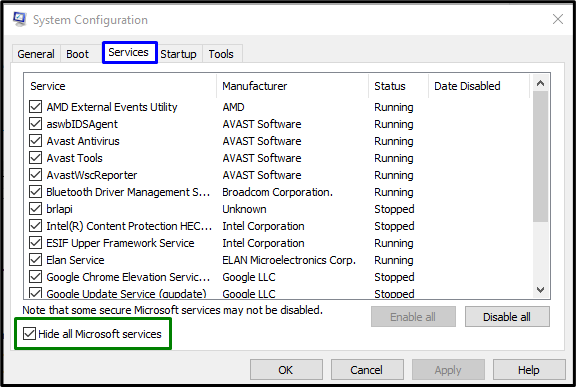
Step 2: Open “Services” Tab
Now, switch to the “Services” tab. Mark the highlighted checkbox and click on the “Disable all” button:
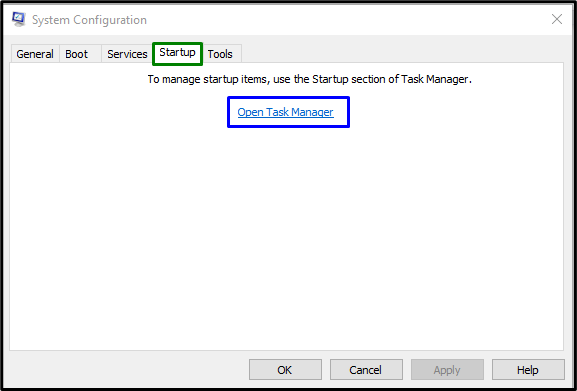
Step 3: Open the “Startup” Tab
Open the “Startup” tab and opt for “Open Task Manager”:
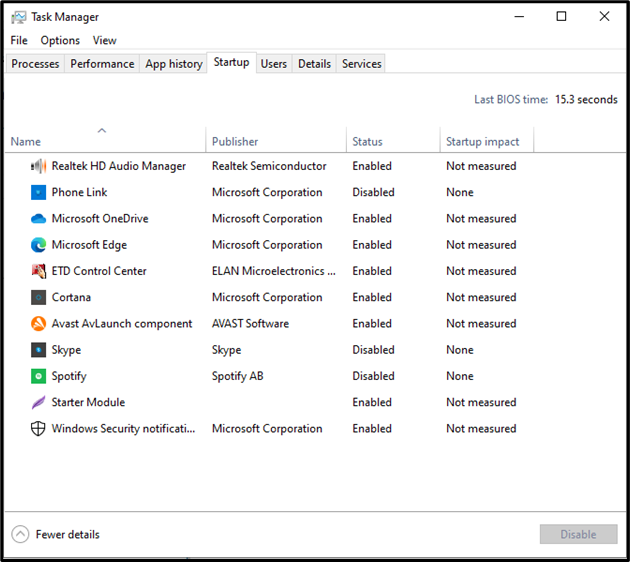
Step 4: Disable Applications
In the below pop-up, disable the given applications one by one:
Restart the PC, and the system will be booted in clean mode, and the encountered limitation will likely resolve.
Fix 5: Configure the Power Management Settings
Saving power can disable certain devices, which results in the malfunctioning of the wireless mouse. Therefore, disable this feature by utilizing the below-given steps.
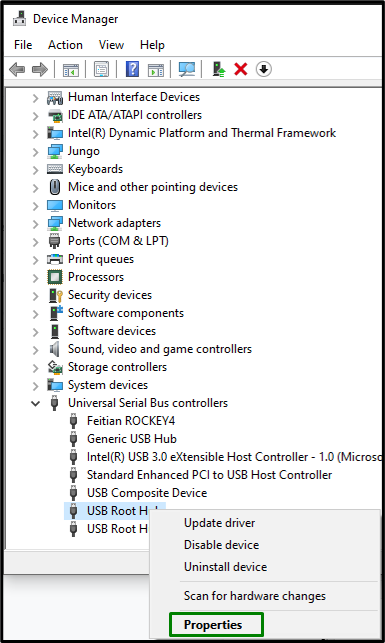
Step 1: Navigate to the USB Driver Properties
In the “Device Manager”, right-click your USB driver and hit “Properties”:
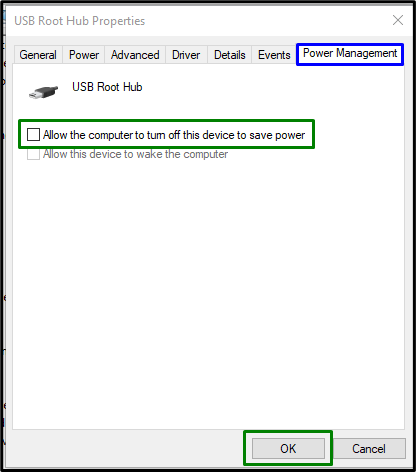
Step 2: Disable Save Power Feature
In the below-appeared pop-up, unmark the highlighted checkbox to disable the “power saving” feature and hit “OK” to complete the process:
After doing so, check if the discussed issue vanishes.
Fix 6: Check For Latest Windows Updates
If none of the above approaches worked out, try updating the Windows. The updated Windows improves the compatibility of both software and hardware. Therefore, updating Windows can also be effective in coping with the issues related to a wireless mouse.
Apply the following steps to apply this approach.
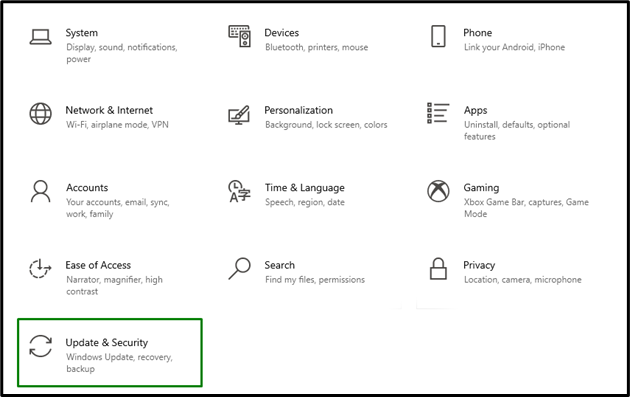
Step 1: Open “Update & Security”
Firstly, open “Settings-> Update & Security”:
Step 2: Check For the Windows Updates
Now, hit the highlighted button to check for the available updates and install them:
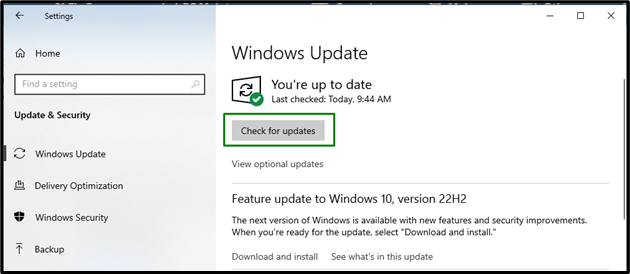
The below popped-up window indicates that the latest updates will be checked and installed:
After the Windows are updated, verify if the discussed issue is streamlined now.
Conclusion
To resolve the “Wireless Mouse not Working” issue in Windows 10, restart the PC/Laptop, disable the Fast Startup functionality, reinstall the mouse driver, run the PC/Laptop in Clean Boot mode, configure the Power Management settings, or check for latest Windows Updates. This write-up elaborated the approaches to figure out the wireless mouse’s malfunction.
Source: linuxhint.com