How to Fix Power Surge on USB Port in Windows 10?
The “Power Surge on USB port” issue indicates that the USB has surpassed the hub port’s power limits. It is such that the USB devices are allowed to withdraw a limited amount of current from each of the ports. Therefore, the users face this error when this allotted limit is exceeded. This limitation can also be caused due to unconfigured power settings or malfunctioned USB drivers etc.
This article will elaborate the approaches to resolve the “Power Surge” issue on the USB port.
How to Fix/Resolve Power Surge on USB Port in Windows 10?
To cope up with the “Power Surge on USB Port” issue in Windows 10, utilize the following fixes:
-
- Unplug the Power Source.
- Disable USB Selective Suspend Setting.
- Execute the Hardware Troubleshooter.
- Configure the Power Management Settings.
- Change Power Mode to Achieve Maximum Performance.
- Reinstall all the USB Drivers.
Fix 1: Unplug the Power Source
The foremost approach to consider to resolve this issue can be to unplug the power source by applying the following steps:
-
- Unplug the power cable.
- Remove the battery and wait for a few seconds.
- Insert the battery back.
- Plug the power cable.
- Start the PC/Laptop.
After applying all these steps, see if this approach was helpful. In the other case, proceed to the next fix.
Fix 2: Disable “USB Selective Suspend” Settings
The “Selective Suspend” feature saves power by placing certain USB ports into “suspended” mode.
Therefore, disabling this feature can help resolve the power surge issue on the USB port. Apply the below-listed steps to carry out this approach.
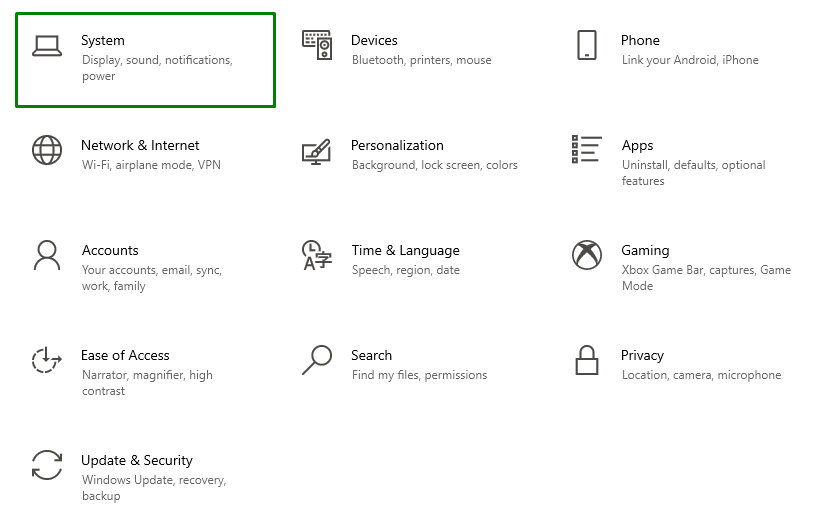
Step 1: Navigate to “System”
First of all, open “Settings-> System”:
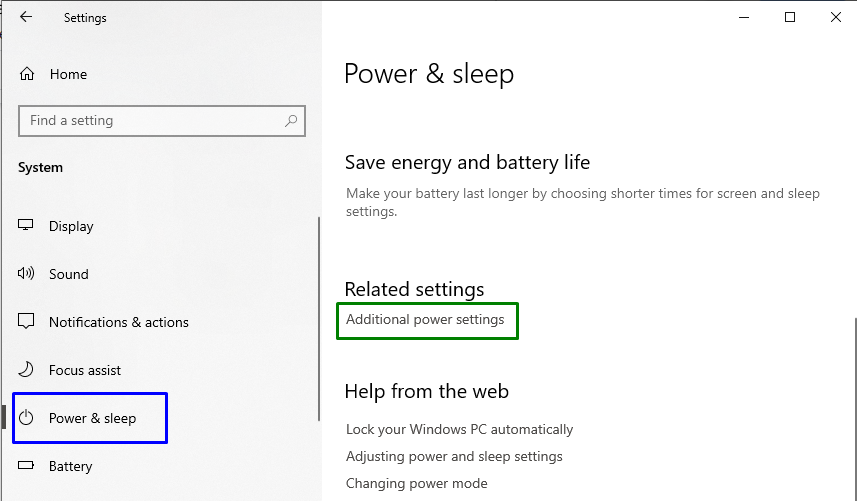
Step 2: Switch to “Additional Power Settings”
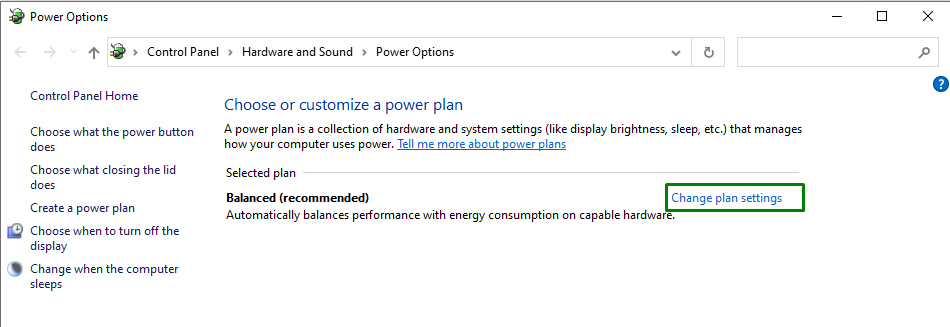
Now, click on the highlighted option in the “Power & Sleep” settings:
In the “Power Options”, hit the highlighted option to edit the plan settings:
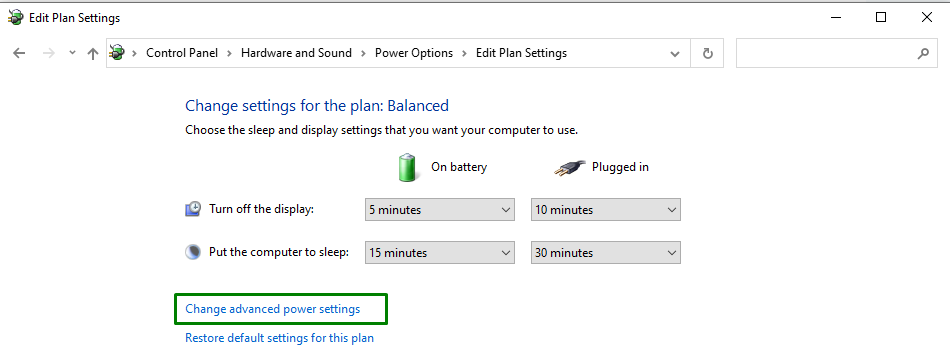
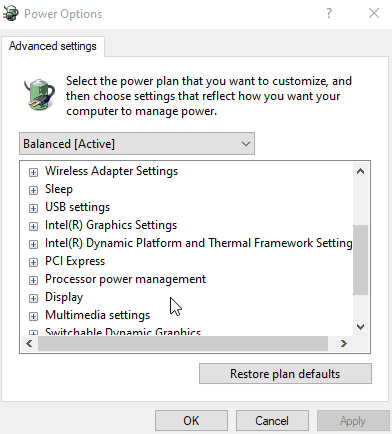
Step 3: Switch to “advanced power settings”
Now, switch to the “advanced power settings”:
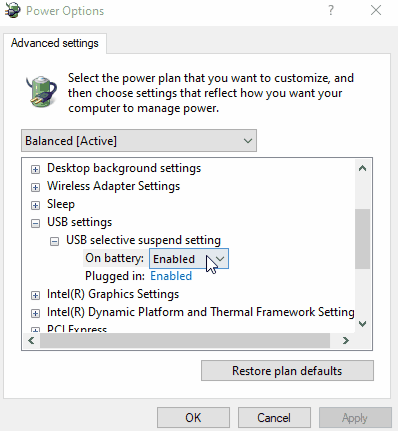
Step 4: Disable the “USB selective suspend” setting
Lastly, disable the stated settings by opting “disabled” from the drop-down list for both “On battery” and “Plugged in”:
After applying all the steps, see if the encountered issue is streamlined now.
Fix 3: Execute the Hardware Troubleshooter
Initiating the hardware troubleshooter assists in diagnosing and identifying technical issues related to hardware devices. As the stated issue is related to hardware, this fix can be effective.
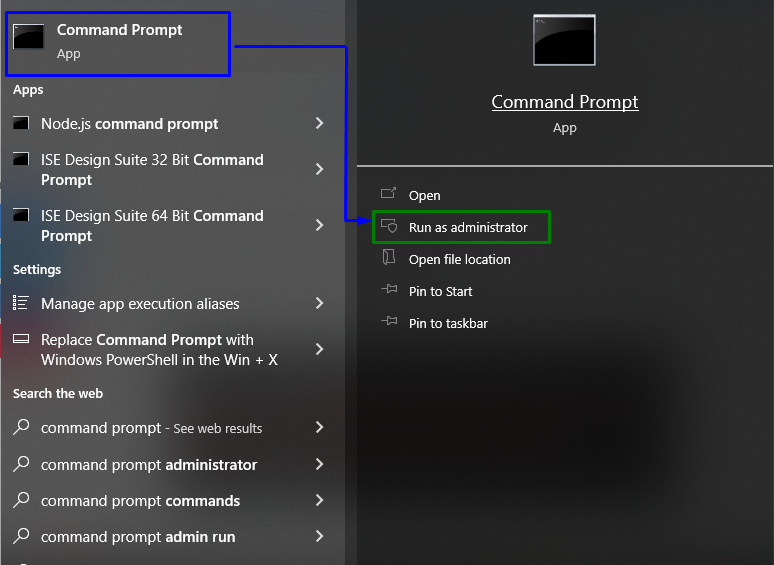
Step 1: Run Command Prompt
Open up the Command Prompt being an “administrator”:
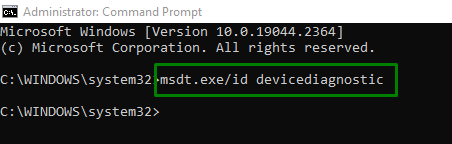
Step 2: Initiate the Hardware Troubleshooter
Now, input the below-given command to identify and troubleshoot hardware issues:
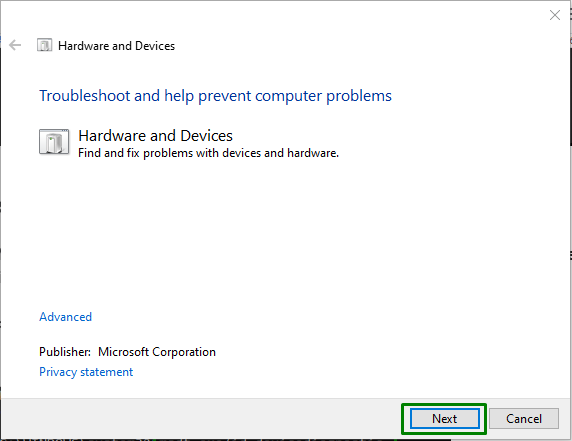
In the following pop-up, hit “Next” to start the troubleshooter:
The following progress window indicates that the troubleshooting has been started:
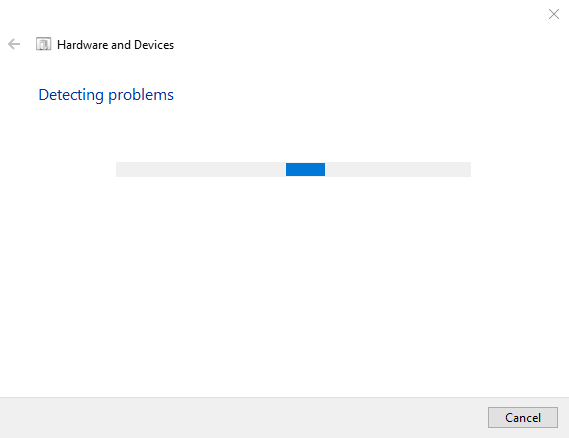
After the troubleshooting is completed, check if this approach made a difference.
Fix 4: Configure the Power Management Settings
Saving the power can lead to disabling certain devices and so the power surge issue on the USB port can also be encountered. Hence, disable this feature by applying the below-given steps.
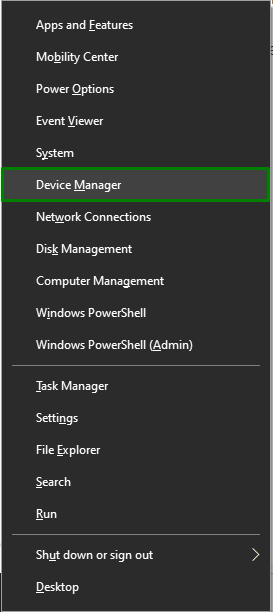
Step 1: Open “Device Manager”
Hit the “Windows + X” keys in combination and open the “Device Manager” from the provided options:
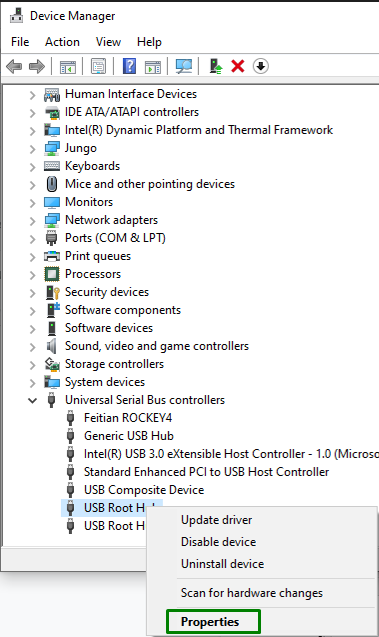
Step 2: Navigate to the USB Driver Properties
Right-click the USB driver and hit “Properties”:
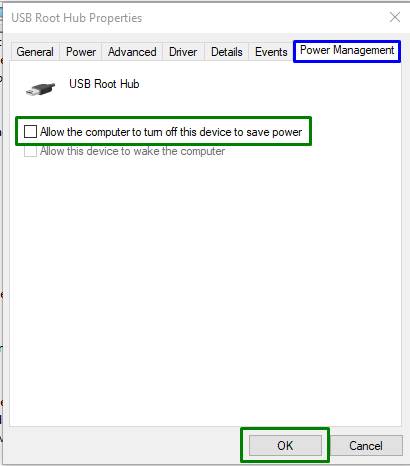
Step 3: Disable Save Power Feature
Now, unmark the highlighted checkbox to disable the “power saving” feature and hit “OK” to complete the process:
After doing so, check if the discussed issue vanishes.
Fix 5: Change Power Mode to Achieve Maximum/Optimal Performance
Disabling the Power saving such that optimal performance is achieved can also help eliminate the encountered error. In the “Advanced Power Settings”, extend the “PCI Express” and “Link State Power Management” options, respectively. After that, opt for the “Off” option from the drop-down lists against both the “On battery” and “Plugged in” options:
After all the steps are done, observe if the encountered issue is sorted out. Otherwise, consider the next approach.
Fix 6: Reinstall all the USB Drivers
The power surge issue on the USB port can also be encountered due to the malfunctioned USB controller drivers on the PC/Laptop. This can be resolved by reinstalling the installed USB drivers.
Note: Before proceeding to the steps, make sure to detach the USB device(s) from the system.
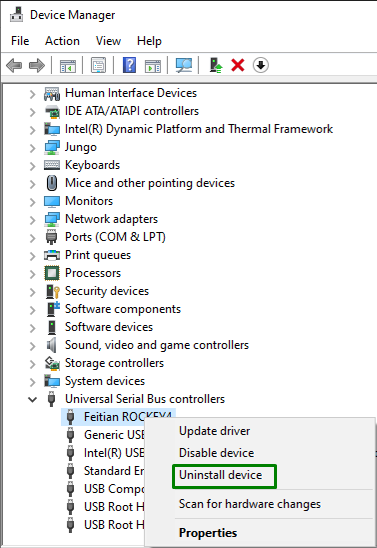
Step 1: Uninstall USB Drivers
Extend the “Universal Serial Bus controllers” option. Here, opt for all of the USB controllers one by one. Right-click on them and hit “Uninstall device”:
Step 2: Reinstall USB Drivers
After the uninstallation is done, restart the PC/Laptop, and the USB controllers will be reinstalled automatically.
Conclusion
To resolve the “Power Surge on USB Port” issue in Windows 10, unplug the power source, disable the USB Selective Suspend setting, execute the hardware troubleshooter, configure the Power Management settings, change power mode to achieve maximum performance, or reinstall all the USB drivers. This blog stated the approaches to sort out the power surge issue on the USB port in Windows 10.
Source: linuxhint.com