How To Extract Files to a Particular Folder Linux
When using a decompressing tool, there is a way to specify a different directory for the extracted files. This guide will discuss how to create archive files and extract the contents to specific directories using unzip and tar in Linux.
Extracting zip Files
The zip files are created using zip, a cross-platform compression and packaging utility that allows specifying the compression levels, ranging from 1 to 9.
When using zip to create zip files, the extracted files are stored in the current directory. Let’s create zip files in the current directory, then extract the contents to a different location.
To create zip files, the syntax is:
In our case, we are compressing different files and folders. Our zip file name is example1.zip. The following command will be:
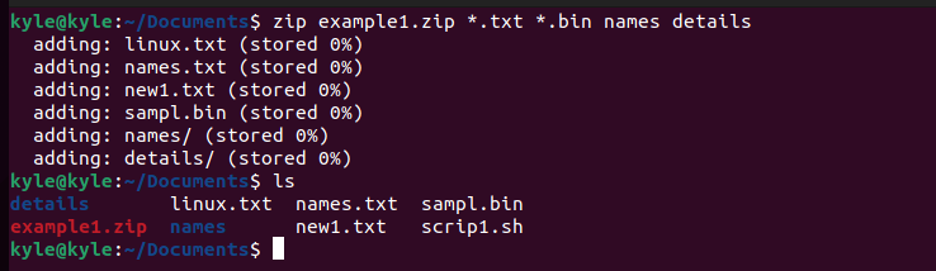
Our zip file is ready and is currently in the /Documents directory. If we were to extract it without specifying the path, the following command would be:
However, let’s specify the path and extract the file contents to /Downloads directory. Furthermore, you must add the -d flag to specify the path. Now, the syntax is:
Create a directory to extract the zip file contents, then use unzip to extract the files using the following command:
$ unzip example1.zip -d ~/Downloads/zip-extracted
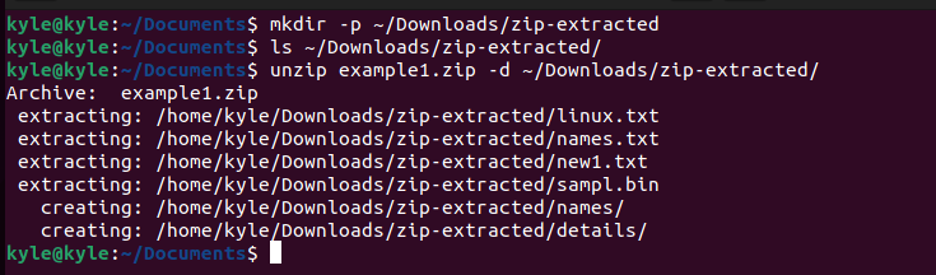
If we list the contents of the created directory, we see that the extraction was a success.

That’s all to it. Whether you are working with a created or downloaded zip file, the process and concept are the same.
Extracting tar Archive Files
The tar format is the most common compression format. Most files are either tar.gz, tar, or tzg format. The extraction will work the same, and like zip files, the default extraction occurs in the current directory unless otherwise specified.
Quickly create a tar archive to use for the following example. In our case, our archive is example2.tar:

You can use the -C or —directory flags to extract the tar file. Also, you need to create the directory to hold the extracted files, as we did with unzip.
The syntax for the extraction is:
or
In our case, our commands will be:
$ tar -xvf example2.tar -C ~/Downloads/tar-extracted
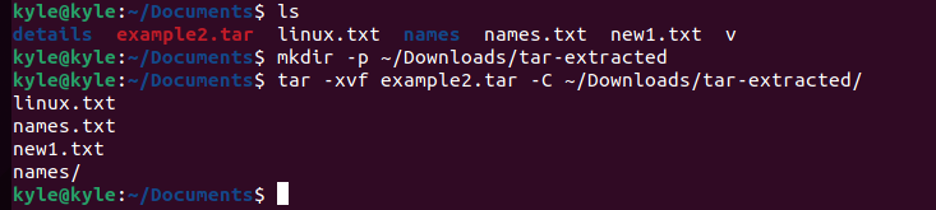
Note that example2.tar is the name of our tar archived file, and our path and directory to extract to is ~/Downloads/tar-extracted. Therefore, replace the names to match your case.
We can list and confirm if the extraction was a success, and the following output shows everything worked as expected:

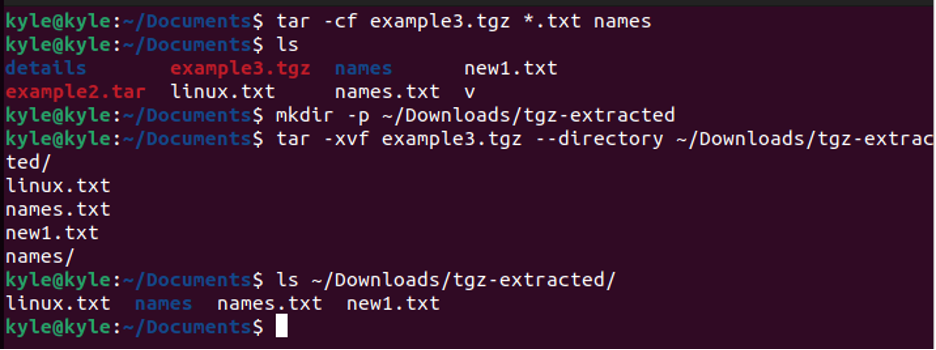
The process is the same for other tar formats. For instance, to extract a .tgz file, the commands will be similar to those shown in the following image. Also, note that we are using the —directory flag, which is the same as -C.
Conclusion
The bottom line is that by default, extracting files on Linux stores the extracted files in the current working directory. You must specify the path if you need to use different directories to extract the files. Moreover, there are various options that you need to add when using different file extraction utilities. We’ve covered extraction using unzip and tar, the two common utilities you can use.
Source: linuxhint.com