How to Draw on Google Docs
Example 1:
When we have to draw any shape, line, or other drawing in Google Docs, we must open the Google Docs window first. A blank document in Google Docs is now opened, and we have to draw some shapes here. We select the “Insert” option here from this Google Docs.
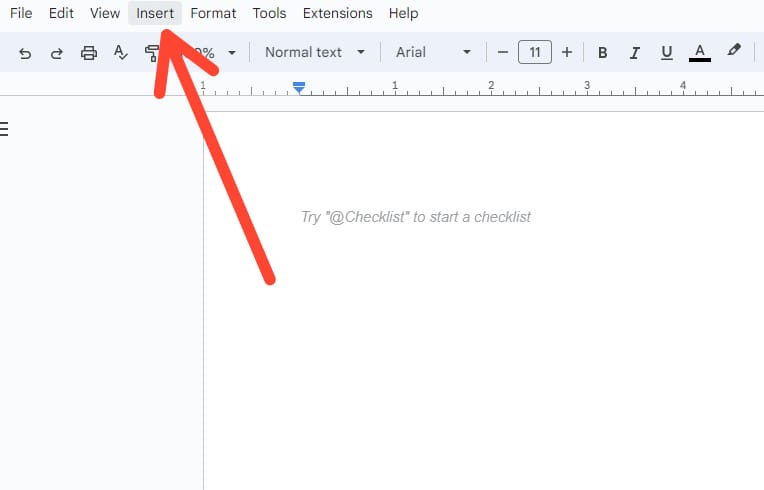
Inside this “Insert” option, we have a “Drawing” option at the third line of this “Insert” menu. After hovering the cursor over the “Drawing” option arrow, another menu opens. We now click on the “+New” option here.

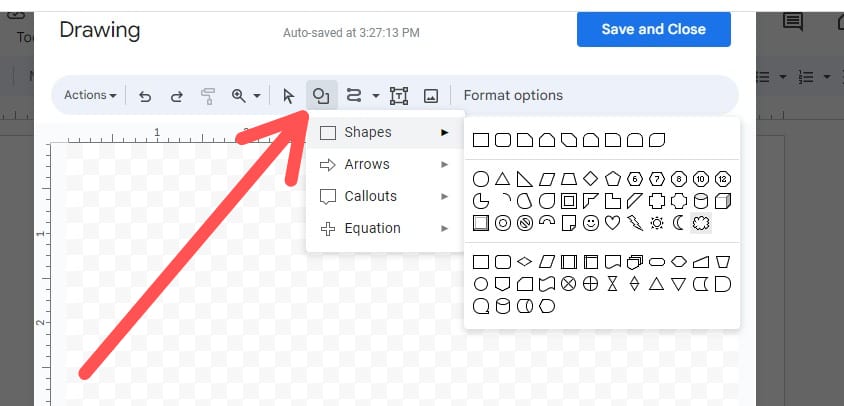
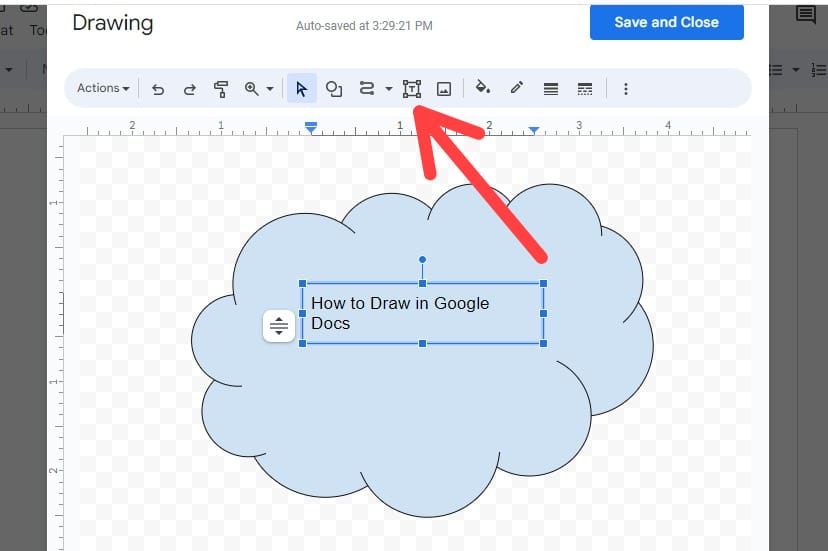
After selecting “+New”, another window appears which is the the “Drawing” window. We have various options for drawing here in this window. One is the “Shapes” option where we have different shapes, arrows, callouts, and equations in this menu. We click on the arrow of the “Shapes” option and a lot of shapes are displayed here from which we select one shape. Here, we select the “cloud” shape and draw the cloud on this “Drawing” window.
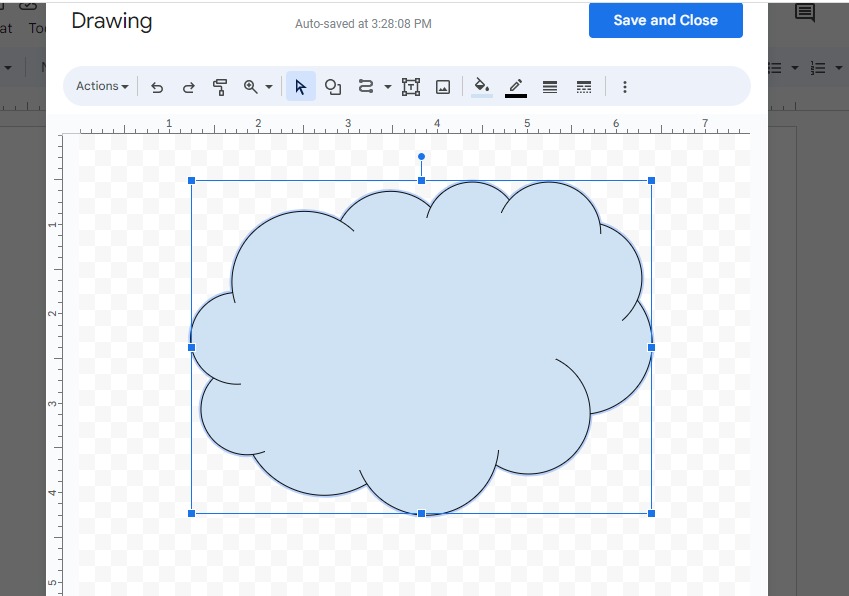
The cloud is now drawn on this “Drawing” window, as shown in the following, with the help of the “Shapes” option. We draw this cloud by dragging the cursor on this drawing screen.
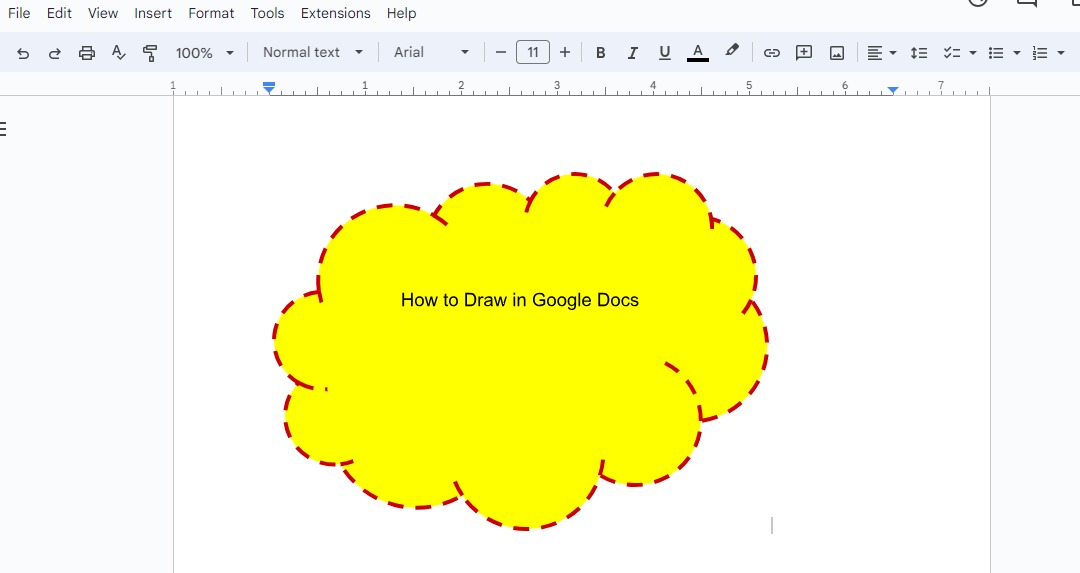
After this, we want to type “How to draw in Google Docs” inside this cloud. For this, we select the “T” icon to draw the text box. After selecting this “T” icon, we draw the text box inside the cloud and type inside this text box.
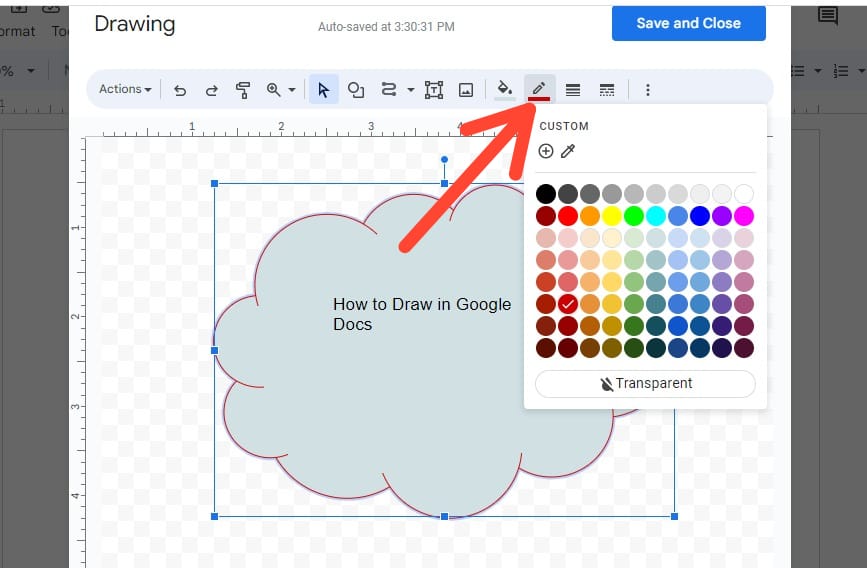
Now, we change the border color of this cloud from the “Border Color” option. We click on the “border color” and different colors will appear. We select one color that is added to the border.
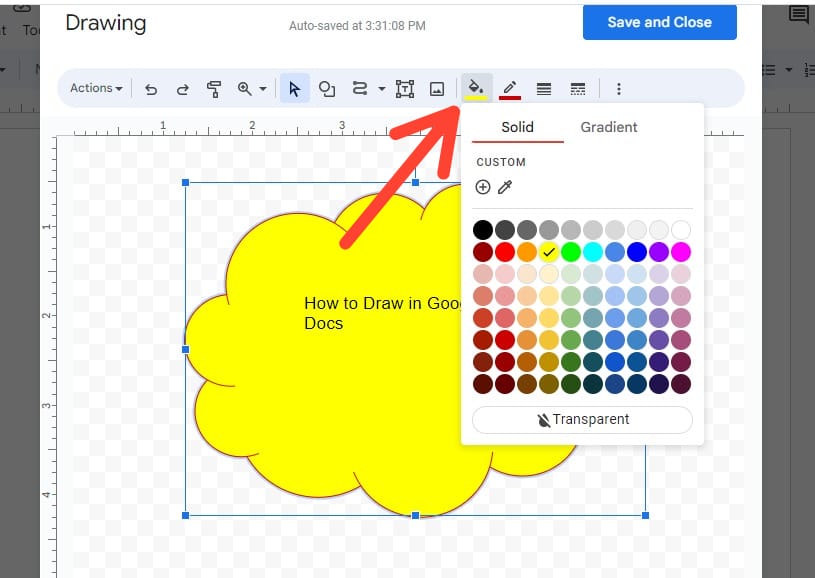
After this, we have to change the color of this cloud so we select the “Fill Color” option here and select the “yellow” color to fill it inside the cloud. We can also apply the gradient colors to fill the shapes.
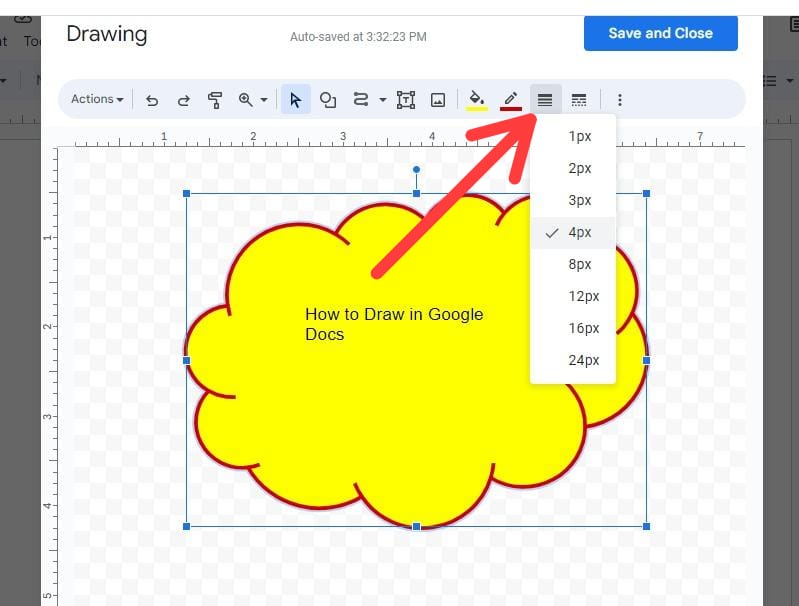
We now alter the border’s thickness by picking the “border weight” icon. We select “4px” from this option for the border thickness. Now, the border of this cloud is “4px” thick.
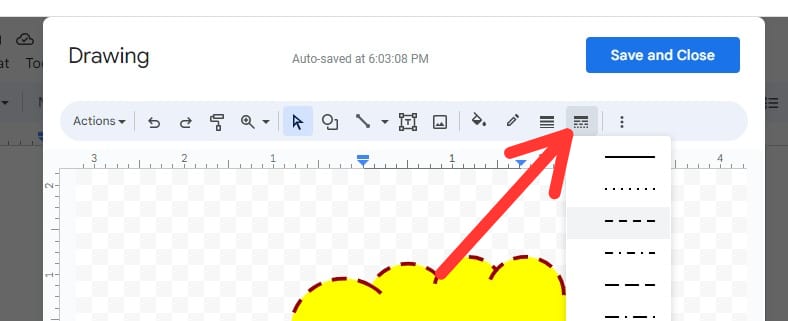
We can also change this cloud’s border from the “Border Dash” option. We select a dashed border here. Now, the order of this cloud has changed.
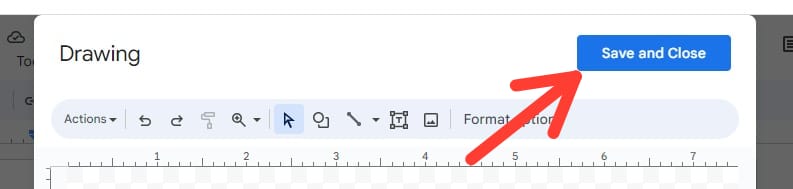
After completing this, we must click on “Save and Close”. So, this drawing is saved and appears on the blank document that we previously opened.
The cloud now appears on the screen of Google Docs. We can also change this cloud by hitting on it and choosing “Edit”. So, we edit this cloud whenever we want some changes.
Example 2:
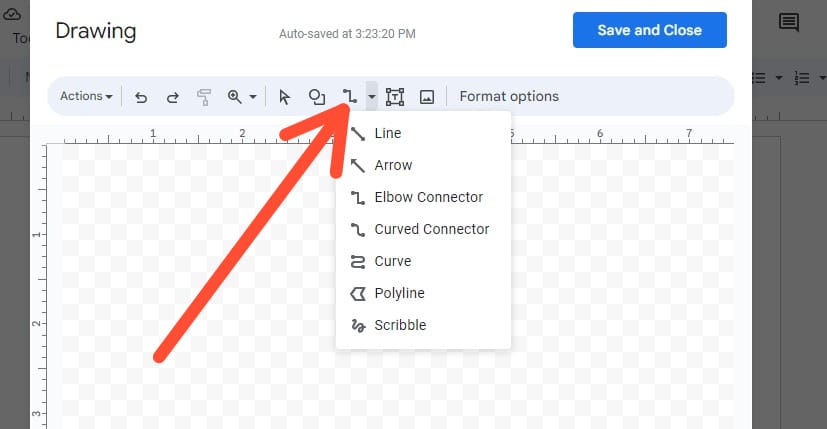
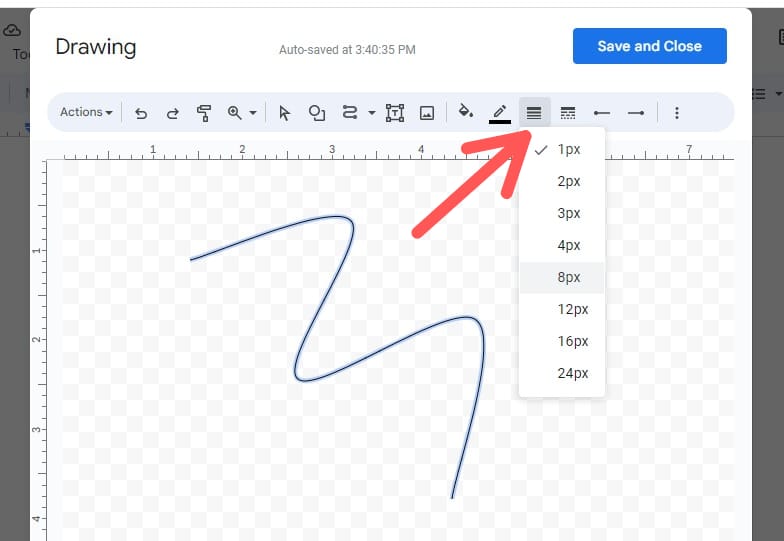
In this example, we draw the line and then apply formatting to this line. We again select the “Insert” -> “Drawing” -> “+New” option. On this drawing window, we select the “line” option. Here, we have many lines from which we select “Curve” to draw the curve on the drawing window.

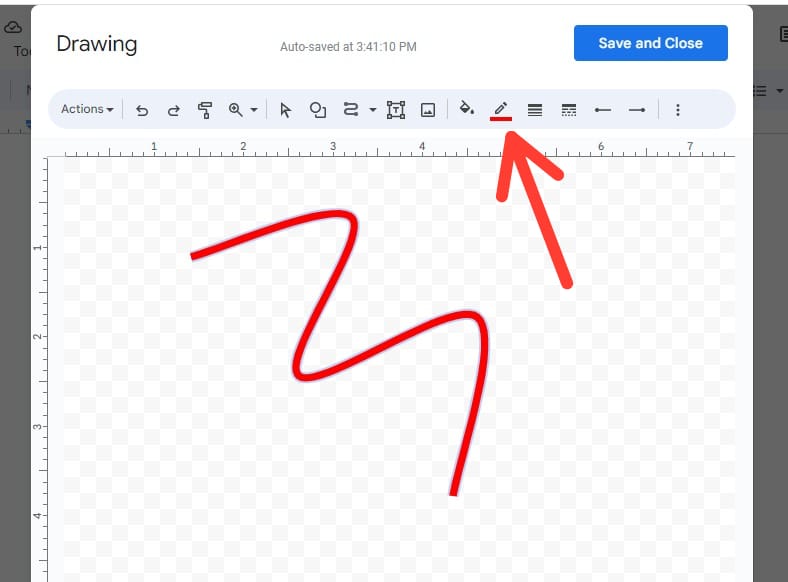
Here, we draw the curve which is shown in the following. Then, we have to change the thickness of this line by utilizing the “Border weight” option. We select “8px” here so the line will appear thicker.
Then, we fill the color in this line by utilizing the “Fill Color” option. We select the “red” color from this “Fill Color” option, and the red line appears.
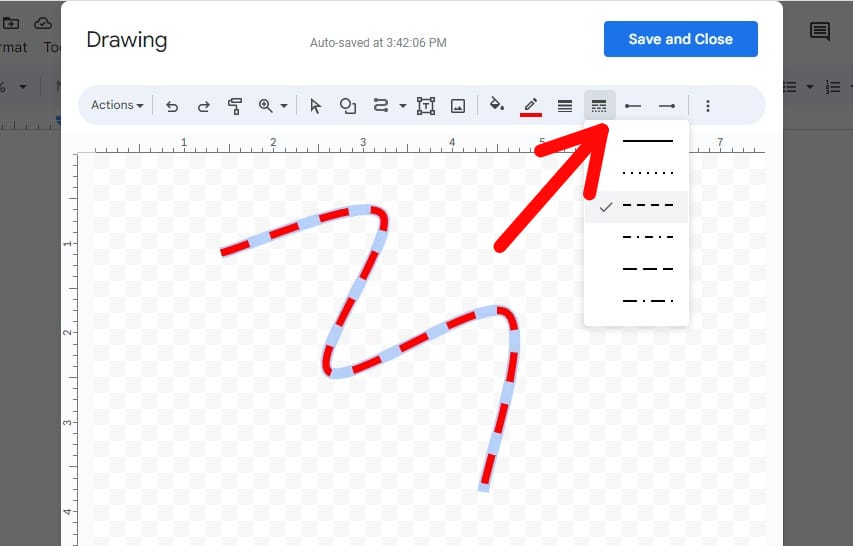
After this, we make this line a dotted line with the help of the “line dashed” option. We select the dashed line here. Our line looks as follows:
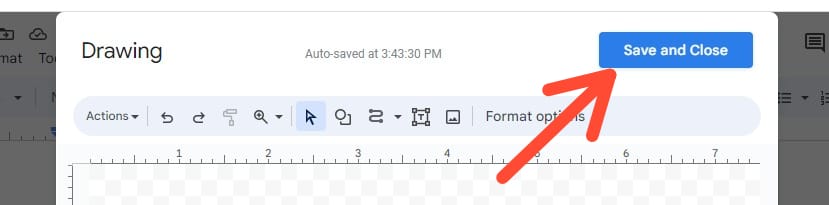
Following that, we must select “Save and Close”. As a result, this line is saved and shown on the blank page that we opened earlier.
Example 3:
We open a new blank document here for more drawings in Google Docs. We revise the same method here and select “Drawing” from the “Insert” menu and then choose “New”.
The drawing window is rendered on the screen. We select the “Actions” option here in which we have the “Word Art” option in the drop-down menu of the “Actions” option.

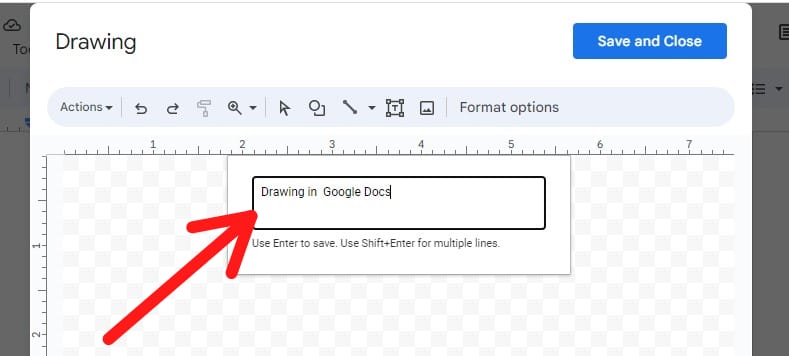
After selecting this “Word art”, a new window appears in which we have a text box and we can write anything that we want to display on the screen.
We type “Drawing in Google Docs” in this text box. Then, we have to hit the “Enter” key. After hitting “Enter”, this text is rendered on this “Drawing” window.
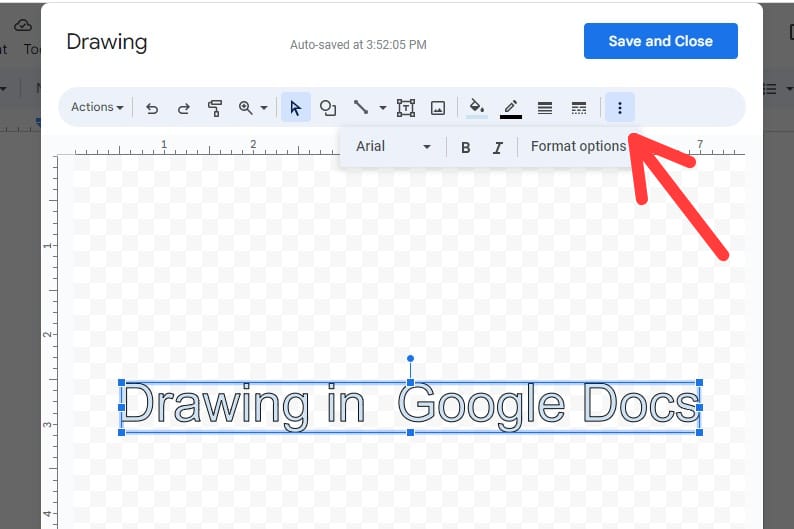
Here, the text is shown which we wrote in the previous text box. We can also change the formatting style of this text by selecting the three dots. After hitting on these three dots, different formatting options will appear.
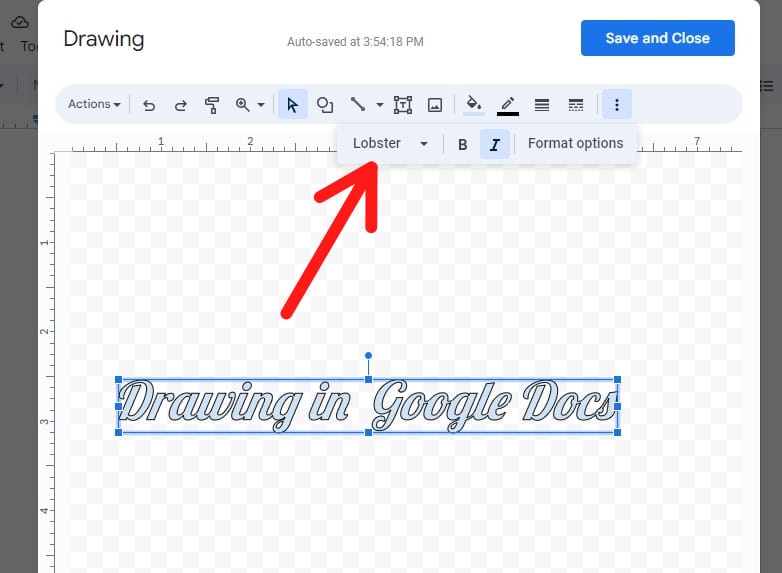
We change the “Font” from “Arial” to “Lobster” and we also apply the “italic” style to this text. Now, the formatting of the text is changed accordingly.
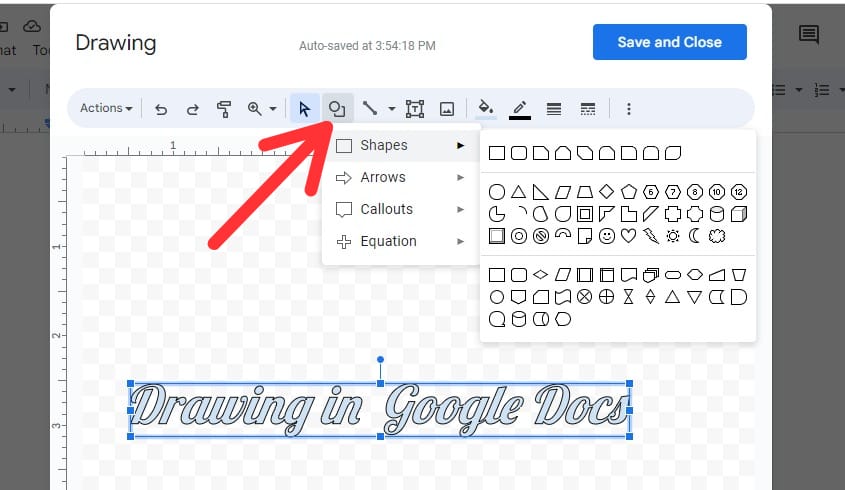
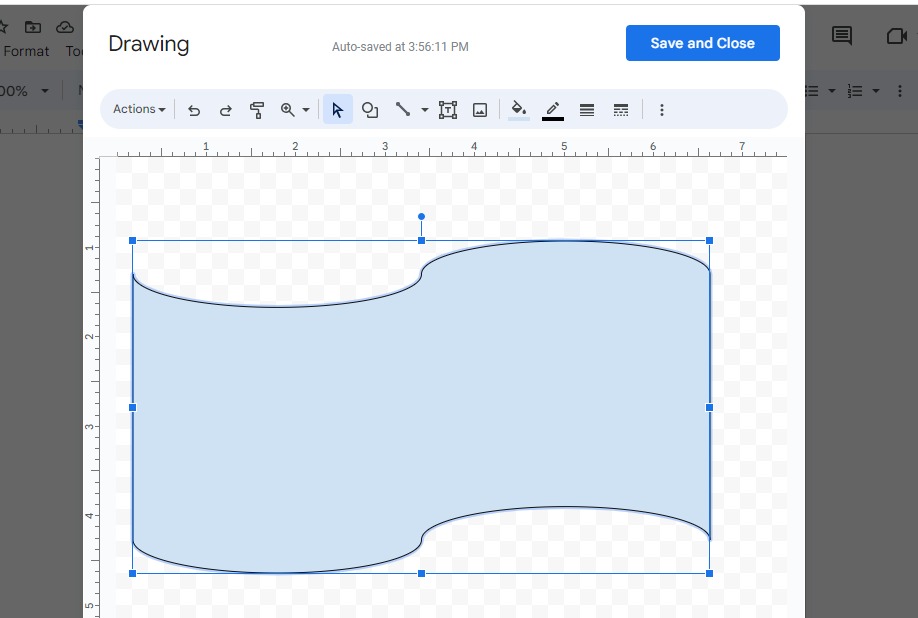
After this, we click on the shaped option and select the shape from this option to draw it on this “Drawing” window.
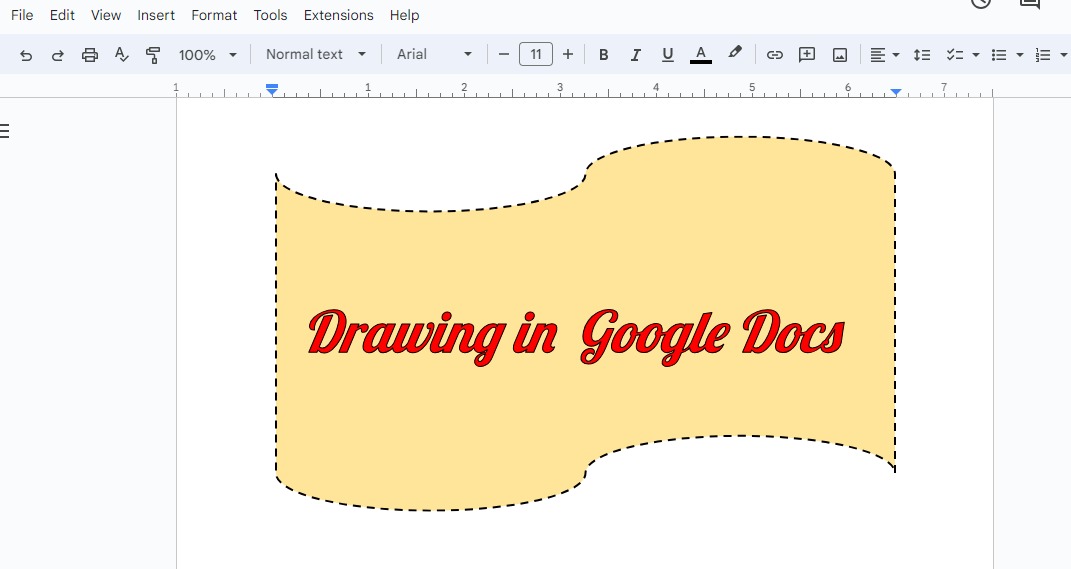
We draw the selected shape on the text. The shape is now displayed on the text, and the text is hidden behind this shape.
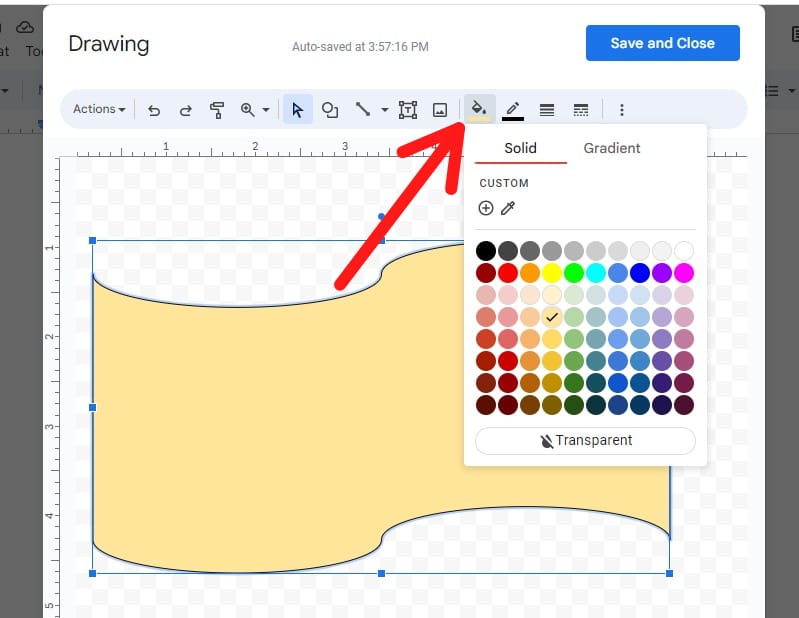
After that, we need to modify the color of this shape. Therefore we pick the “fill color” here and select the color to fill it inside the shape. To fill the shapes, we can also utilize the gradient colors.
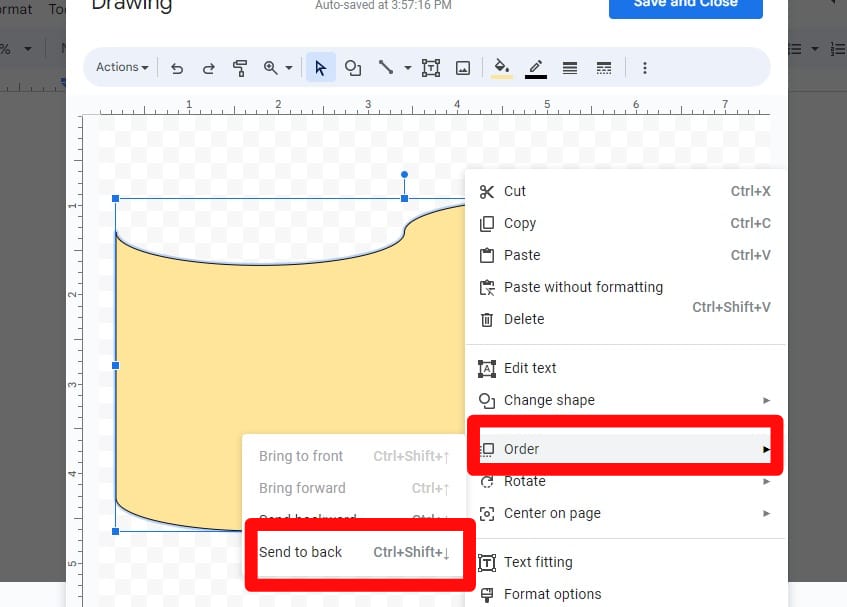
Now, we want to show the text on this shape which we previously typed. For this, we click the right button. From these options, we choose the “Order” option. From this “Order” option, we select the order of this shape which we adjust to “Send to back”. Now, this shape is sent to the backside of the text.
Now, the shape is displayed behind the text, and the text appears on this shape. We also change the border of this shape to the dotted border and then hit “Save and Close”.
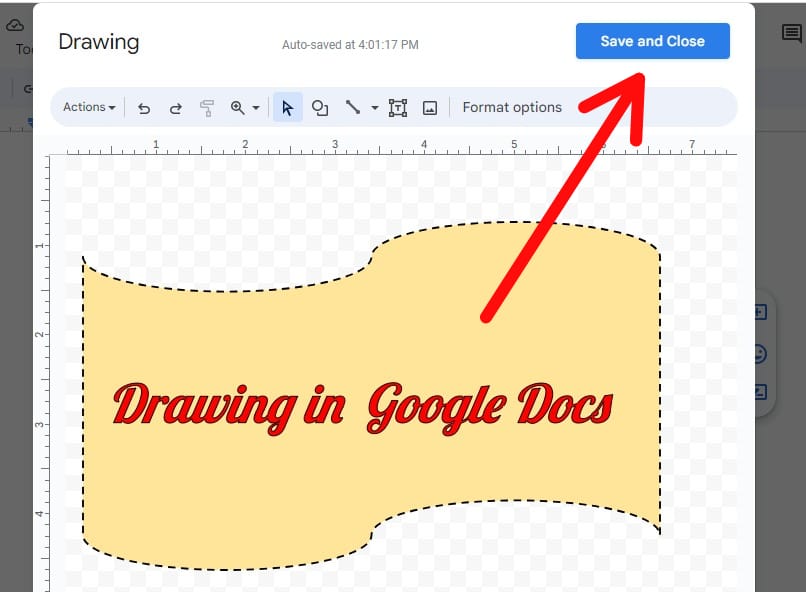
The drawing is now rendered here. We may also edit this drawing by clicking on it and selecting the “Edit” option. As a result, we edit this drawing whenever we want.
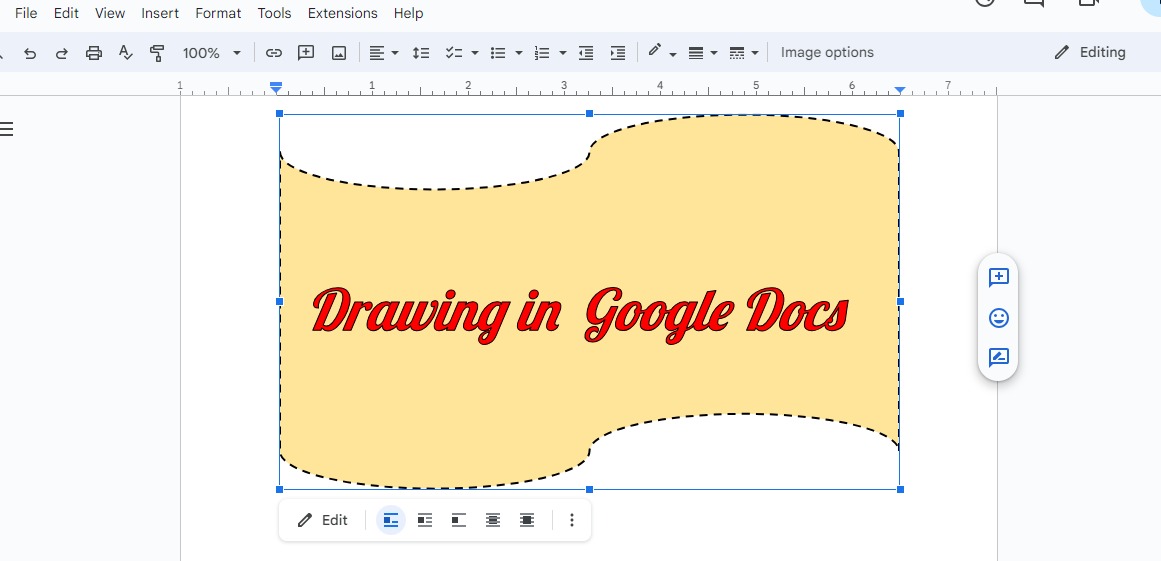
Here is the complete drawing in the following image which we drew on the drawing window and is now displayed on the blank document.
Conclusion
In this guide, we learned the “Drawing” concept in Google Docs. We have drawn many shapes and lines here. We also showed how to apply formatting or coloring to the drawing. We explored the “Drawing” concept in detail and drew here in this guide. We thoroughly explained each step of the drawing concept here.
Source: linuxhint.com