How to Download and Install Git on Your Mac?
Git is the most reliable source for developers to manage and host their projects on platforms like GitHub and GitLab. Due to its huge popularity, it supports cross-platform compatibility to be utilized by every type of user. This guide is for Mac users to install and use Git on the Mac operating system in all possible ways.
This article will cover:
- Method 1: Install Git Using Git Installer (GUI)
- Method 2: Install Git Using Home Brew Command
- Method 3: Install Git Using Mac Ports
- Bonus Tip: How to Uninstall Git on Mac?
How to Download and Install Git on Your Mac?
There are several methods to download and install Git on the Mac operating system including GUI and CLI. Let’s check each method in the guide.
Method 1: Install Git Using Git Installer (GUI)
The most convenient way to install Git on Mac is through the Git installer. Download the Git installer file, open and install the Git. Let’s see the practical implementation below.
Step 1: Download Git Install
Open your Safari web browser, download the Mac installer file, and open it:
Step 2: Install Git
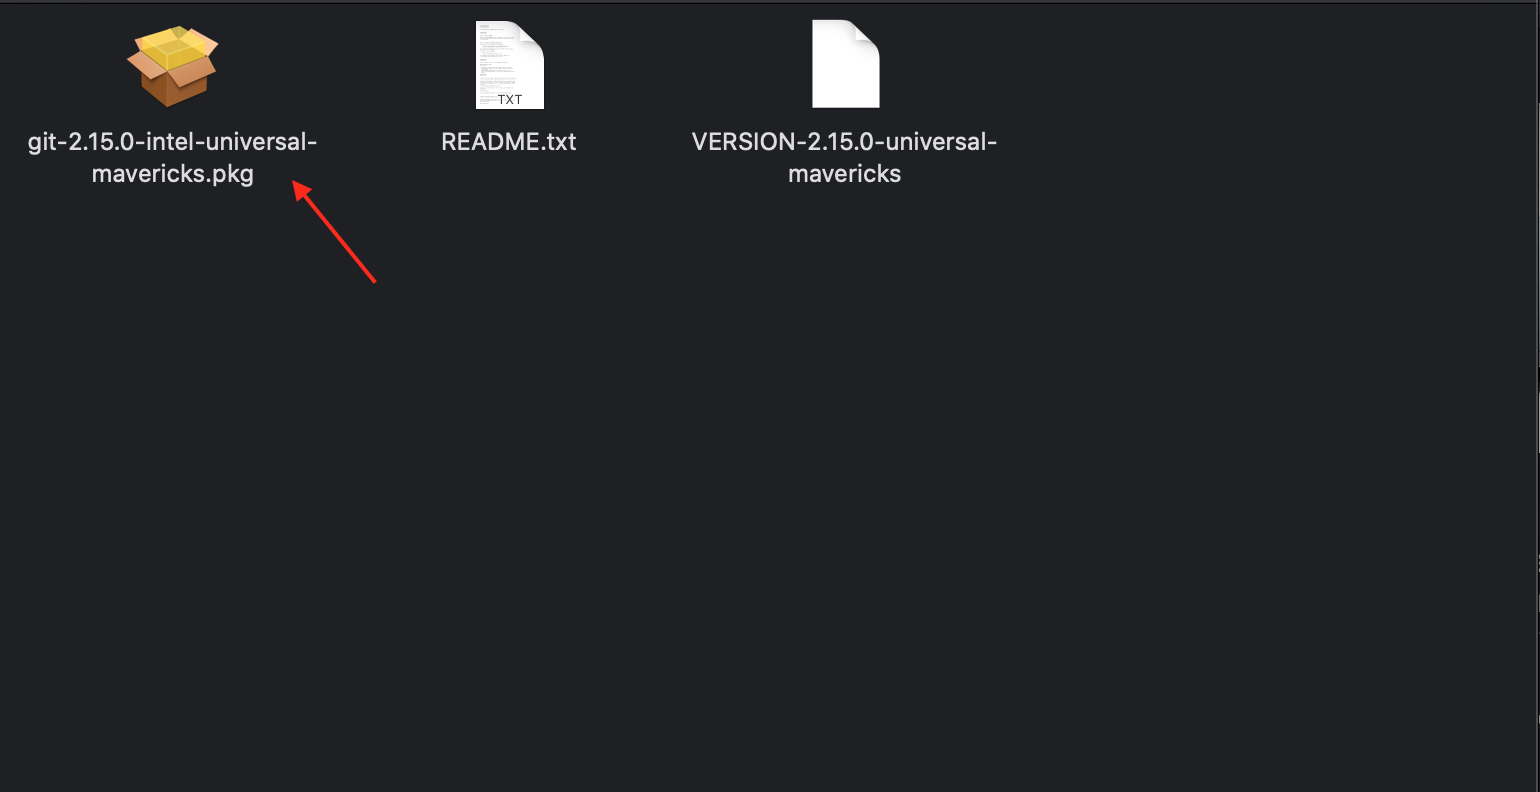
From the appeared window, click and open the universal package to install it as shown:
Next, hit the “Continue” button to proceed further:

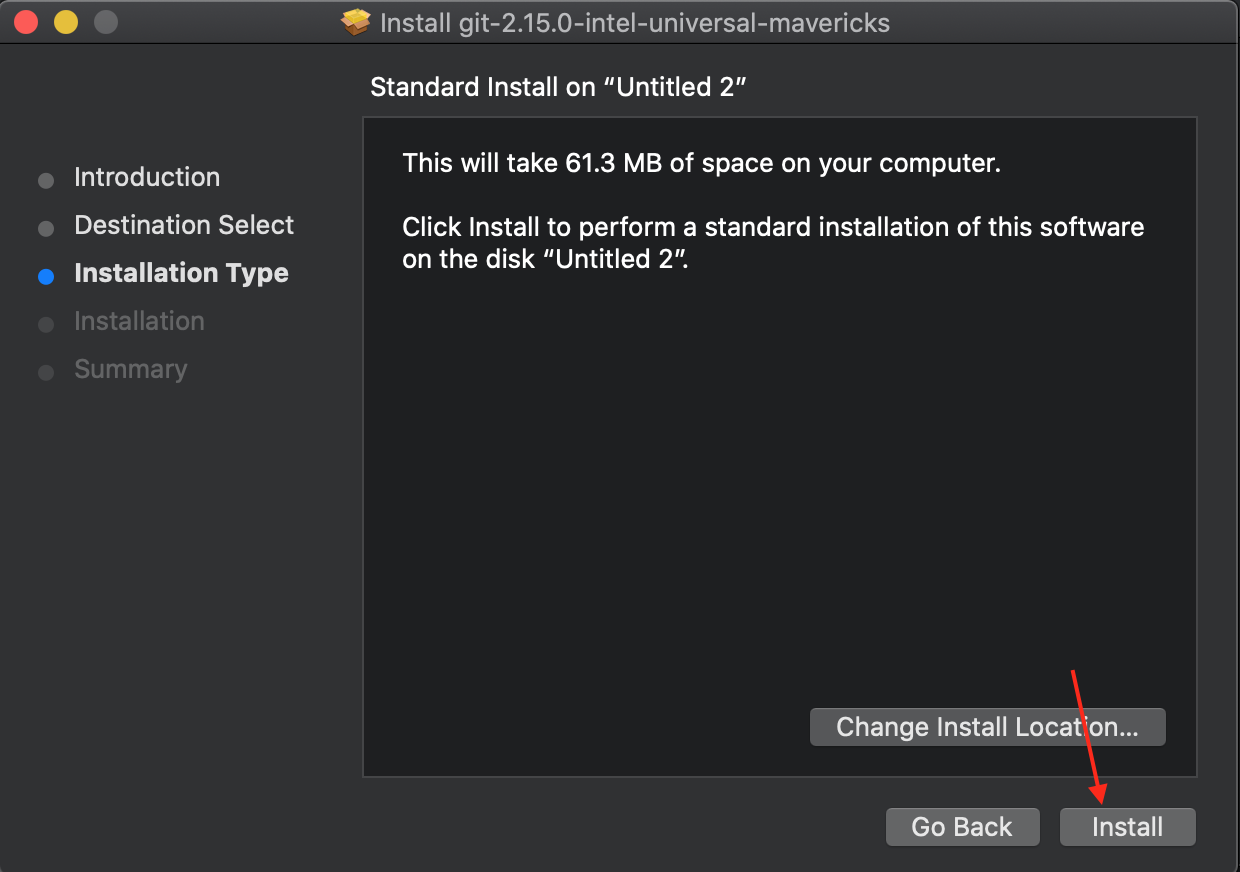
Afterward, press the “Install” button to install the Git:
Step 3: Finish Installation
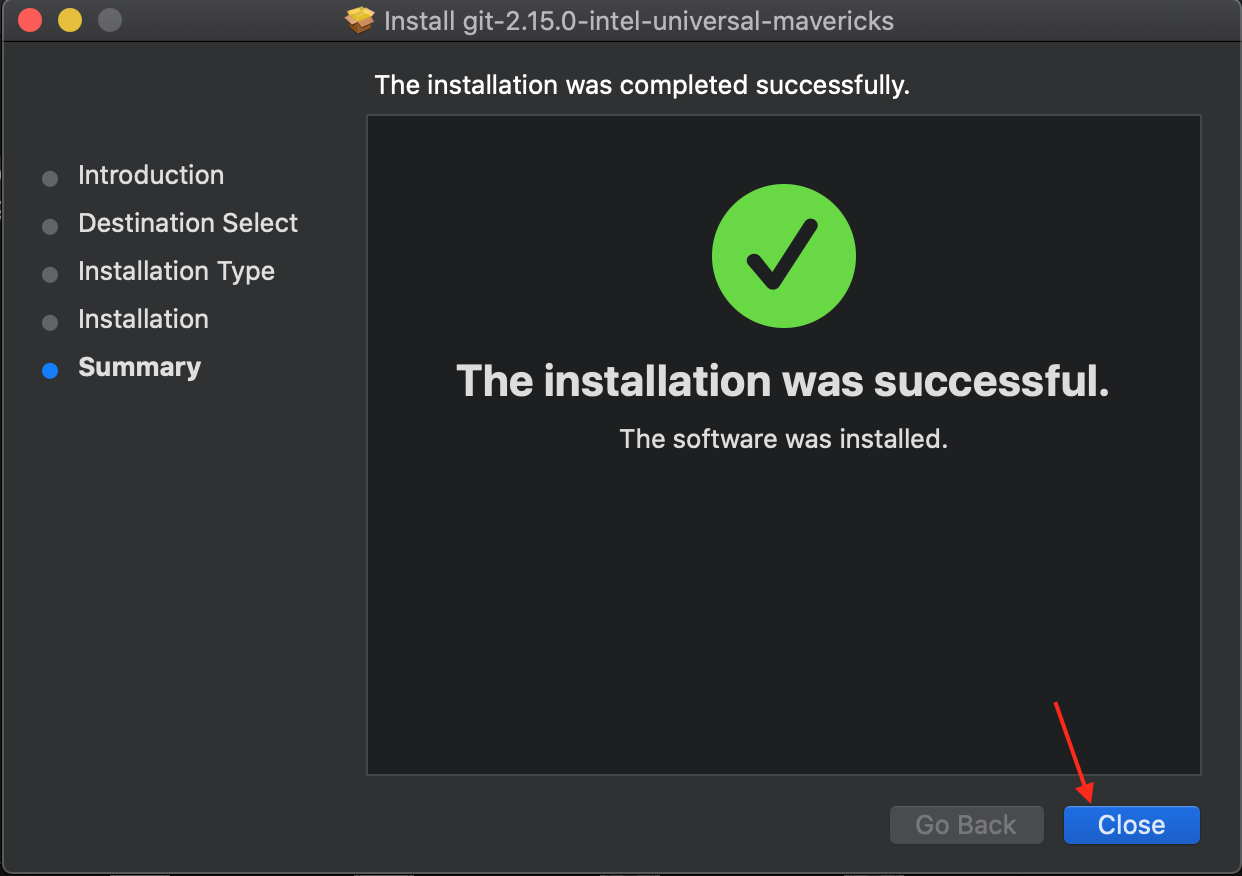
Once the installation is completed successfully, hit the “close” option to finish it:
Step 4: Check Git Version
Now, open your terminal, and check the Git version by running this command:

The output shows that Git version 2.15.0 has been installed successfully.
Step 5: Configure Username and Email
Configure the username and email for Git using the “git config –global” command as provided below:

For email configuration, use this command:

Method 2: Install Git Using Home Brew Command
The second method to install Git is based on the CLI (Command Line Interface) with the help of the “brew” command. To do this, quickly walk through the provided 2-steps.
Step 1: Install Git
Open the Mac terminal and install Git with the below-stated command:
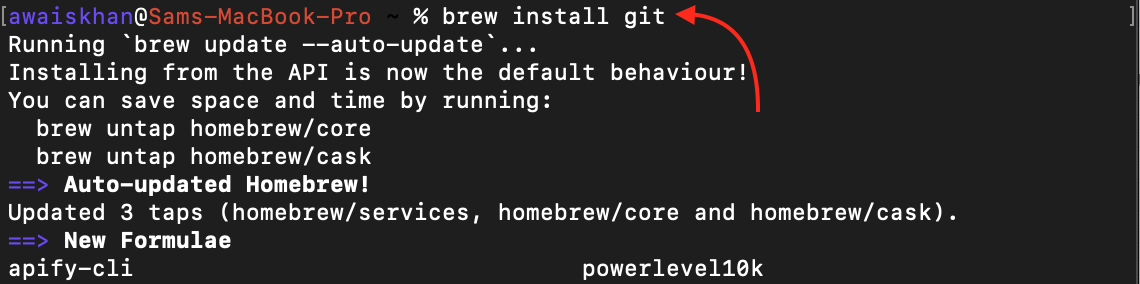
By running the above command, Git will be installed on your Mac OS.
Step 2: Check Git Version
For the Git installation verification, check the version of Git by executing the provided command:

As you can see Git version 2.42.0 has been available for use.
Method 3: Install Git Using Mac Ports
Another possible way to install Git is using Mac ports (a medium that installs software on Mac). For this method, see the below-given steps.
Step 1: Install Git Using Ports
Open your Mac terminal and install Git via Mac ports by running the given command:
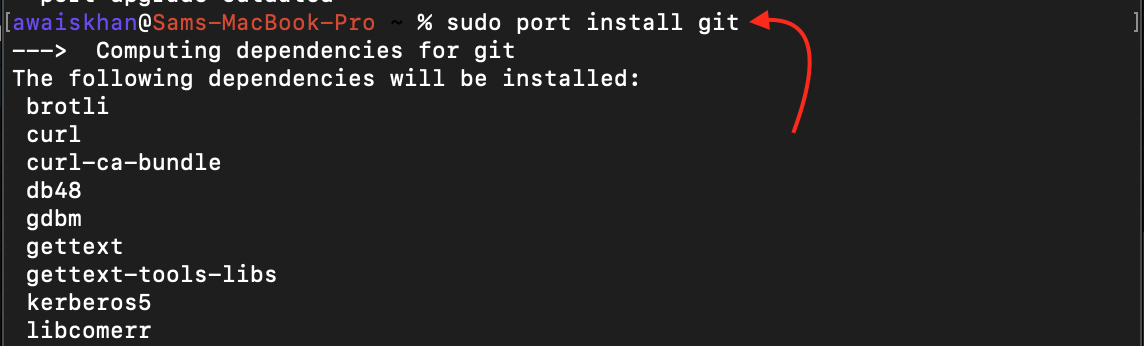
The above command will install Git.
Step 2: Check Git Version
To check whether Git has been installed or not, check its version:

The Git version 2.42.0 has been installed.
Bonus Tip: How to Uninstall Git on Mac?
If you want to install Git on your Mac operating system, simply type this uninstall command:
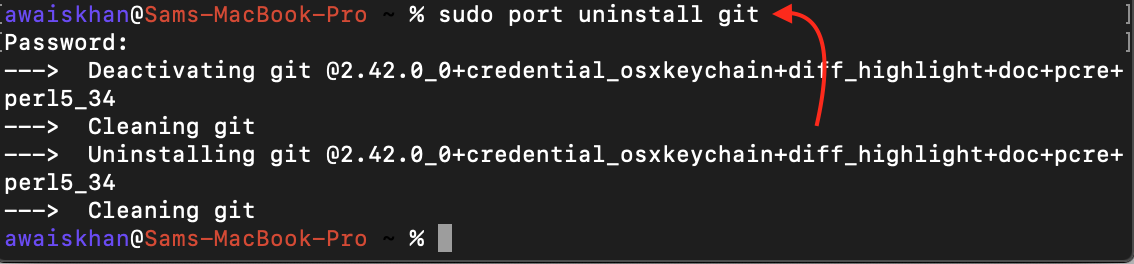
The Git has been uninstalled.
Conclusion
To download and install Git on your Mac, use the GUI method by downloading the Git installer file, brew command, or Mac ports. For the Mac installer, download its file, open it, and simply press the continue options then hit the “install” option. For the brew command, run “brew install git” in the terminal. For the Mac ports, run the “sudo port install git” command in the terminal. In this guide, we have provided all possible methods to download and install Git on your Mac operating system.
Source: linuxhint.com