How To Disable PowerShell on Windows 10
PowerShell is a powerful tool to run commands on Windows to customize the system settings. Sometimes we need to disable the PowerShell tool on Windows so that unauthorized users couldn’t create and run miscellaneous commands to make changes on the computer. In this guide, we will discuss various methods to disable PowerShell on Windows.
How To Disable PowerShell on Windows
We can be disabled to keep secure our computer from unwanted and miscellaneous commands operated by unauthorized users. There are two different methods to disable PowerShell on Windows:
Method 1: Disable Power Through Local Group Policy Editor
Local group policy editor on Windows allows the user to get access and configure some advanced settings that are not listed in the Windows default settings app. Using the local group policy editor, we can disable PowerShell by following some simple steps given below:
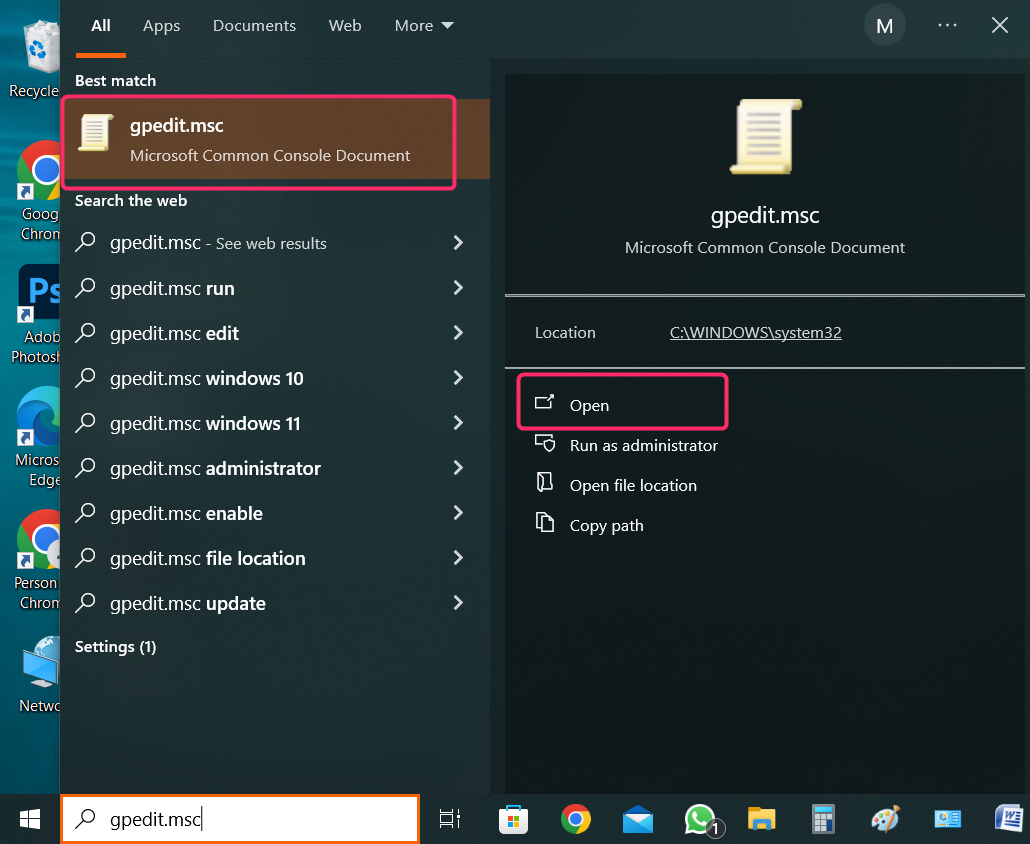
Step 1: Search for gpedit.msc in the Start menu and open it:
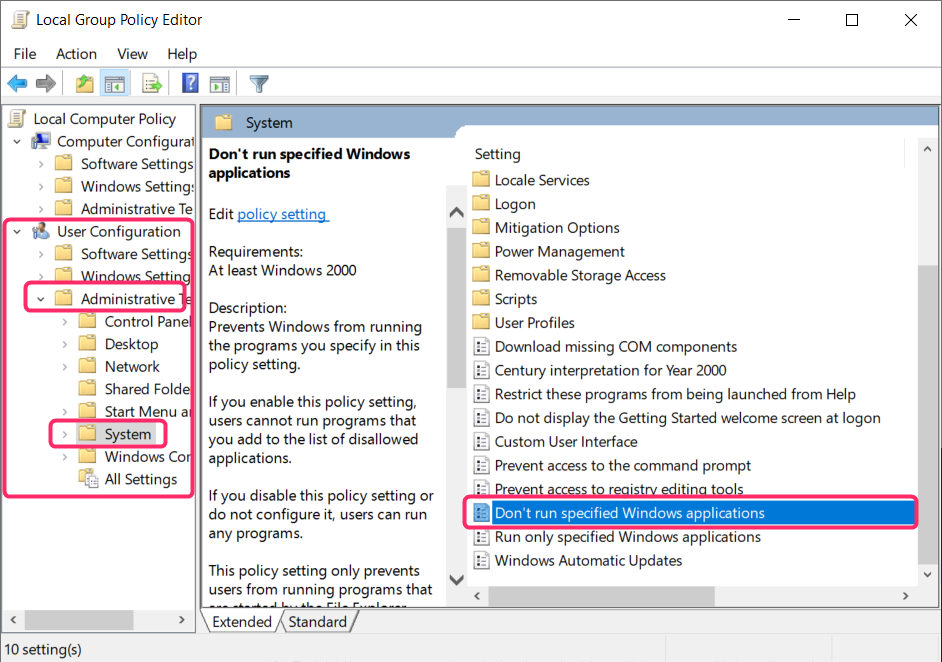
Step 2: From left, expand Administrative Terms under user configuration and click on System. On the right, double-click on Don’t run specified Windows applications:
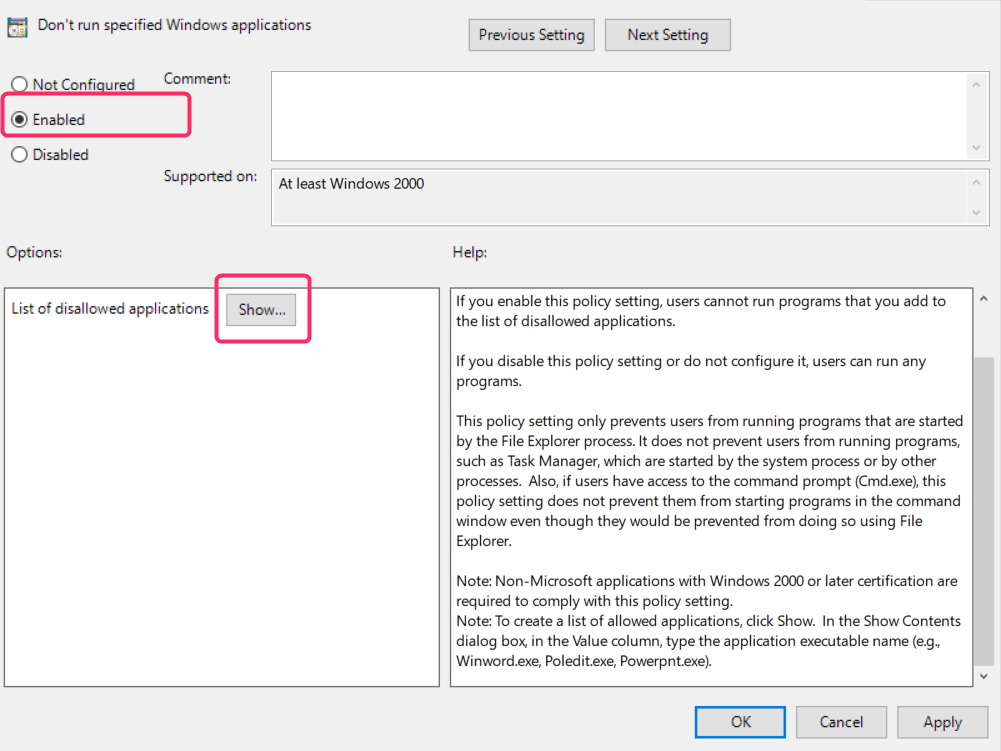
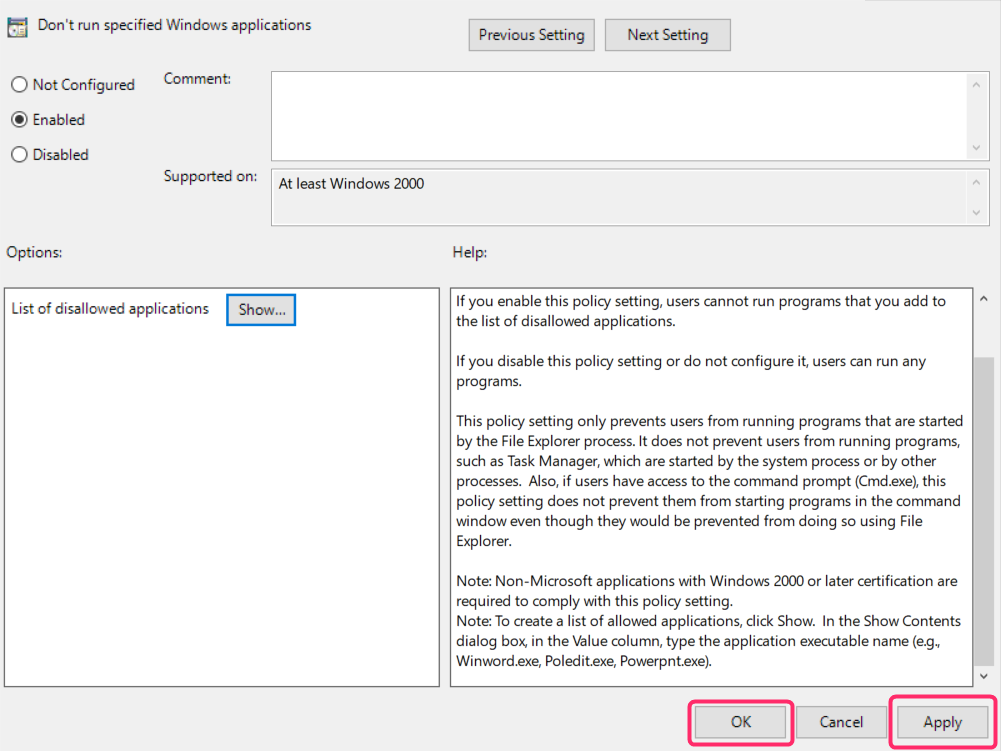
Step 3: Enable don’t run specified Windows applications and click on Show under the list of disallowed applications:
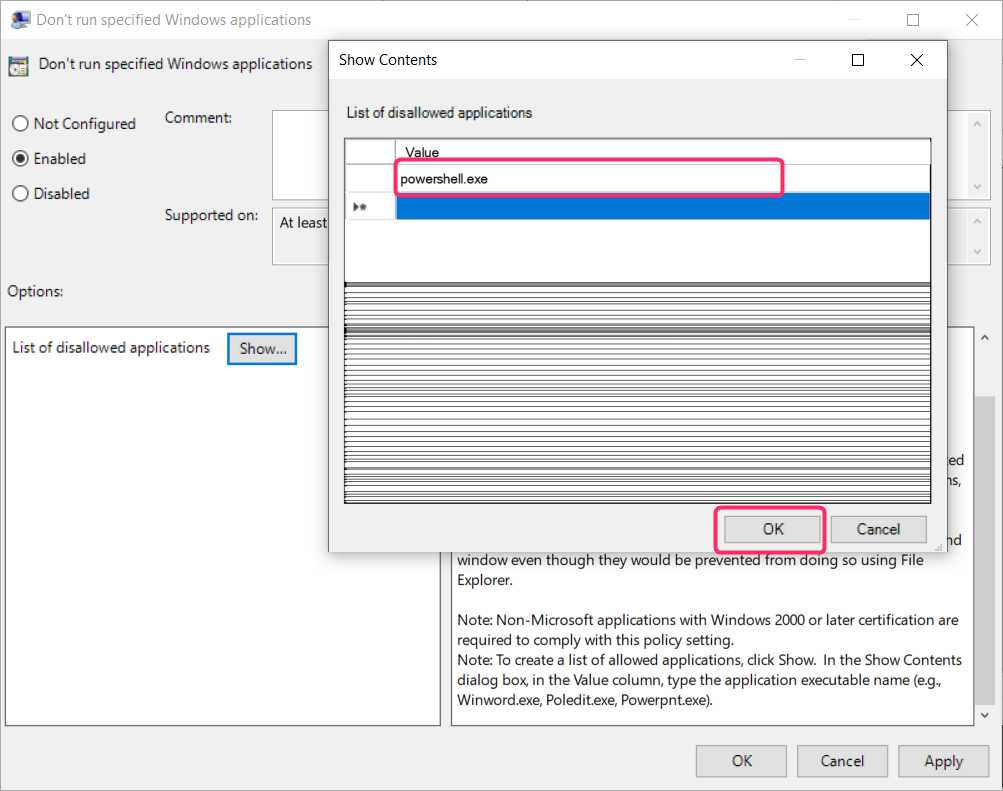
Step 4: Type powershell.exe in the value column and click OK:
Step 5: Now you are back to the previous window and from there click on Apply and OK:
Method 2: Disable PowerShell Through Local Security Policy
The local Security Policy on Windows contains all the information about the computer’s security and using the local security policy, we can disable PowerShell in simple steps:
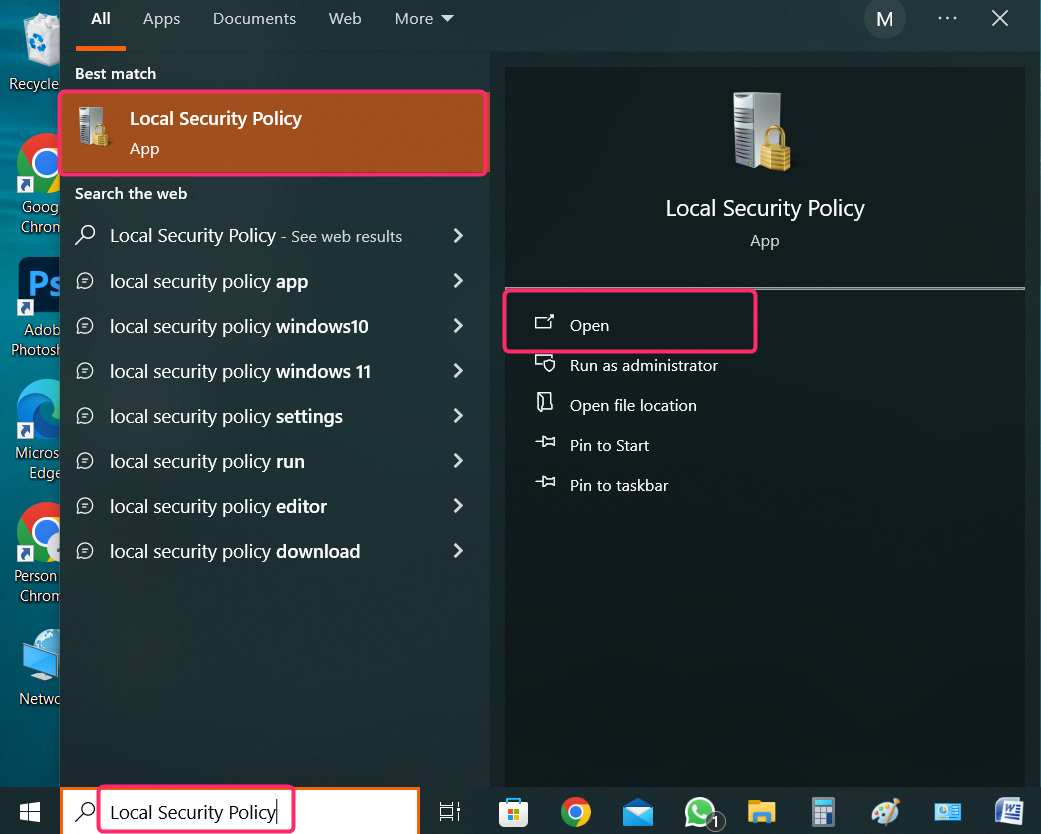
Step 1: Search for Local Security Policy from in start menu and open it:
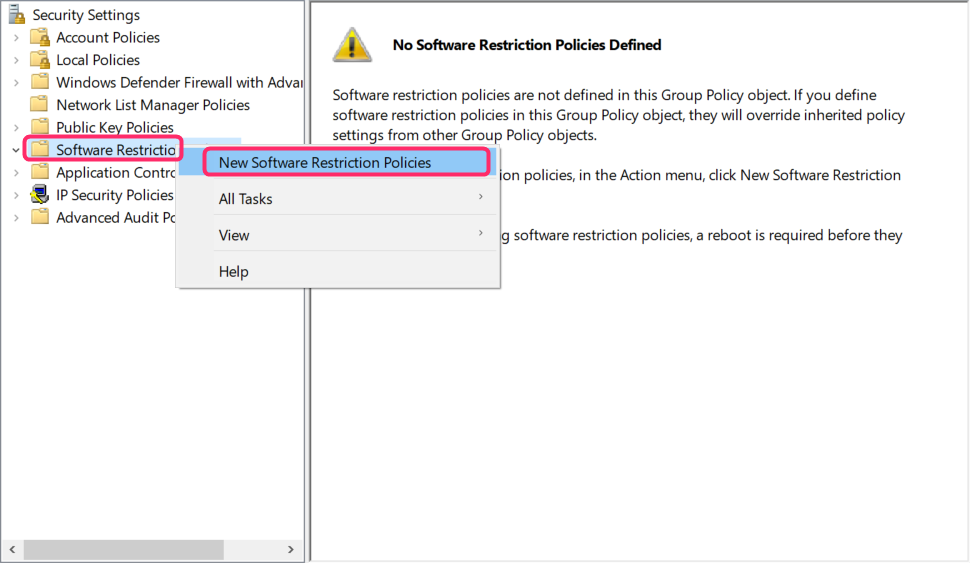
Step 2: Right-click Software Restrictions and select New Software Restriction Policies from the drop-down menu:
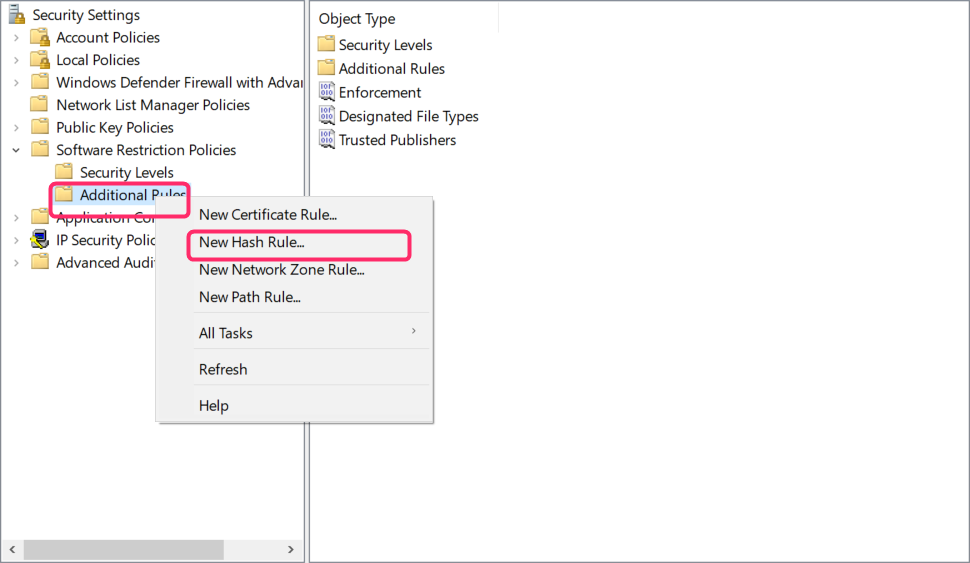
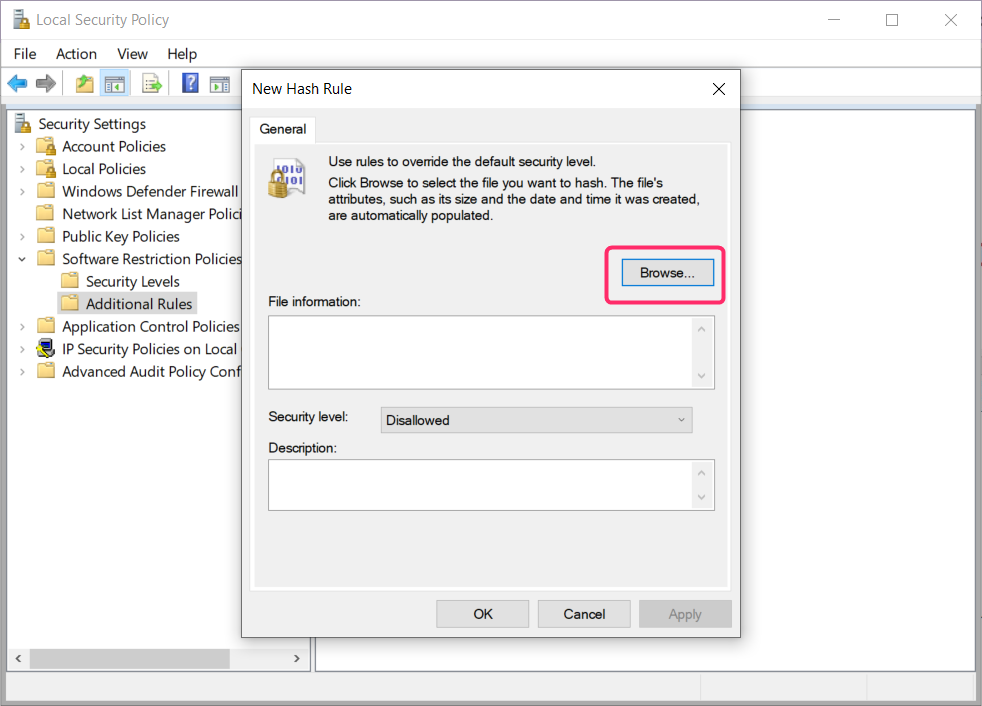
Step 3: Right-click to Additional Rules and click on New Hash Rule from the drop-down menu:
Step 4: Click on Browse in the new hash rule window:
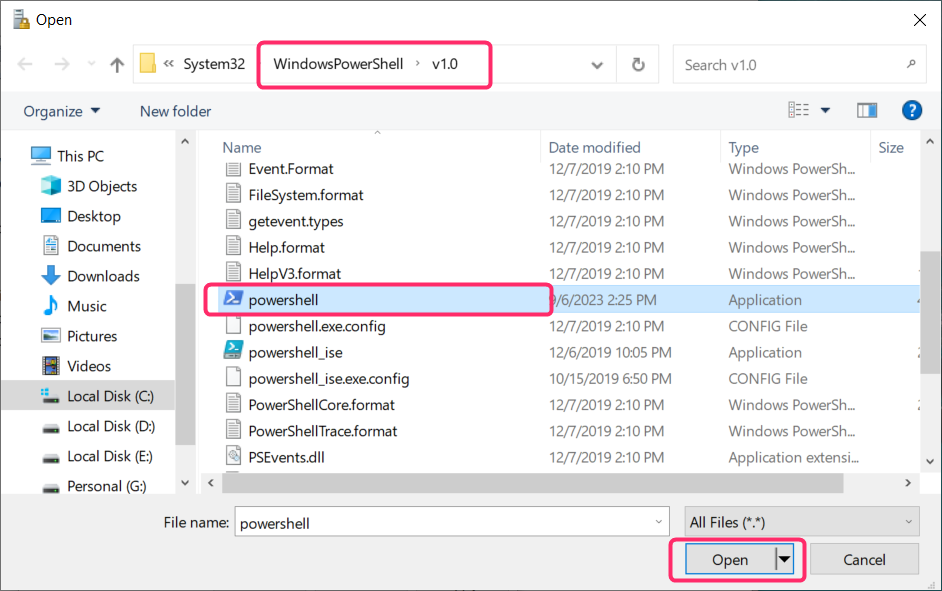
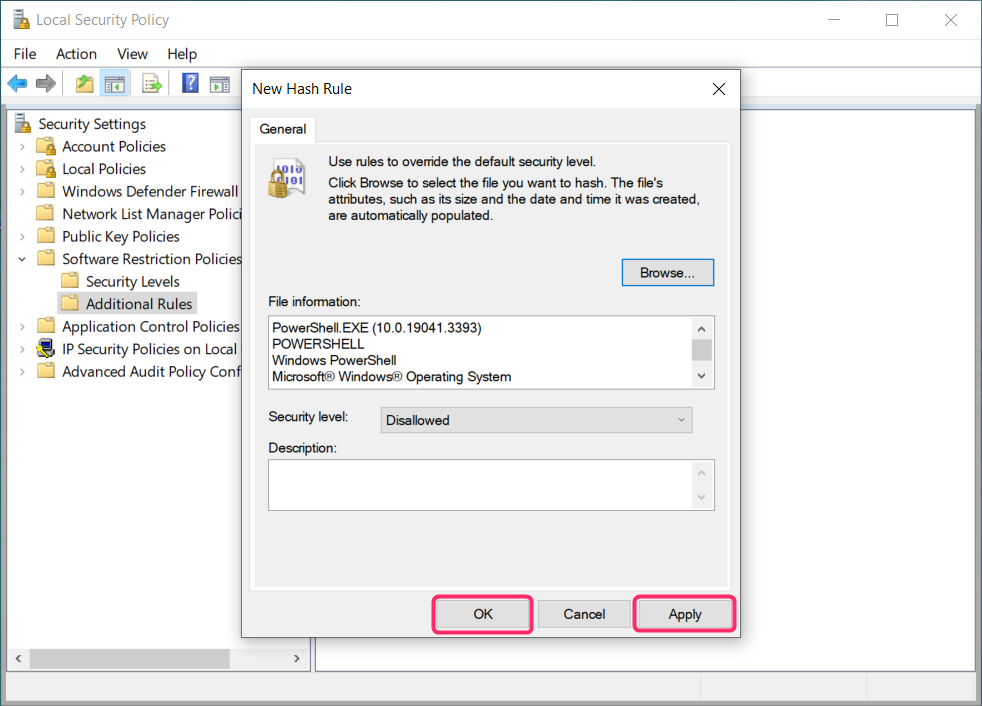
Step 5: Go to WindowsPowerShell and open the v1.0 folder. Select powershell in the v1.0 folder, then click on Open:
Step 6: Now click on Apply and OK:
Conclusion
Open the local group policy editor and expand the administrator term under user configuration, then click on system. Enable don’t run specified applications and add powershell.exe in the disallowed apps, then apply it. Similarly, open the local security policy and add a new hash rule. Browse for PowerShell and apply it.
Source: linuxhint.com