How to Disable Game DVR and Game Bar in Windows 10?
This tutorial will explain the approaches to disable/inactive Game DVR and Game Bar functionalities in Windows 10.
How to Disable/Inactive Game DVR and Game Bar Features in Windows 10?
To disable/inactive Game DVR and Game Bar functionalities in Windows 10, apply the following approaches:
- Disable/Inactive Game DVR and Game Bar from Settings.
- Utilize Registry Editor.
- Using Group Policy Editor.
- Removing the Game Bar Permanently.
Fix 1: Disable Game DVR From Settings
To inactive Game DVR from “Settings”, consider the following steps.
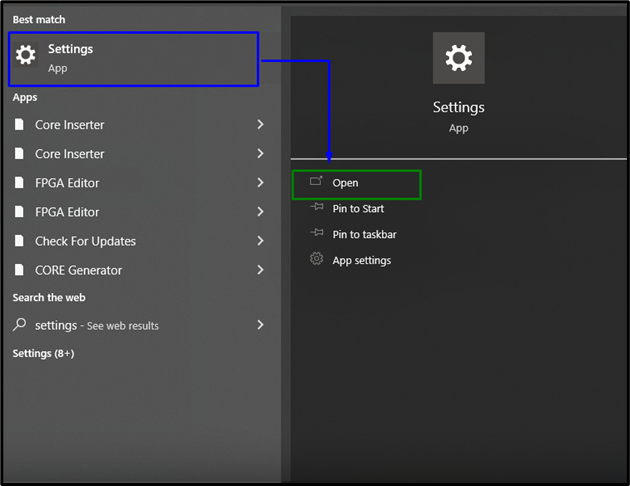
Step 1: Open Settings
Firstly, press the “Windows+I” shortcut keys to open Settings:
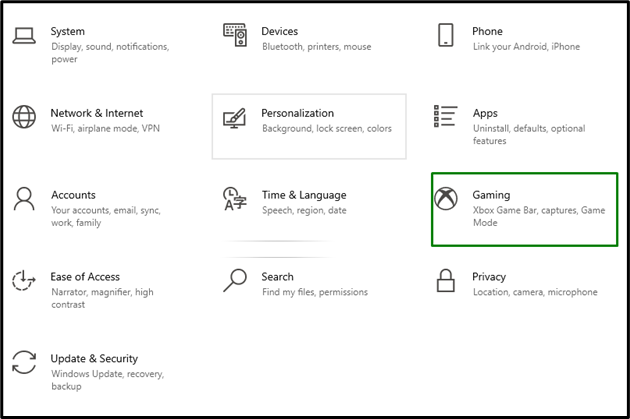
Step 2: Navigate to Gaming
After that, click on the “Gaming” option:
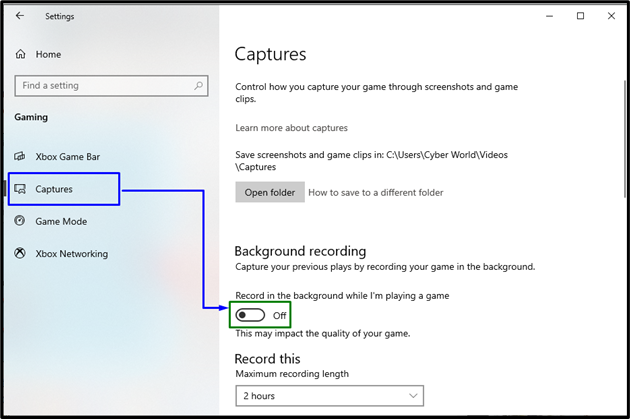
Step 3: Disable Game DVR
In the “Background Recording” portion, turn off the highlighted slider”:
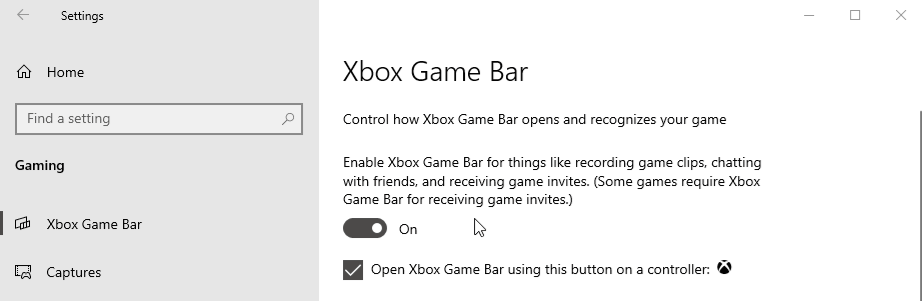
To disable the Game Bar via Settings, navigate likewise to “Settings->Gaming->Xbox Game Bar”. Here, move the slider position to “Off”:
Fix 2: Utilize Registry Editor
Utilizing the Registry Editor confirms that the Game Bar cannot be utilized via setting the key values. For doing so, overview the below-given steps.
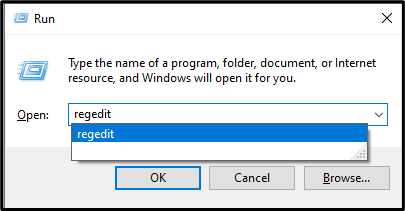
Step 1: Navigate to Registry Editor
Enter “regedit” in the “Run” box to navigate to the “Registry Editor”:
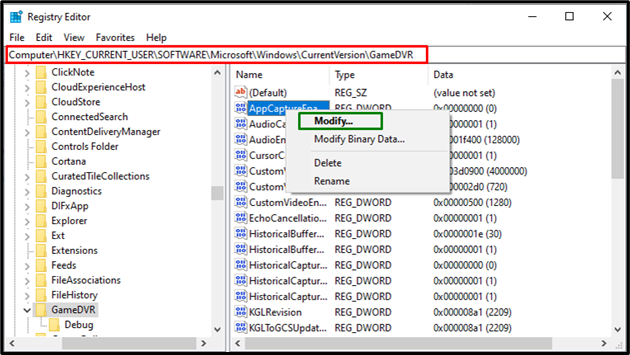
Step 2: Set the Value of “AppCaptureEnabled” Key
Now, move to the path “HKEY_CURRENT_USER\Software\Microsoft\Windows\CurrentVersion\GameDVR”. Here, right-click the “AppCaptureEnabled” key and click “Modify”:
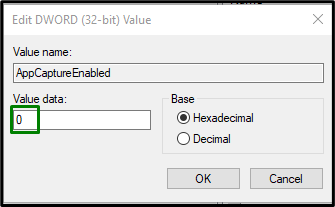
Now, set its Value data to “0”:
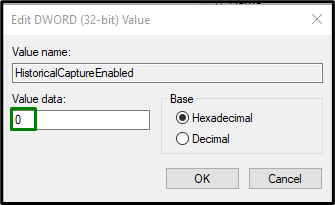
Step 3: Set the Value of “HistoricalCaptureEnabled” Key
Likewise, navigate to the stated key in the same path, as follows:
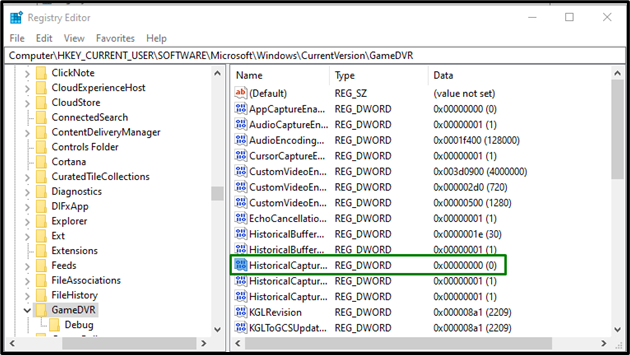
Now, similarly, set its value to “0” in order to turn off the “Game DVR”:
Fix 3: Using Group Policy Editor
The stated features can also be disabled using the Group Policy Editor. Let’s overview the below-given steps to do so.
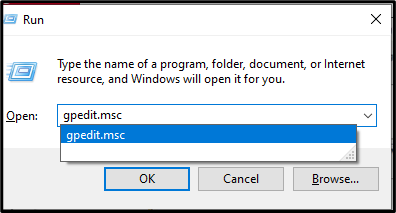
Step 1: Navigate to Local Group Policy Editor
Type “gpedit.msc” in the “Run” box to redirect to the “Local Group Policy Editor”:
Step 2: Navigate to Path
Within the “Local Group Policy Editor”, navigate to the path “Computer Configuration -> Administrative Templates -> Windows Components -> Windows Game Recording and Broadcasting”.
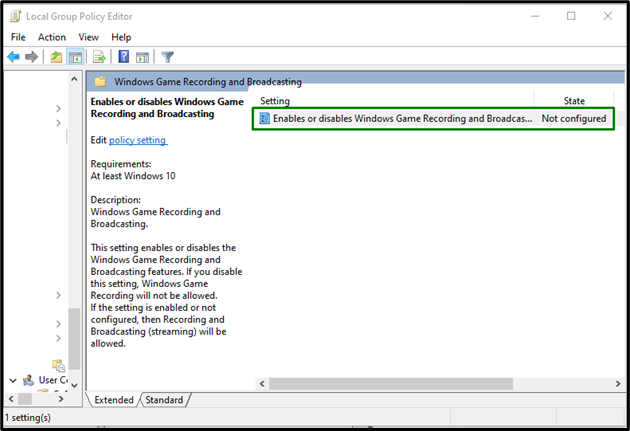
Step 3: Disable/Inactive “Windows Game Recording/Broadcasting”
At the destined path, click on the highlighted settings:
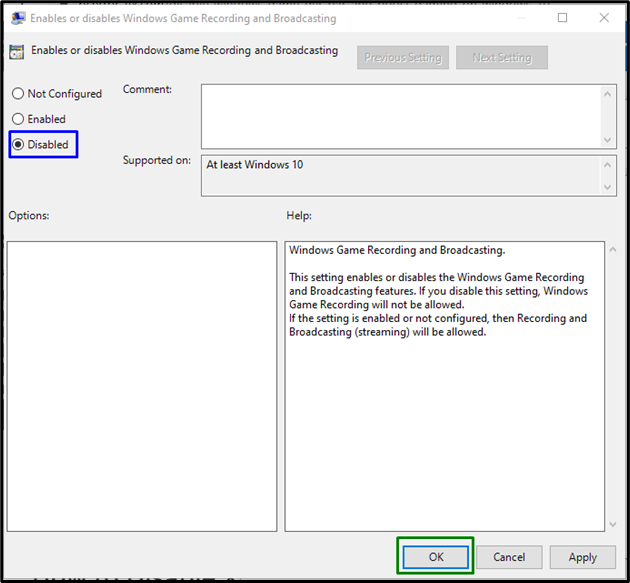
In the “Enable or disables Windows Game Recording and Broadcasting” window, mark the highlighted radio button to disable the stated features:
Alternative Fix: Removing the Game Bar
If disabling the Game Bar doesn’t solve the issue, and you want to remove it permanently, then do it by using Windows PowerShell.
Step 1: Open Windows PowerShell
Press the “Windows + X” shortcut keys and navigate to Windows PowerShell(Admin):

Step 2: Remove Game Bar
Execute the following commands sequentially to remove the “Game Bar”:
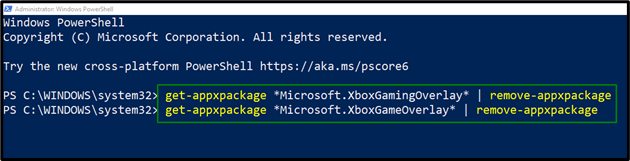

As a result, the Game bar will get permanently disabled.
Conclusion
You can disable “Game DVR and Game Bar” in Windows 10 using System Settings, the Registry Editor, the Group Policy Editor, or permanently remove the Game Bar. If disabling doesn’t work for you, try to remove them to make things streamline. This article explained the approaches for disabling the Game Bar and Game DVR functionalities in Windows 10.
Source: linuxhint.com