How to Disable Cortana in Windows 11
At times, it gets annoying to get assistance when we are performing something very important and the useless notifications occur which are not helping us out in any way. So, disabling them would be great instead of wasting your energy being displeased. In this tutorial, we will be talking about the process of disabling Cortana in Windows 11.
Procedure to Disable Cortana in Windows 11
We will be executing all of the possible methods in which Cortana can be disabled in Windows 11:
- Disabling Cortana in Windows 11 from the “startup”.
- Disabling Cortana in Windows 11 through the “task manager” from the “startup”.
- Disabling Cortana in Windows 11 via “application”.
- Disabling Cortana in Windows 11 (permanently) by using the Windows registry.
Method # 01: Disabling Cortana in Windows 11 from the “startup”
In this case, we will be studying disabling Cortana from the startup in Windows 11. Cortana takes place automatically when we use the desktop. It is a default setup of the system. But we can stop it from working. This method disables Cortana temporarily in Windows 11.
Step # 01:
First, open the setting window. Find the “apps” from the left options appearing in the fifth row. Click it. Then, the “apps” setting will be opened. From there select “app and features”.
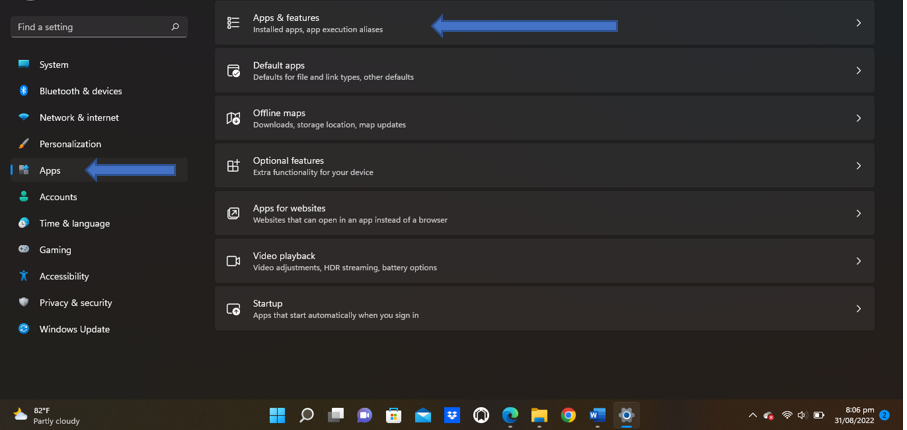
Step # 02:
The menu will look like this:
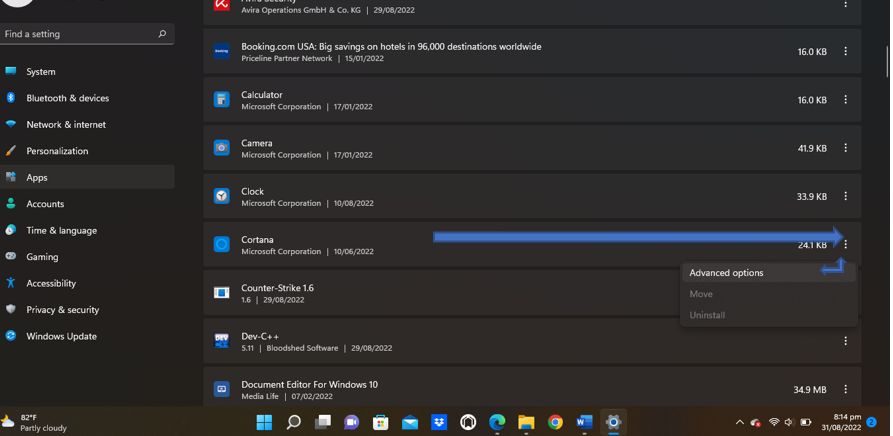
Step # 03:
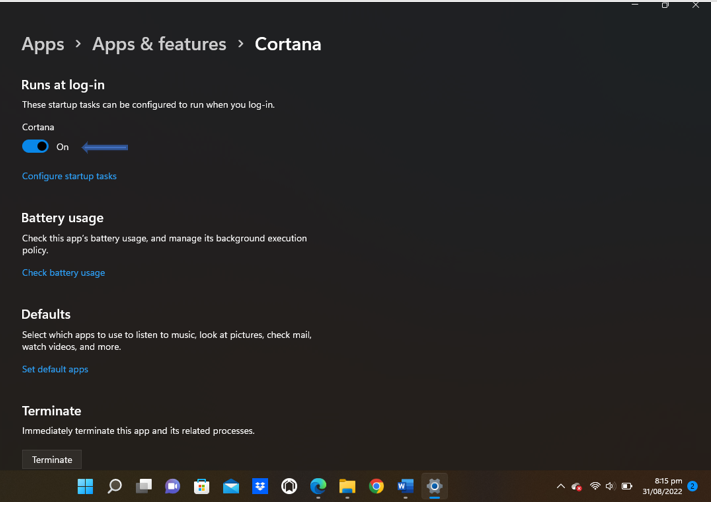
Then, we will see the “Cortana” option. Go to the advanced option by clicking on the “three dots” on the content right around the memory occupying. We can see the Cortana option as “on”.
Step # 04:
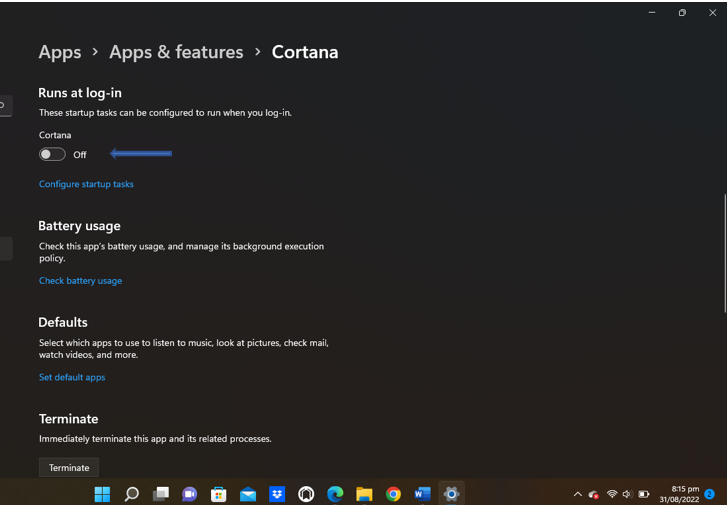
The closing step is to “turn off” the Cortana app from there.
Method # 02: Disabling Cortana in Windows 11 from the “startup” through “task manager”
Next, we will be disabling the Cortana feature through the task manager. It is an easy procedure to disable Cortana by using a task manager in Windows 11.
Step # 1:
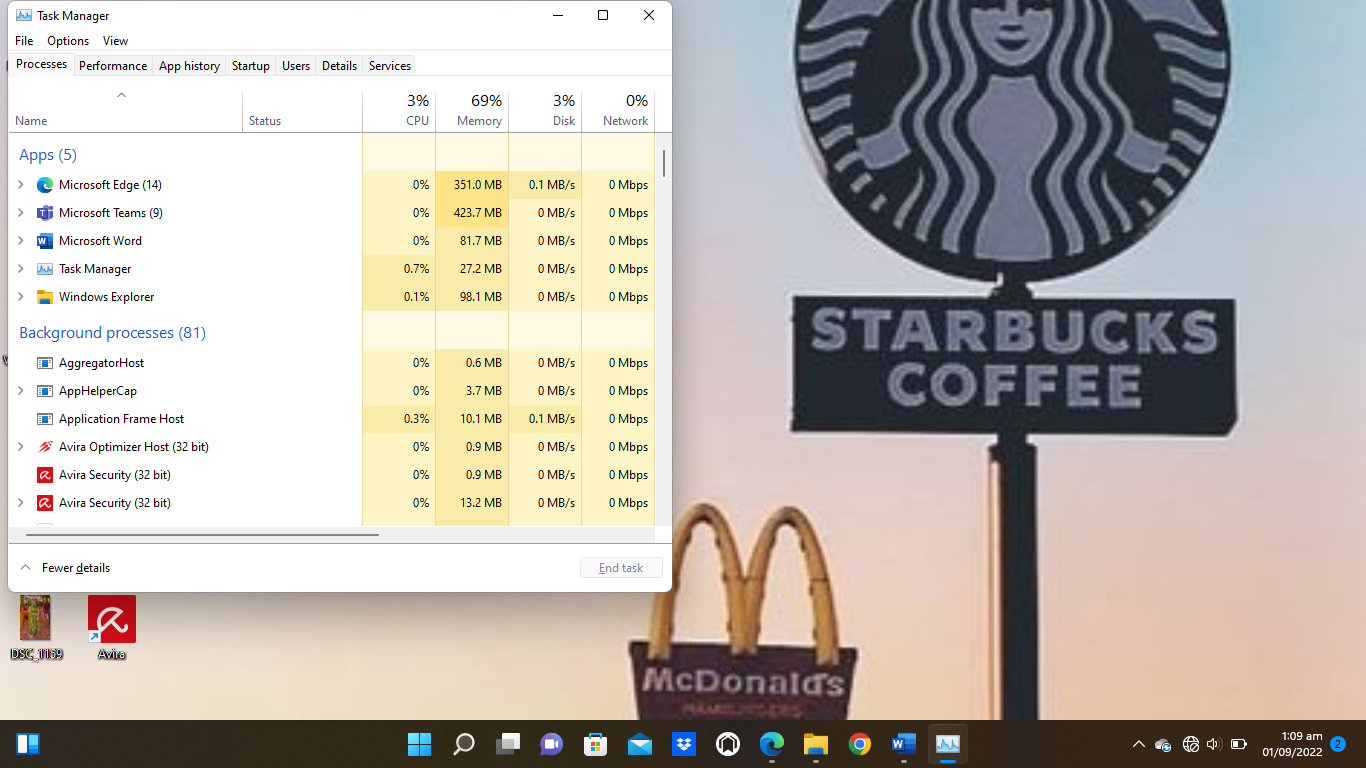
To disable Cortana in Windows 11 through the task manager, we have to go to the Windows 11 task manager. There are two approaches to opening the task manager. The first way is to go to the start button and select it if it is appearing; otherwise we can search there too. The other way to open the task manager is to do it via “ctrl + shift + Esc” and the screen will appear like the display below.
Step # 02:
After opening the task manager, go to the “app history” visible on the Windows at the top columns. Click it.

Step # 03:
Here, we can now see the app showing. And at the top of the list of apps we can see “Cortana”, click on it. Hovering the cursor at the bottom. There we see the “disable” option appearing. As we select the app, the “disable” button gets opted for pressing. Here we have disabled Cortana in Windows by the task manager.

Here is a tip: We can still use Cortana as per the need of the time, which can occur anytime. So, just press the key as the “Window key + c” or we can also activate it again by the start button Windows bar where the searching is performed.
Method # 03: Disabling Cortana in Windows 11 via “application”
Here is another method to disable the Cortana as sometimes, accidentally through voice hearing or by any shortcut key pressing, it can enable the Cortana automatically. This method is also a temporary solution to disabling Cortana. This time, the disabling of Cortana is done manually but through the application which is the simple way to turn off the features of Cortana.
Steps to follow:
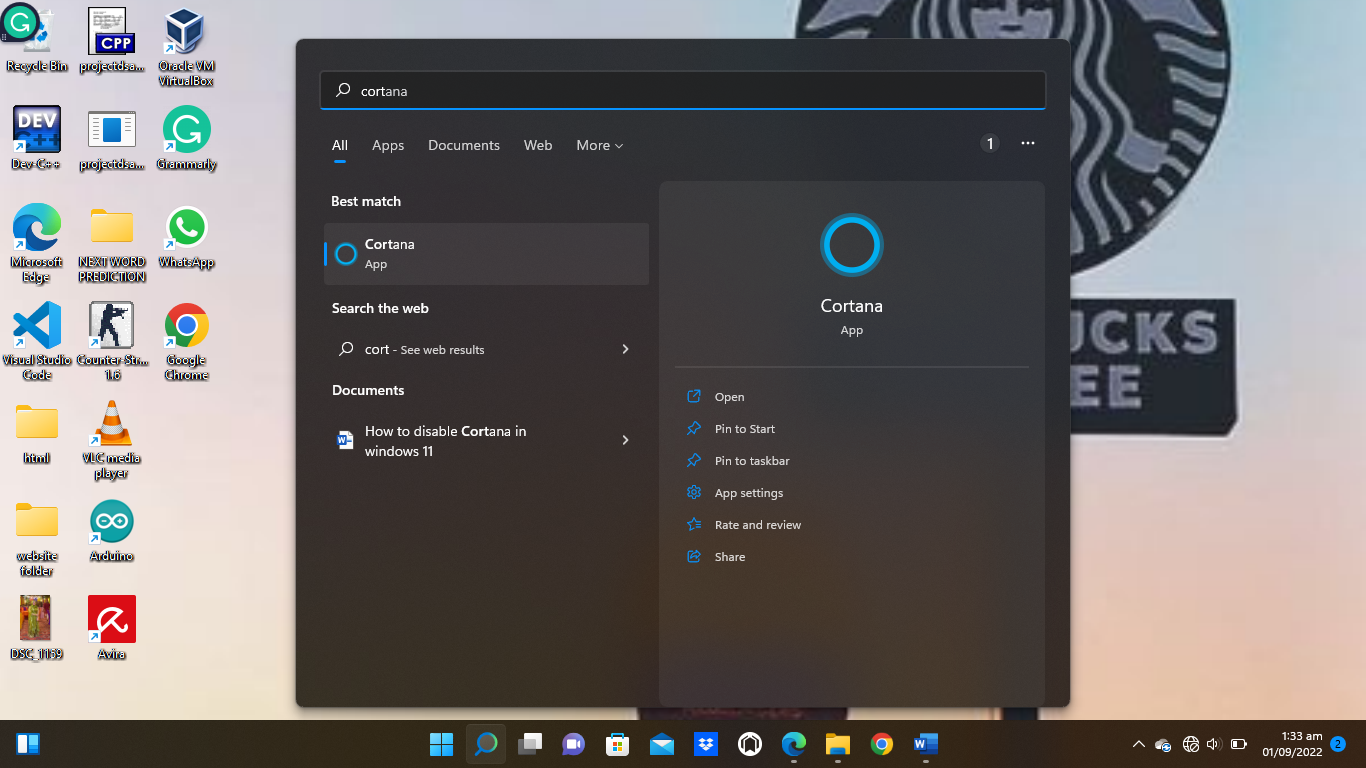
In this example, we have to open the start menu and search there or directly search in the search bar next to the start button in Windows 11. Search “Cortana”. There, we will see the app. Click and open it. There we see the dotted menu at the top of the Windows at the left–top corner, from there go to settings by selecting it.
We can disable the features available in Cortana which we do not need in our working state. We will have the following features as a short cut for “keyboard”, “voice activation” (which happens the most in activating the Cortana), and the last “microphone”. By adjusting all these Cortana, at least will not be able to accidentally change the permissions from the app.
Method # 04: Disabling Cortana in Windows 11 (permanently) by using the Windows registry
As in the above examples, we have done the de-activating of the “Cortana” but temporarily. What if someone does not prefer it? So, here we will be learning to disable Cortana permanently with the registry method of Windows. By applying this method, you cannot even use Cortana manually as it is a very powerful feature.
Steps:
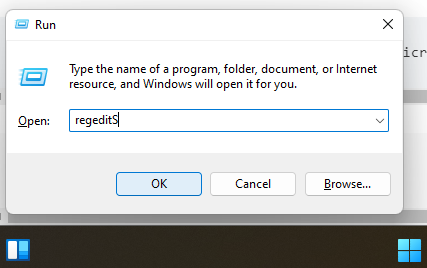
Press the “Windows” key with the “r” key. The screen will appear. There we see the bar with the open text written and that bar type “Regedit. Click the okay button. There we can navigate it through the following directory: “computer\HKEY_LOCAL_MACHINE\SOFTWARE\policies\microsoft\windows\windows and then search”. Write the same or copy and paste the same directory then press enter.
From the Windows search file, click new then a dropdown menu will appear to choose “DWORD with the 32 or 64”. Once clicking that, we have the option of allowing Cortana to open the folder. Set the value as “0” and press “ok” with the “Hexa decimal” option instead of decimal if we go with the “32” bit in the previous step of selecting the bit.
Now, we have the Windows key created. That’s how Cortana is disabled we can even check it again by searching in Windows.
Here is a picture of how the first “Window + r” displays the screen.
Conclusion
“Cortana” still exists in “Windows 11” as well. However, if we don’t like it to be in your Windows, this article is a lifesaver for all those who do not want to be irritated and get annoyed with it. We have performed it with four different methods. One can choose which from the above to disable the “Cortana” in “Windows 11”.
Source: linuxhint.com