How To Design Bulk ID Cards with Different Names and Photos with Inkscape
This tutorial will explain designing with Inkscape Vector Graphics Editor to create multiple cards with different names and photos. You will need NextGenerator extension to practice this. This is useful to people who work at office, as event organizer, or simply want to create similar thing. We tried our best to make this easy for you to exercise with funny examples. Happy drawing!

Subscribe to UbuntuBuzz Telegram Channel to get article updates.
About Design
Identity card (also known as employee card, student card, conference card) is a type of design printed with name, description, and/or photo in a piece of paper and usually hanged or clipped onto one's neck or pocket to identify one as an official staff in office work or events with many people.
Sample Result
Download Sample
Click button below to take all sample files in one ZIP you can exercise with.

Requirements
1. Inkscape vector graphic editor.
2. NextGenerator extension. Read our tutorial to install it.
Materials
What we need to make this design are as the following.
- a list of person names in CSV text file
- a design in an Inkscape SVG file
- a photo in PNG to be replaced with another photos
- a color in hexadecimal format to be replaced with another colors (optional)
- photo files in PNG
Basic Use
Basically, we will work around input and process and output with this.
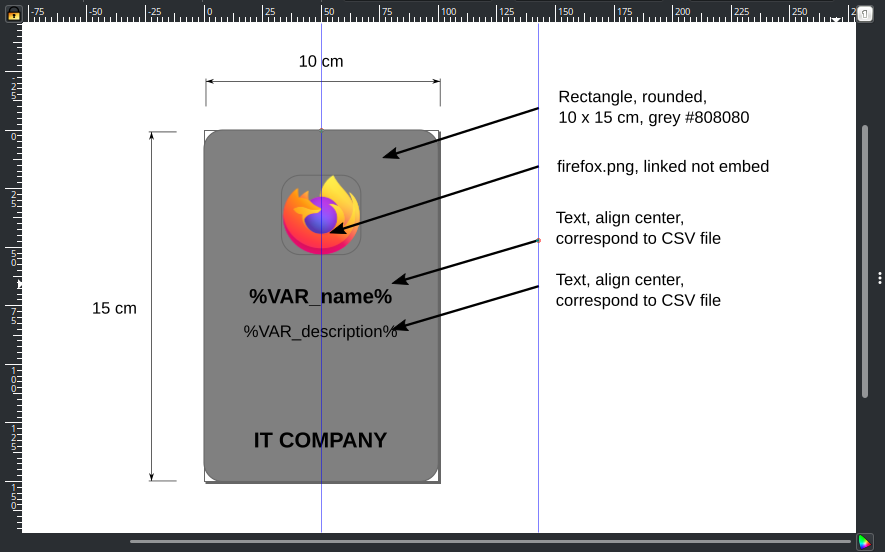
As the input, we will make something like this in Inkscape (idcards.svg) and below it in LibreOffice Calc (list.csv).

As the process, we need to configure NextGenerator like picture below.

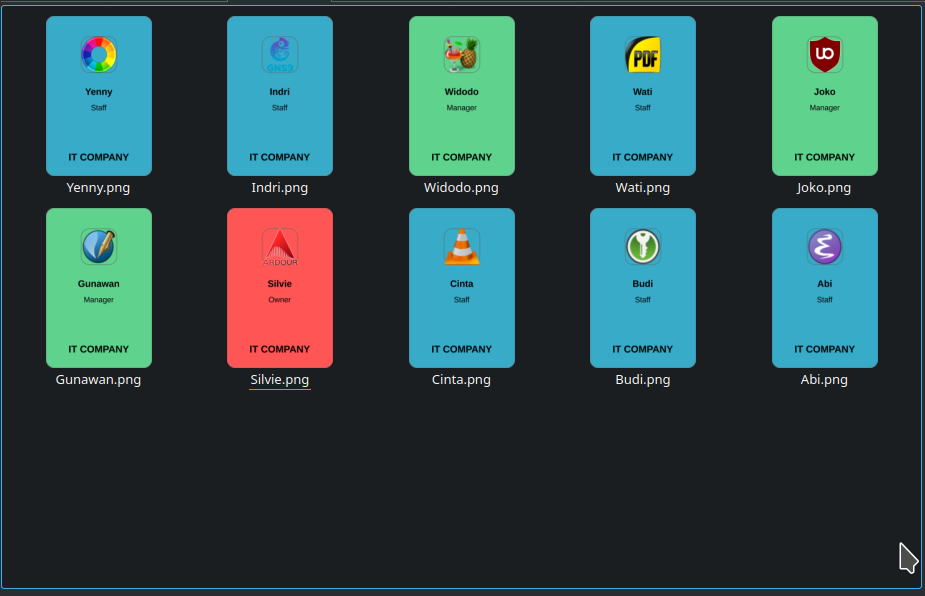
As the output, we will get ID cards exported into selected directory like below. Notice that these are very simple. We have not used any real photo yet nor any real template design. However, this should give you basic understanding on how to make them. You can observe, these cards follow exactly what we describe in the CSV file. For example, "Silvie" is the "Owner" and she gets "Red" background color with "Ardour" as photo etc.
Step 1. Making the data
Create a folder named idcards.
Run LibreOffice Calc.
Write a data table of 10 employees like below.
Save it as list.csv in the folder idcards.
Step 2. Preparing the photos
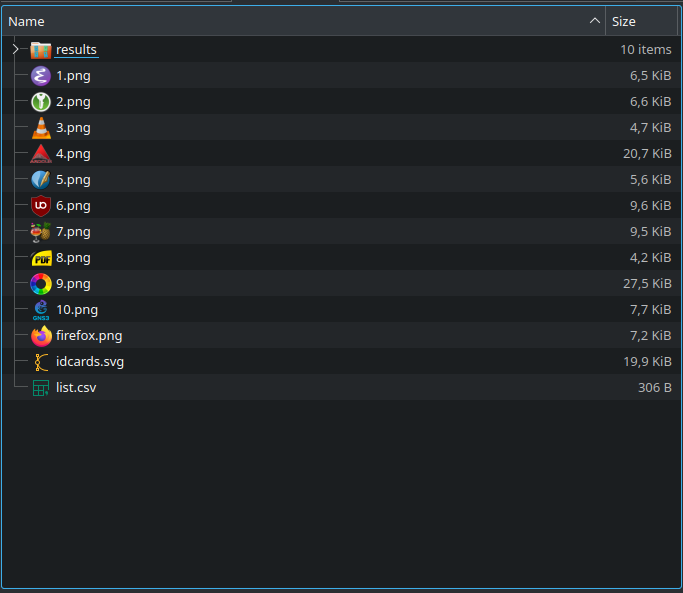
Fill the directory idcards with following files.
Prepare one picture file with the name firefox.png.
Prepare 10 pictures with the name ranging from 1.png to 10.png.
Step 3. Designing the card
Create a folder named results in idcards.
Run Inkscape.
Create a design of card like the following.
Save it as idcards.svg in the directory idcards.
Currently, you should have 13 files (csv, svg and png) in the directory.
Step 4. Exporting the ID cards
In Inkscape, pick Extensions -> Export -> NextGenerator.
Fill the options like the following.
Click Apply.
Close the warning dialog if any.
All cards will be saved in the directory results.
Final Result
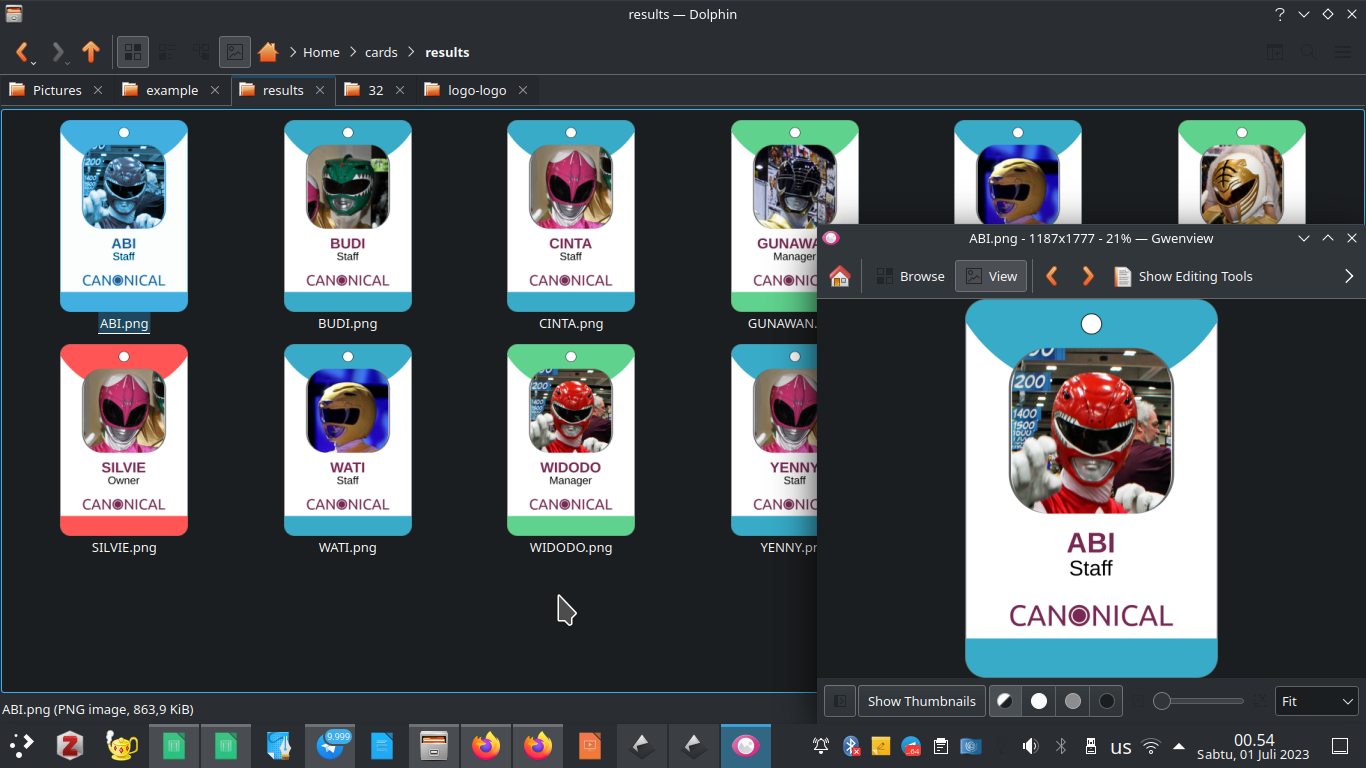
Once finished, you should see ten ID cards in png format in the directory idcards. Your result will look similar to example given above. However, we modified the design a little and here's our final result. We added a Canonical logo, a pair of color shapes, and a hole circle. We use amusing photos everybody knows below all taken from commons.wikimedia.org. We hope this gives you a lot of idea to make further designs. See you next time!
This article is licensed under CC BY-SA 3.0.
Source: Ubuntu Buzz !