How to Deploy war File in AWS
Let’s start with how to deploy a war file in AWS:
Deploy war File in AWS
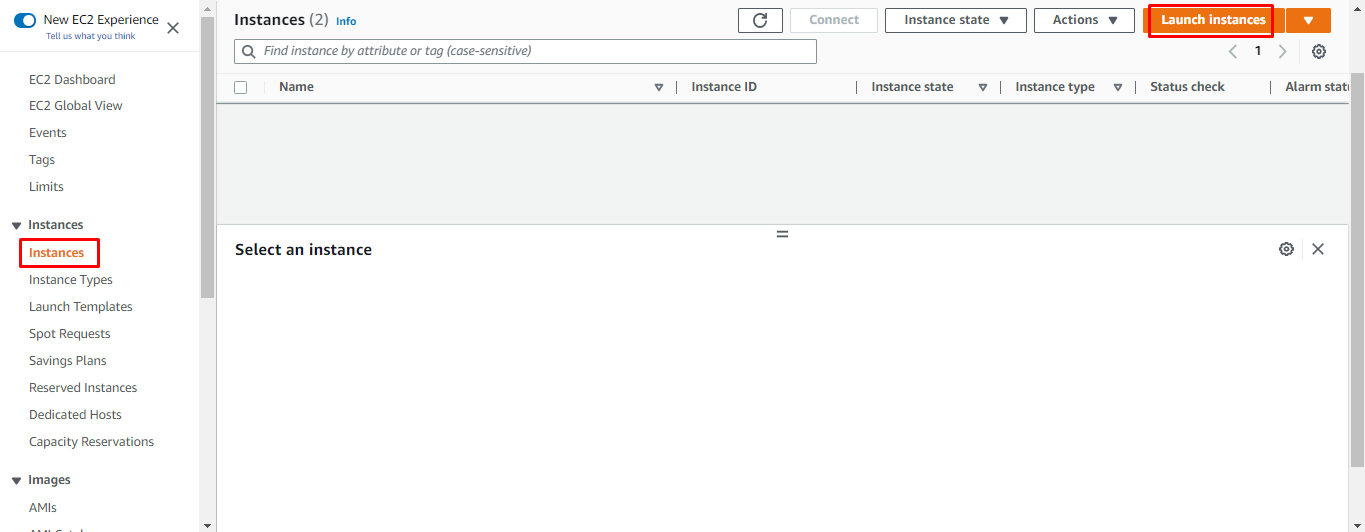
To deploy a war file in AWS, create an EC2 instance by clicking on the “Launch Instances” button from the EC2 management console:
Set the name of the instance and select the Amazon Machine Image for the EC2 instance:

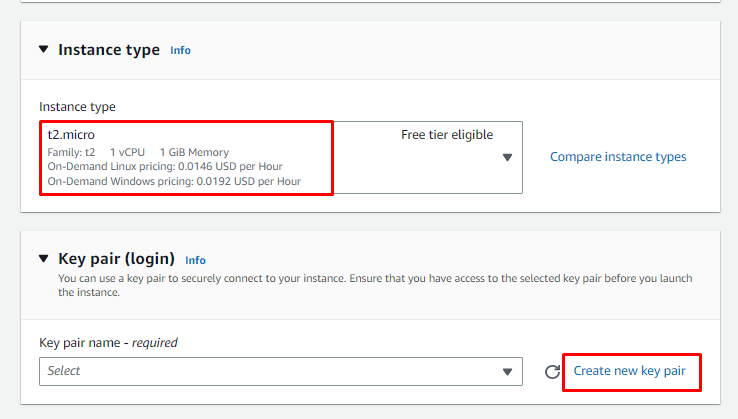
Scroll down the page and choose the type of the instance and click on the “Create new key pair” link:
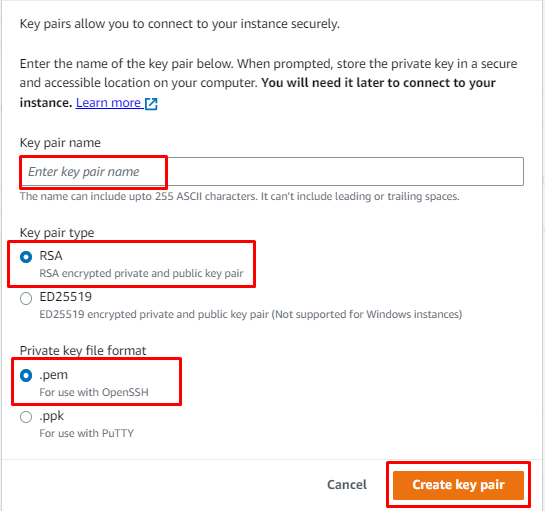
On the key pair file creation window, type the name of the file and select its type and format. Complete the process by clicking on the “Create key pair” button:
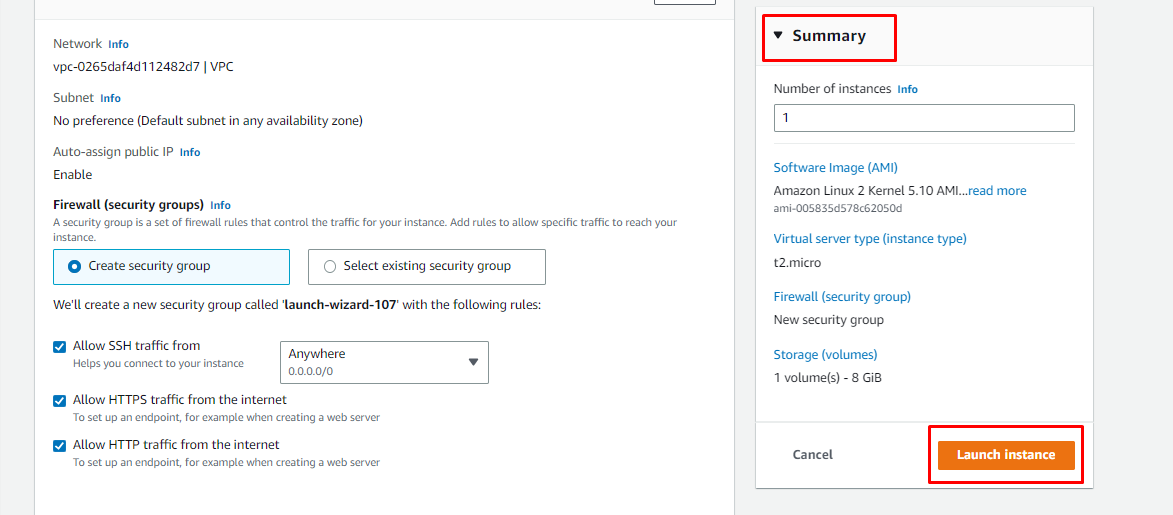
After the configurations of the instance, click on the “Launch Instance” button to create an EC2 instance:
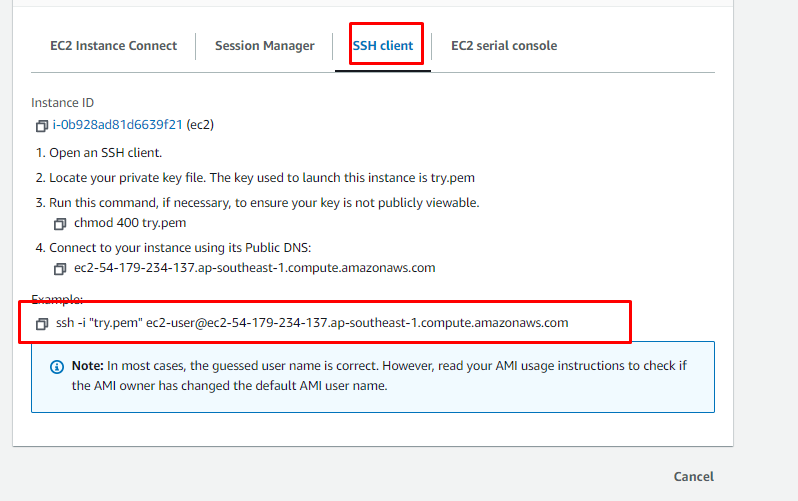
After that, click the “Connect” button after selecting the EC2 instance:

On the Connect page, select the SSH client tab and copy the command from the page:
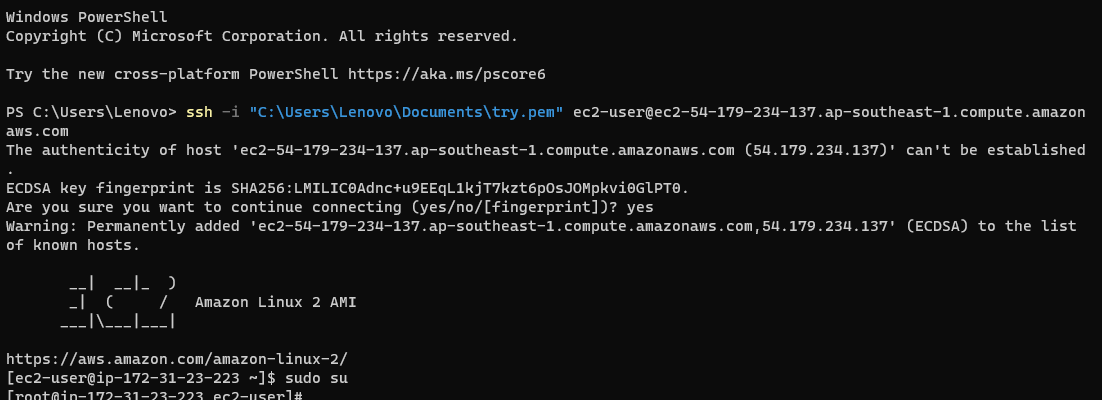
Paste the command on the Command Prompt or PowerShell and change the path of the private key pair:
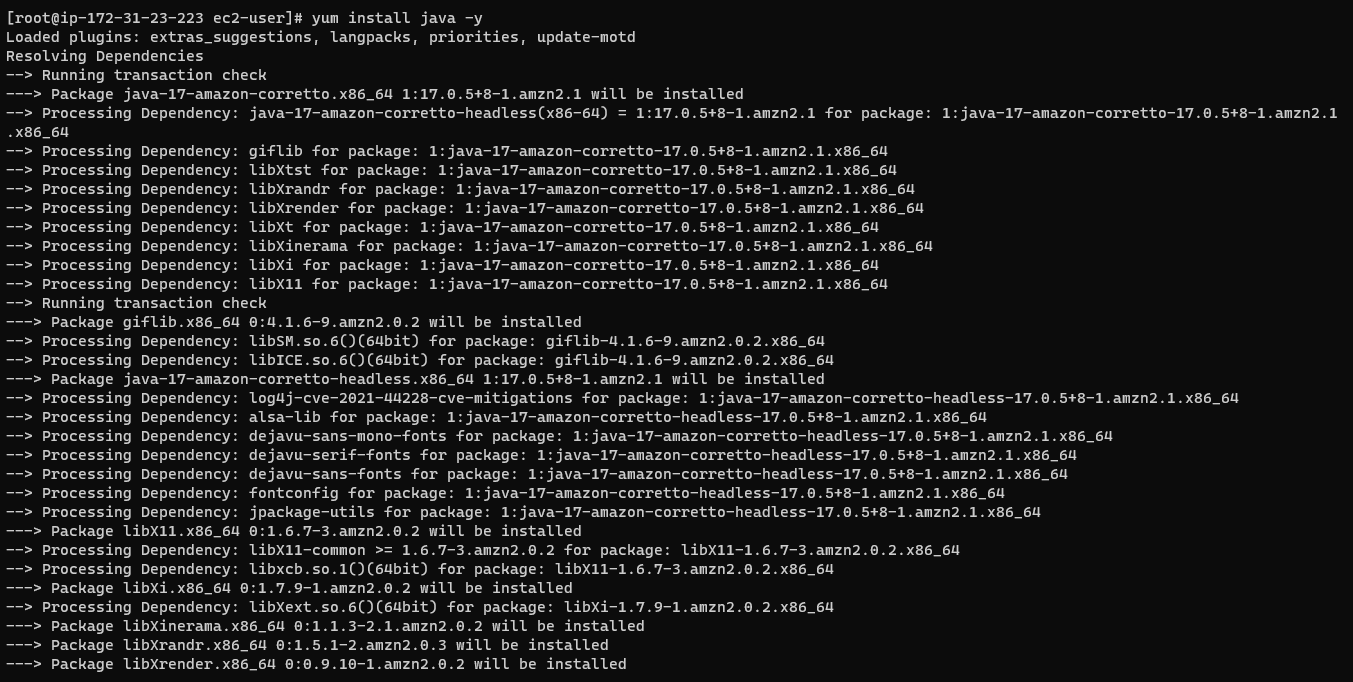
Install Java JDK using the following command:
Running the following command will install the Java JDK:
Download the Tomcat server file using the following command:
The above command will download the Tomcat server:

The Tomcat file is downloaded in “tar” format. The user needs to untar it using the following command:
File has been untarred using the above command:

Rename the file to the “Tomcat” and head into the local directory using the following command:
Running this command will display the following command:

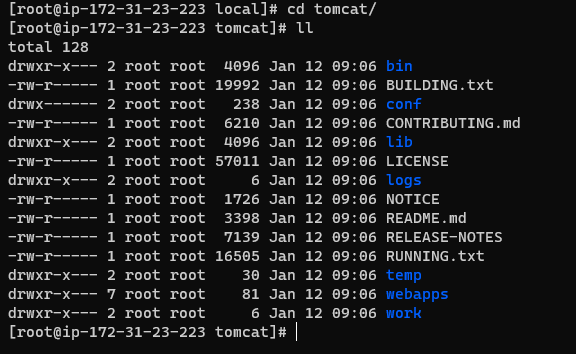
After that head into the Tomcat folder using the following command:
The user is inside the tomcat folder using the above command:
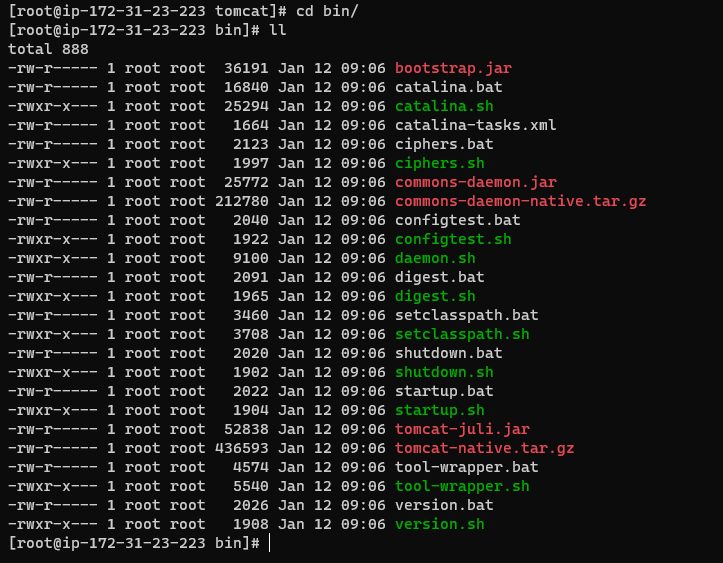
Head inside the bin folder using the following command:
Running the above command will display the following output:
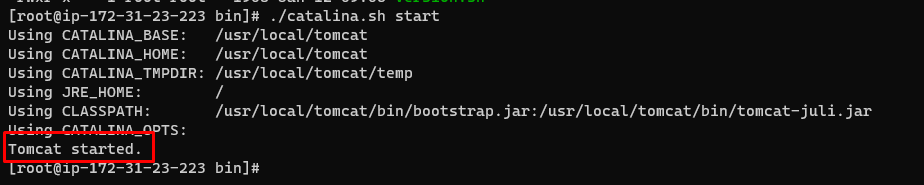
Start the Tomcat server using the following command:
The above command will start the tomcat server:
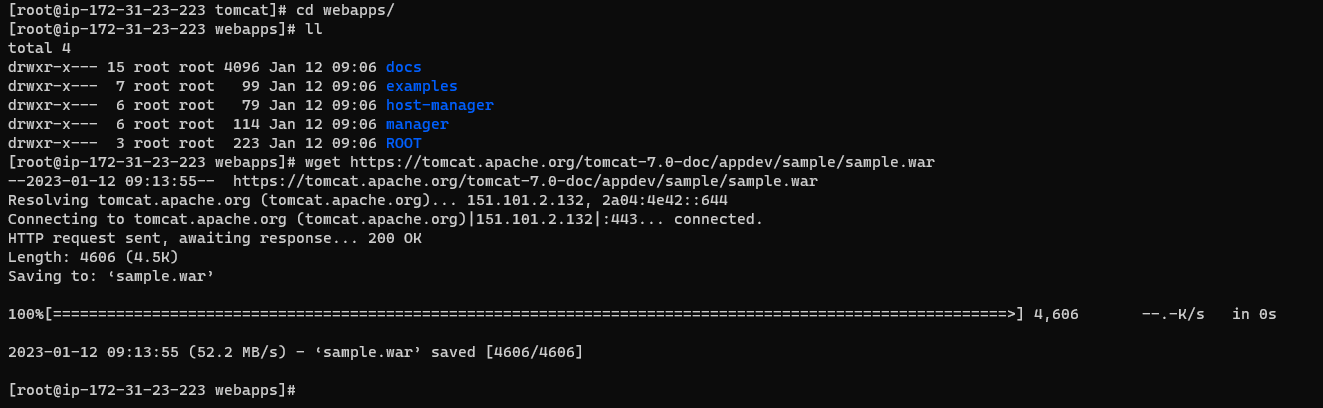
Head into the web app folder and download the war file using the following command:
Running this command will download the war file:
Again, start the tomcat server after deploying war file using the following command:
The above command will start the tomcat server running the war file:

Use the following command on the web browser to check the war file deployed:
The syntax for the above command is following:
Side Note: This is the Public IP of your EC2 instance
Running this command will display the war file on the web browser:
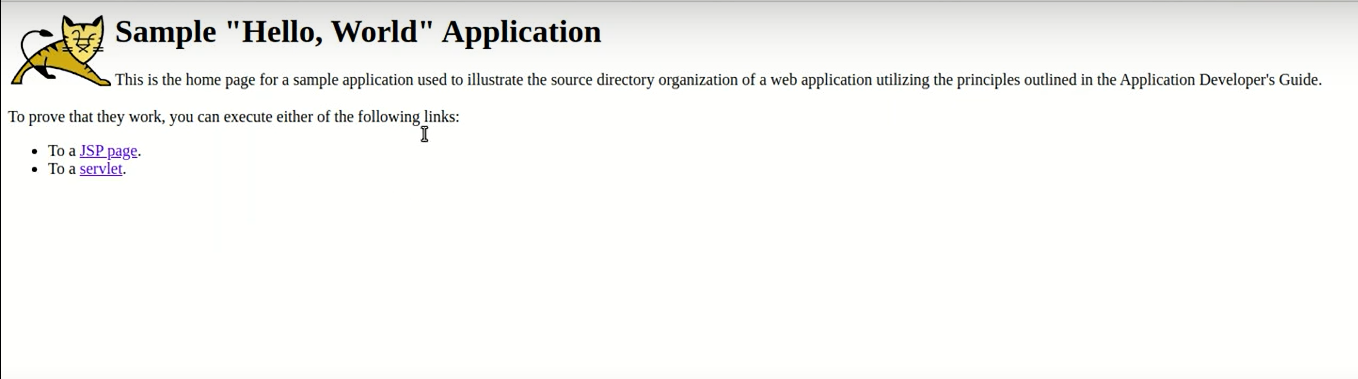
You have successfully deployed the war file in AWS:
Conclusion
A war file can be deployed in AWS by creating the EC2 instance from the EC2 console page. After that, connect to it using the SSH client and paste the command on the Command Prompt or PowerShell. Once the user is connected to the instance, download the Tomcat server and start its services. After that, download the war file inside the tomcat server, and the file is deployed. Use the public IP and port number with the file name on the web browser to display the war file.
Source: linuxhint.com