How to Delete Unwanted Autofill Entries in Google Chrome
To maintain privacy and security, Chrome allows the users to manage their autofill settings. Users can choose which types of information they want Chrome to save and autofill, as well as review and delete existing entries. This guide is all about deleting unwanted autofill entries within Google Chrome.
Method 1: Delete All Autofill Entries at Once
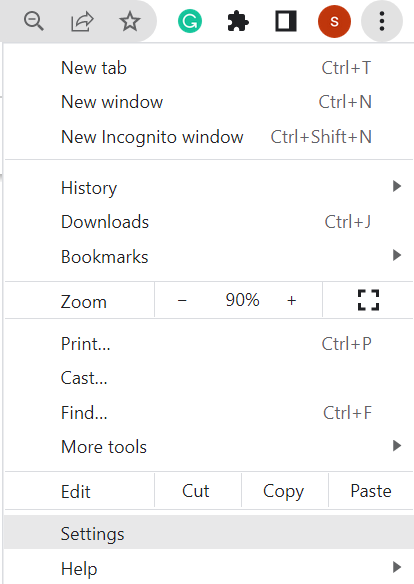
To delete all the autofill entries in the Google Chrome browser, you need to have a basic knowledge of the Google Chrome settings. If you don’t have any knowledge about that, it is nothing to worry about. Using this method, you can learn the basics of Google Chrome easily. After launching your Google Chrome browser, you will be given a new tab. Explore the top right taskbar that is given beside the URL space in a newly opened tab. It contains different icons for extensions, accounts, and settings. The triple dot icon that is held at the rightest side is the one that we tap to expand its “More tools” option. Within the “More tools” setting, we have a “Clear browsing data” option that redirects us to clear the autofill entries of Chrome.

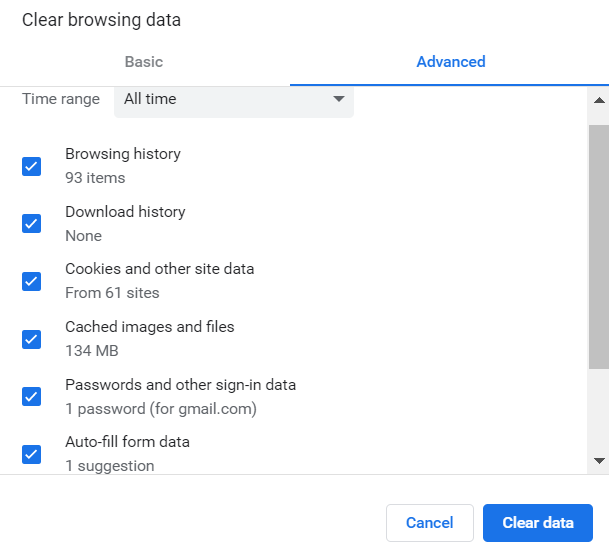
We will be redirected to Chrome’s “Settings” page where we encounter a “Clear browsing data” window that appears on our screen. In this basic section, we don’t have any information regarding the autofill entries. Therefore, we move towards the “Advanced” section. Many checkboxes are listed here which displays the history of many things.
From all of these listed checkboxes, only the “Auto-fill form data” and “Password and other sign-in data” are of use. Both these checkboxes contain 1 entry – 1 autofill form means 1 password is saved for Gmail as specified. Since we want to delete all the autofill entries from our Google Chrome browser, we need to click on the “Clear data” button. It removes the saved password for Gmail like the autofill entry. Thus, you will not be able to log in from your Gmail account with a saved password from now on.
Method 2: Delete the Autofill Entries One by One
In some situations, we won’t feel a need to clear all the autofill entries at once because we might not feel that all the autofill entries will harm our system. Hence, we might want to come up with a method to manage each autofill entry separately. Therefore, we utilize the “Settings” option of the Google Chrome browser that lies within the triple dot icon at the topmost right corner.
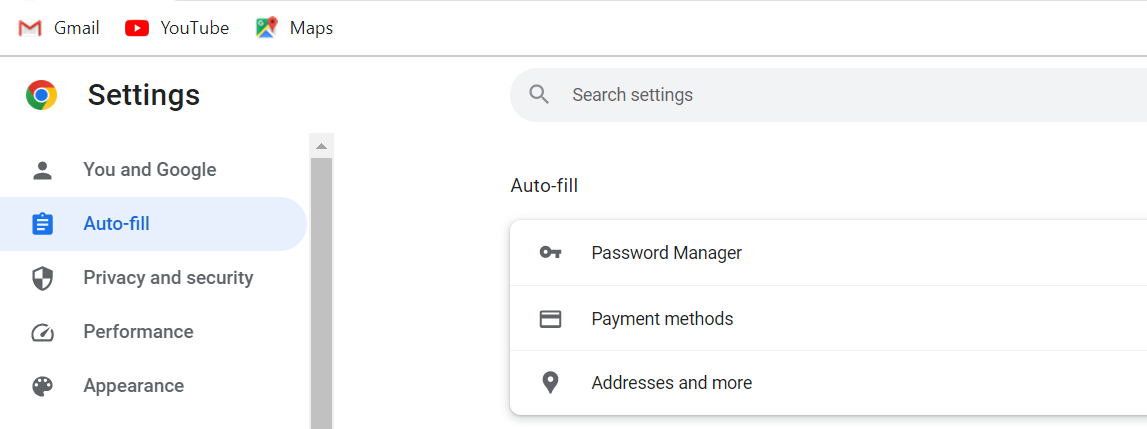
Once the “Settings” page of the Google Chrome browser is opened, list all the options for edit at the left side of the screen. The “Auto-fill” setting lies at the second number from the top. Upon tapping the “Auto-fill” menu, we will see three available options for update in autofill entries.
The “Password Manager” option is specific for managing the saved passwords or login details. The “Payment methods” option is specific for users who tend to save their banking information. The last option which is “Addresses and more” is specific for managing any address of your choice.
The “Password Manager” section provides many options to enable or disable. You need to enable the first option which is “offer to save passwords” if you want the Chrome browser to save the passwords at its end. Even if you enable the “offer to save passwords” option, the Chrome browser doesn’t use the saved passwords for autofill at the time of sign-in to your accounts if you haven’t enabled the “Auto Sign-in” option.
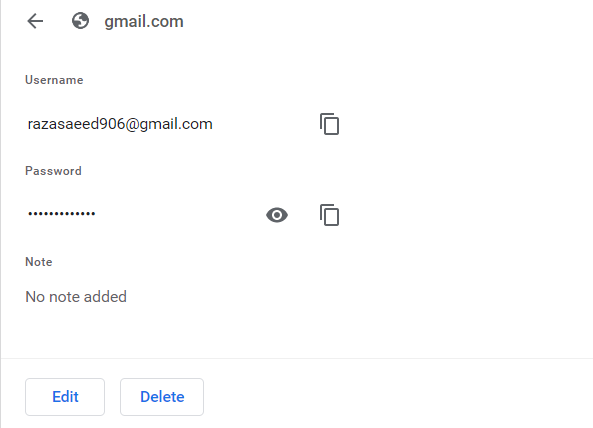
Therefore, it is necessary to enable the “Auto Sign-in” option when you want to use the autofill utility of Google Chrome. The “Saved Passwords” section has all your already saved password details and you can add new ones using the “Add” button. You can see that we have a saved autofill entry for a Gmail account. Now, tap on the saved password entry which is “gmail.com” to see the username and password.
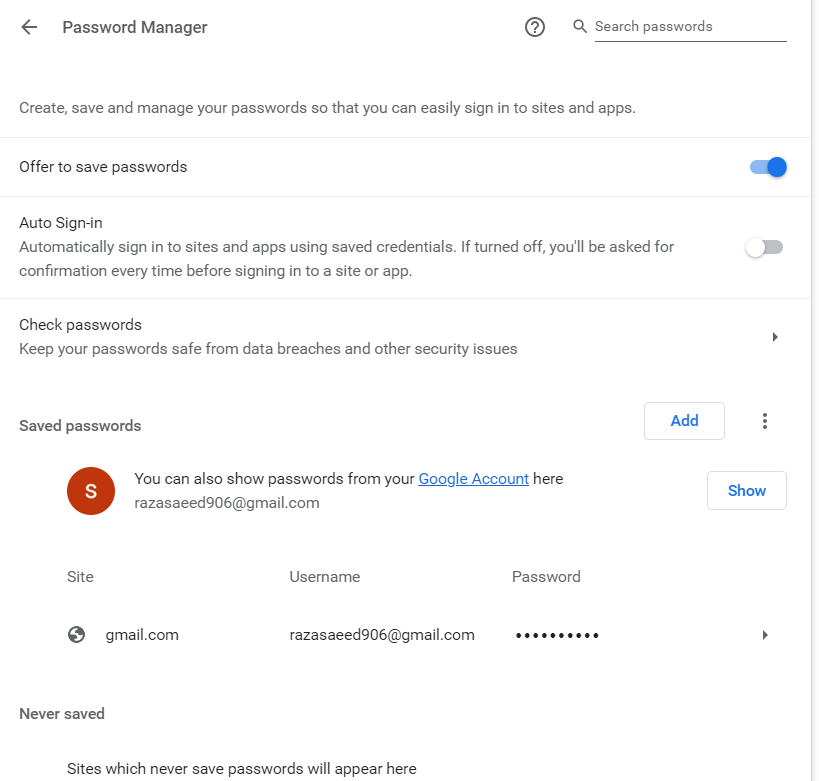
You will be moved to a new page that displays the username and password for a certain account. The “Edit” button that is available here is to edit the username and password if required, while the “Delete” option is to permanently delete this saved password from the Chrome browser.
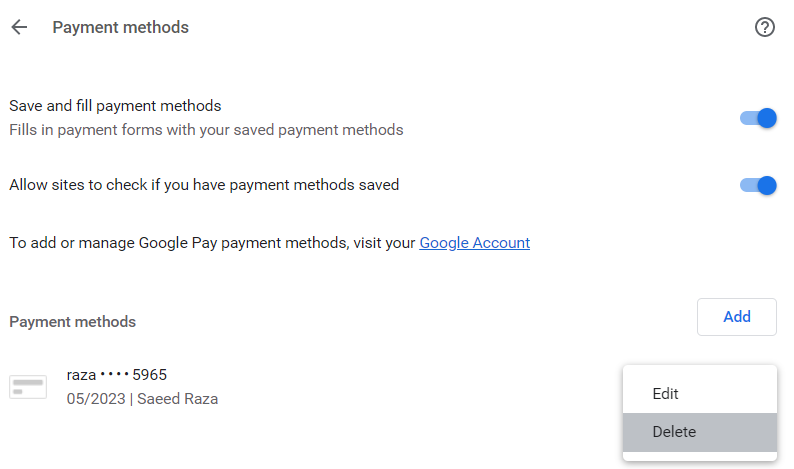
Similar to password, we have a “Payment methods” option which is available to enable or disable the saving and filling of payment methods. You can also allow the sites to check for already saved payment methods. Within the “Payment Methods” block, you may enter the new payment methods and delete the old ones. We have a single entry here as displayed. In front of this entry, we have a triple dot icon that is available to edit or delete it as shown. Hit “Delete” to remove this entry permanently.
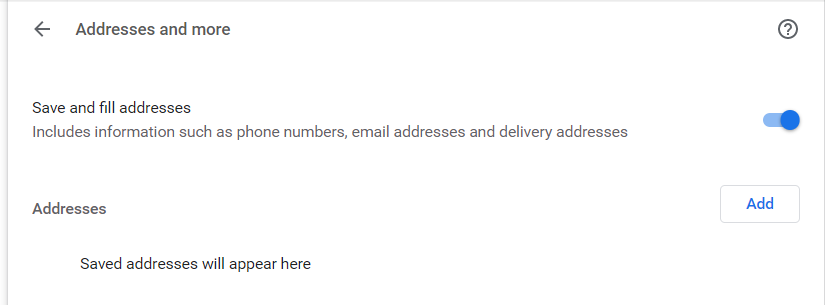
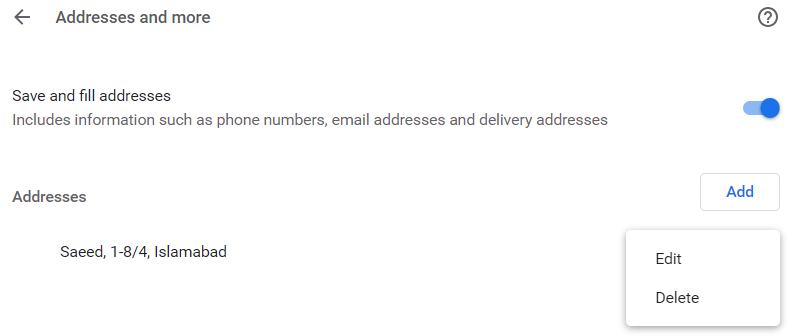
The “Addresses and more” option of the autofill setting allows you to save and clear any sort of address in your Chrome browser. We use the “Add” button to enter a new entry.
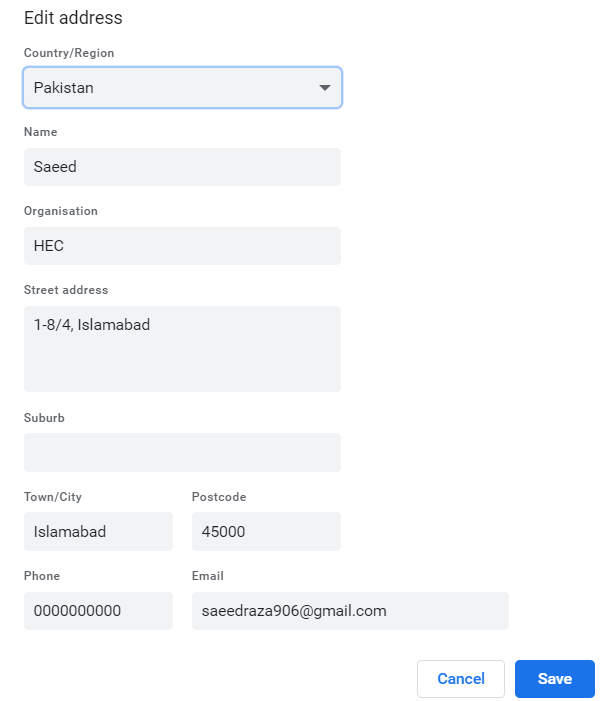
After providing the details, pat the “Save” button.
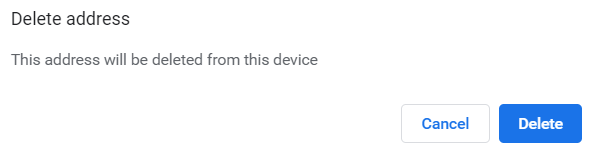
The address appears in the list of addresses. Use the three-dot icon and tap on “Delete”.
The autofill address entry is now deleted permanently from the Chrome browser.
Conclusion
The autofill feature can be particularly helpful for repetitive tasks like logging into websites, filling out registration forms, or making online purchases. Chrome employs encryption and other security measures to protect the autofill data, but users should still exercise caution when using this feature especially on shared or public devices. In summary, users should be mindful of security considerations and manage their autofill settings to protect their personal information using the methods that are discussed in the guide.
Source: linuxhint.com