How to Create Git Repository for Remote Projects?
In Git, if the developers are working on a project with other people from over the globe, a Git repository can help them to collaborate more easily. Everyone can push their changes to the centralized server known as GitHub and pull the latest changes from others by creating a central repository on a remote server.
This write-up will state the method for creating the repository for remote projects.
How to Create/Make a Git Repository for Remote Projects?
To make a Git repository for the remote projects, follow the below given instruction:
-
- Navigate to the Git root directory.
- Initiate a Git Local repository and move toward it.
- Generate files and add them to the staging index.
- Next, commit all changes using the “git commit” command and verify the status.
- Sign in to GitHub account and make a new repository.
- Copy the “HTTP” URL of the newly created repository to clone it with the local Git repository.
- Insert the remote in the local Git directory by using the “git remote add” command.
- Lastly, push all changes to the remote repository.
Step 1: Navigate to Git Root Directory
First, launch the Git Bash terminal and navigate toward the Git root directory with the help of the “cd” command:
Step 2: Make a Local Git Repository
Execute the “git init” command to generate a new local Git repository. For instance, we have specified “projectrepo” as a repository:
As a result, the repository has been generated successfully:

Step 3: Go to the Created Repository
Use the “cd” command along with the name of the stated repository and navigate to it:
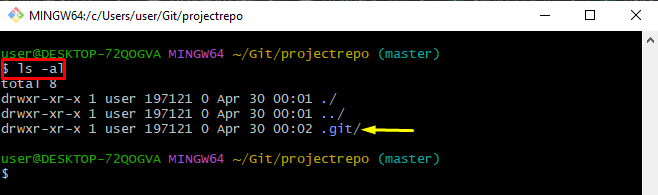
Step 4: List all Files
Next, execute the “ls -al” command to list all the hidden files:
The resultant image shows that “.” extension files have been listed on the terminal:
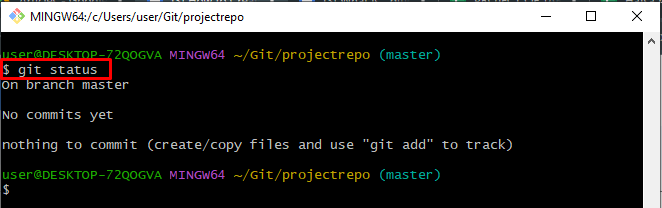
Step 5: Check the Status of Git
View the current status of the Git working directory by running the “git status” command:
It can be noticed that there is nothing to commit:
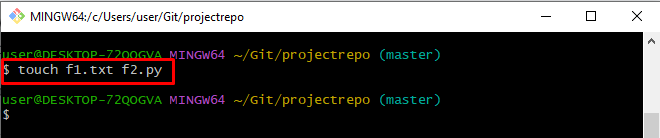
Step 6: Generate Files
Next, execute the “touch” command to create a file:
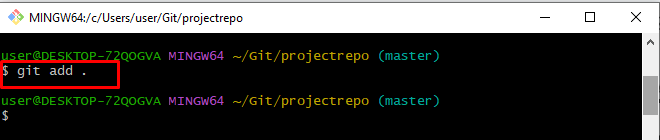
Step 7: Track Files in Staging Area
Then, add/track all newly generated files from the working area to the staging index by using the “git add .” command:
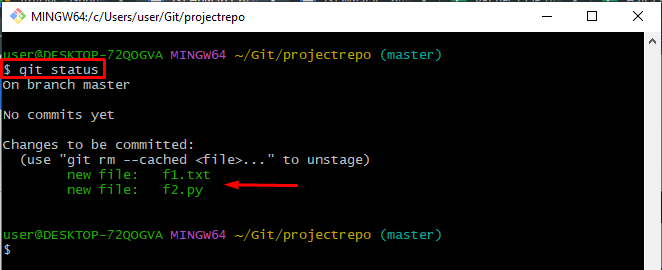
Step 8: View the Current Status
Check the current status of the Git repository by executing the “git status” command:
The given image indicates that new files have been added to the staging area and are ready to commit:
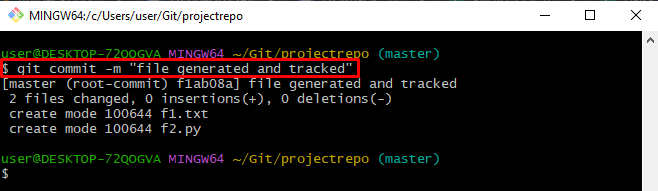
Step 9: Commit Changes
Run the “git commit” command and add a commit message for saving modifications in the Git repository:
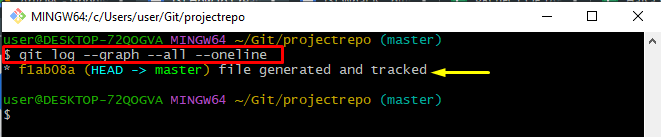
Step 10: View Git Log
Use the “git log –graph” command to create a graphic overview of how a developer’s various development pipelines have branched and merged over time:
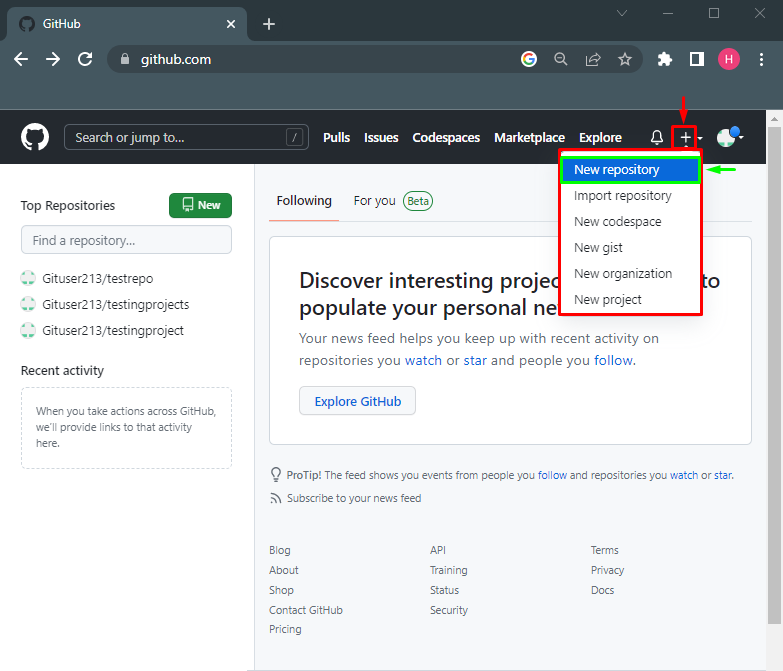
Step 11: Navigate to Your GitHub Account
Now, in this stated step, Sign in to GitHub account by utilizing the provided link and click on the “+” icon. Then, hit the “New repository” option to move ahead:
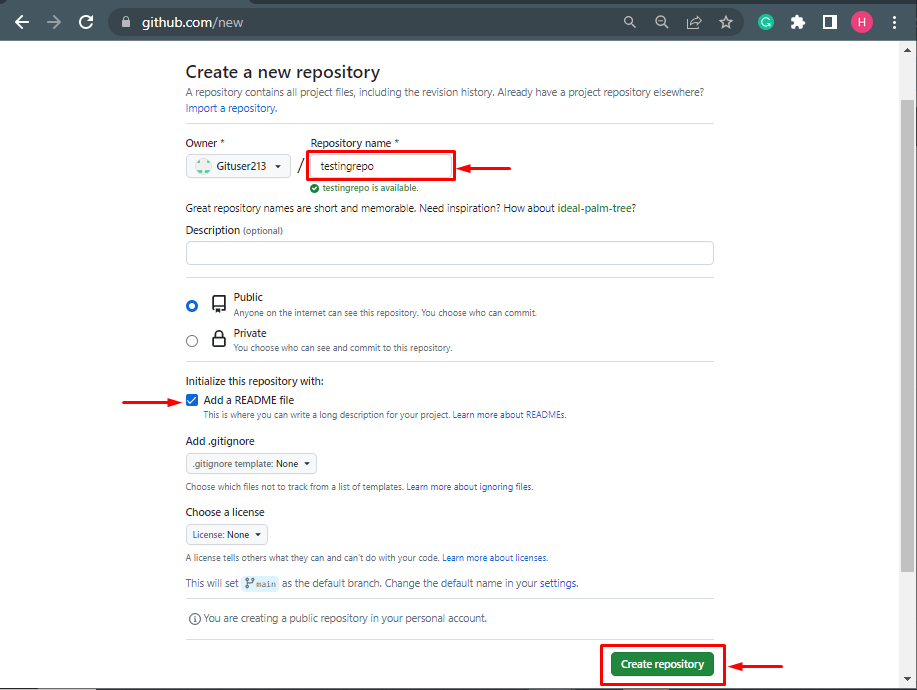
Step 12: Create a New Repository
Add the required information in the stated fields to create a new repository, such as specify a name and hit the below-highlighted “Create repository” button:
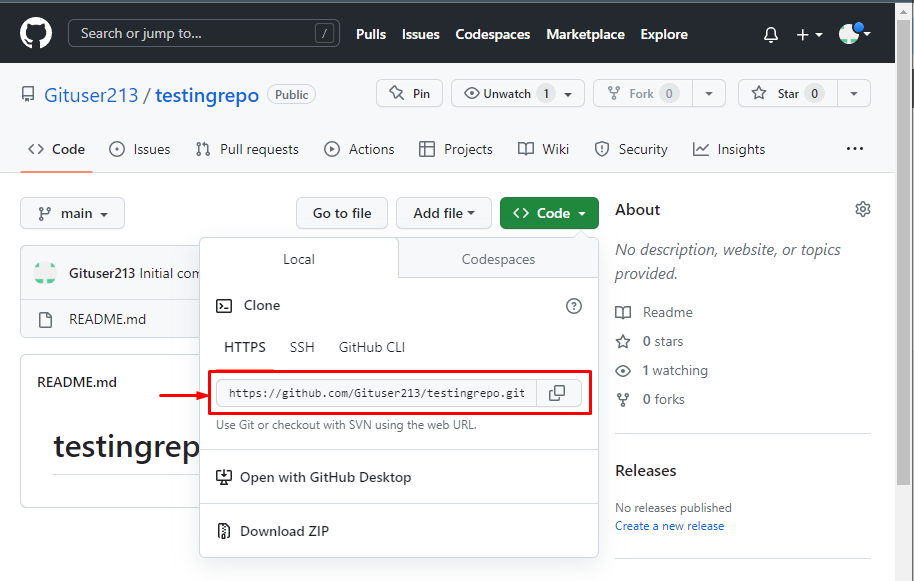
Step 13: Copy the HTTPS Link
Next, click on the “code” option and copy the “HTTPS” url for further use:
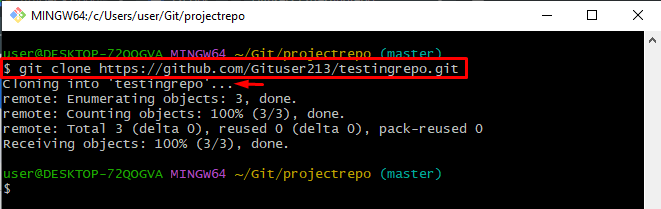
Step 14: Clone the Newly Created Repository
After that, clone the newly created repository in the local Git repository by executing the provided command:
The resultant image shows that the remote repository has been cloned with the local Git repository successfully:
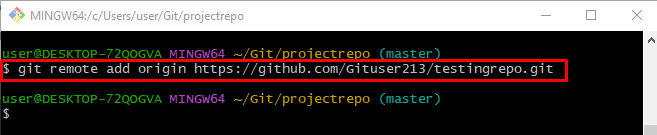
Step 15: Add Remote
Insert the remote “origin” in the local Git repository by using the “git remote add” command and set the HTTPS URL of the remote repository:
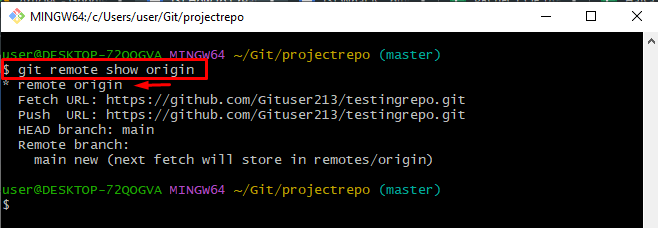
Step 16: Show the Remote
Execute the “git remote show” command to verify whether the remote is added or not:
It can be observed that the remote has been added successfully:
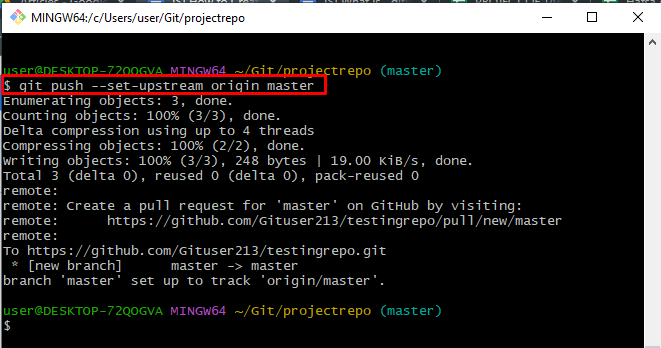
Step 17: Push Changes
Lastly, push all the changes into the remote repository by running the “git push –set-upstream” command:
As a result, all the changes have been pushed to the remote repository successfully:
You have learned about creating the Git repository for remote projects.
Conclusion
To make a Git repository for the remote projects, generate files in the local repository, and track them in the staging index. Then, commit all changes and verify the status. Furthermore, sign in to your GitHub account and make a new repository. After that, copy the “HTTPS” URL of the newly created repository and clone it. Insert the remote in the local Git directory by using the “git remote add” command. Lastly, push all modifications to the remote repository. This post described the way to create a Git repository for remote projects.
Source: linuxhint.com