How to Create Branch and Checkout Using a Single Command
Git branches are used to communicate between the local and remote servers. When users develop a new feature, they can do it by generating a new Git branch. Branches are generated in order to isolate the list of commits from the rest of the developer’s main Git history. After that, they can push locally modified content to the centralized server repository.
This post will discuss:
- How to Create Branch and Checkout Using “git checkout” Command?
- How to Create Branch and Checkout Using “git switch” Command?
How to Create Branch and Checkout Using “git checkout” Command?
To generate a branch and checkout, try out the following steps:
- Move to the particular Git root directory.
- List all the local branches.
- Use the “git checkout” command to create and switch to a new branch.
Step 1: Navigate to Git Repository
Type out the “cd” command and redirect to the Git root directory:
Step 2: List Git Branches
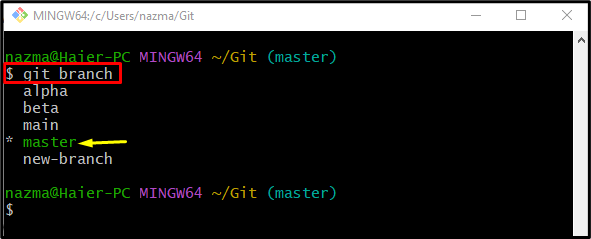
Then, execute the “git branch” command to view all existing branches:
Here, the “master” is the current working branch:
Step 3: Create and Switch Branch
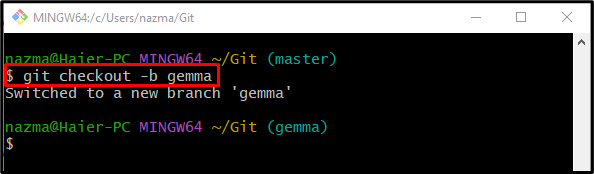
To generate and switch the new branch immediately, run the “git checkout” command:
Here, the “-b” indicates the branch. According to the below-given output, we have successfully created and switched to a new branch:
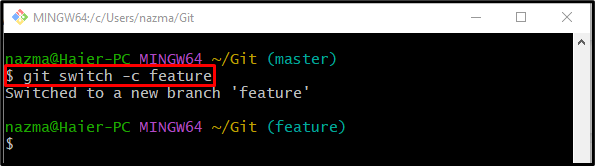
How to Create Branch and Checkout Using “git switch” Command?
The “git switch” command is used for generating and redirecting to the new branch, as follows:
That’s it! This blog provided different ways to immediately create and switch to a new branch using a single command.
Conclusion
To generate a branch and checkout, first, move to the particular Git root directory and list all the local branches. Then, run the “git checkout -b <branch-name>” command. Another way to generate and redirect to branches is the “git switch -c <branch-name>” command. This post provided the different commands to generate and switch immediately to a new branch.
Source: linuxhint.com