How To Create AWS VPC Using Terraform
AWS provides a virtual private cloud (VPC) service for creating a logically isolated virtual network in the cloud. Here, we can launch EC2 and RDS instances and create security groups and other resources. Like many other tasks, we can also create a VPC using Terraform.
What We Will Cover
This guide will show how to create an AWS VPC (Virtual Private Cloud) using Terraform.
What You Will Need
- AWS account
- Access to the internet
- Basics of Terraform
Creating AWS VPC Using Terraform
Now that we have installed Terraform on our local machine, we can continue our task of working with VPC. Here, we have outlined the VPC setup for our case:

We have one private and one public subnet with their corresponding route table. The public subnet also has a NAT gateway attached to it. The Terraform configuration for different components is stored in different files as:
- variables.tf: Definition of variables used in the files
- vpc.tf: For VPC resource
- gateway.tf: For Gateway resources
- subnets.tf: For defining public and private subnets
- route-table.tf: For public and private route table resources
- main.tf
As mentioned earlier, Terraform uses several configuration files for provisioning resources, and each of these files must reside in their respective working folder/directory. Let us create a directory for this purpose:
Step 1. Create a folder that will hold your configuration files, and then navigate to this folder:
|
1
|
$ mkdir linuxhint-terraform && cd linuxhint-terraform
|
Step 2. Let us create our first configuration file, “variables.tf”, that will contain information about our AWS region and the type of instance we want to use:
|
1
|
$ nano variables.tf
|
Now, put the following text inside it, and save the file:
|
1
2 3 4 5 6 7 8 9 10 11 12 13 14 15 16 17 |
variable "aws_region" {
description = "The AWS region to create the VPC in." default = "us-east-1" }
variable "vpc-cidr" { variable "pubsubcidr" { variable "prisubcidr" { |
Step 3. Create vpc.tf:
|
1
|
$ nano vpc.tf
|
Now, put the following text inside it, and save the file:
|
1
2 3 4 5 |
resource "aws_vpc" "my-vpc" {
cidr_block = var.vpc-cidr } |
Step 4. Create gateway.tf file and define internet gateway and NAT gateway here:
|
1
|
$ nano gateway.tf
|
Now, put the following text inside it, and save the file:
|
1
2 3 4 5 6 7 8 9 10 11 12 13 14 15 16 17 18 19 |
# Create Internet Gateway resource and attach it to the VPC
resource "aws_internet_gateway" "IGW" { vpc_id = aws_vpc.my-vpc.id } # Create EIP for the IGW resource "aws_eip" "myEIP" { # Create NAT Gateway resource and attach it to the VPC |
Step 5. Create subnets.tf for the private and public subnets inside the VPC:
|
1
|
$ nano subnets.tf
|
Now, put the following text inside it, and save the file:
|
1
2 3 4 5 6 7 8 9 |
resource "aws_subnet" "myprivatesubnet" {
vpc_id = aws_vpc.my-vpc.id cidr_block = var.prisubcidr } resource "aws_subnet" "mypublicsubnet" { |
Step 6. Create route-table.tf for private and public subnets:
|
1
|
$ nano route-table.tf
|
Now, put the following text inside it, and save the file:
|
1
2 3 4 5 6 7 8 9 10 11 12 13 14 15 16 17 18 19 20 21 22 23 24 25 26 27 28 |
# Creating RT for Private Subnet
resource "aws_route_table" "privRT" { # Creating RT for Public Subnet |
Step 7. Make a “main.tf” file that will contain the definition for our infrastructure:
|
1
|
$ nano main.tf
|
Now, put the following configuration inside it:
|
1
2 3 4 5 6 7 8 9 10 11 12 13 14 15 16 17 18 19 20 21 |
terraform {
required_providers { aws = { source = "hashicorp/aws"
version = "~> 3.27" required_version = ">= 0.14.9" } provider "aws" { |
Modify the “User_Name” in the above code with the username in your case. Let us see a bit about the parameters used in the previous files:
- shared_credentials_file: It is the path of the file containing the credentials of the AWS users.
- profile: It specifies the user’s profile to be used for working with AWS.
- aws_vpc: Resource for building a VPC.
- cidr_block: Provides an IPv4 CIDR block for the VPC.
- aws_internet_gateway: Resource for creating an internet gateway for the VPC.
- aws_eip: Resource for producing an Elastic IP (EIP).
- aws_nat_gateway: Resource for creating a NAT gateway for the VPC.
- Allocation_id: Attribute for allocation id of the above-generated EIP.
- subnet_id: Attribute for subnet id of the subnet where NAT gateway is deployed.
- aws_subnet: Resource for creating a VPC subnet.
- aws_route_table: Resource for creating a VPC route table.
- route: Argument that contains a list of route objects.
- nat_gateway_id: Argument denoting the ID of the VPC NAT gateway.
- gateway_id: Optional argument for VPC internet gateway.
- aws_route_table_association: Resource for creating an association between route table (public or private) and 1) internet gateway and 2) virtual private gateway.
- route_table_id: The route table ID with which we are associating the subnet.
Initializing the Terraform Directory
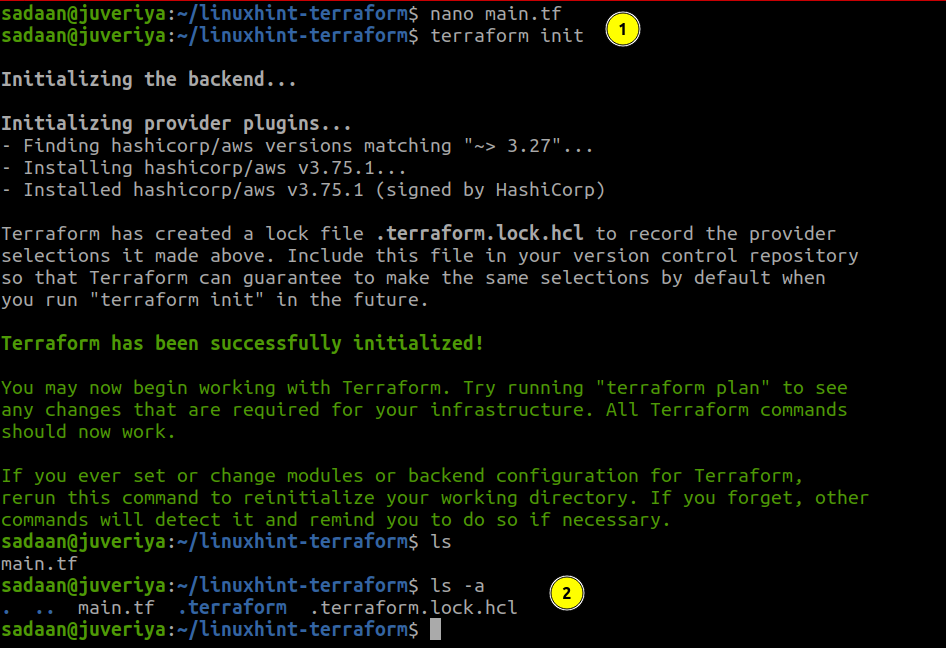
To download and install the provider we defined in our configuration and other files, we need to initialize the directory containing this file:
|
1
|
$ terraform init
|
Building the Infrastructure
To apply the changes we planned above, run the following command:
|
1
|
$ terraform apply
|
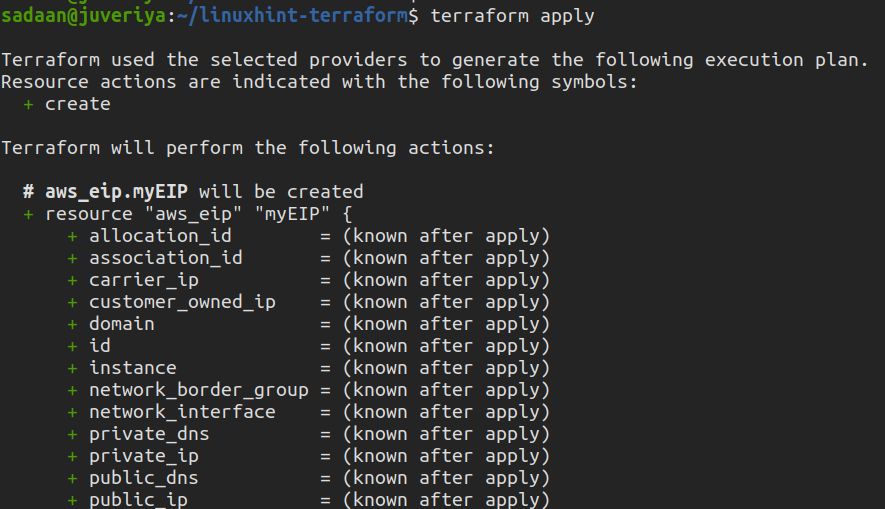
Enter “yes” on the terminal when prompted.
Verifying the Procedure
Now, let us check if the desired VPC is created or not. Head to the VPC console, and check for the available VPCs:

We can see that our VPC is created successfully.
After you have done performing this task, delete the resources to avoid unnecessary charges:
|
1
|
$ terraform destroy
|
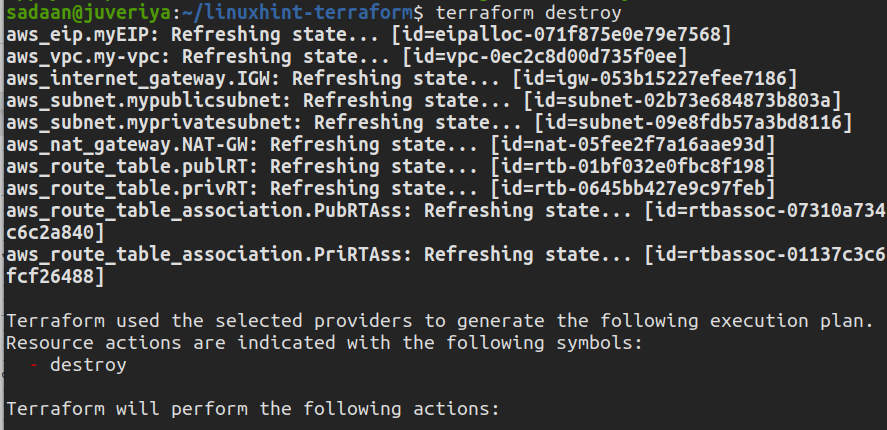
Enter “yes” to apply the action.
Conclusion
In this guide, we have learned about creating a VPC on AWS using Terraform. The next thing that you can do is try to provision an RDS or EC2 instance using Terraform.
Source: linuxhint.com