How to Create and Use a Portable Version of the Arduino Software (IDE)
Arduino IDE is a versatile and open-source platform that can program multiple boards. It is one of the most popular IDEs available to program microcontroller boards. Using Arduino IDE, we can compile and upload programs to boards and see real time results in the serial monitor.
While programming with Arduino IDE we might need to switch between different devices and PCs. For that the conventional Arduino IDE is not that fast. To solve this, we can use Portable Arduino IDE and transfer entire IDE files including libraries to any computer without affecting the remaining system files. This article will cover how we can set up a portable Arduino IDE installation on a PC.
Here is the content we are going to discuss:
2: How to Install Portable Arduino in Window
3: Uploading Code to Arduino UNO Using Portable Arduino IDE
3.1: Output
4: How to Update the Portable Arduino IDE
5: Why Portable Arduino Is Not Available on macOS
6: When Will Portable Arduino Available on IDE 2.0
1: Why Portable Arduino IDE
Portable Arduino IDE has multiple advantages. This makes it easy to transfer and carry Arduino IDE files across multiple systems. It is like a pen drive which can be carried anywhere having a personal set of sketches, custom libraries and boards installed.
Interestingly using a portable Arduino IDE, we can set it in any computer within a minute and without affecting the rest of the files.
Another advantage of portable Arduino IDE is its multiple times faster than the normal Arduino IDE. Using the portable Arduino IDE, we can replicate the same Arduino file on any computer without any need of setting Arduino IDE from scratch.
2: How to Install Portable Arduino in Window
Installing a portable Arduino IDE is simple: we just have to download the zip file and create a new folder inside the Arduino directory with a name portable.
Following steps will guide you on portable Arduino IDE installation:
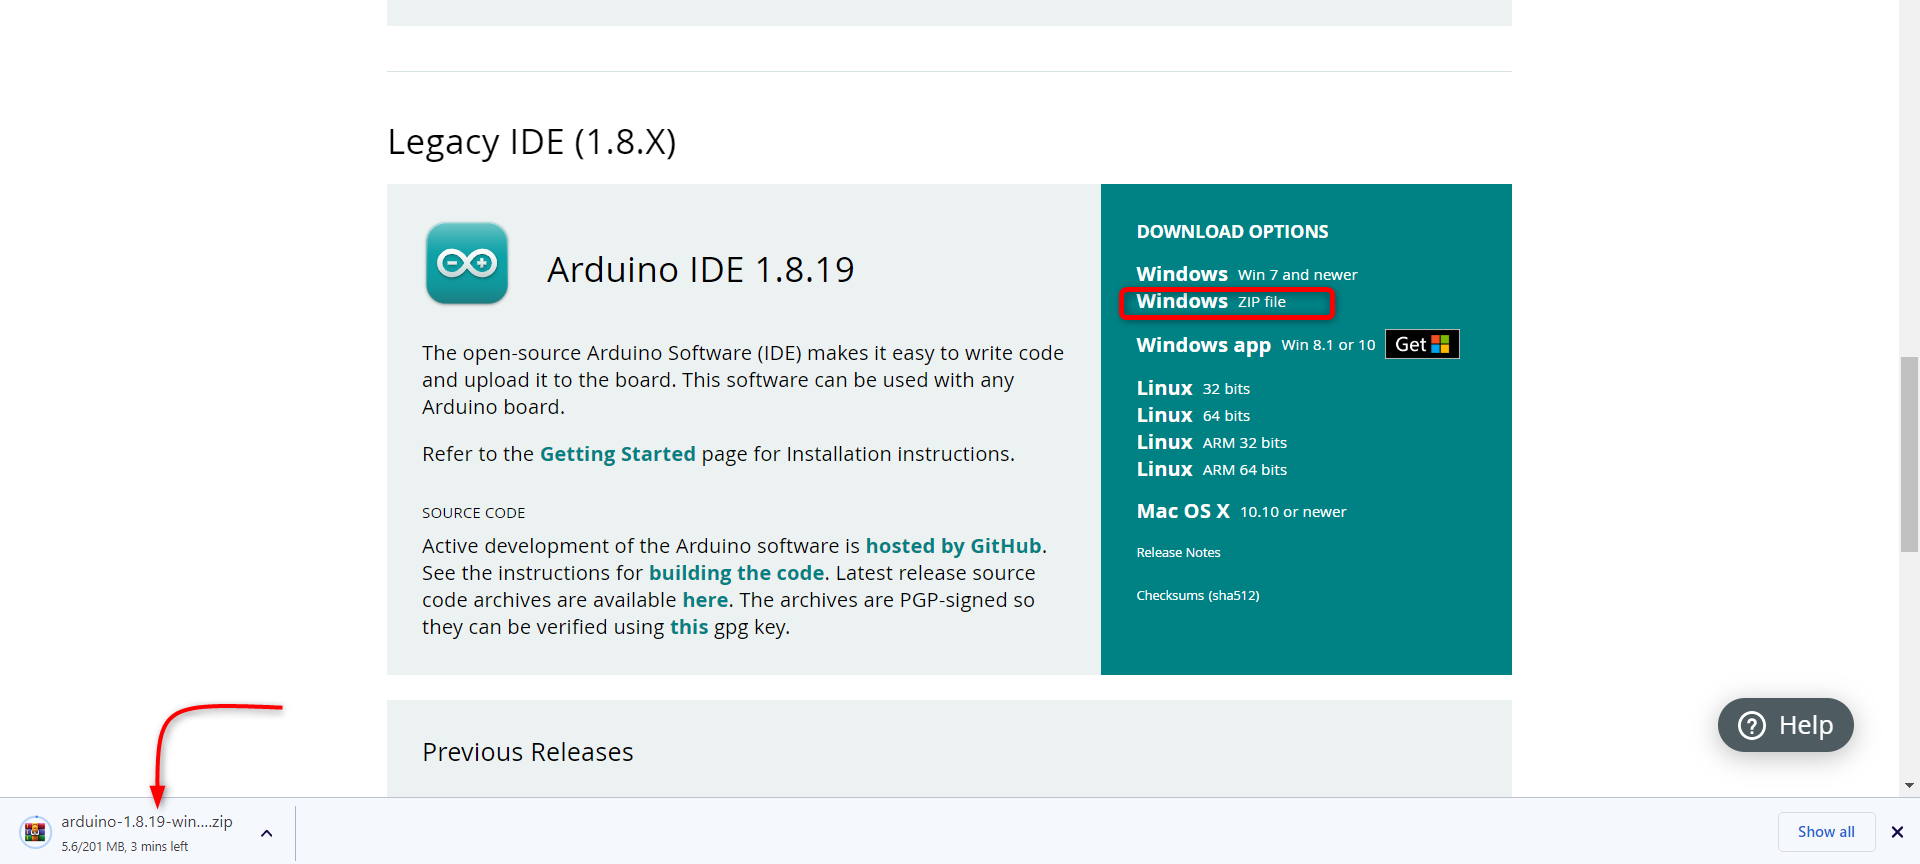
Step 1: Open Arduino IDE software download page. Download the zip file for Windows.
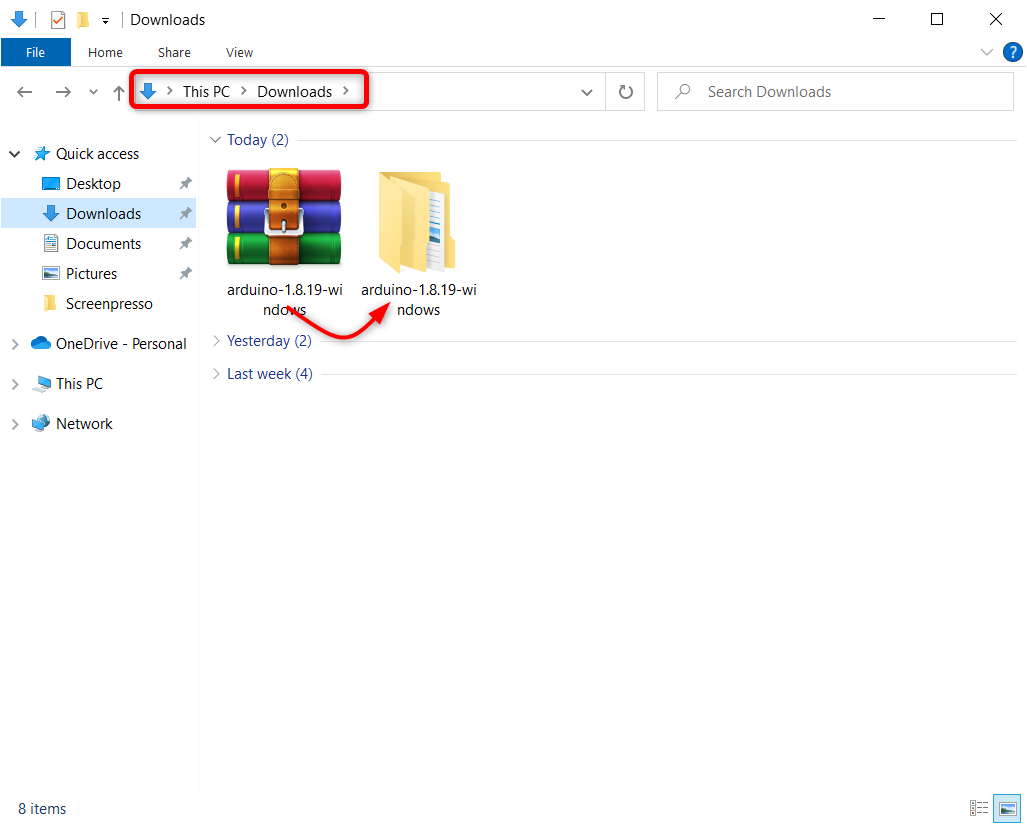
Step 2: Extract the Arduino IDE zip file.
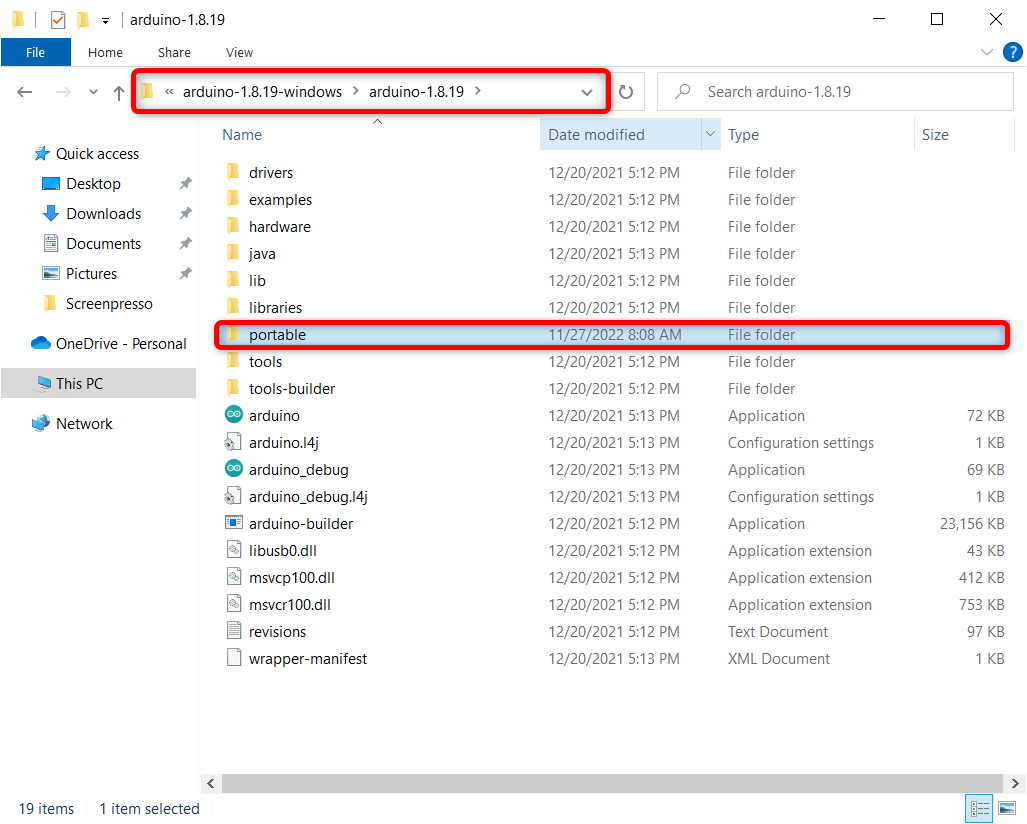
 Step 3: Now create a new folder with the name portable in the Arduino IDE directory.
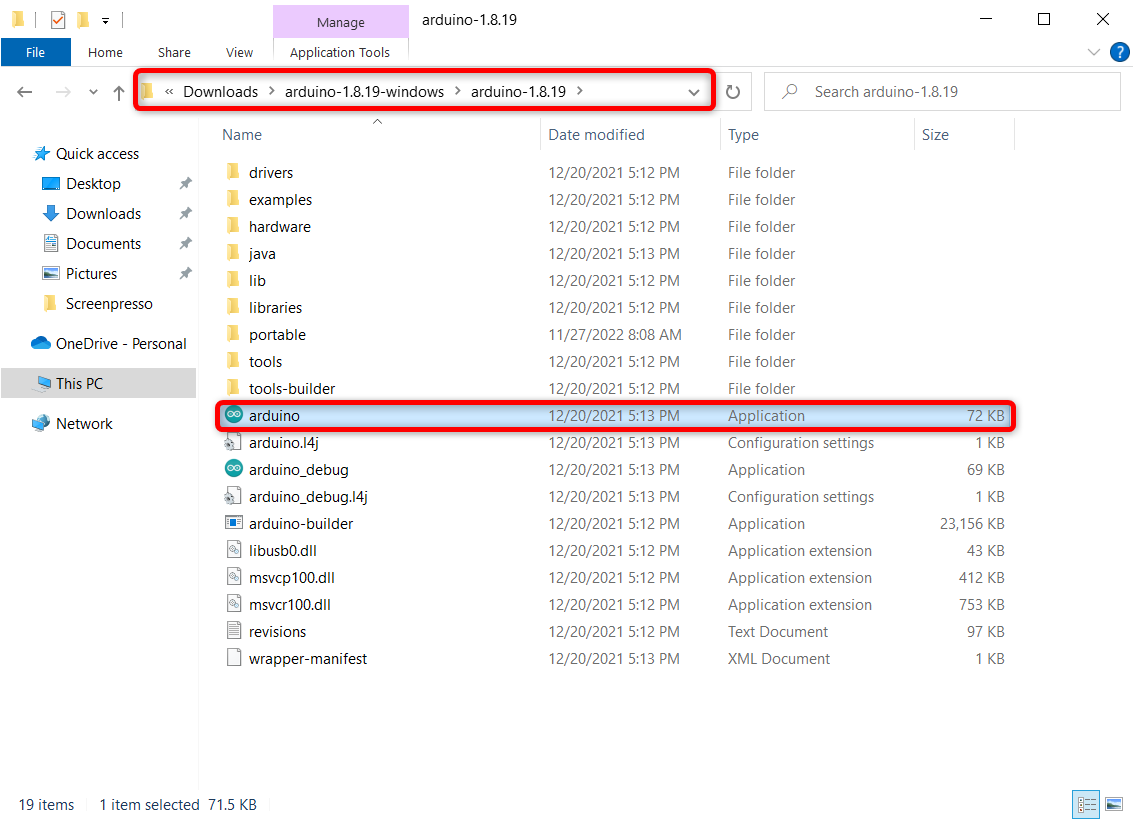
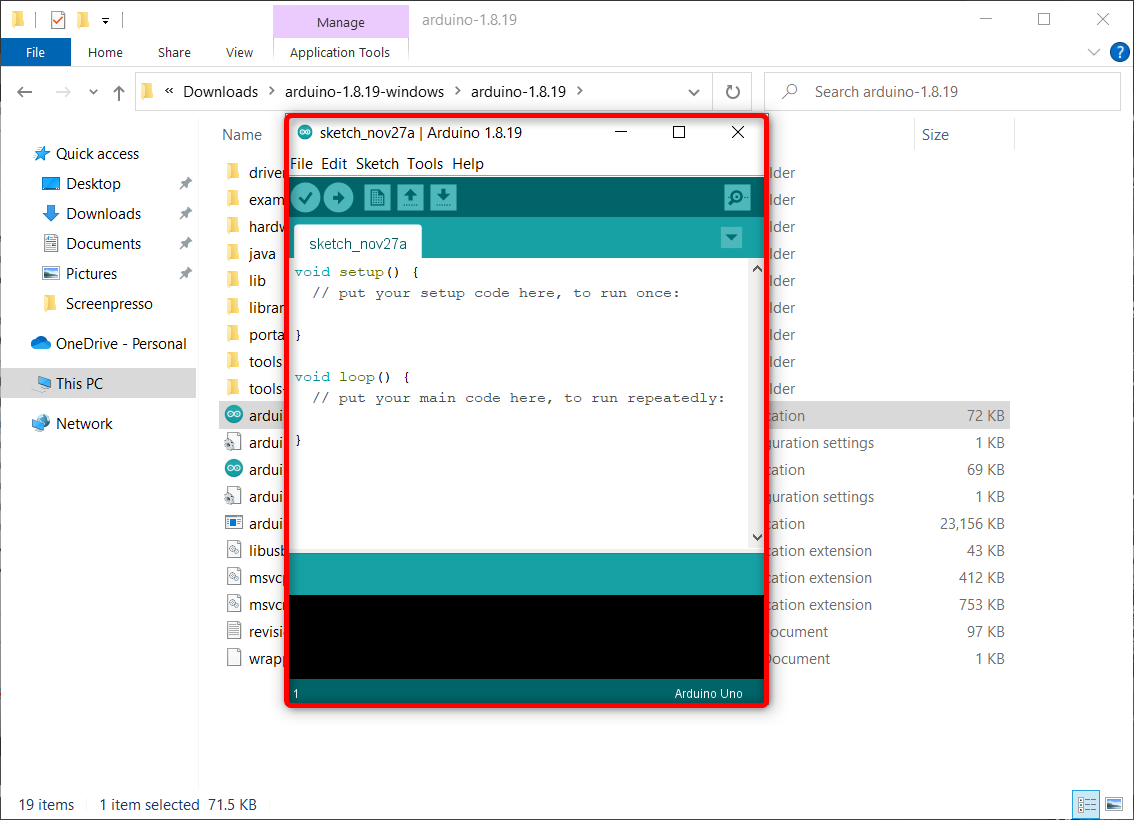
Step 4: Now run the Arduino IDE application.
Step 5: Arduino IDE will open showing us the IDE editor interface.
We have successfully installed a portable Arduino IDE on our PC. Now to test its installation we will upload a blink sketch in Arduino UNO.
3: Uploading Code to Arduino UNO Using Portable Arduino IDE
To test the installation of IDE first we need to connect Arduino UNO with PC then open the blink example sketch from IDE examples section.
Follow the steps to upload code in Arduino UNO:
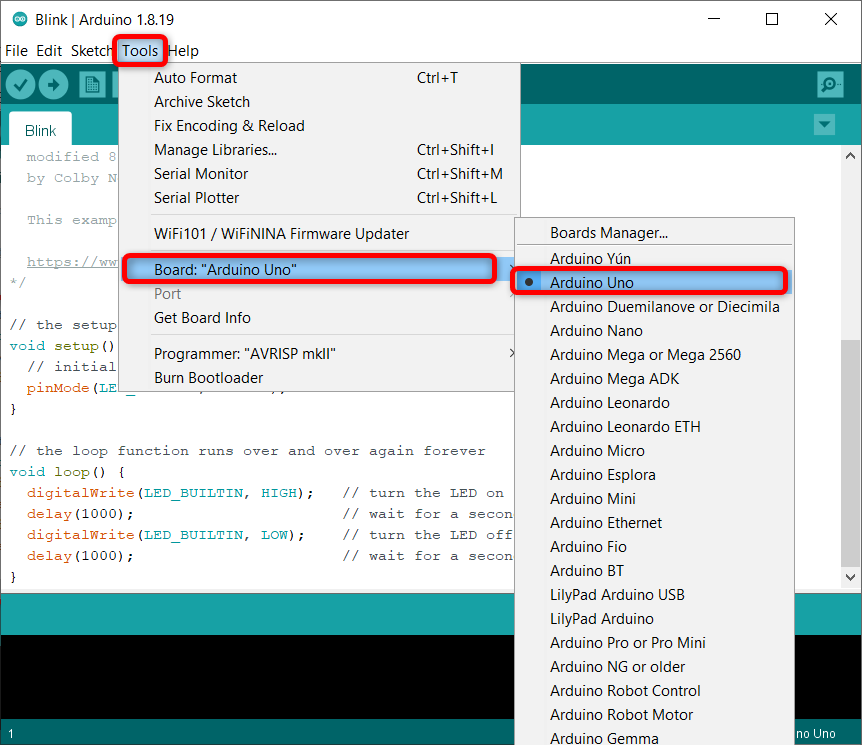
Step 1: Connect Arduino UNO with PC and select the board. Go to: Tools>Boards>Arduino UNO
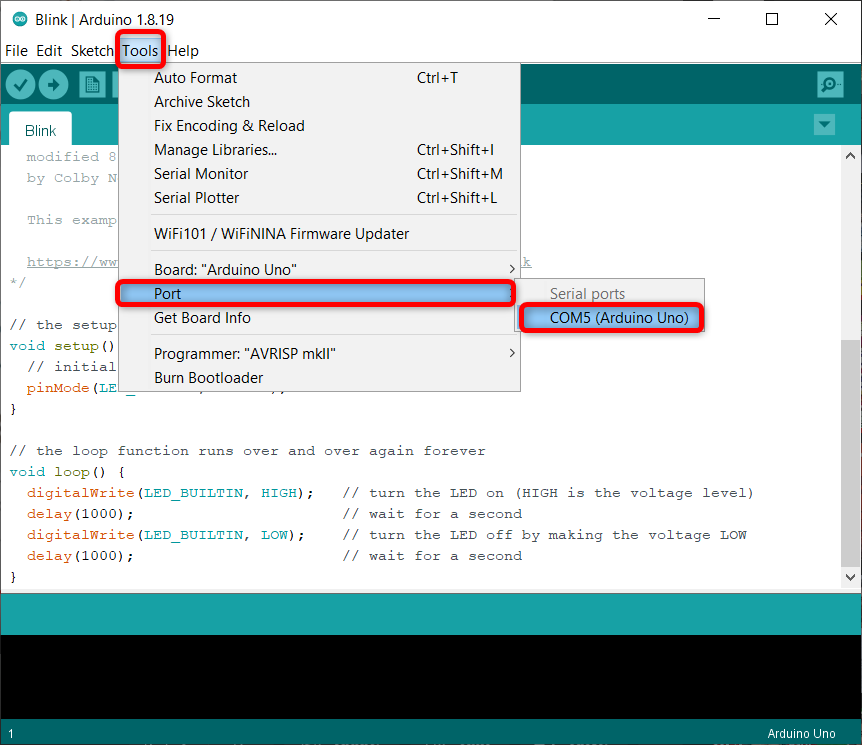
Step 2: Select the COM port. Go to: Tools>Port>COMX
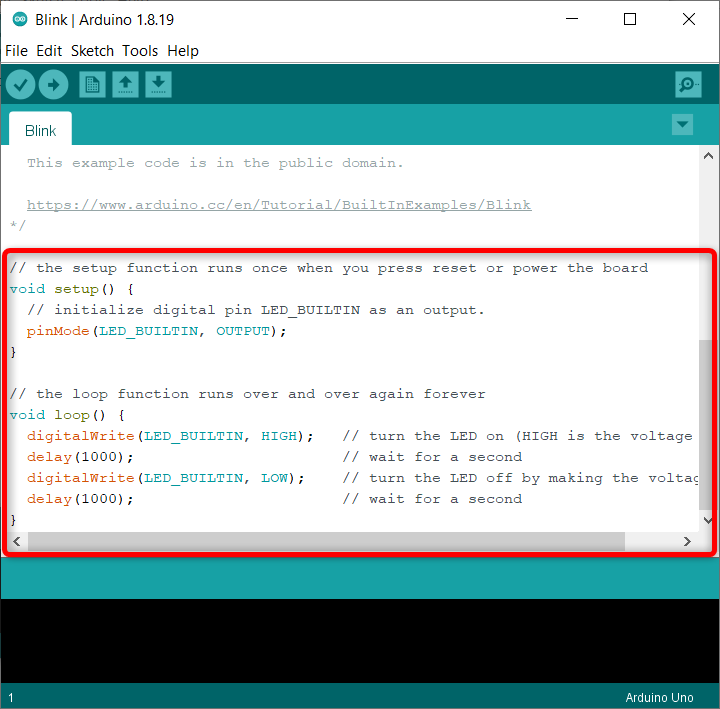
Step 3: Open the LED blink program.
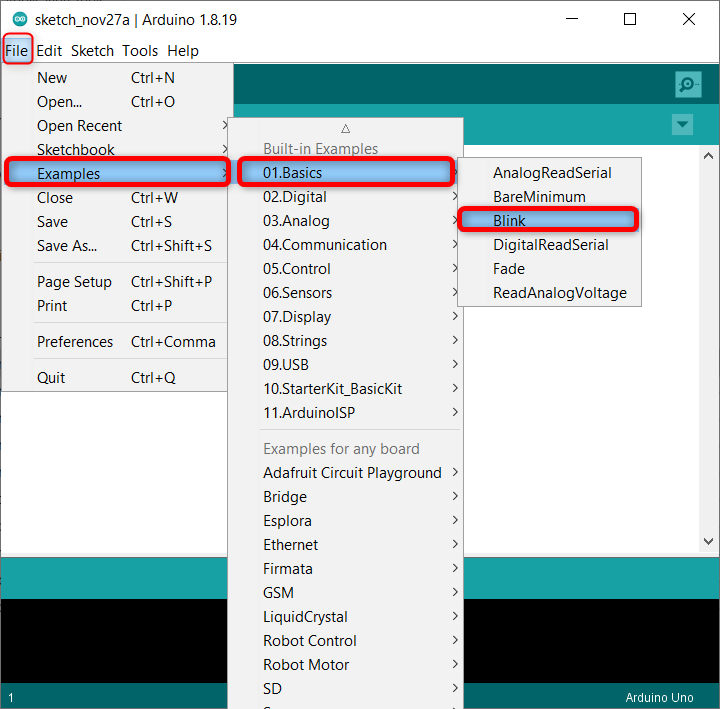
Step 4: LED blink example will open in the new window.
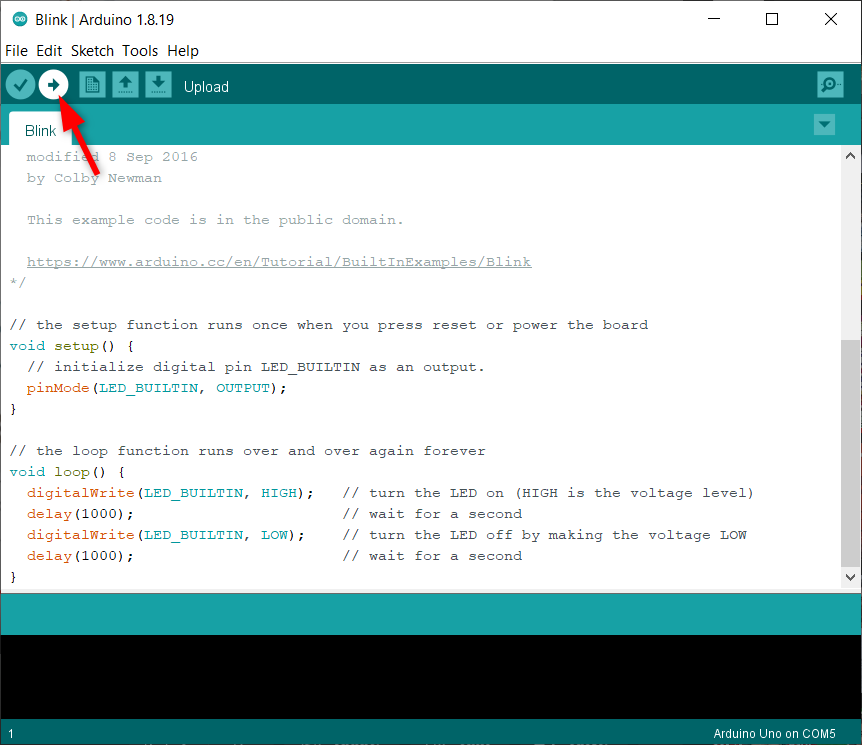
Step 5: Click the upload button to compile the Arduino sketch and upload it to the UNO board.
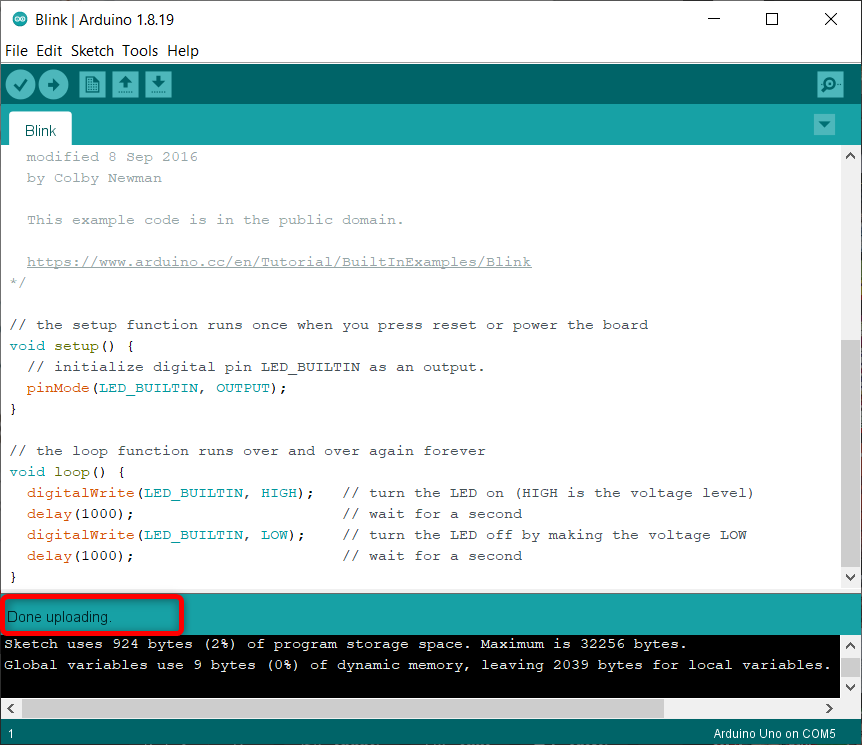
Step 6: Once the sketch is compiled and uploaded you will see the Done Uploading message in output window.
3.1: Output
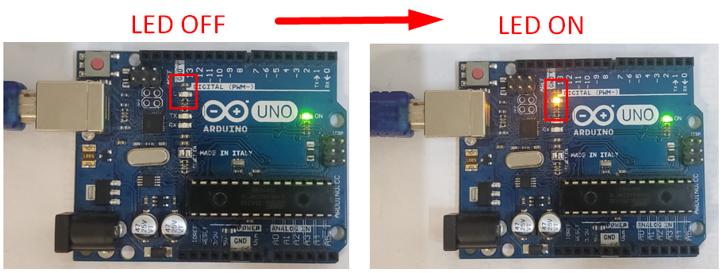
In the output we can see the Arduino built in LED at pin 13 started blinking with a delay of 1 sec.
We have successfully completed and tested the portable Arduino IDE installation.
4: How to Update the Portable Arduino IDE
To update the portable Arduino IDE, we just need to repeat the above steps: just download the new updated Arduino IDE zip file from the Arduino download page and extract the file into a new folder.
Now we can either copy the portable folder from the older version to the newer Arduino IDE folder or we can copy all the files of the newer version and replace (overwrite) them with older Arduino IDE.
Note: Once you have copied newer version files into older, remember to rename the Arduino root folder with the updated released Arduino IDE version name. Secondly, always run Arduino IDE from inside the Arduino folder using the executable files. This will not affect the Arduino libraries and cores if any version of Arduino IDE is installed.
5: Why Portable Arduino Is Not Available on macOS
Unfortunately, portable installation of Arduino IDE is only available on windows and Linux systems. It is not available on MAC systems. One of the main reasons is package signature. Arduino IDE allows users to install custom libraries, cores, and sketches that will break the macOS package signature.
This will result in no opening of the Arduino IDE every time you will open Arduino IDE gatekeeper will stop it from running. However, some Arduino geeks have developed solutions on their own. You can read it here.
6: When Will Portable Arduino Available on IDE 2.0
If you are looking to install the Arduino IDE on the latest 2.0 version, then sorry to say it is not available yet. Officially Arduino has not supported portable Arduino IDE in its recent version. You can track the latest news on Arduino IDE portable support on this GitHub thread (Add a portable mode) created by Arduino.
Conclusion
Portable Arduino IDE helps users to seamlessly transfer code across different devices. Using a portable Arduino IDE, we don’t need any special access permission of any folder inside a system. This article covers all the steps one needs to do to set up a portable Arduino IDE for the first time in its PC.
Source: linuxhint.com