How to Create a StatefulSet in Kubernetes
Prerequisites
Ubuntu 20.02 or any other latest version of Ubuntu should be installed in your system. Enable the virtual machine on your ubuntu system to execute the Kubernetes commands. You must be familiar with Pods, Cluster DNS, StatefulSets, and the kubectl command line tool.
Follow this step-by-step guide to learn how to create a StatefulSet in Kubernetes:
Step #1: Start the Kubernetes Dashboard
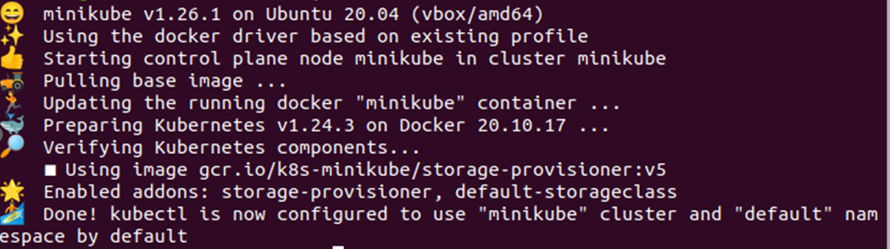
To run the Kubernetes application or commands on the Kubernetes application, you need to have a running Kubernetes terminal. The ‘minikube’ is the Kubernetes terminal which is used to execute the various commands on the Kubernetes applications. Use the command given below to start the minikube:
When you enter this command on the Kubernetes terminal, press enter to execute it. After implementing the instruction, you will get the following result:
Step #2: Open/Create a YAML File
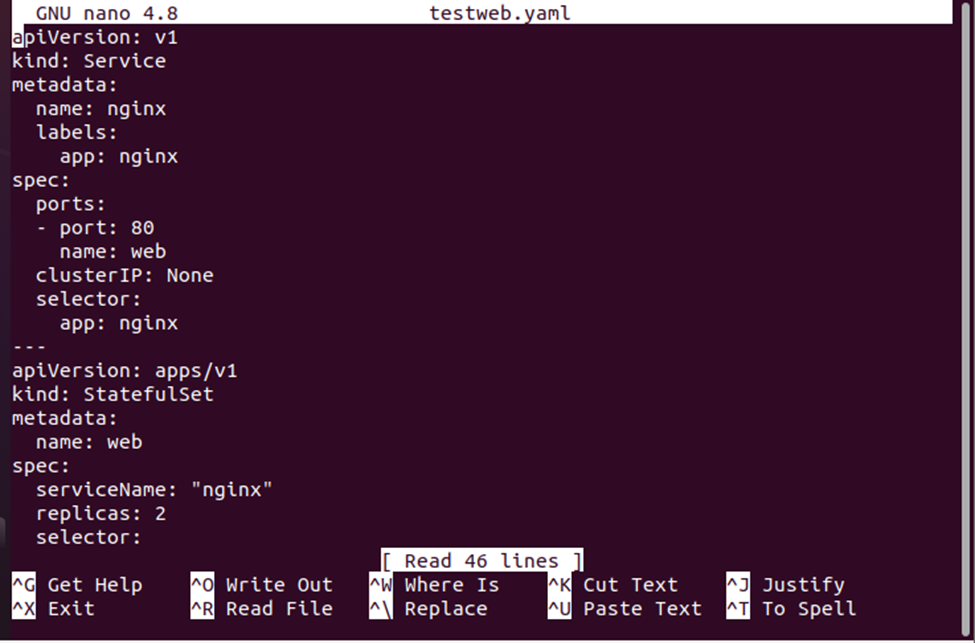
The next step is to open a YAML file, if you already have the created file. Otherwise, you can create a new YAML file to be used for creating the StatefulSet. Kubernetes provides the ‘nano’ command to create or open a file in the Kubernetes system. Specify the file name with the file extension and run the nano command on it. See the command given below:
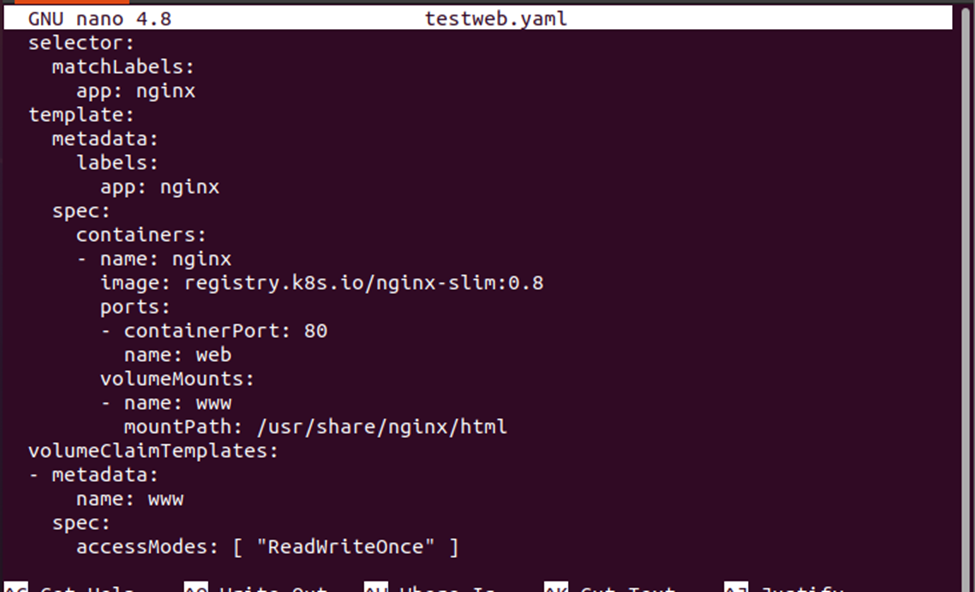
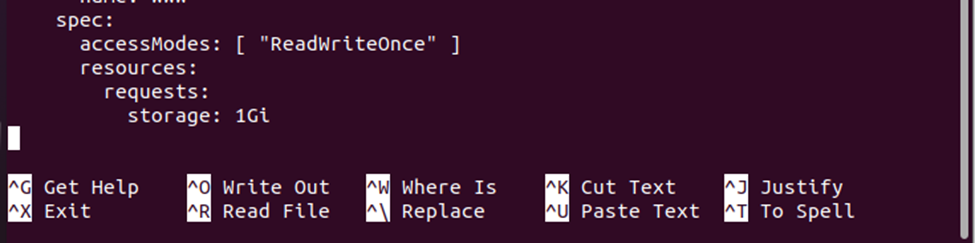
When you execute this command in the Kubernetes terminal, you will see the following file open in the Kubernetes terminal:
Step #3: Create the Configuration From the YAML File
The ‘kubectl create’ command is used to create the configuration for the services. We have the YAML file and all the specifications for the StatefulSet service mentioned in the file. The file will be used with the ‘create’ command to directly create the Kubernetes resource on the Kubernetes terminal. See the command given below to directly create the Kubernetes resources:

After the successful execution of the command, you will see the ‘created’ message on the terminal. Two pods will be created with this command and each of them will be running in the NGINX webserver.
Step #4: Create the StatefulSet Pods
The next step is to create the pods for the StatefulSet. The command used to create the pods for the StatefulSet is given below:
After executing this command, you will get to see the following result on the Kubernetes terminal:
Step #5: Get the Services of the NGINX Webserver
As we have created two pods in the previous step and each of them is running in the NGINX server, let us get the services of those pods from the NGINX webserver. Use the following command to get the NGINX services:
Write this command on the minikube terminal and press the enter command to execute it and see the following result:

Step #5: Get web StatefulSet
The next step is to confirm that both pods have been created successfully and that can be done by using the web StatefulSet. To get the web StatefulSet, use the following command:
Write this command on the Kubernetes terminal, after execution you will get the following output:

Step #6: Create the Ordered Replicas of StatefulSet
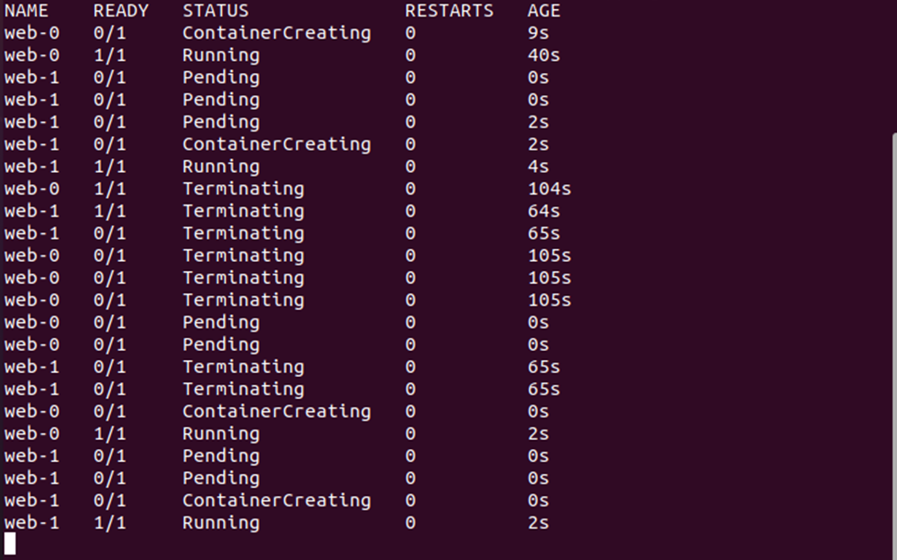
The pods for the StatefulSet with multiple replicas are created in sequential order. Each pod is deployed in a 0 to the n-1 sequence. Let us configure the order of the created pods in the terminal. Use the ‘kubectl get’ command to configure the order. See the complete command below:
When you execute this command in the Kubernetes terminal, the output will eventually look like the one given in the snippet below:
As you can see from the output, until the web-0 pod has been running, the web-1 pod has not been launched.
Step #7: Examine the Ordinal Index of Pods
The pods are created with the ordinal index and they also have a stable network identity, let us examine the ordinal index of the StatefulSet pods with the following command:
This command will show the unique identity of the pods based on the unique ordinal index, which was assigned by the StatefulSet controller to each pod. The complete pod’s name is given as <StatefulSet-Name>-<ordinal-index> and two pods will be created for the web StatefulSet because it has two replicas. Now, let us see the output below:

Step #8: Implement the Hostname Instruction in Each Pod
A steady hostname has been allocated to each pod grounded on its ordinal index. To implement the hostname assigned to each pod, we can use the following command:
This command will show you the two replicas of the pod. See the output given in the snippet below:

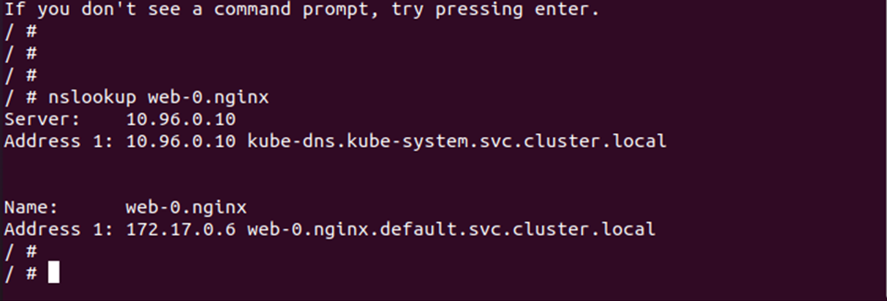
Step #8: Examine the in-cluster DNS Addresses
The in-cluster DNS addresses of the pods are examined by using the ‘nslookup’. The ‘dnsutils’ package provides the ‘nslookup’ functionality to execute the ‘kubectl run’ command on the StatefulSet container. The complete command is given below for your guidance:
This will start a new shell where you can execute the text DNS container with the following command:
When you execute this command, a similar output will be available on your terminal:
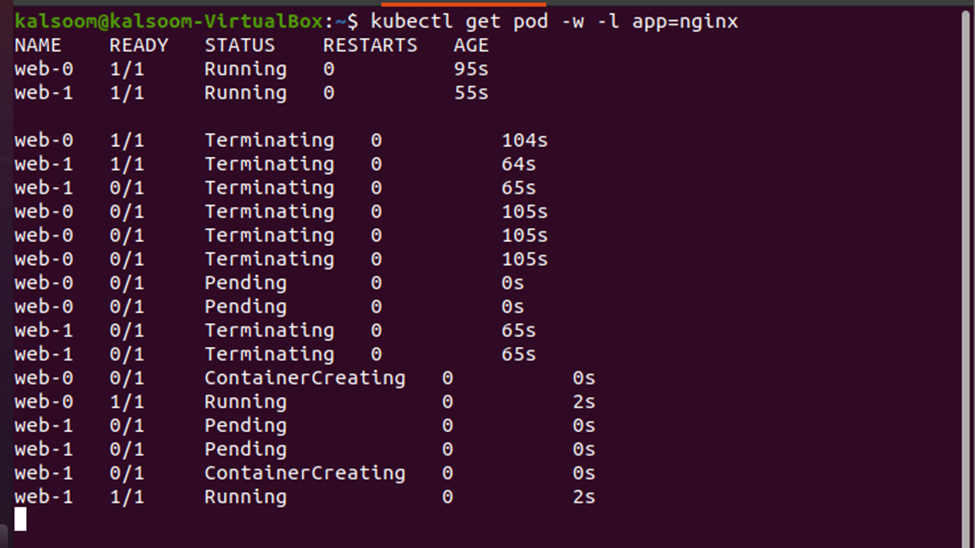
Now, check the status of the StatefulSet pods and then exit the container shell. Again, use the ‘kubectl get’ command to see the pods of the StatefulSet.
Step #9: Delete the pods in StatefulSet
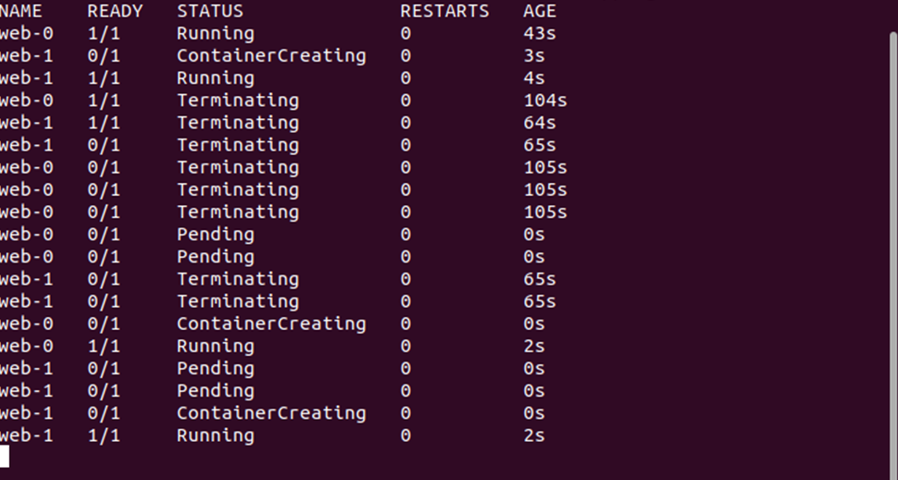
The final step is to erase all the pods in the StatefulSet. And for that, you can practice the ‘kubectl delete’ instruction. See the complete command given below:
When you run this command in the Kubernetes terminal, the output will eventually look like this:

Conclusion
In this article, we learned how to create, update, and delete the pods in the StatefulSet of Kubernetes. We used different kubectl commands to configure the pods in the StatefulSet. The YAML file has been used for the definition of the services of the pods and to configure those services in the StatefulSet
Source: linuxhint.com