How to Create a Local Branch From an Existing Remote Branch?
This blog will discuss creating a new local branch from the existing remote branch.
How to Create a Local Branch From an Existing Remote Branch?
To create a local branch from an existing remote branch, follow the below-listed steps:
- Move to the Git root directory.
- Add and verify the new remote URL.
- Fetch all existing remote branches from the remote repository.
- Use the “$ git checkout -b <new-branch-name> <remote-branch-name>” command.
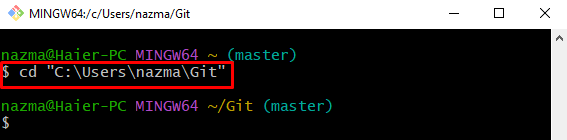
Step 1: Switch to Git Root Directory
First, execute the “cd” move to the Git root directory:
Step 2: Set Tracking Remote URL
Then, set the remote URL for tracking the data from the remote repository by utilizing the “git remote add” command:

Step 3: Check Remote URL
Now, run the “git remote” command with the “-v” flag to verify the newly added remote URL:

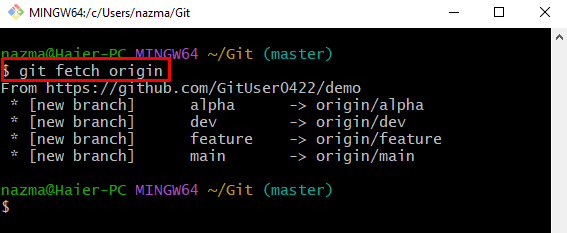
Step 4: Fetch Remote “Origin”
Next, download the full latest version of the remote repository by using the “git fetch” command and specify the remote name:
Here, the origin“ is our remote URL name. After executing the above-stated command, the remote repository all branches will be downloaded into the local repository:
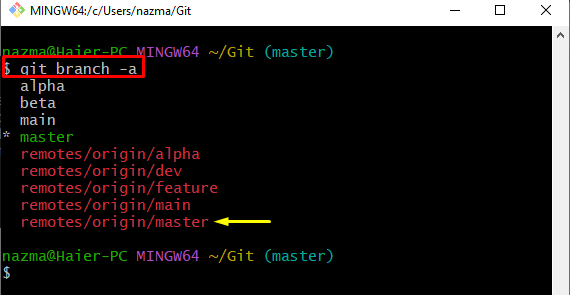
Step 5: View All Branches List
After that, display all local and remote branches by running the “git branch” command with the “-a” flag for all:
As a consequence, all the branches will be displayed. Now, choose the required one. For instance, we have selected the “remotes/origin/master” branch:
Step 6: Create and Switch Branch
Finally, run the “git checkout” command and specify the new branch:
Here:
- “-b” flag indicates the branch.
- “dev” is the new branch name.
- “origin/master” is the fetch remote branch name.
As a result, the new branch has been created and switched successfully:

Step 7: Verify Branch List
Lastly, verify the newly created branch by running the “git branch” command:
In the below-given output, the highlighted branch named “dev” is the newly created branch:

That’s all! We have discussed the easiest way of creating a local branch from an existing remote branch.
Conclusion
To create a local branch from an existing remote branch, move to the Git root directory and add the new remote URL. Then, verify the added remote URL for tracking through the “$ git remote -v” command. Next, fetch all existing remote branches from the GitHub hosting service. After that, execute the “$ git checkout -b <new-branch-name> <remote-branch-name>” command. This blog demonstrated the procedure for creating a new local branch from the existing remote branch.
Source: linuxhint.com