How to Create a Local Account in Windows 10?
Windows 10 is the latest and most popular Microsoft Window that allows the user to create multiple accounts to be shared with others. Doing this keeps the data separate for each user and prevents messed-up situations. We know that adding a user in Windows 10 requires a Microsoft account but what if the user doesn’t have a Microsoft account? For that purpose, a local account in Windows 10 is created.
The aim of this write-up is to uncover all possible methods to create a local account in Windows 10.
Method 1: Create a Local Account in Windows 10 Through Settings
The easiest and most utilized method to create a local account is through the PC settings. To see this method practically, check out the given instructions.
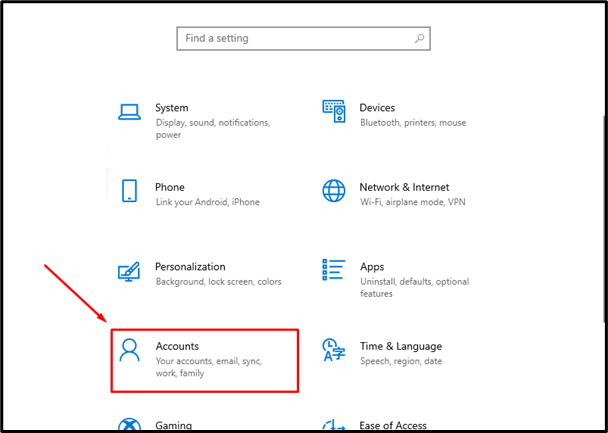
Step 1: Open Settings
Search and open the system settings from the Windows search bar:

Step 2: Go to Accounts
From the system settings, go to the “Accounts” settings:
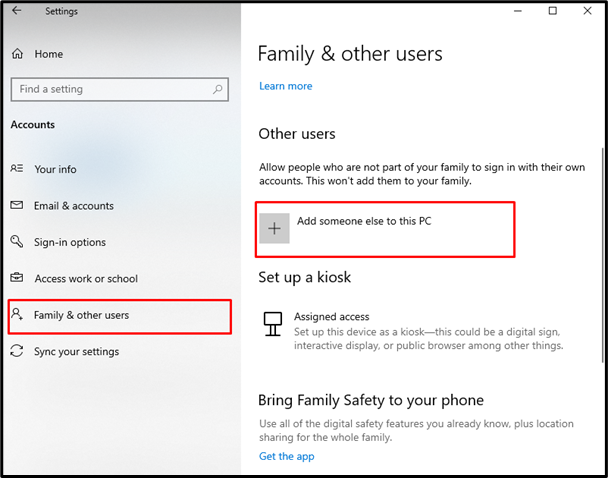
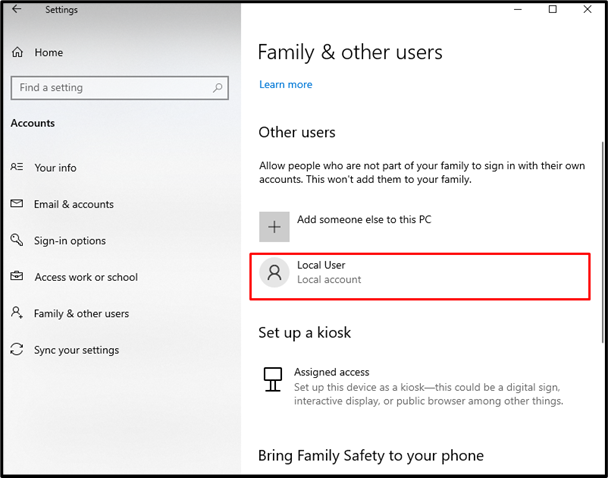
Step 3: Add an Account
After that, hit the “Family & other users” and press the “Add someone else to this PC” option:
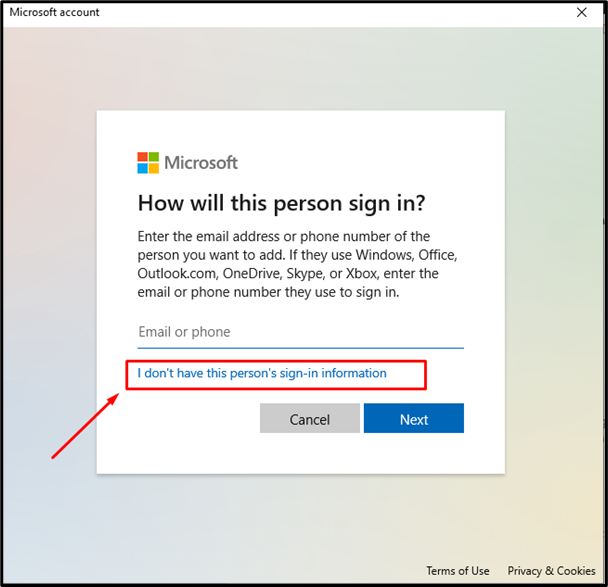
As we want to create a local user, so, proceed with the “I don’t have this person’s sign-in information”:
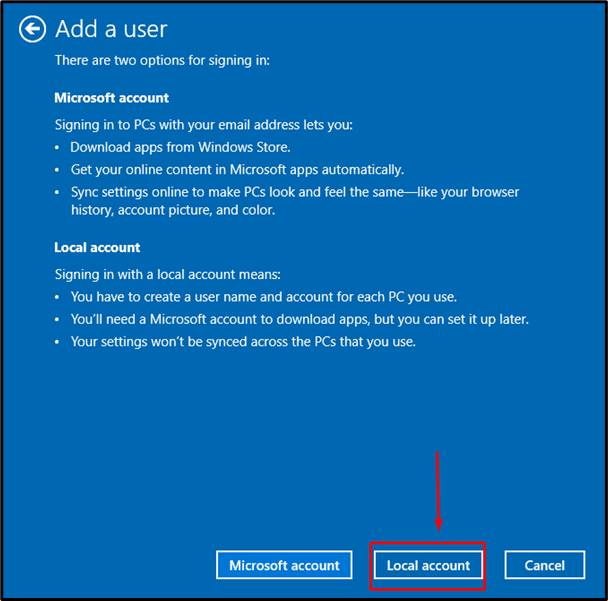
Step 4: Continue Without a Microsoft Account
Next, press the “Add a user without a Microsoft account” option to continue:

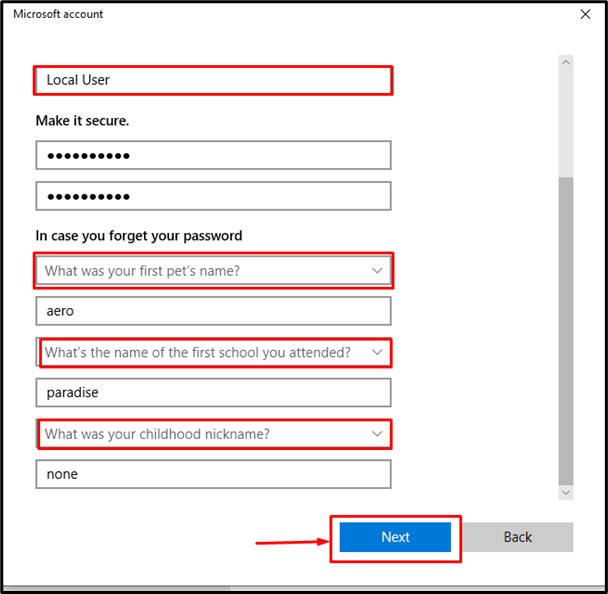
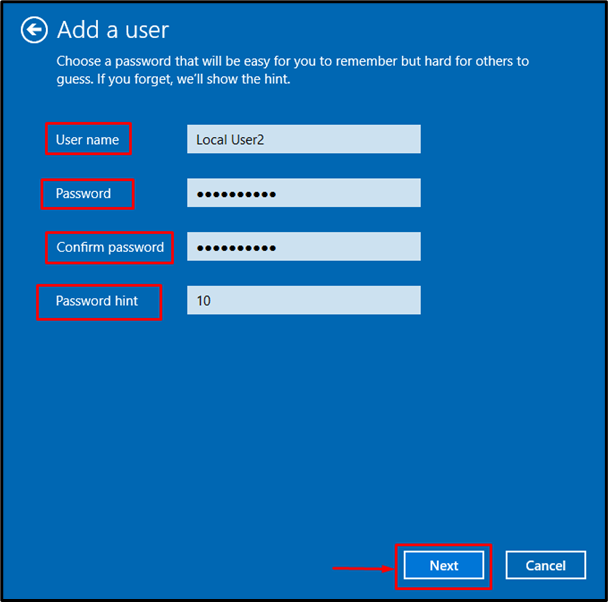
Step 5: Enter Username and Password
Enter the username and password for the local user, add some questions that will be asked if the user forgets the password, and hit “Next”:
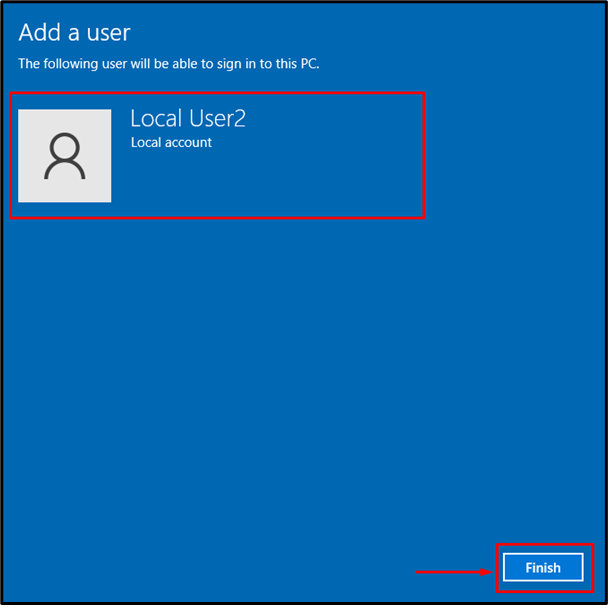
Step 6: Verification
By performing the above steps, the local user will be created as shown below:
Method 2: Create a Local Account in Windows 10 Through Netplwiz
The second method of creating a local user account is through Netplwiz. It is the control panel that handles the user’s management tasks in Windows. For this method, the following steps are considered.
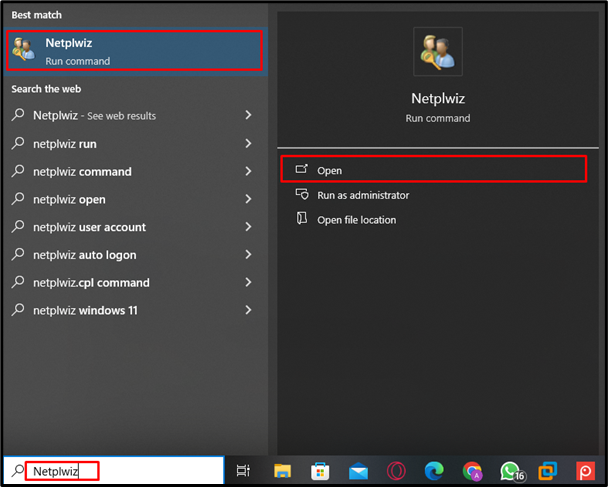
Step 1: Open Netplwiz
Search and open the “Netplwiz” panel from the Windows search bar:
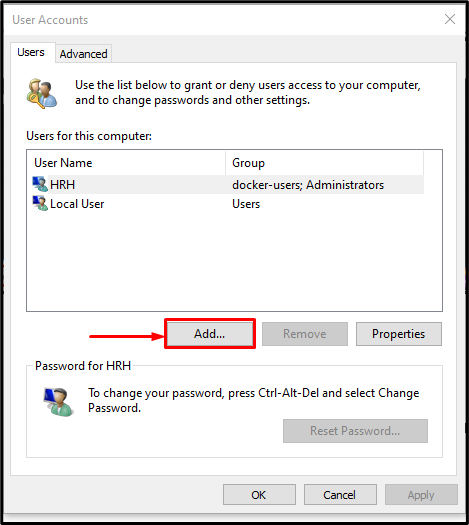
Step 2: Add User
From the user account panel, click on the “Add…” button to add a new user:
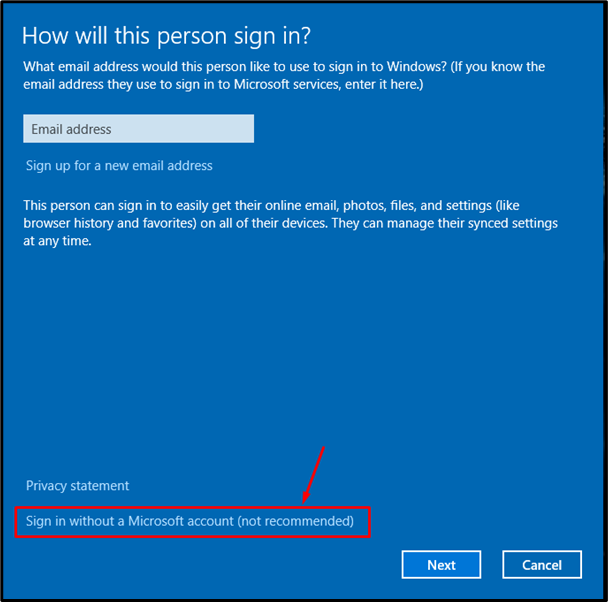
Step 3: Continue Without a Microsoft Account
A new window will be opened, click on the “Sign-in without a Microsoft account (not recommended)” option to proceed:
Step 4: Create a Local Account
After that, press the “Local Account” button from the next interface:
Step 5: Enter Username and Password
Enter the username, and password, describe the hint to remember the password, and hit “Next”:
Step 6: Check Results
Upon doing so, the local user will be created, click on the “Finish” button to close the window:
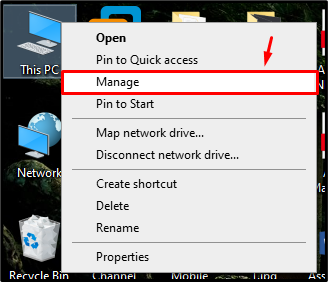
Method 3: Create a Local Account in Windows 10 Through User Management
Another method that you can consider for creating a local user account is through user management. Walk through the provided steps to learn this method.
Step 1: Manage This PC
Right-click “This PC” and click on the “Manage” option:
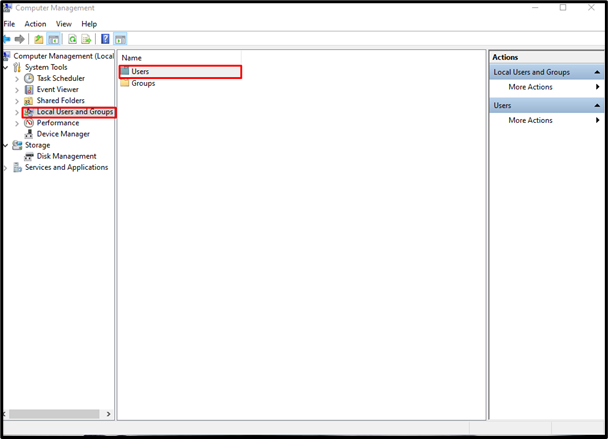
Step 2: Open Local Users and Groups
Afterward, open the “Local Users and Groups” section, right-click on the “Users” folder, and press the “New User…” option:
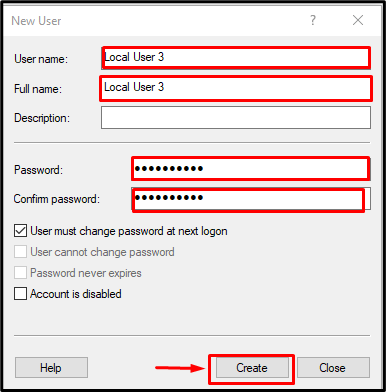
Step 3: Create a Local User
A small window will pop up, create a local user account by entering the username and password and clicking on the “Create” button:
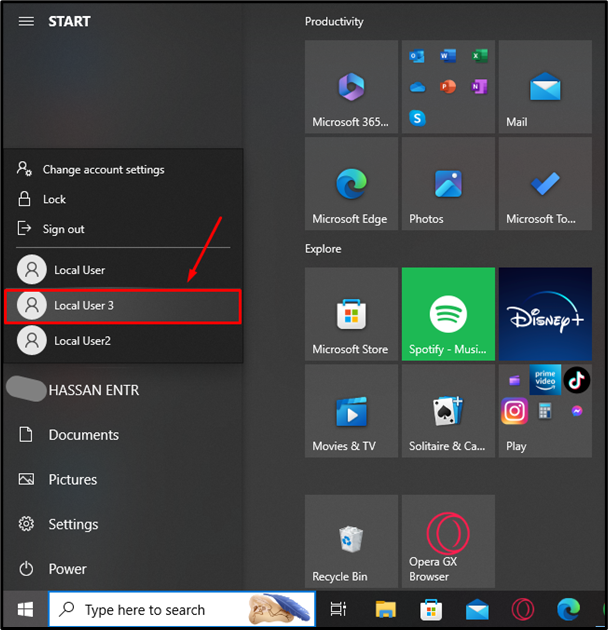
Step 4: Check Results
By performing the above steps, the local user account will be created which can be verified from the following image:
Method 4: Create a Local Account in Windows 10 Through CMD
CMD (Command Prompt) is a command line tool that interacts with Windows, and you can create a local user account from CMD too. It’s just an execution of one command containing a username and password. To do this, accomplish the given instructions.
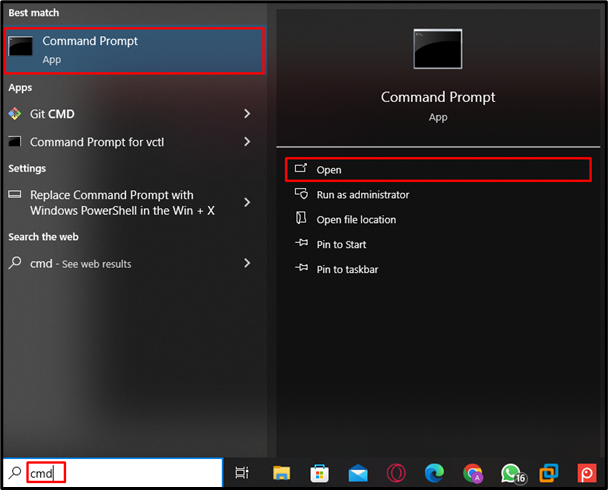
Step 1: Open CMD
Search and open the CMD (Command Prompt) using the Windows search bar:
Step 2: Create a Local User
After that, run this command and replace the “<username>” and “<password>” with your requirements:

By executing the above command, the local user will be created.
Step 3: Check Results
Verify the results by checking the account from the start menu:

Method 5: Create a Local Account in Windows 10 Through PowerShell
PowerShell is the built-in tool in Microsoft Windows 10 that is utilized for system management tasks and can be used to create a local account. To implement this method, utilize the following two commands. To see the practical implementation of this method, navigate to our dedicated article on how to use the New-LocalUser (Microsoft.PowerShell.LocalAccounts) Cmdlet in PowerShell.
By using any of the above methods, you can easily create a local account in Windows 10.
Conclusion
To create a local account in Windows 10, there are multiple methods available. You can use the methods through the Windows settings, Netplwiz panel, user management, CMD, and PowerShell. For a practical demonstration of these methods, read the above-mentioned guide.
Source: linuxhint.com