How to Create a Django App on Ubuntu Server?
Nowadays, practically every website and application employ the well-known Django framework for creating websites. The construction of dynamic websites, web services, and web applications are supported by a web framework, which is a software framework. An accessible, Python-based custom application platform is called Django. To create web applications, one uses the MVT web framework. When building websites, Django excels at handling heavy traffic and transaction loads. This article will explain how to install Django on an Ubuntu server and how it functions.
Creating a Django App on the Ubuntu Server
We will demonstrate how to create a Django application on an Ubuntu server in a few simple steps in this example. A growing Python web framework called Django enables users to quickly build trustworthy sites. You can focus on creating your app rather than having to reinvent the wheel due to Django, which was built by seasoned programmers and handles a lot of the complexity associated with web development. Python’s language characteristics and entity methodology assist programmers in writing logical and understandable code. A Python web development framework called Django makes it simple to create robust web apps. The Django Admin Interface on the platform contains helpful built-in functionality.
We will update our current system before installing Django on the Ubuntu server. If you have already updated your system, you can skip this step. To achieve this, we will open a terminal window and type the “sudo apt-get” command, which fetches and updates any out-of-date system dependencies and applications. Thus, we type “sudo” on the terminal before typing “apt-get” and “update” after a space.
After we execute this command, the system password must be entered. You will input your password at this point and then click on the Enter option. You can now see that the system has been updated.

We will check the Python version after the update because it comes with the “python3” version pre-installed. Therefore, we will type “python3” followed by a double dash (–) and “version” to check the version.
After the execution of this command, the result will show “3.8.10” as the Python version in the terminal window, as shown below.
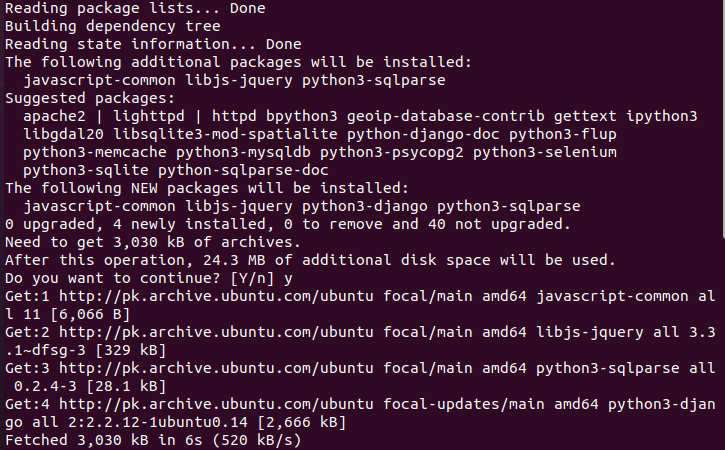
Now, in the following step, we will run the command to install Django on Ubuntu. To do this, we first write “sudo,” then “apt-get,”. After that, we type “install,” and last, “python3-Django” on the terminal screen.
Now, when we execute this command, sudo will prompt us for the password for “Kalsoom”. In essence, this means that you must enter the password here for your Ubuntu system. To install Django on the server, we enter the password.
As shown in the image below, Django is installed on our Ubuntu server after the password is entered.
Here, we are going to use the Django admin command to build our first Django project. Django’s command-line management tool is known as django-admin. This page describes what it is capable of. Every Django project also comes with a fully prepared manage.py script. However, before we do that, we will use the command line to check the version of Django that we installed in the previous step. Django-admin is input using the command line, followed by a double dash (–) and version to check the version.
When we ran this command, the output showed the installed Django version in the terminal window which is “2.2.12”.
We will now use the command to create our Django project. First, we will write “Django-admin,” followed by a space, and then “startproject.” This is how we used it to create the main project directory. Both have names that will be used when they are created. Within the folder for the new project, the startproject command is used to start it before the startapp command. After typing “startproject”, we then provide our project name in this case: the name of the project is “jangoproject”.
The following step is using the command “cd” and the Django project’s name, “jangoproject,” to navigate to the project folder.
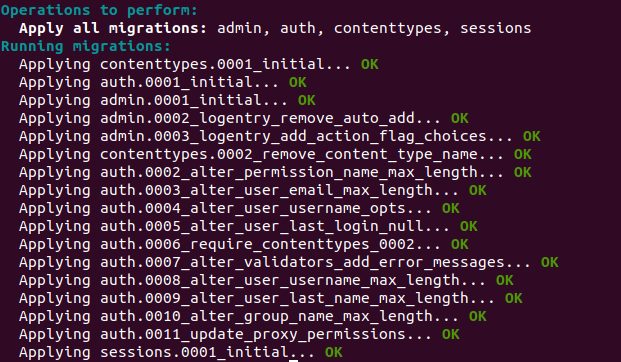
We will now run the migrate command. Django uses migrations to propagate modifications you make to your categories into your database schema, such as adding fields or deleting models. Although they are intended to be primarily automatic, you still need to be aware of when to perform migrations, when to conduct them, and the typical issues you could encounter. When writing the migrate command, we first type “python3,” then “manage.py,” and “migrate”.
The default migration that will apply to my project is shown in the image below when we run this command. The output was divided into two sections: “Operation to perform” and “Running migrations”.
To create a user who can access the Django administration, we use the command in which we type “python3” first, then “manage.py,”, and finally “createsuperuser”.
When we run this command, it will prompt us for a username. However, it also gives us the option to leave the field empty if we wish to use the default Ubuntu username. If you leave this field empty, Ubuntu’s default user name will be zip. Since we are leaving it empty, it will ask for our email address before requesting our password. Once we provide our password, the superuser will be successfully created as displayed below.
Superuser is created successfully.
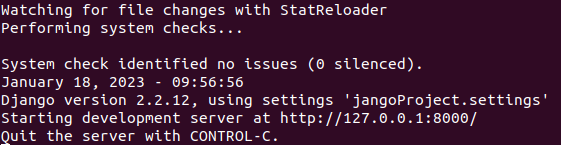
Using the command, we can now run the server where we enter “python3”. We then type manage. Here, “py” stands for the Python extension and we type “runserver” in the last part.
Now, when we executed this command, the output revealed that the Django server is automatically running the development server at port “8000”.
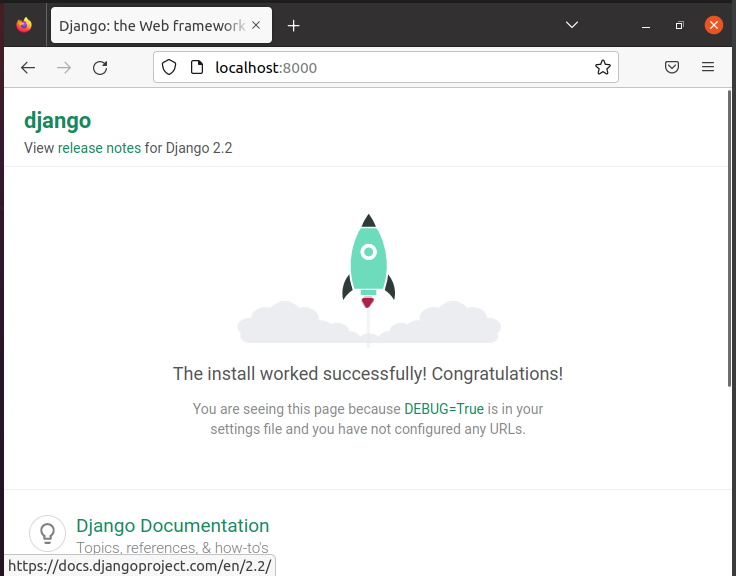
We will now check whether the Django server is operational via the browser. To check whether it is working or not, we will first open the browser and then type “localhost:8000” into the top search box. As a result, Django has been successfully deployed and is operational.
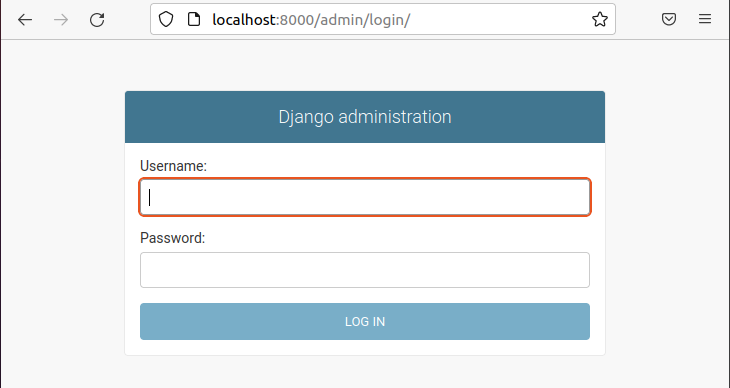
By entering “/admin” and “localhost:8000,” we can now access the Django administration panel. As shown below, it has now presented the Django administration window. We then input a username and password here since we used the name of the Ubuntu server as a username so we enter the same username and password.
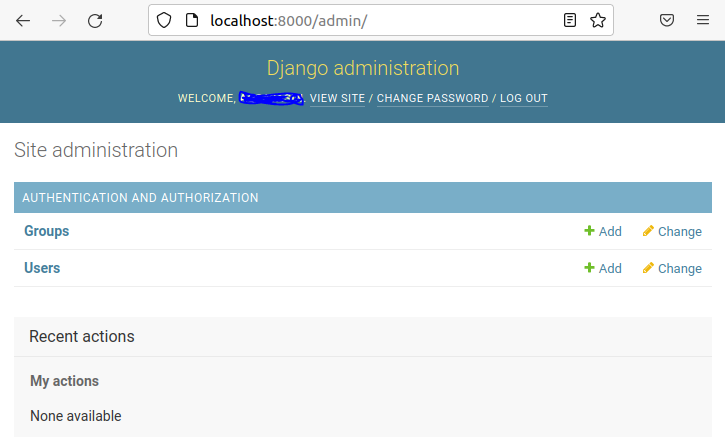
You will receive this key after entering the proper username and password and you will be able to start any new Django project on your Ubuntu server.
Conclusion
This article has covered the creation and use of Django applications on Ubuntu servers. To make the process simple to grasp, we have divided it into steps. In this article, we first upgraded our Linux system, then we used the command to check the Python version, and then we used the command to install the Django server. We also demonstrated how to view the version of the Django server that we have set up. Then, using the admin “startproject” command, we started a new Django project in the following step. Finally, we demonstrated how to check whether the Django server is installed and operational or not.
Source: linuxhint.com