How to Connect to Oracle Database From NetBeans IDE
While developing any application in NetBeans, the developer may need to connect to the Oracle database to store, view, and modify the data. This connection can be established using the JDBC driver by importing its jar file into the NetBeans IDE.
This article presents a practical demonstration of how to connect to the Oracle Database from NetBeans IDE.
Prerequisites
Before establishing a connection, first, make sure you have already installed the Oracle database and NetBeans IDE on your system. In order to download and install the Oracle database, go to Oracle’s Official website, and for the Netbeans, visit the NetBeans’ Official website.
Connect to Oracle Database From Netbeans IDE
You can check the currently installed Oracle version by executing the “sqlplus -version” command from the CMD:
Output
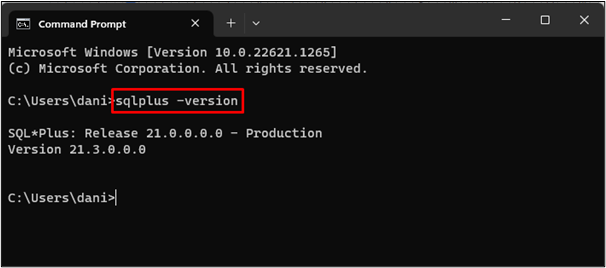
The output shows that version 21 of the Oracle database is installed in the system.
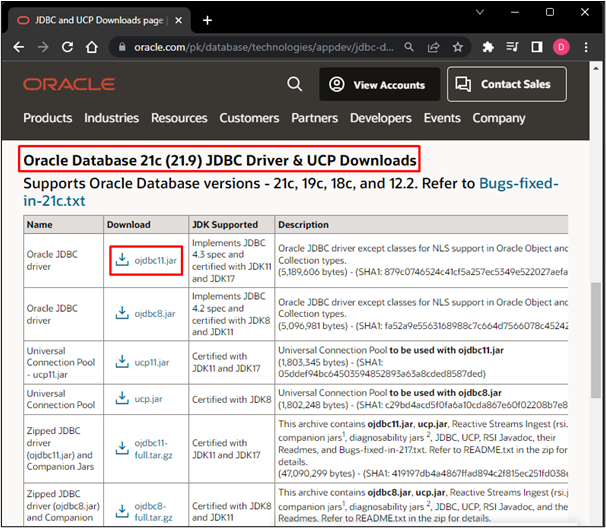
Download JDBC Driver
Download the JDBC driver (jar file) according to the version of your database. To do that, visit the Oracle Database JDBC driver and Companion Jars Downloads page and select the JDBC driver accordingly:
Connect to Oracle Database From NetBeans IDE
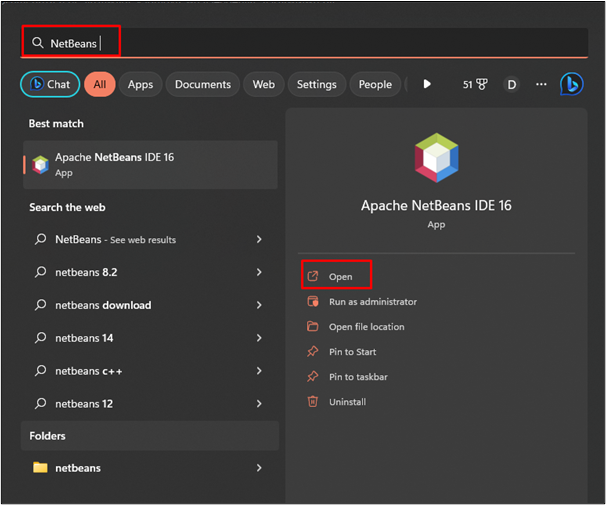
Once the JDBC is successfully downloaded, open the windows search menu by pressing the Windows button, type NetBeans, and click on the “open” button to launch the NetBeans IDE:
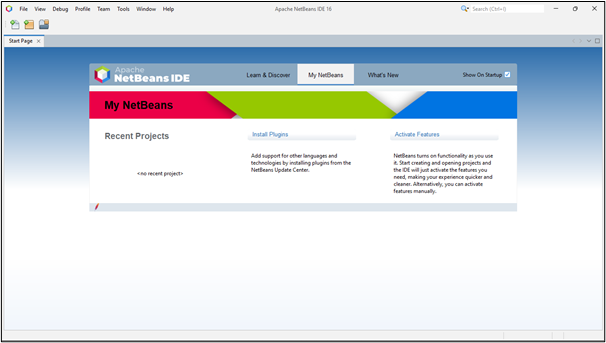
As a result, the following screen will appear:
Now in order to connect with the database, press “Ctrl + 5” or go to the Window option and click on services:
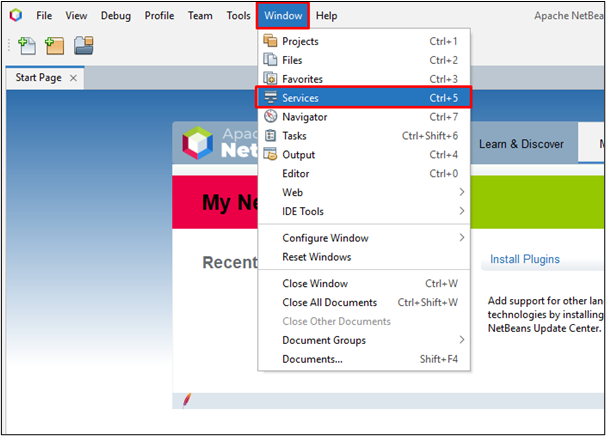
Clicking on the “Services” option will lead you to the following window:
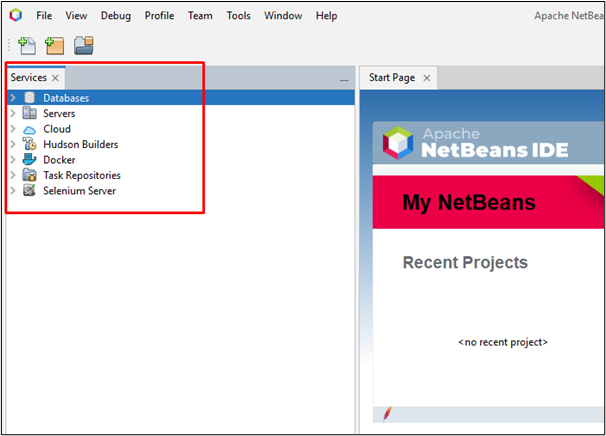
From the given options simply right-click on the Databases and then click on New Connection:

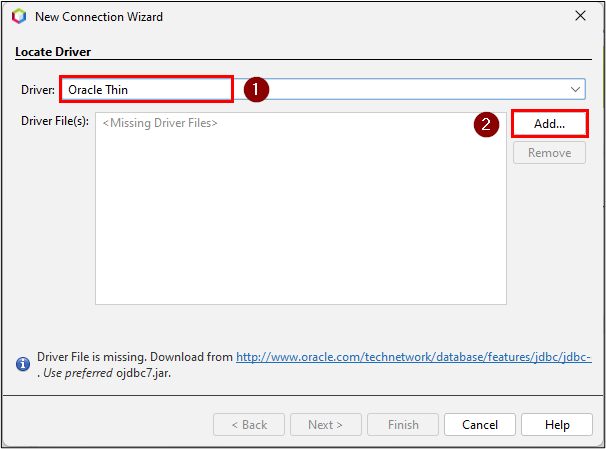
After that, the New Connection Wizard will be opened and from that select the Driver as “Oracle Thin”. Next, click on the “Add…” button to add the JDBC driver jar file:
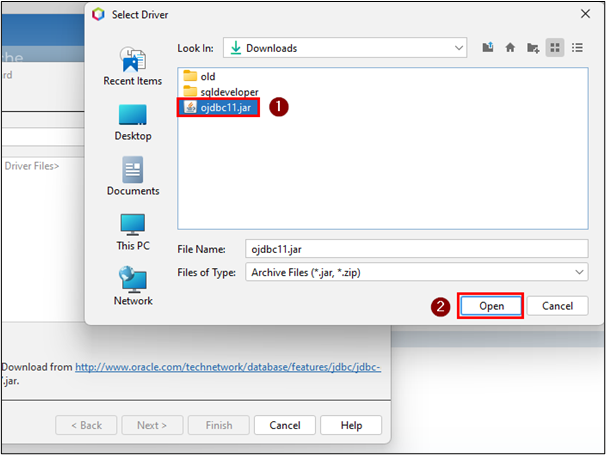
Select the jar file and hit the “Open” button:
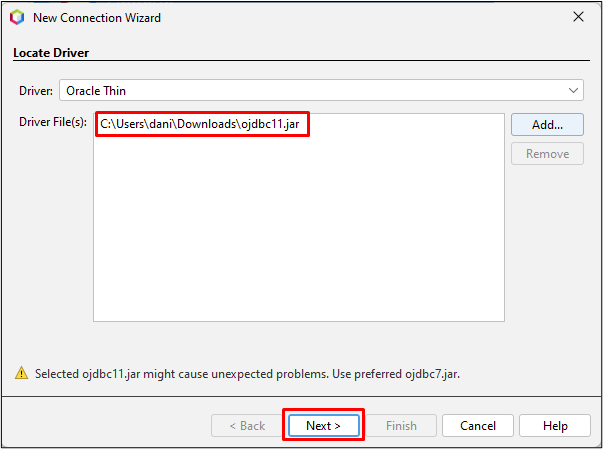
After that, confirm the file path and click on the “Next” button:
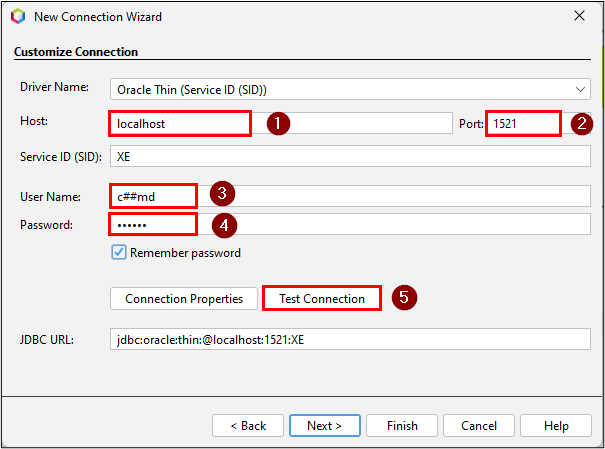
Type the Host, Port Number, User Name, and Password, and click on Test Connection:
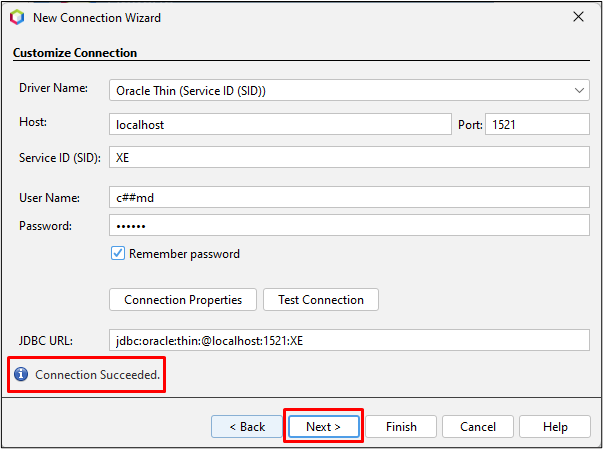
A “Connection Succeeded” message will be displayed on the bottom left; click on the “Next” button to proceed further:
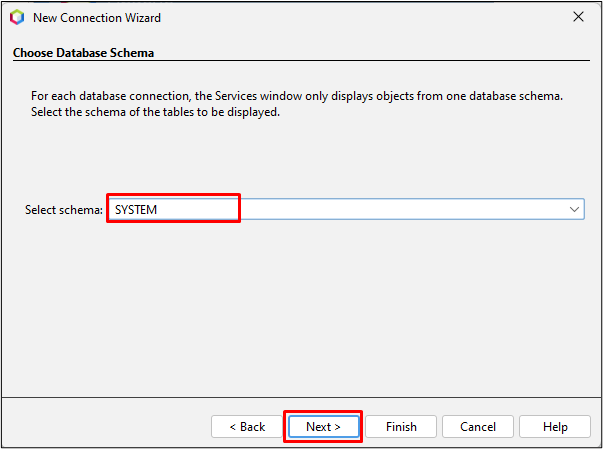
Select the schema and click on the “Next” button:
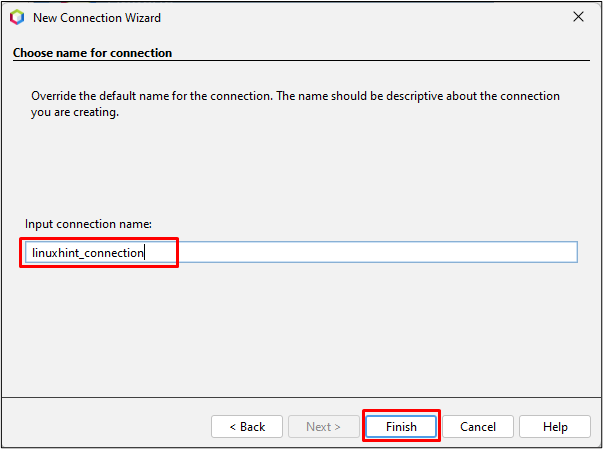
Type the connection name and click on “Finish” to establish the connection:
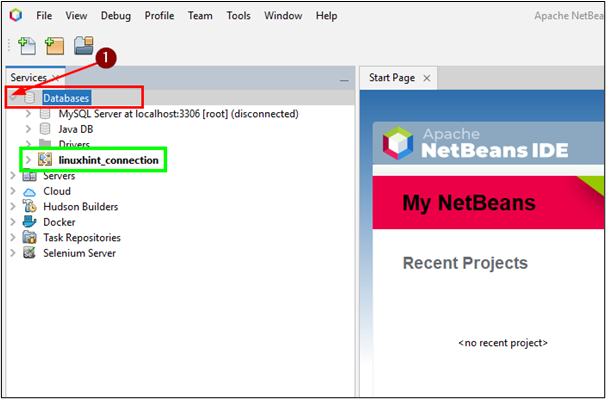
Now click on the drop-down button and you will see that the connection has been added:
To confirm it, you can explore the databases and table of this connection:
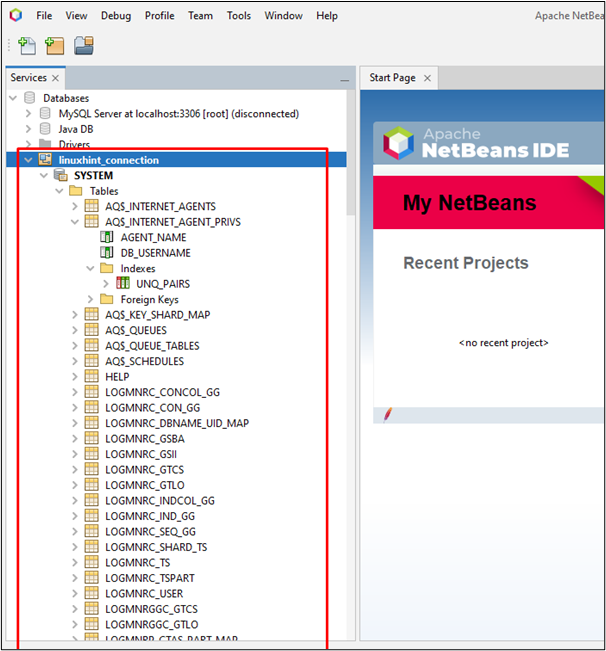
You have successfully connected to the Oracle database from the NetBeans IDE.
Conclusion
To establish a connection with the Oracle database from NetBeans IDE, firstly, download the JDBC driver > open the NetBeans > open the services > select a new connection > choose the driver as “Oracle Thin” > import the jar file into the NetBeans > specify the necessary details like host, port number, password, etc. > click on test connection > select the schema > specify the connection name > and click on “Finish” button to establish the connection.
Source: linuxhint.com