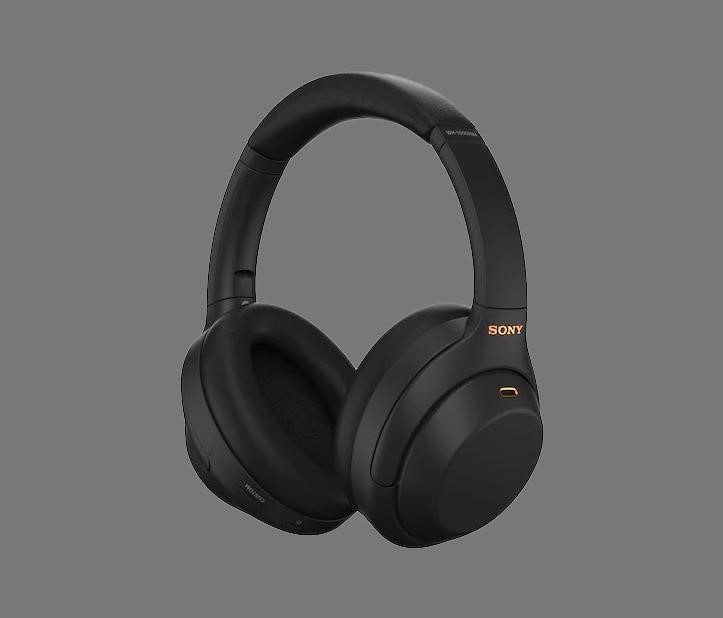
How To Connect Sony Bluetooth Headphones To A Laptop
Moreover, the process of connecting the Sony Bluetooth headphones is quick and easy which also makes its standout among its competitors. This guide explains the process of connecting the Sony Bluetooth headphones with both Windows and macOS laptops.
Connecting Sony Bluetooth headphones with Apple laptop
To make the process of connecting Sony Bluetooth headphones with Apple laptop is easy I have explained it stepwise so follow the subsequent steps:
Step 1: First turn on your Sony headphones by pressing the power button and turn its pairing mode on by holding the power button for seven seconds. If you are connecting the Sony headphones for the first time then it will automatically go to the pair mode, but if you are doing it for a second time then only press the power button and hold for seven seconds.
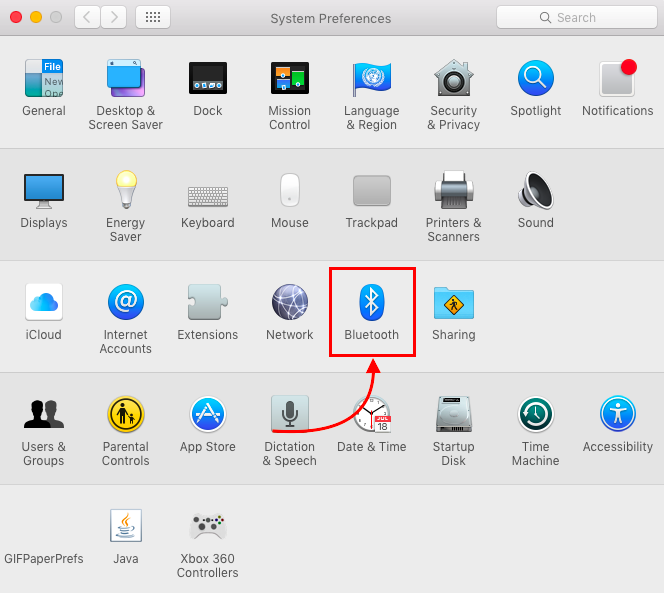
Step 2: Next go to the Bluetooth option in the System Preferences of your Apple laptop, in the Bluetooth option there will be a list of devices active nearby your apple laptop and one of the devices will be Sony headphones click on the pair icon next to the headphone name.
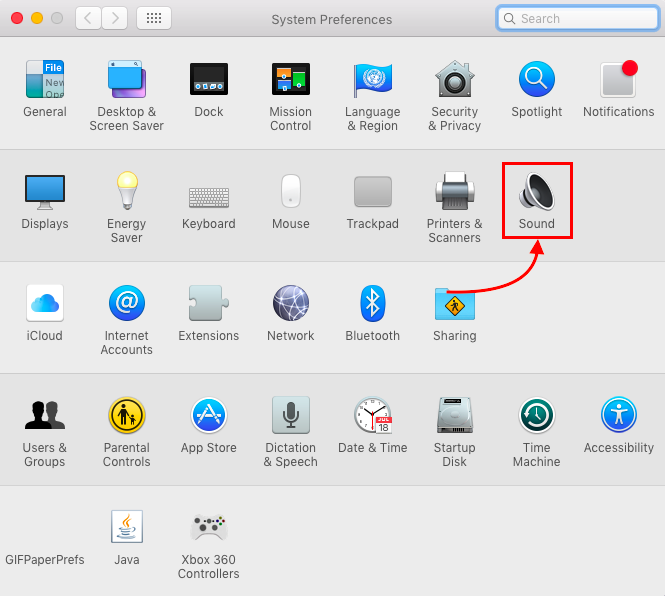
Once the headphones are paired and you are still unable to hear any sound then go to the Sound settings of your Apple laptop in System Preferences and set the headphones as a device for sound output.
Now you are all set and ready to use your Sony Bluetooth headphones with your apple laptop and enjoy.
Connecting Sony Bluetooth headphones with Windows laptop
The process of connecting Sony Bluetooth headphones with Windows is also quite simple just follow the given steps:
Step 1: Turn on your Sony headphones first and if it is a second time then long press the power button for seven seconds to move it into pairing mode.
Step 2: Next you need to turn on the Bluetooth of your Windows laptop and there are two ways for it:
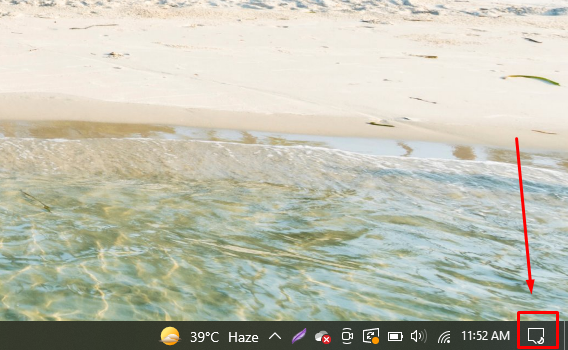
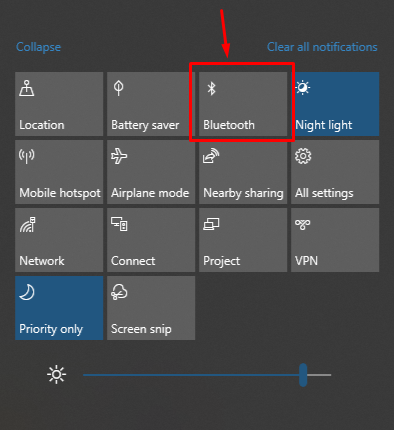
i: Right click on the notification icon on the extreme right side of the taskbar:
Next you will see a menu of different options will pop right up click on the Bluetooth option to turn it on:
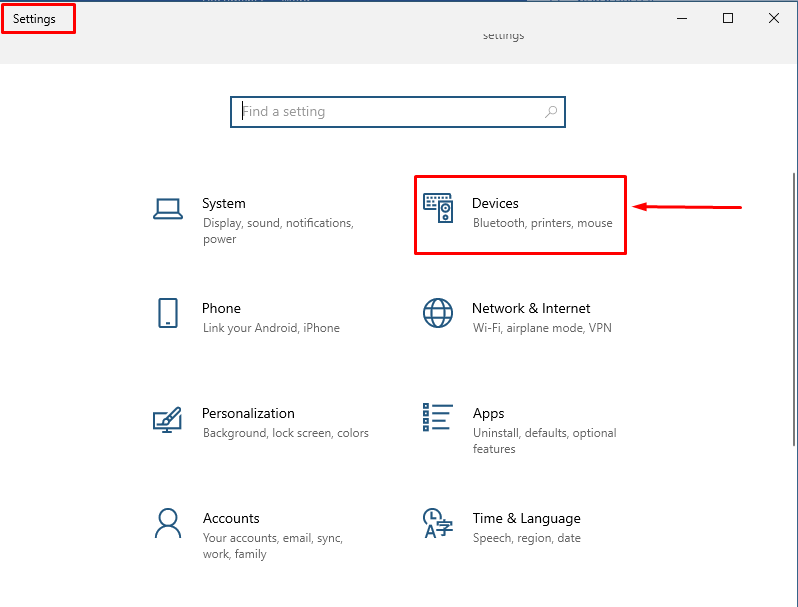
ii : Press Windows+I key from your laptop keyboard to open the Settings menu and from there go to the devices option:
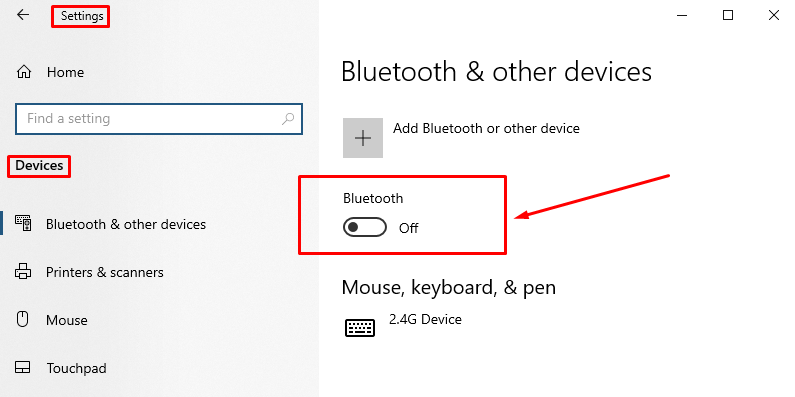
Once you have opened the device menu click on the toggle icon to turn on the Bluetooth:
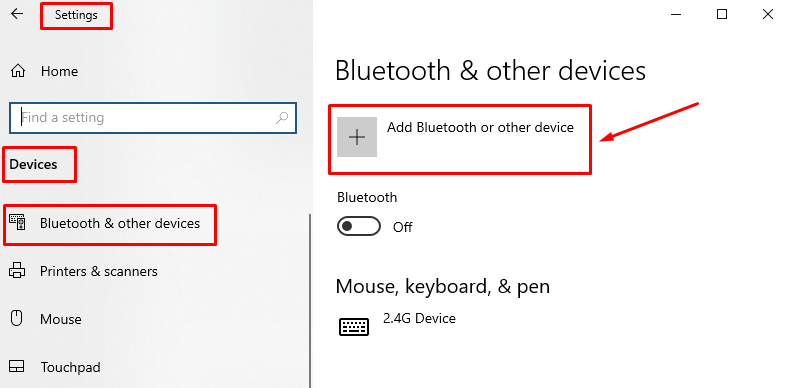
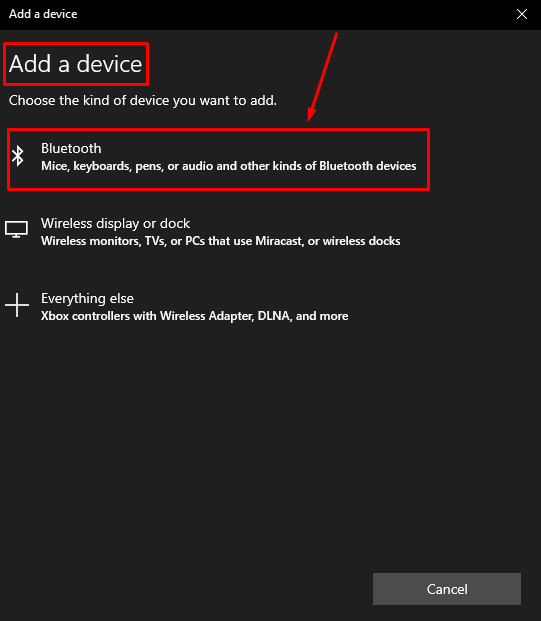
Step 3: Now to search for devices click on the “Add Bluetooth or other device” in the device’s menu of Windows settings:
Upon clicking the “Add Bluetooth or other device” option another small window will appear asking which type of device you want to add or search, so select the “Bluetooth” option:
Next it will start for searching the nearest Bluetooth device right away:

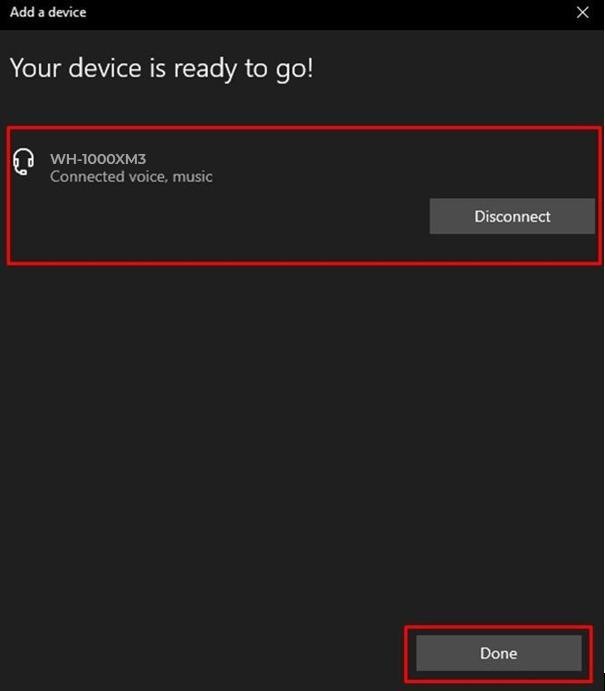
It will take a few seconds to detect your Sony Headphones and once it has detected them click on it and it will connect. Once it is connected click on the “Done” icon at the bottom:
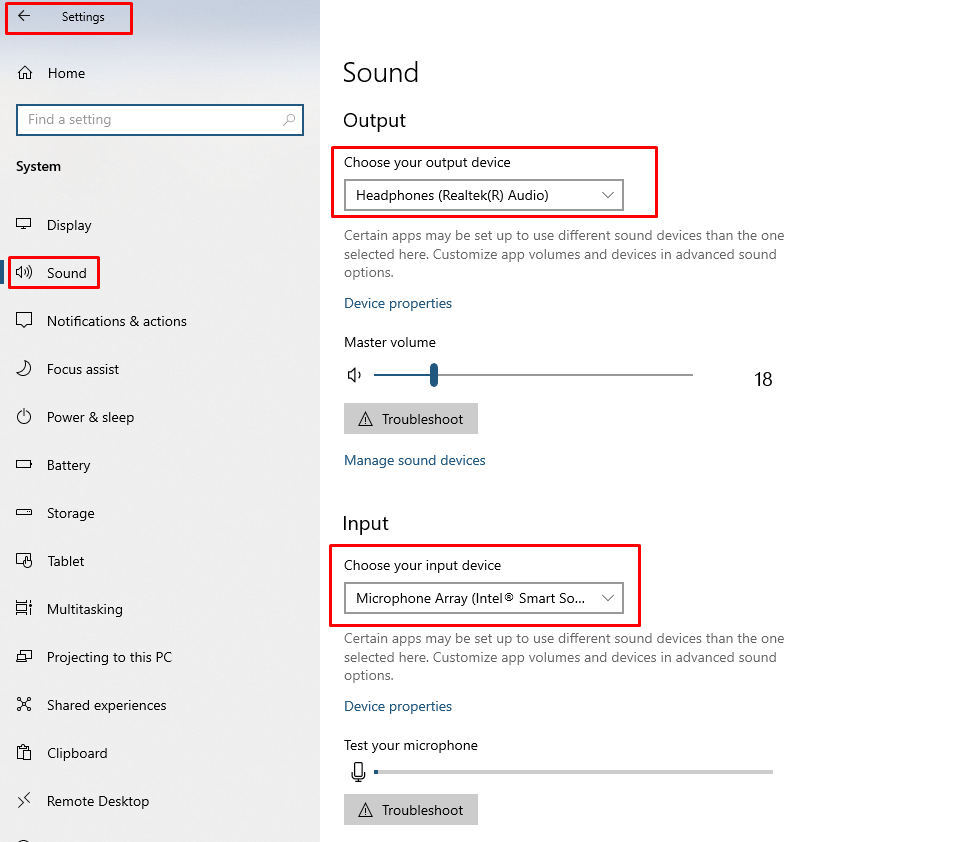
Step 4: Next to connect your audio of your laptop with Sony headphones go to the sound settings and set your Sony headphone as an input for microphone and output for the audio:
Note: While pairing, a pass code might be asked so enter “0000” as a passcode and if that doesn’t work which is very rare then enter “1234”.
Points to remember while connecting the Sony Bluetooth headphones with a laptop
- Headphones should have sufficient charge
- Bluetooth drivers of the laptop must be updated and working fine
Conclusion
Wireless headphones are normally a better choice as compared to the wired headphones as they are easy to carry and easy to wear. Sony is one of the best brands that is known for its wireless headphones because of its better sound quality and durability. Moreover, this guide explains the process of connecting Sony Bluetooth headphones with both Windows and Apple laptops.
Source: linuxhint.com