How to Connect Arduino to a Computer
What is an Arduino?
If you are new to Arduino then here is a brief introduction about Arduino. Arduino is an open-source platform which designs a variety of products so we can easily integrate our hardware with software. It is designed to allow new users to understand programming languages and allow them to communicate with electronic devices.
How to Connect Arduino to Computer
Now we will see how we can connect our Arduino board with a PC. In this tutorial we will cover software installation and setup our Arduino for the first time.
All you need is:
- Arduino Uno Board
- USB B Cable
- Window 10/8/7/XP, macOS or Linux OS
- Arduino IDE (Software for compiling our Arduino program)
Setting up Arduino
First, we will set up our hardware then we will continue towards the software installation part.
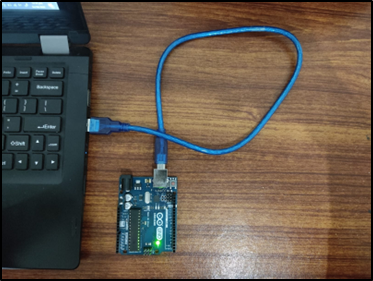
Step 1: Get all your equipment ready. Now connect the narrow end of the USB B cable to Arduino and the other end of cable to the USB port of your PC. This USB B cable will help us to upload our program from PC to Arduino board:
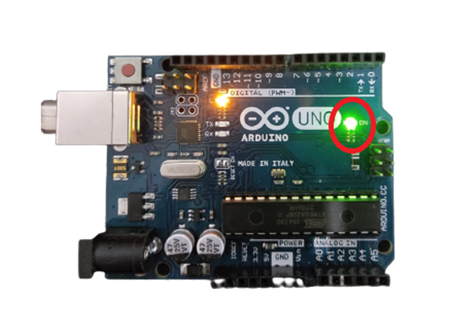
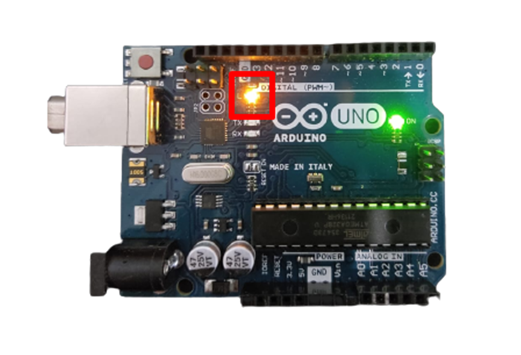
Step 2: Once you plug in your Arduino board a led will start blinking which indicates your Arduino board is connected to PC.
Step 3: Now we will set up drivers needed for serial communication between Arduino & PC.
If you are using the latest version of Windows then most of the time it will automatically set up Arduino drivers for you. In case that’s not working then here is an alternative way of doing this manually.
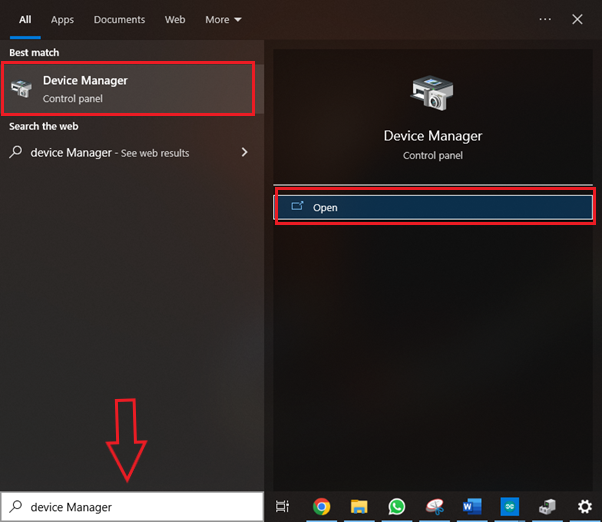
Step 4: Press Window key using keyboard & Type “Device Manager” in search bar, then press Enter:
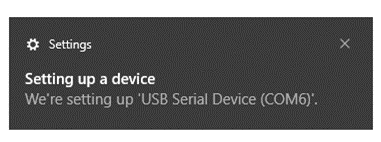
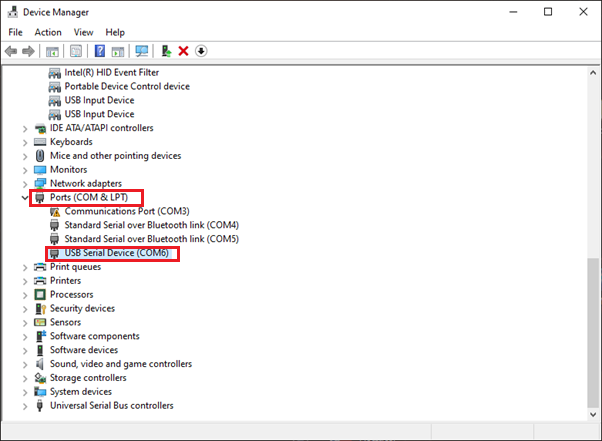
Step 5: A new window will open showing all the drivers installed on your PC. Now look for your device under (COM & LPT) ports. As you can see my PC has already set up the Device for me, Arduino shows up at the COM6 port in my case:
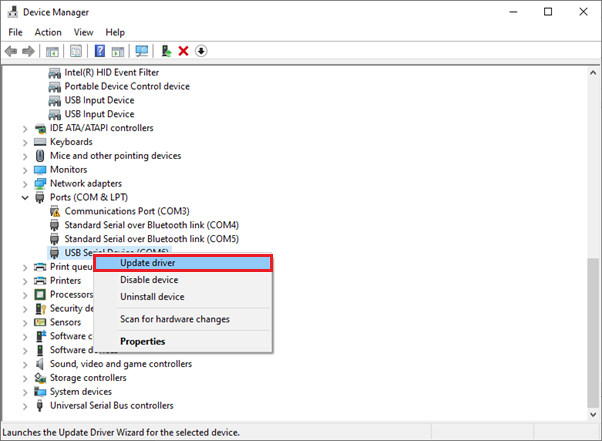
Step 6: Right click the COM6 port and select “Update drivers”:
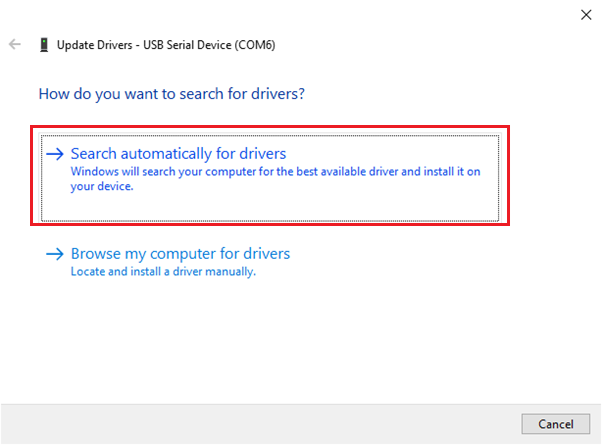
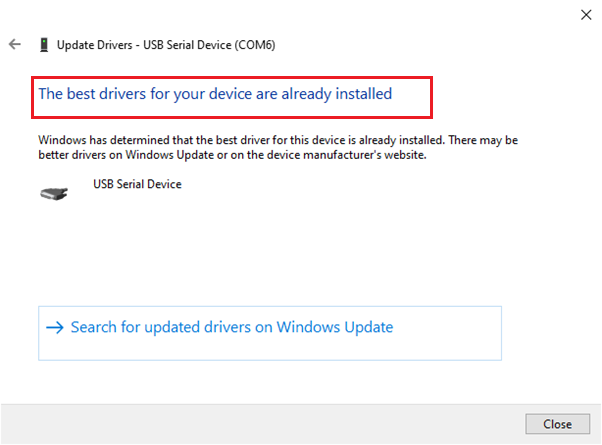
Step 7: If you are running an older version of Windows then it will not automatically recognize Arduino, you have to find on which port Arduino is working, select that port and click “Update driver”. New window will appear then click on “Search Automatically”. Now the Windows will set up necessary drivers needed for Arduino.
Tips: If you are a kind of user who frequently changes the Ports used for devices then it might be possible one day your Arduino works over COM6 and the other day COM4/5 it’s always good to check before uploading your code and update the driver if needed.
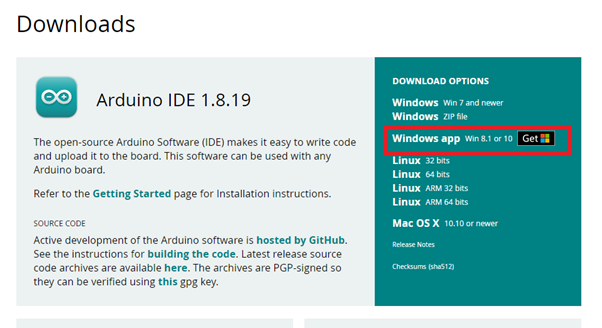
Installation Guide for Arduino IDE
We can download the Arduino IDE from their official site. Arduino has launched IDE for multiple operating systems. In our case we will continue with Windows OS:
Configuration of Arduino IDE
Till now we are done with Arduino setup as COM6 port is now working with Arduino next we need to configure Arduino ide.
Once you have installed the IDE on the PC, load the program and follow these steps to configure the IDE.
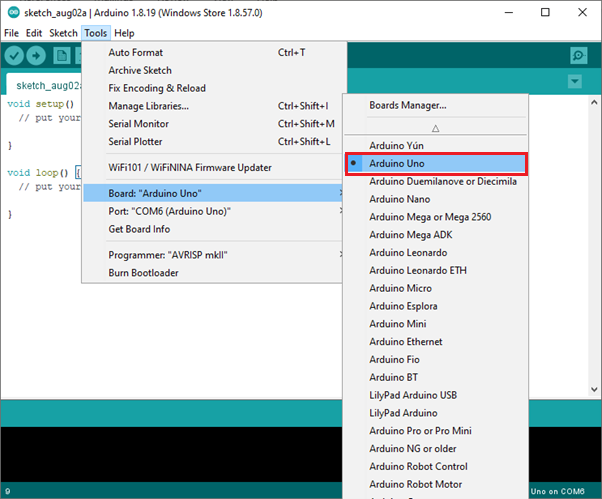
Step 1: Once your program is loaded now navigate to Tools>Board>Arduino Uno.
Here you will find all the Arduino boards available select the one you are using in my case we will select Arduino Uno.
Step 2: Next we have to tell the IDE which port is used by Arduino. Navigate to Tools>Port>COM6(Arduino UNO).
Earlier we installed our Arduino on the COM6 port so you will select the same port here. In case you forgot the port navigate to device manager and confirm it first.

Uploading the Sketch
Now, write and upload the sketch:
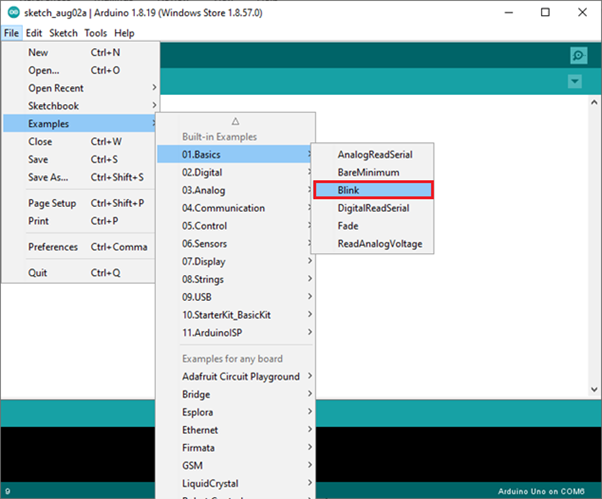
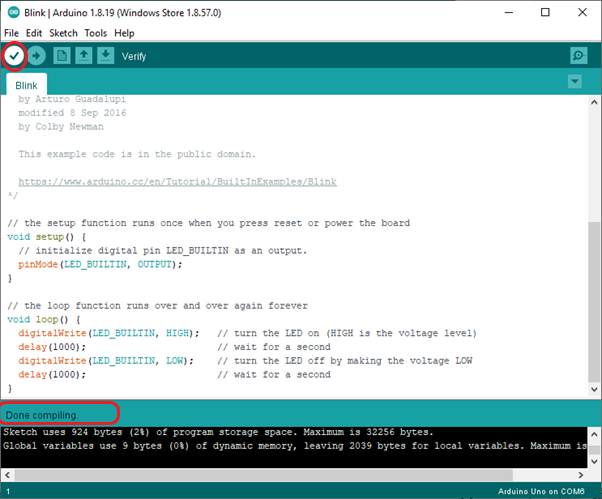
Step 1: Now we will load a basic built-in program to test our complete setup. Head towards the File>Examples>01.Basics>Blink.
Step 2: After you have loaded the Blink program, now verify the program once completed will show “Done Compiling” after uploading your program in Arduino it will show “Done Uploading” upon successful completion. If you have uploaded your program, you will see Led at pin 13 will start blinking.
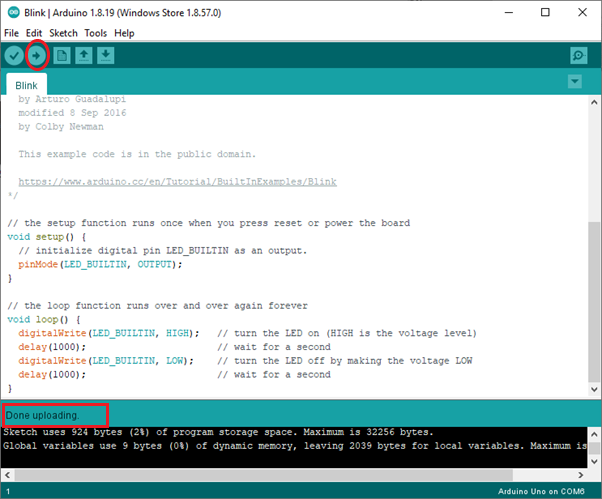
You have just uploaded your first program on your board.
Conclusion
So that’s it from setting up Arduino for the first time. Arduino is a very powerful tool. We have just completed our first led blinking program. In the future you can write complex programs and integrate different hardware like sensors, measuring tools and can design different projects using it. Arduino will help you in creating new skills and writing different programs.
Source: linuxhint.com