How to Configure Docker For Use With a Proxy
Docker is a well-known open-source platform utilized to configure, deliver, and execute projects and software in the small executable package known as containers. The Docker users are usually required to configure the proxy for Docker for different purposes such as accessing external sources for images and dependencies. Proxies servers are also helpful for maintaining user security as it allow limited traffic. It can also be used to increase performance.
This article will demonstrate:
How to Configure Docker For Use With a Proxy on Windows?
To configure a proxy for Docker on Windows, follow the listed instructions.
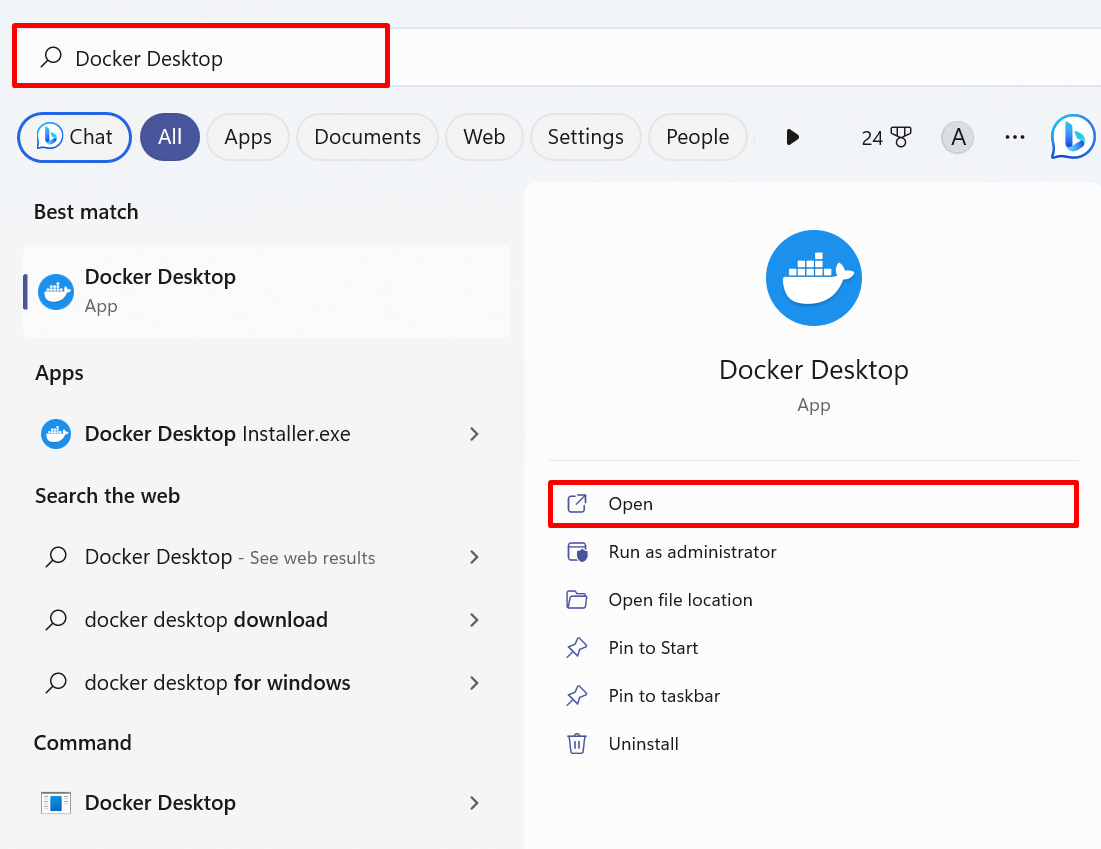
Step 1: Launch Docker Application
First, launch the Docker Desktop application via the Windows Start menu:
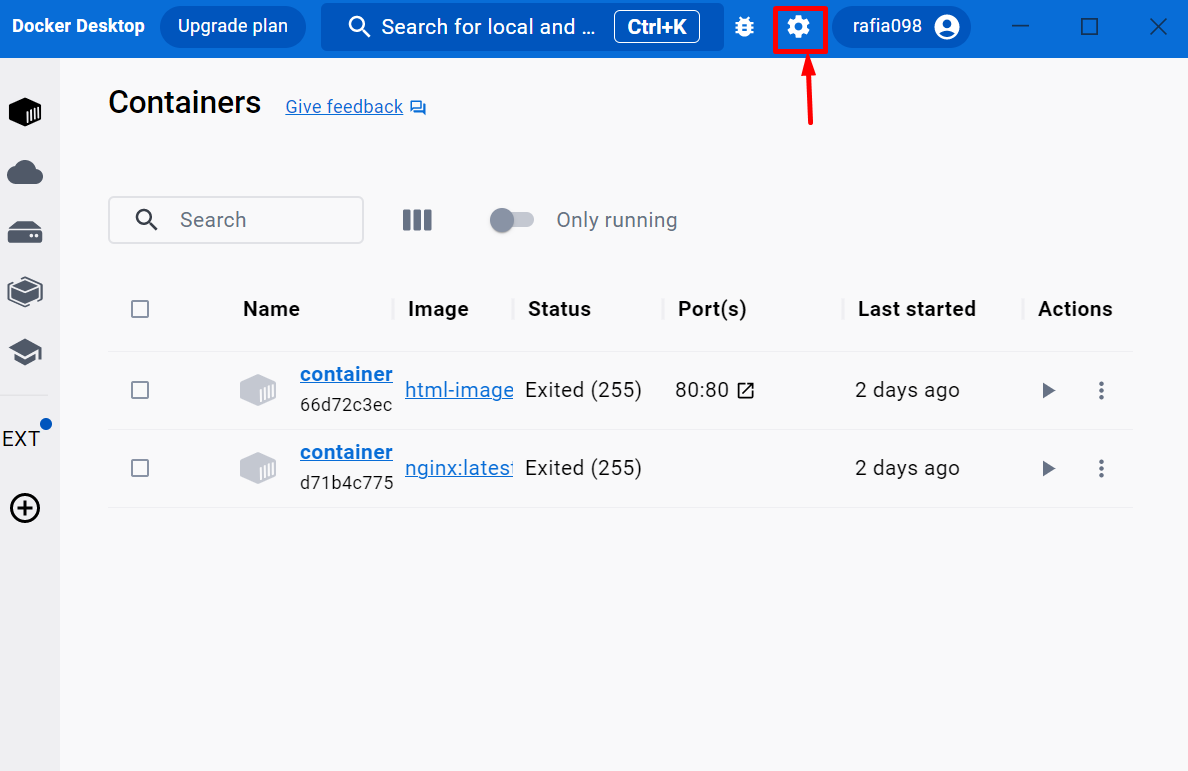
Step 2: Navigate Docker Settings
Click on the below highlighted “Gear” icon to navigate to the Docker settings:
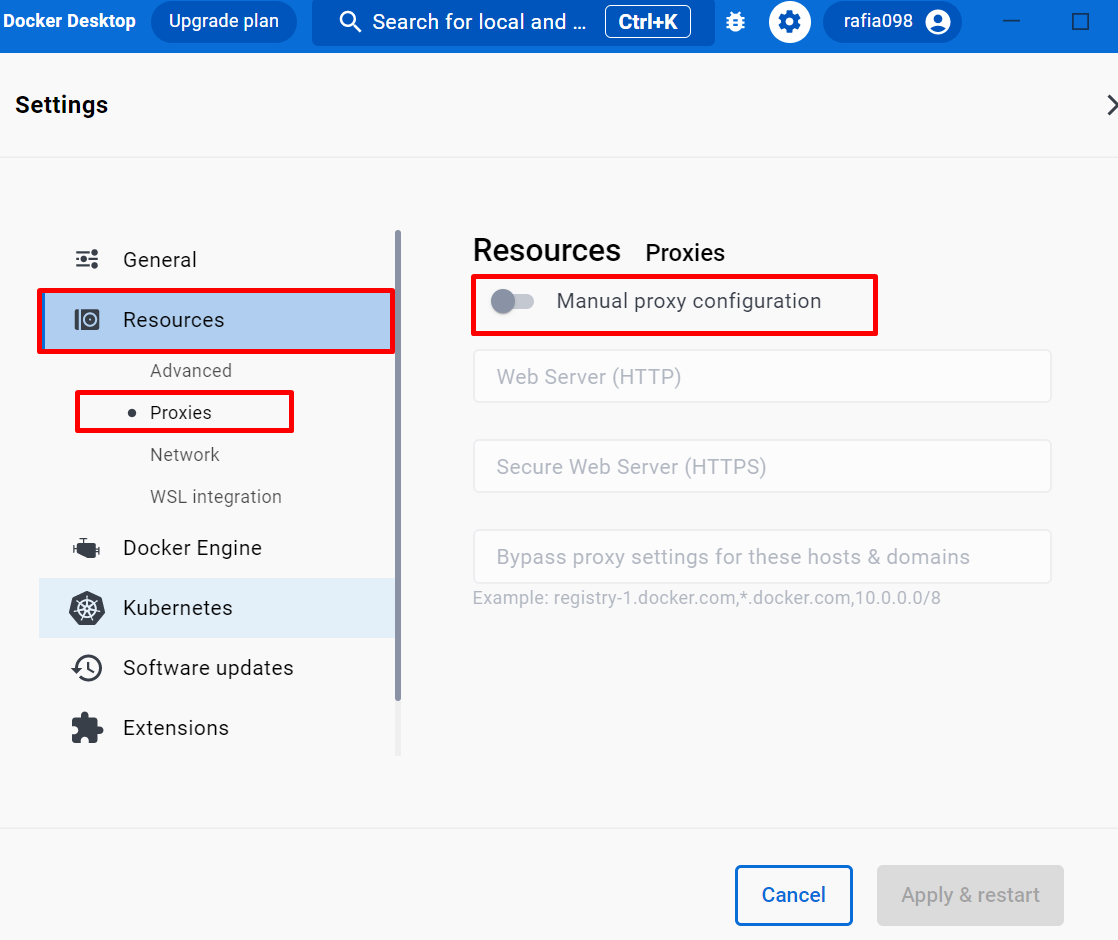
Step 3: Configure Proxy for Docker
Next, open the “Resources” Docker settings and navigate to the “Proxies” option. Then, turn on the “Manual proxy configuration” settings:
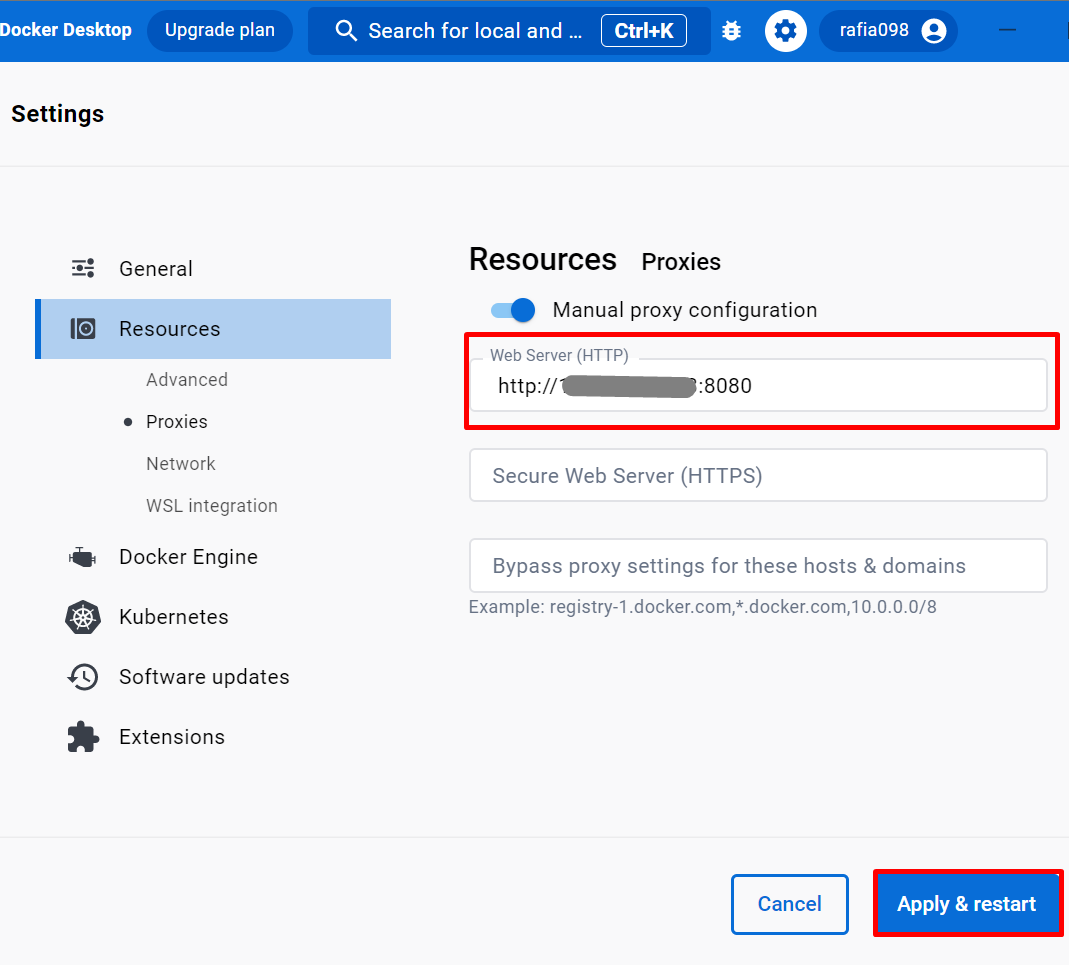
Set the HTTP proxy in the highlighted field and save the changes by hitting the “Apply & restart” button. For instance, we have set our system IP as a proxy server:
Step 4: Verification
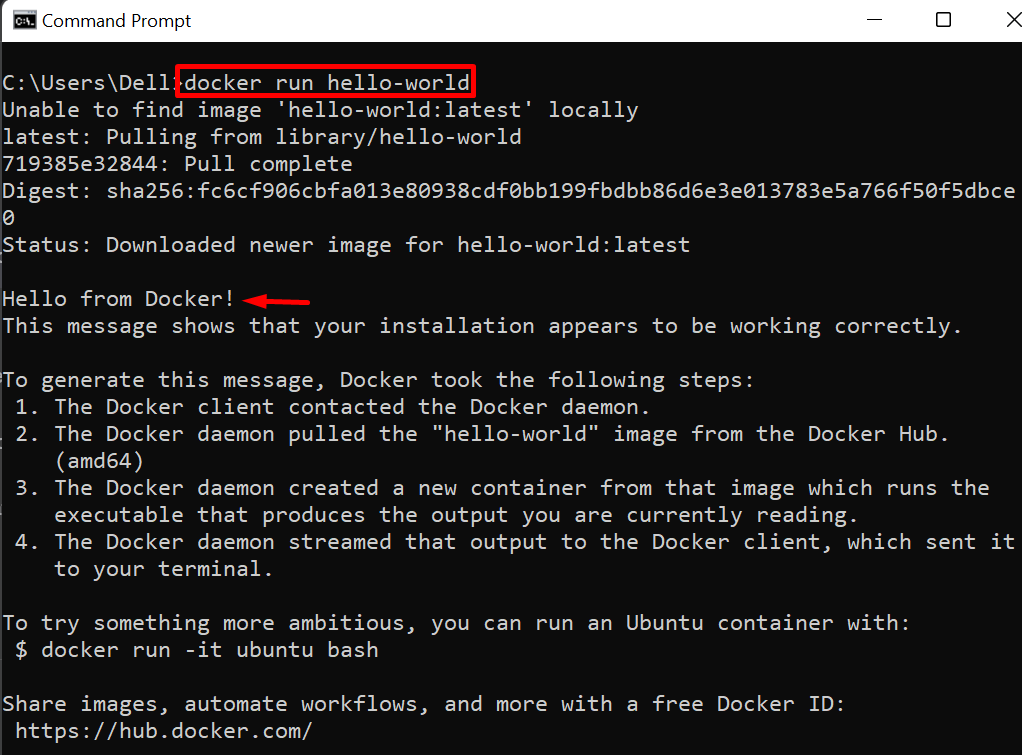
To check whether the proxy server is set on Windows for Docker, simply execute the below command. If this command executed successfully without getting any error, it means the proxy server is successfully set:
How to Configure Docker For Use With a Proxy on Linux?
Mostly Docker settings are configured in the “daemon.json” file. But some additional configurations and environmental variables such as HTTP proxy, and HTTPs proxy cannot be configured in the “daemon.json” file. To configure these variables, it is essential to set the systemd unit file. For the demonstration, check out the following instructions.
Step 1: Create systemd Unit file
First, create the systemd service file using the provided command. Here “-p” option is used to create the subdirectories:

Step 2: Generate File to Set HTTP Proxy Settings
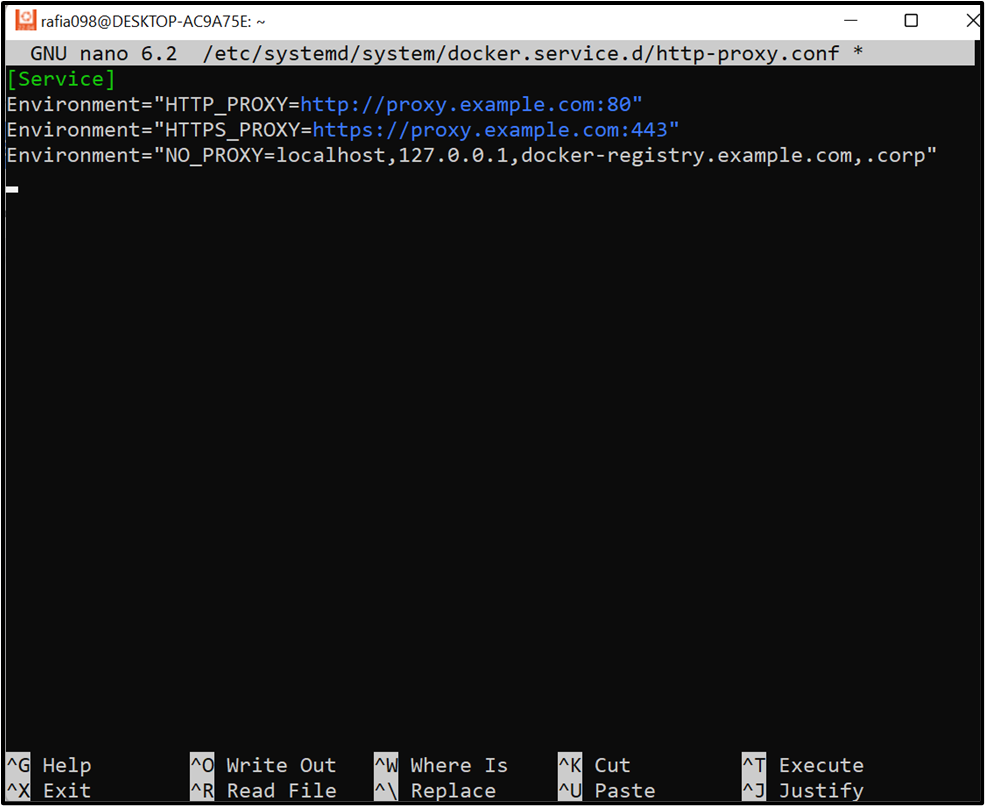
Next, create the “http-proxy.conf” file at “/etc/systemd/system/docker.service.d” path and set the proxy environment variable to set proxy:
Next, add the following lines in the “http-proxy.conf” file and place your proxy as “Environment= “HTTP_PROXY=<place your proxy server>””:
In the below code, we have set the HTTP_PROXY, HTTPS_PROXY, and NO_PROXY:
Environment="HTTP_PROXY=http://proxy.example.com:80"
Environment="HTTPS_PROXY=https://proxy.example.com:443"
Environment="NO_PROXY=localhost,127.0.0.1,docker-registry.example.com,.corp"
After that, save the changes using “CTRL+S”. In order to exit the editor, press “CTRL+X”:
Step 3: Restart Docker
After that, restart or reload the Docker Daemon using the provided command:

Next, restart the Docker service using the given command:

That’s all about setting the proxy of Docker on Windows as well as on Linux.
Conclusion
To configure a proxy to use Docker on Windows, simply open the Docker settings, then navigate to “Proxies” settings under the “Resources” settings. Then, turn on the “Manual proxy configuration” settings and set the HTTP proxy. In order to set the proxy for Docker on Linux, first create the “systemd” service file, then create the “http-proxy.conf” file and set the environment variables like HTTP_PROXY, and HTTPS_PROXY. Then, restart the Docker Daemon and Docker service. This post has demonstrated how to configure Docker for use with a proxy.
Source: linuxhint.com