How to Configure Application Load Balancer With Host-Based Routing
“A load balancer receives requests and then transfers them to targets defined in a target group. We can create an Application Load balancer either using the AWS management console or AWS CLI. There are several routing options with AWS Application Load Balancer, e.g., Host-Based routing.
In Host-based routing, incoming traffic is routed on the basis of the domain name or host name given in the Host Header. In this tutorial, we are going to create an Application Load balancer with Host-Based routing.”
Overview of This Lab
In this lab, we will set up Application Load Balancer on AWS using the host-based routing approach. To perform this lab, we require the following components: First, we need two availability zones with a minimum of one EC2 instance in each of them. Next is a VPC with at least one public subnet in each of these availability zones. We will configure the load balancer using these public subnets. Finally, configure a web server for the above EC2 instances and use the security group to open the port 80 for http requests on these instances.
Configuring the EC2 Instances
The first EC2 instance is an Ubuntu 20.04 Linux machine, and the web server (apache) displays the message: “This is an xyz host”. It has a hostname: www.xyz.tecofers.com
Similarly, the second instance is also an Ubuntu 20.04 Linux, with the web server displaying the message: “This is an abc host”. It has a hostname: www.abc.tecofers.com
The web servers contain the “abc” and “xyz” directories inside their root directories, i.e. (/var/www/).
Setting up the Target Group
Step 1. In this step, we will create target groups(“xyz” and “abc”) for routing the incoming requests. On the EC2 dashboard, select the Target Groups option on the left pane under the Load Balancing title. Now select the “Create target group” option:

Step 2. The “Specify group details” page has several options to be filled.
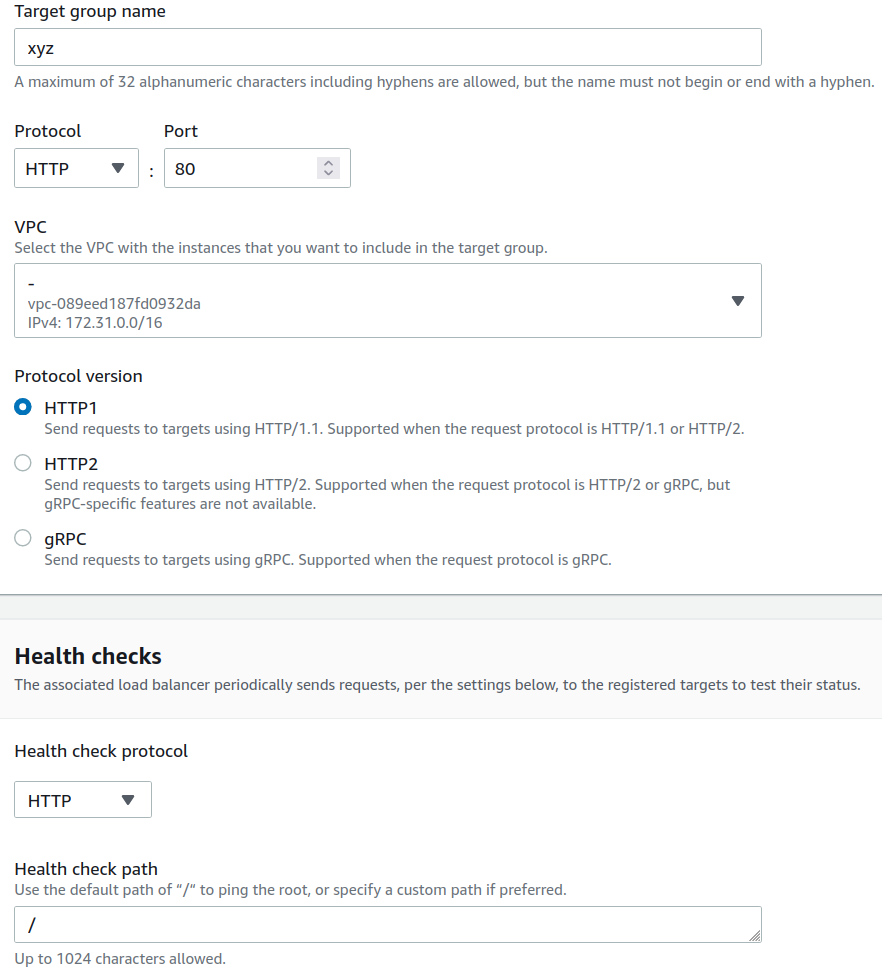
i) We start with the “Basic configuration” heading:
- For the “Choose a target type” option, click the “Instances” radio button here.
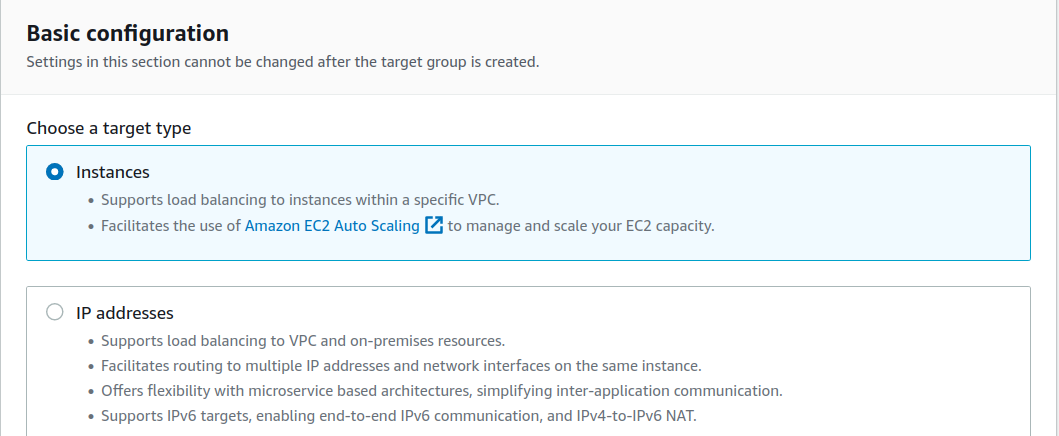
- For the “Target group name”, enter an appropriate target group name(“xyz” in my case).
- For the “Protocol” and “Port” options, select “HTTP” and “80”, respectively.
- For the “VPC” option, choose the VPC containing your instances.
- Finally, for the “Protocol version,” stick to the default option(HTTP1).
ii) The “Health checks” Configuration has the following fields:
- For the “Health check protocol” drop-down menu, choose HTTP.
- For the “Health check path”, specify a custom path or use the default one(recommended).
- We recommend keeping the “Advanced health check settings” as it is. Adding tags is an optional step. Enter “Next” to continue.
Register the Instances
In this step, we need to register the instances with the Target Groups.
Step 1. On this page, choose an instance and then select the button “Include as pending below”. This will make the instance appear in the “Review targets” heading. Proceed by hitting the “Create target group” button.
For another target group, “abc”, repeat the same steps of creating a target group and then attach another instance here. On the Target groups, the two target groups will appear as:
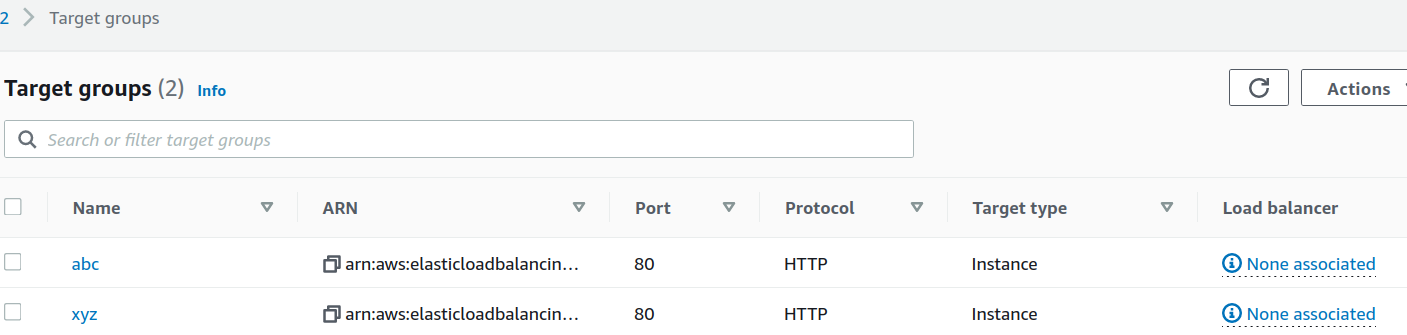
So far, we have not attached any Load balancer to our target groups. Let’s go and create a load balancer.
Create the Application Load Balancer
Note: Creating a load balancer service requires you to pay AWS.
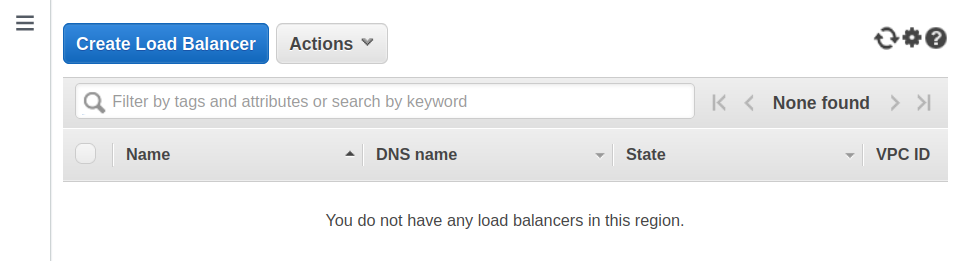
Step 1. On the EC2 dashboard, select the Load Balancers title and hit the “Create Load Balancer” button, and then choose “Application Load Balancer”:
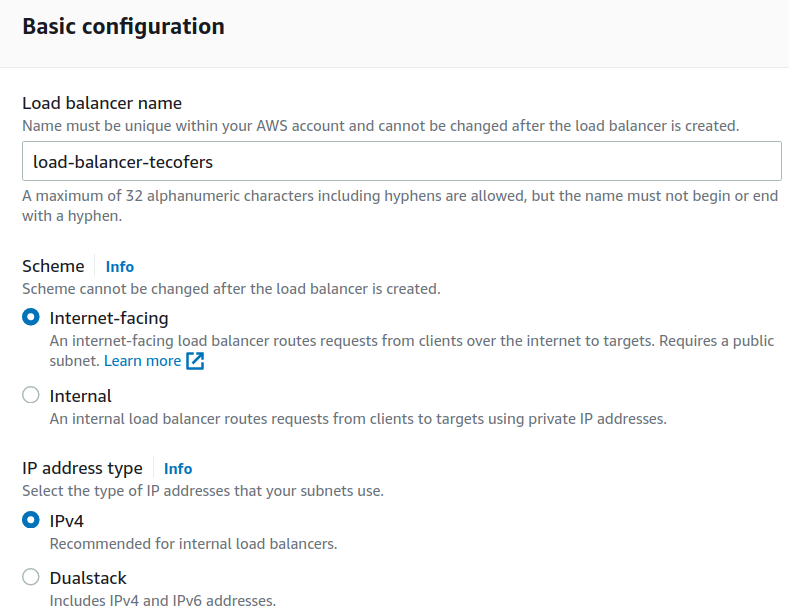
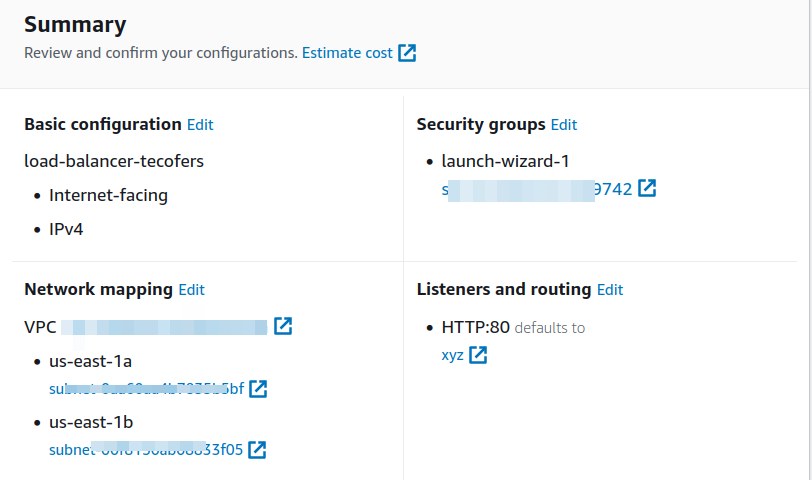
Step 2. Enter a name for the load balancer that satisfies the naming constraints. Under the Scheme, keep the default option (“Internet-facing”) selected. For “IP address type,” choose IPv4.
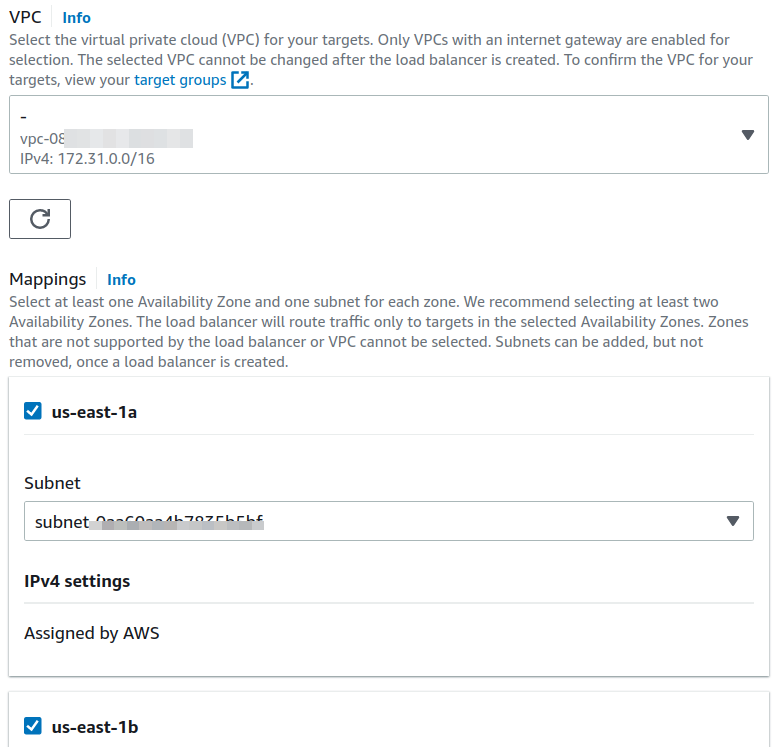
Step 3. On moving ahead, we have “Network mapping”; here, choose the VPC we are working with. Also, choose two availability zones that hold the targets. The incoming traffic will be routed to these targets by the load balancer.
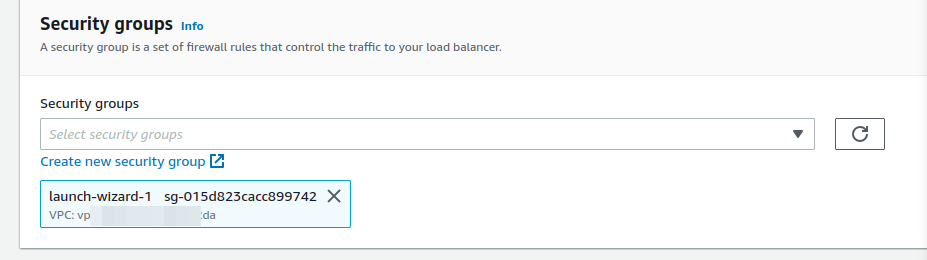
Step 4. For the Security Groups, select or create a new security group for the load balancer that will allow communication with the target port (port 80)
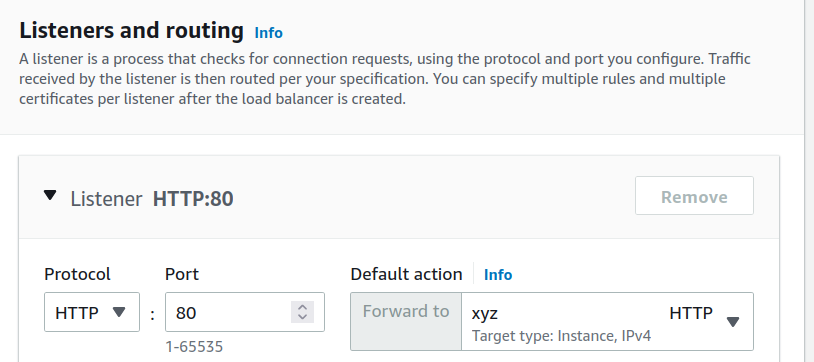
Step 5. Now come the Listeners and routing segment; what we have to do here is to configure a listener by choosing a protocol(HTTP here) and a port. For the Default action, choose your target corresponding to the “forward to” field.
Step 6. Adding tags and Add-on services are optional steps and can be skipped. After reviewing the configuration summary and click the “Create load balancer” button:
The load balancer is now ready.
Add the Host-based Forwarding Rules
After the load balancer is created and its status becomes active, we are required to add traffic forward rules.
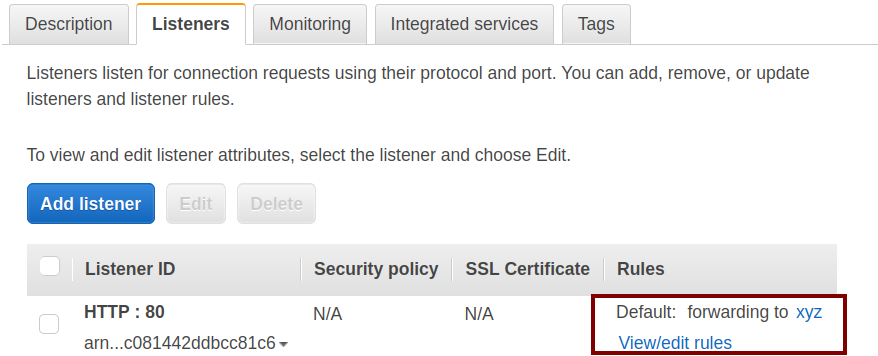
Step 1. From the “Load Balancers” page and select the load balancer and then further move to the Listeners tab:

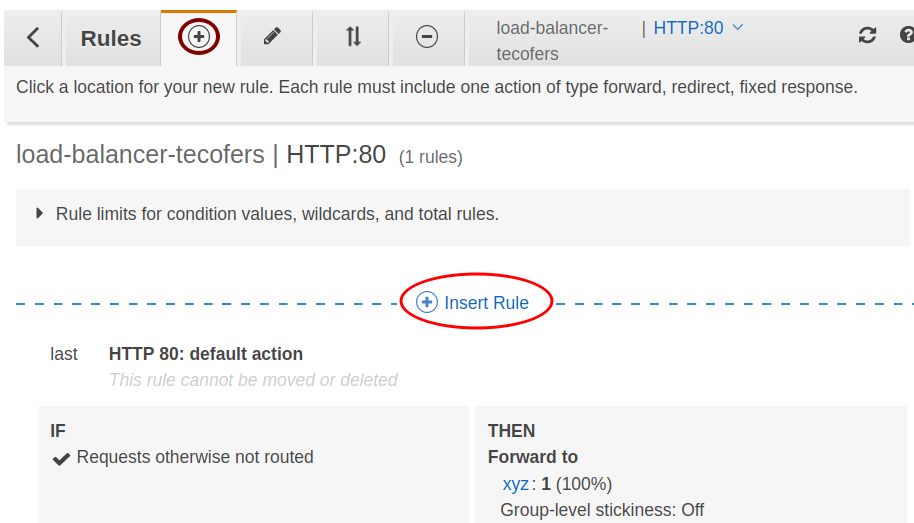
Step 2. Navigate to the Listeners tab and under the “Rules” column, click on the “View/Edit rules” link. A new page appears here first; click on the “+” icon, then click on the “Insert Rule” link.
Step 3. For the IF(all match) column, do as follows:
i) click on the “+ Add condition” and set “Host header” as the type of Rule.
ii) enter the host or domain name inside the field corresponding to the label “is”.
Step 4. For the “Then” column, do as follows:
I) click on “+Add action” and set “Forward to” as the action.
ii) choose the target group.
Save the rule and for another target group, insert the rule in the same way and save it.
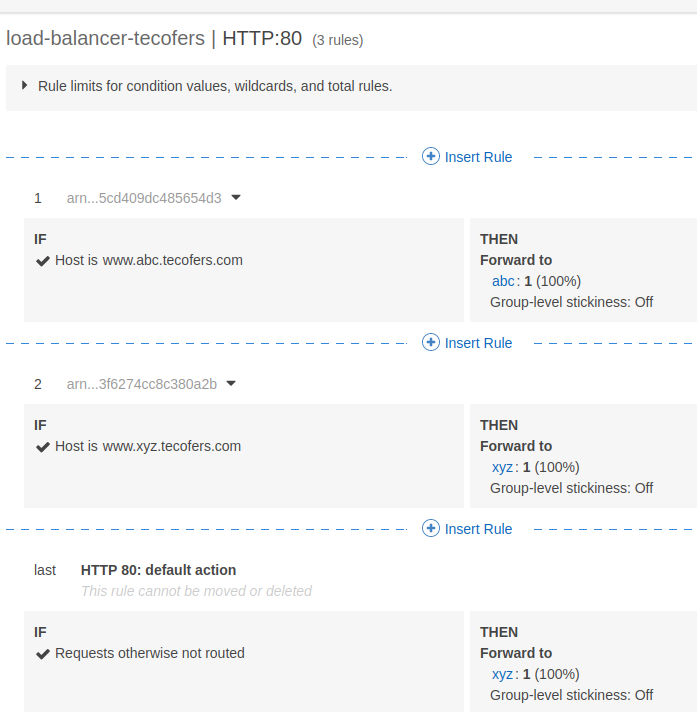
In case the above rules are not satisfied, the default rule will be used.
Register the Domain
To make the host-based routing work over the internet, we have to register the hostnames with Route 53 and map them with the load balancer DNS.
Step 1. From the Route 53 dashboard, choose the “Create hosted zone” option:
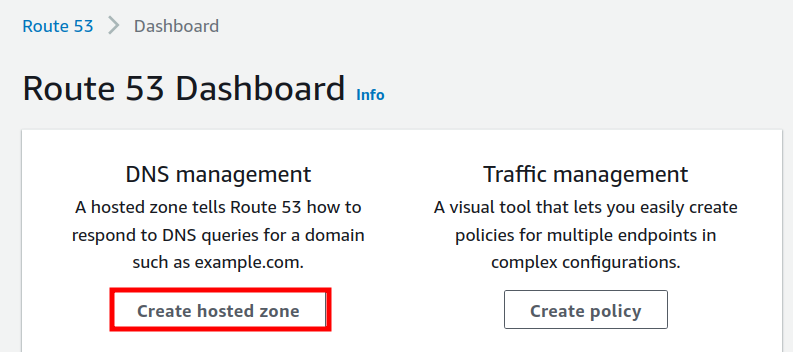
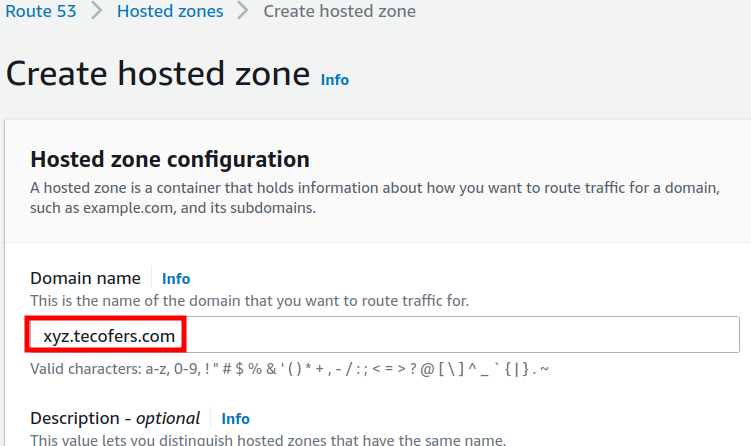
Step 2. Next, enter your domain name to where traffic will be routed to. For the “type” field, set “Public hosted zone”. Hit the button “Create hosted zone”.
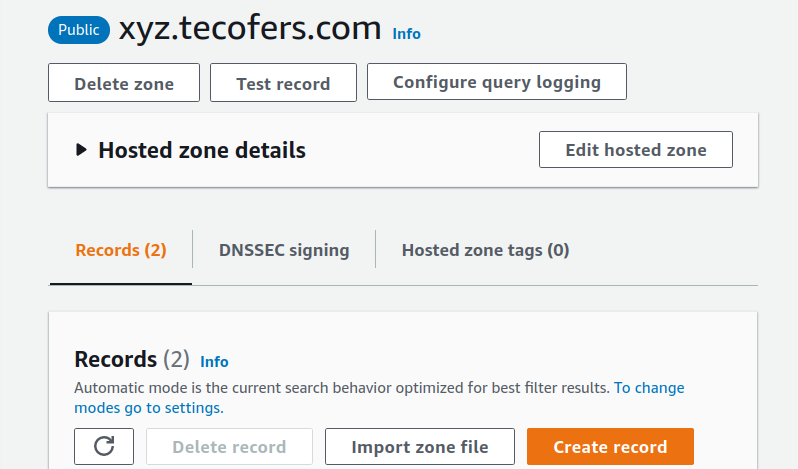
Step 3. In the “Records” section, choose “Create record”.
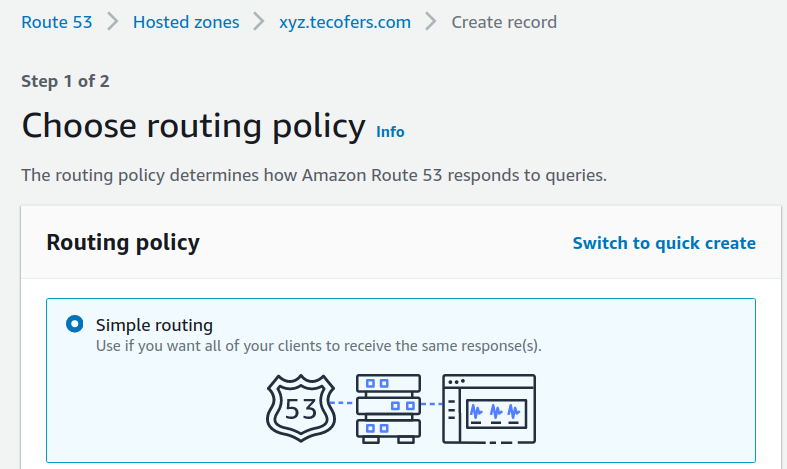
Step 4. On the “Choose routing policy’ page, select the link “Switch to wizard” and then choose the “Simple Routing” box and click “Next”:
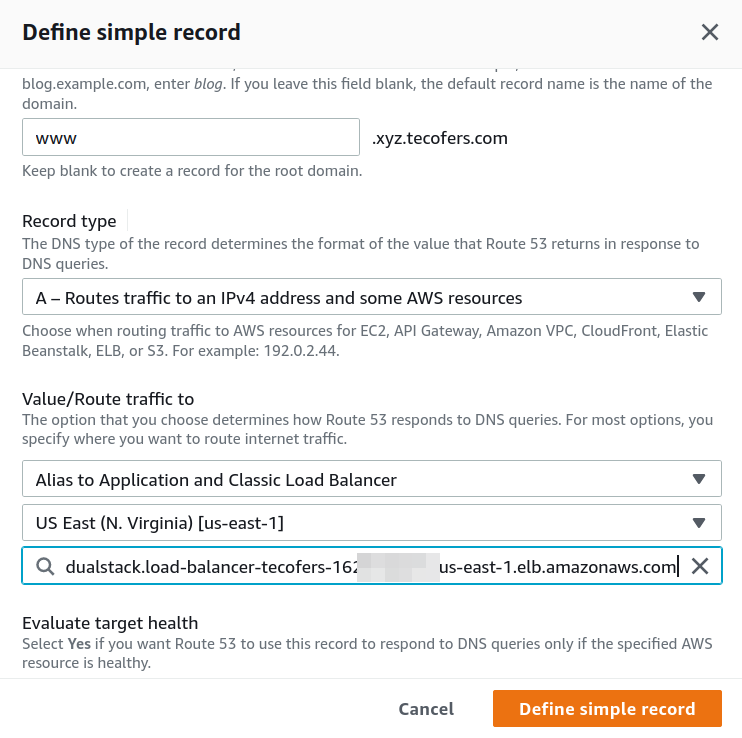
Step 5. Now choose “Define simple record” and then enter the record details:
Domain: domain or subdomain name to route the traffic to.
Record type: DNS type of the record.
Value/Route traffic to:
- Choose “Alias to Application and Classic Load Balancer”
- Choose the region where the load balancer is deployed
- Choose the load balancer address and hit “Define simple record”.
On the next page, click on the “Create records” button.
Do the same steps for another domain name and verify the above record on the “Configure Records” page.
Test the Setup
To verify the above procedure, on a web browser, enter the DNS name of the load balancer along with the hostnames:

Conclusion
We have finally made the way to host-based routing on the AWS application load balancer. Try to do this lab yourself and also try to configure the Application Load balancer with path-based routing.
Source: linuxhint.com