How to Code Arduino – Beginners Guide
Arduino IDE is a cross platform software available on Windows, Mac and Linux. Arduino language which is derivative of C++ is used to program Arduino boards using the IDE.
How to start using Arduino as a beginner:
In this guide we will explain to you how to write your first program with the help of your Arduino board. All you need is:
- Arduino board (UNO)
- USB B cable
- A Computer or Laptop
- Arduino IDE or Arduino Software

By following steps below, you can write your own program. Let’s begin:
Step 1: To communicate with your Arduino board we need software that converts our code into binary files that can be understandable by our Arduino board. You need to download the Arduino IDE so we can proceed further. If you want to download and install Arduino IDE, click Here.
As we have downloaded Arduino IDE now, we will proceed to Step 2.
Step 2: Launch Arduino IDE from the start menu by pressing the Windows key and type Arduino IDE or by double-clicking the IDE software icon. Window will open which looks like this.
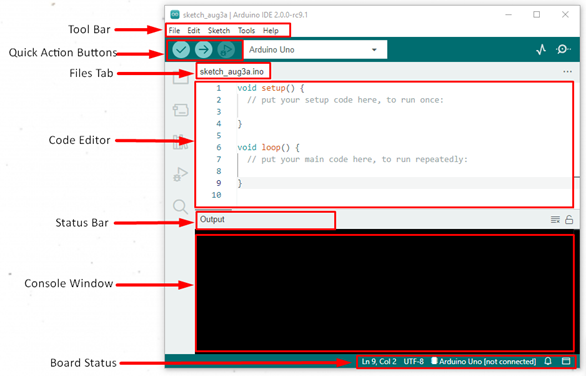
Here I have shown the complete interface of Arduino IDE.
Step 3: Next step will be selecting the right Arduino board; it all depends upon which board you are using follow these steps to select your Arduino board in IDE:
Go to Tools>Board>Arduino AVR Boards – now select whichever board you are using.
Remember to select the right model of your board if you mistakenly select the wrong board IDE will give compilation error.
Step 4: As of now you have selected your board it’s time to tell the IDE at which USB port of your PC you have connected your Arduino board. For Port selection, go to: Tools>Ports>(Select Port-Number).
It’s important to select the right serial port otherwise your code will not be able to burn in the Arduino board.
How to Write First Arduino Code
We have installed our IDE and done building connections between Arduino and PC. Now we will proceed towards writing the first code.
All Arduino programs follow the same structure. We can divide Arduino program into three parts:
- Code structure
- Variable and constants
- Functions
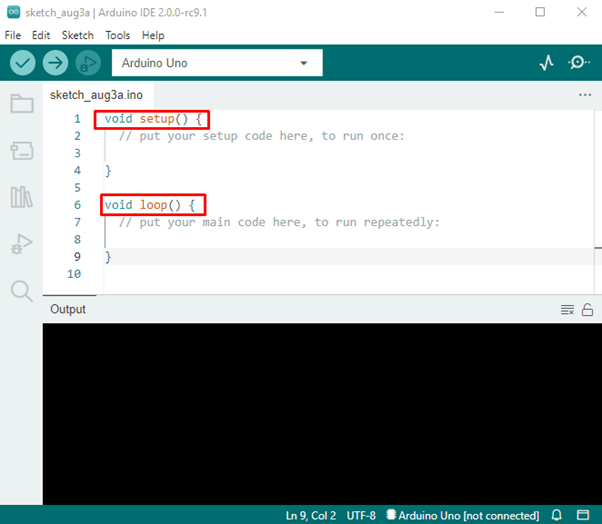
Arduino code structure have further two main parts:
The setup() function: Purpose of this function is when a sketch starts it initializes the pin modes, variables and starts using the available libraries in your program. It only runs once during the whole compilation process.
The loop() function: The loop() function is used after the setup() function is initialized, as the name suggests loop() function will keep on running until stopped it is used for controlling the Arduino board actively.
Arduino Program Example
As an example, we will use the Arduino built in Led program from the example section. Using this sketch, we will try to understand the basics of the Arduino program.
Follow these steps to import Led blinking sketch:
Go to Files>Examples>01.Basics>Blink, a new window will open showing us a sketch of the LED Blinking program.

As we can see in the sketch we have initialized the setup() function it will run only one time.
| 4 | pinMode(LED_BUILTIN, OUTPUT); | This will set the Built in led pin as our output. |
After that loop() function is initialized, it will run over and over again:
| 8 | digitalWrite(LED_BUILTIN, HIGH); | This will turn on the led |
| 9 | delay(1000); | This will give a pause of one second |
| 10 | digitalWrite(LED_BUILTIN, LOW); | This will turn off the led |
| 11 | delay(1000); | Give a pause of one second |
Read about digitalWrite() and delay() functions – How to use Arduino DigitalWrite() and how Arduino Delay function works.
Using quick action buttons, upload the program to Arduino.
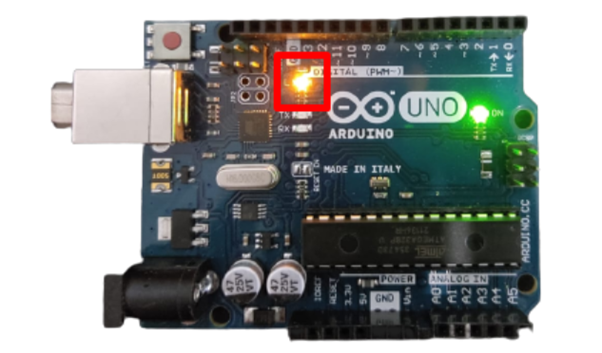
Program Output
We can see a built in Led blinking over Arduino board as our output:
Conclusion
This may be the end of this article but it’s just the start of your new journey with Arduino.
Writing code with Arduino is always fun and a great learning opportunity for beginners. We have written our first code of led blinking, you can try other examples as well and increase your programming knowledge.
Source: linuxhint.com