How to Clear the Clipboard in Windows 11/10 Using a Shortcut
Clipboard in Windows keeps the data of anything you can copy. However, all the copied data in the clipboard can be removed when the windows restart or shut down. But occasionally, you may be required to clear/remove the clipboard in Windows 11/10 for various reasons. There are multiple ways to clear the clipboard in Windows for example using the settings app, using the clipboard dialog box, and using the desktop shortcut method.
This guide will present you with detailed information on clearing the clipboard in Windows 11/10 using the shortcut:
How to Clear/Delete the Windows 11/10 Clipboard Using a Shortcut?
You can follow the below steps to clear the clipboard in Windows 11/10 using a shortcut:
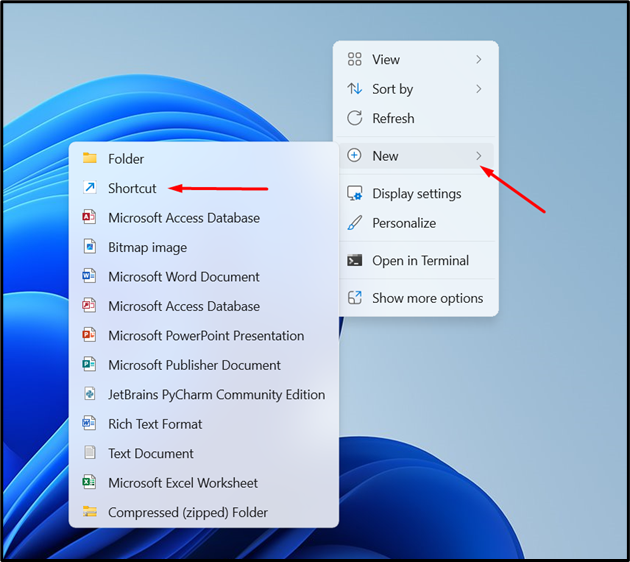
Step 1: Create a New Shortcut
To create a new shortcut, you need to right-click on the blank space of the window desktop and click on “New > Shortcut”.
Step 2: Paste or Type Command
In the new pop-up window, you need to type the following command. This command is utilized for cleaning the clipboard:

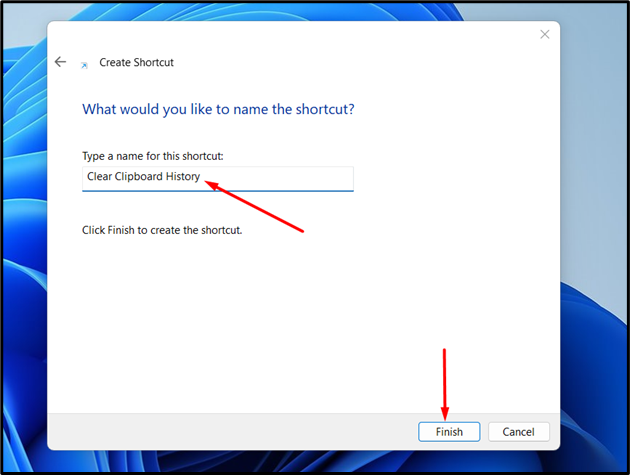
Step 3: Name the Shortcut
Now, you need to provide the name of the newly created shortcut. After typing the name, hit “Finish”:
As you can see, a “Clear Clipboard” shortcut has been created successfully:

Step 4: Clear Clipboard History
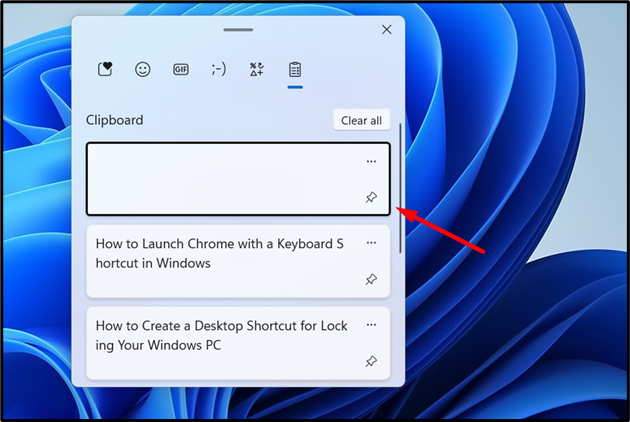
Finally, we can now clear the clipboard history using a shortcut. To clear the history simply double click on the shortcut icon. For example, let’s consider the following data stored in the clipboard:

To delete this, we simply double-click on the shortcut icon:
This method only clears the latest copied clipboard, just like shown above.
Clear All the Clipboards From Windows 11
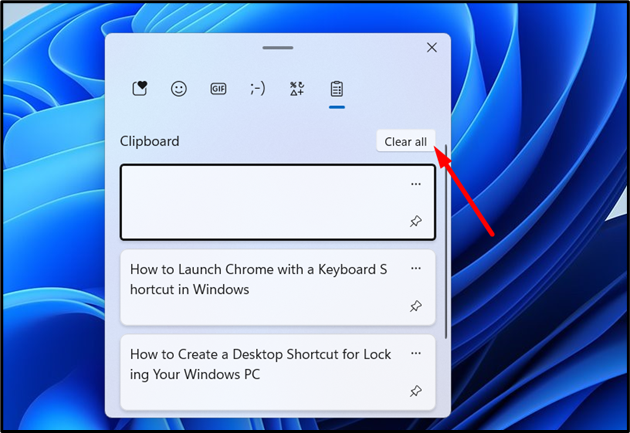
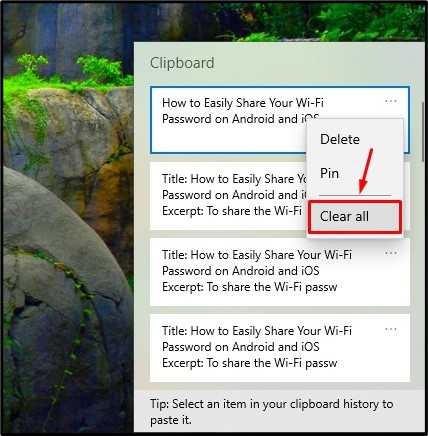
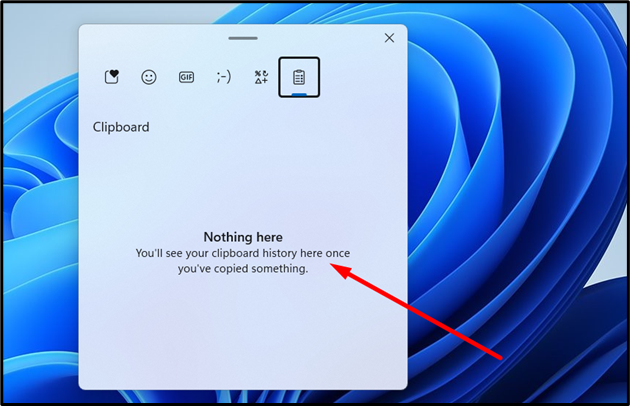
To clear all the clipboards from the windows, you simply need to press the “Windows + V” combination on the keyboard. After opening the clipboard box, click on the “Clear all” choice:
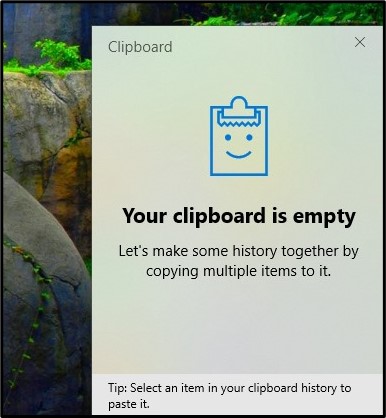
This will clear/remove all the clipboards from the Windows:

Clear All the Clipboards From Windows 10
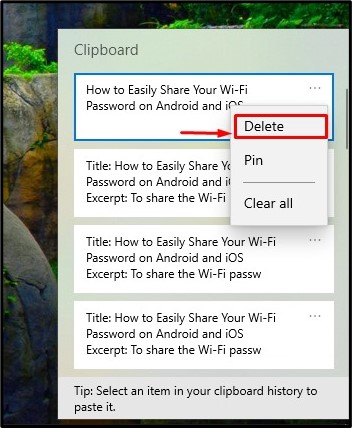
To clear all the clipboards from Windows 10, press the “Windows+V” combination on the keyboard. After that, click on three dots at the top right corner of any entry and click on the “Clear all” choice:
This will clear/remove all the clipboards from the Windows:
You can also only delete a single entry from the clipboard by simply clicking on the “Delete” option:
Alternative Approach: Clear the Clipboard in Windows Using the Setting App
We can also clear the clipboard in Windows from the settings app. To do this, follow the steps provided:
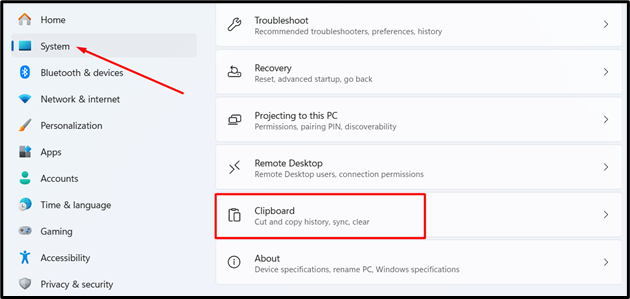
Step 1: Open Windows Setting
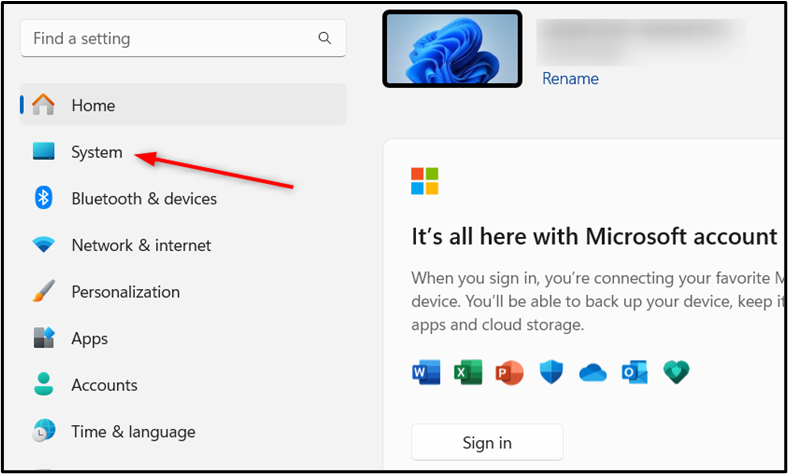
First, right-click on the Windows icon and navigate to “Settings”:

Step 2: Open Clipboard Setting From System Tab
Next, move to the System tab and scroll down to select the Clipboard setting:
Click on the “Clipboard” setting:
Step 3: Click on Clear Option
Click on the clear option shown next to the “Clear clipboard data”. This will remove all the clipboard data from your windows:
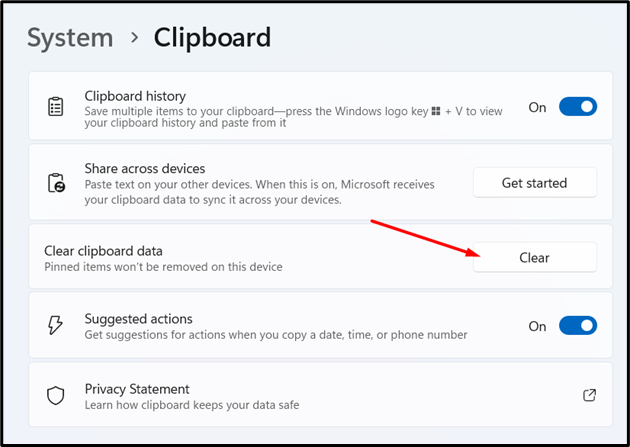
The below snippet verifies that all the clipboard has been cleared successfully:
Conclusion
To clear all the clipboards in Windows 11/10 using a shortcut, right-click on the desktop and create a new shortcut, type the item value, and click on it. We can clear all the clipboards by clicking on the “Clear all” option in the clipboard dialog box. Alternatively, we can also clear the clipboards from the setting app in the clipboard setting. This article presented a step-by-step guide on clearing all the clipboards using shortcuts and other methods.
Source: linuxhint.com