How to Check and Reduce High Memory Usage in Windows 11?
Memory is essential for running applications, playing games, surfing the internet, and executing other tasks on a PC. When users open the computer, the background processes and running applications start using the memory which can cause high memory usage. The other causes of high memory usage include too many startup apps, insufficient RAM and virtual memory, fragmentation of hard disk, viruses, and malware. High memory usage can cause the PC to slow down, or crash. In such circumstances, users need to check and reduce high memory usage.
This blog will illustrate:
How to Check/Find Out Windows 11 Memory Usage?
To find out the memory usage on Windows 11, check out the below-provided procedure:
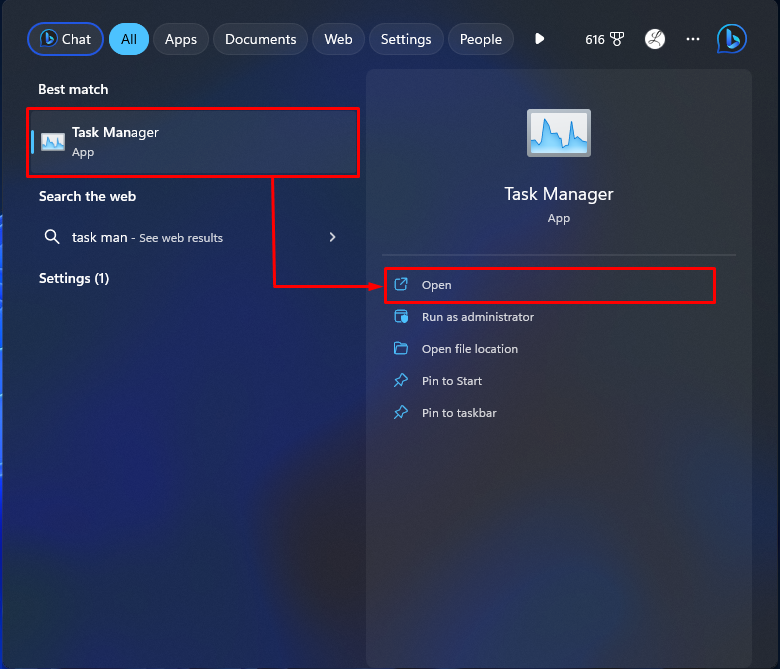
First, search for the “Task Manager” in the search bar and open it:
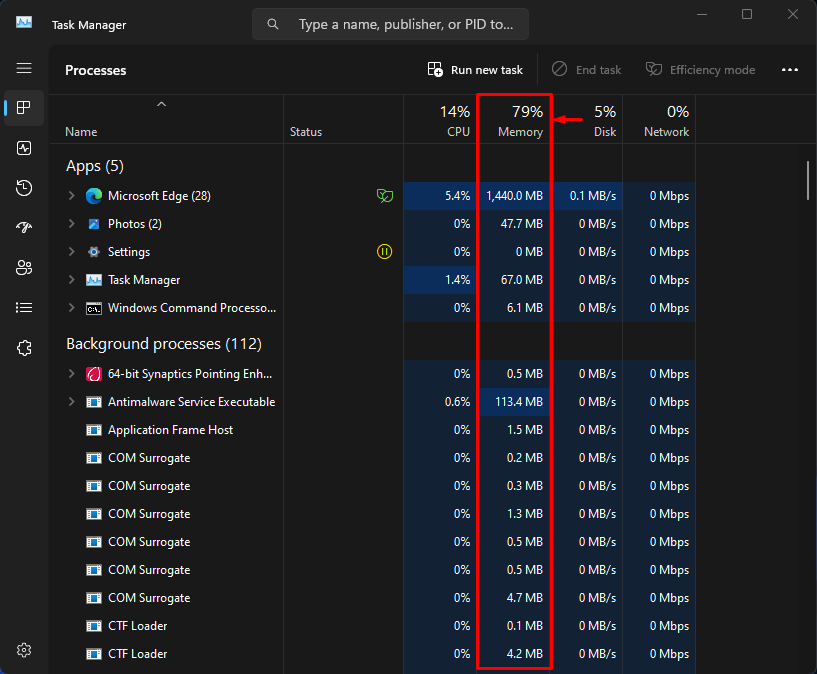
Then, view the “Memory” column in the “Processes” window. It displays the memory usage percentage of our PC and shows how much memory each service or application is utilizing:
How to Reduce/Minimize Windows 11 High Memory Usage?
To minimize high memory usage in Windows 11, try out the following solutions:
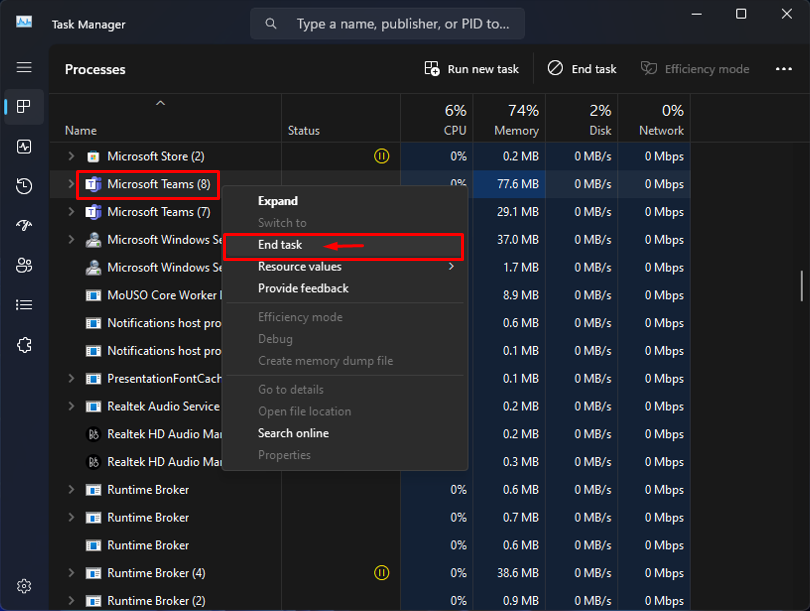
Solution 1: End Unnecessary Apps or Programs
To end unnecessary apps or programs, open the Task Manager app and select the unnecessary app or program that is using high memory. Next, right-click on the selected unnecessary app and tap on the “End task” option to reduce memory usage. For instance, we have selected “Microsoft Teams” because we are not using it and it is using so much memory:
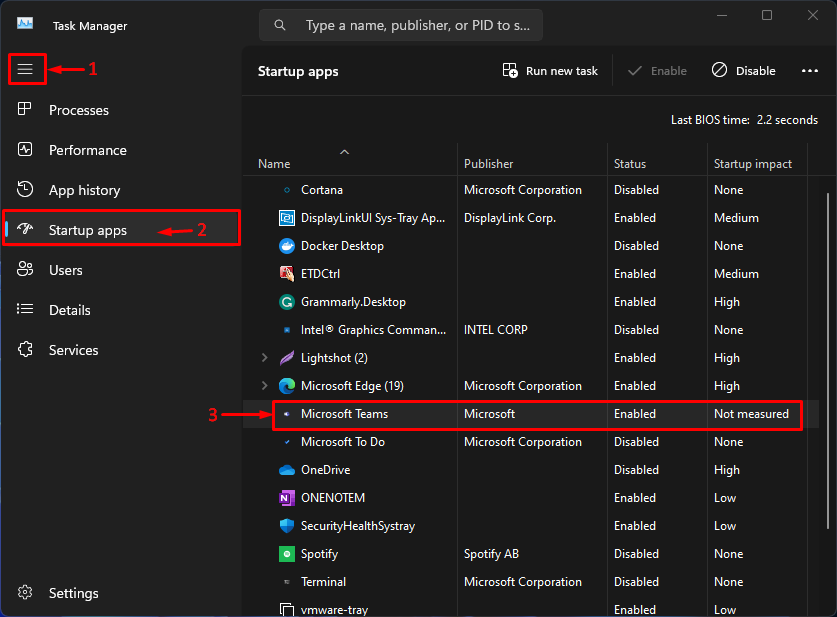
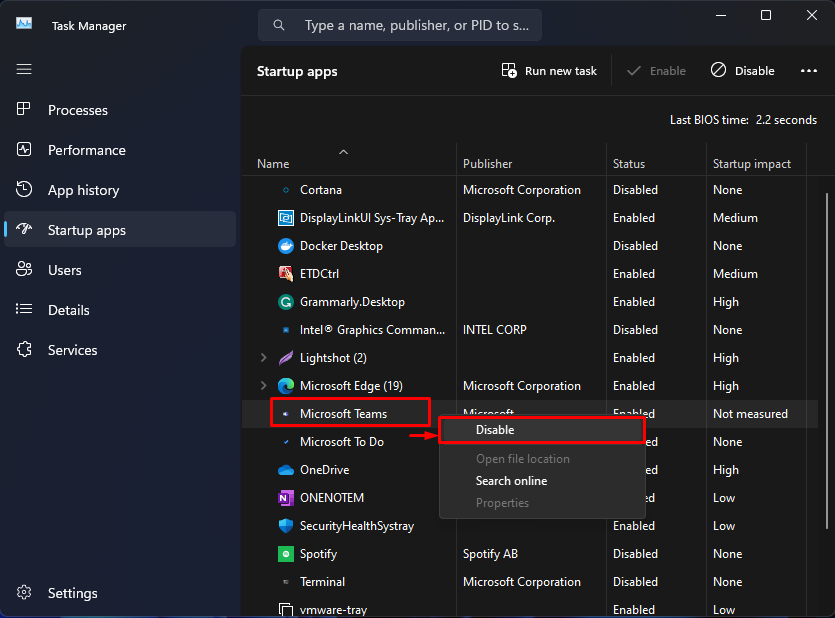
Solution 2: Disable Startup Apps
To disable startup apps, select the “Startup apps” option from the left side of the Task Manager app. Then, choose the app or program that needs to be disabled. For instance, we have selected the “Microsoft Teams” app:
Now, right-click on the selected app and choose the “Disable” option:
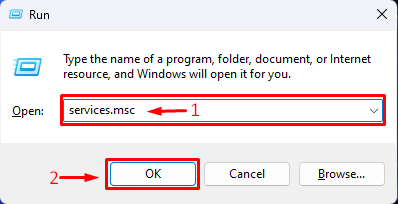
Solution 3: Disable SysMain Service
To disable the SysMain service, first, hit the “Windows + R” keys to launch the Run dialog box. Then, type “services.msc” in it and hit the “OK” button:
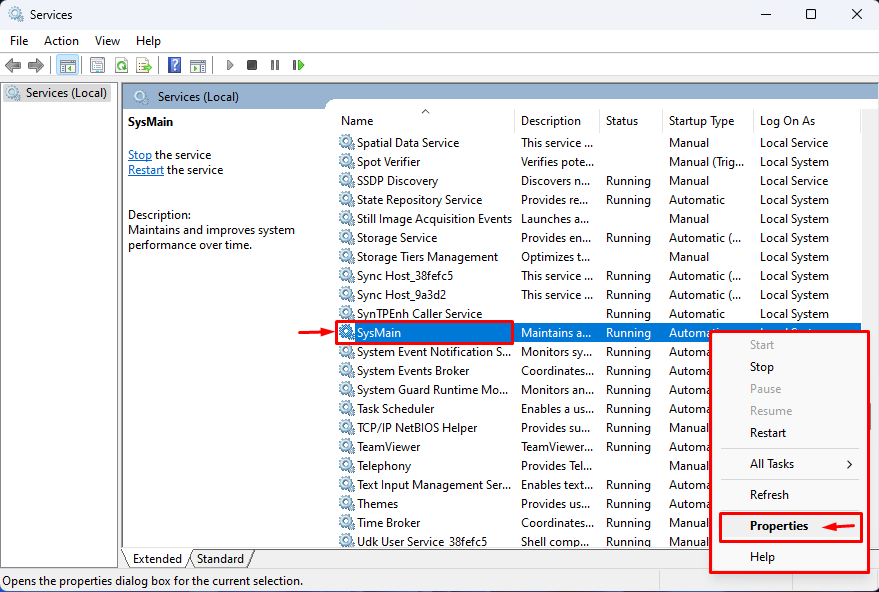
Next, look for the “SysMain” service, right-click on it, and choose the “Properties” option:
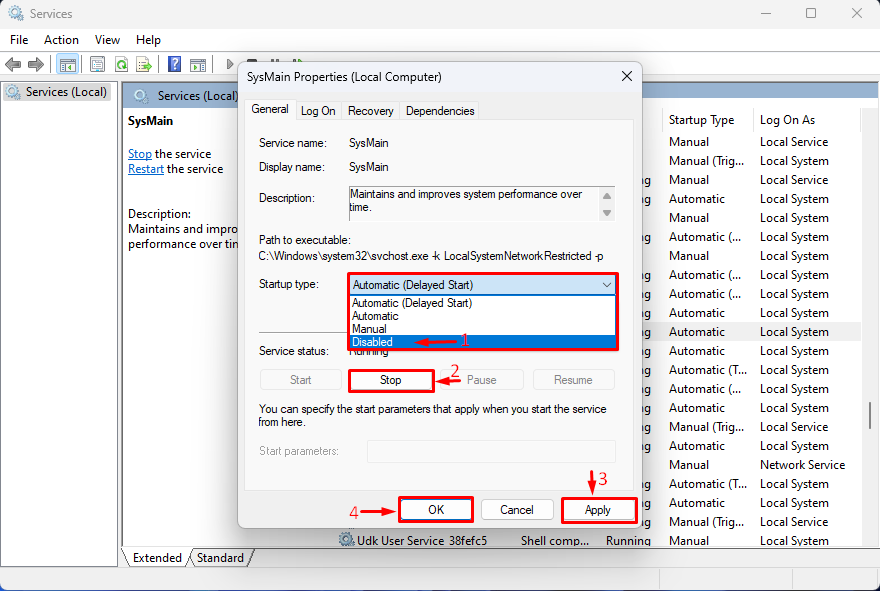
After that, select the “Disabled” option in the “Startup type”. Then, hit the “Stop” button and wait for the procedure to finish. Finally, tap on the “Apply” and “OK” buttons to save changes:
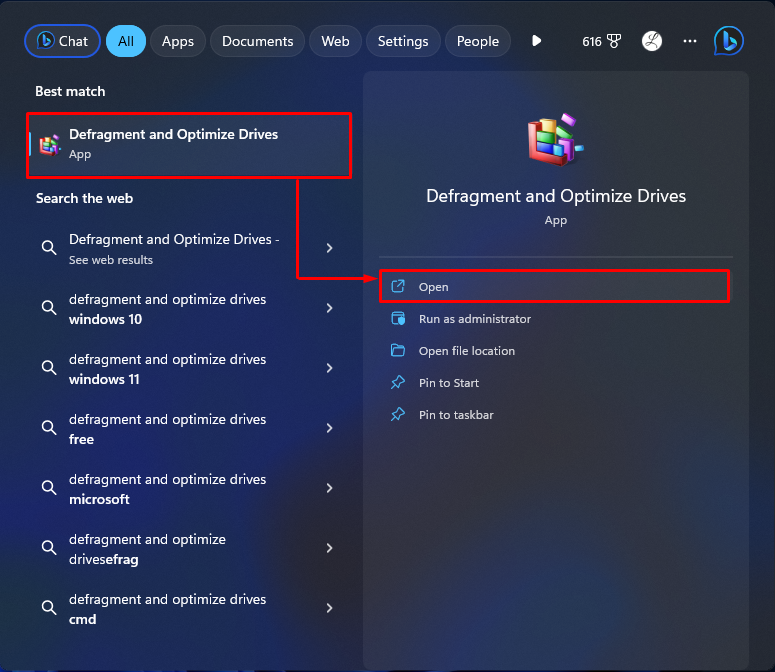
Solution 4: Defragment Hard Drive
Defragging the hard drive is also a good option to reduce high memory usage. First, search for the “Defragment and Optimize Drives” in the Start menu and open it:
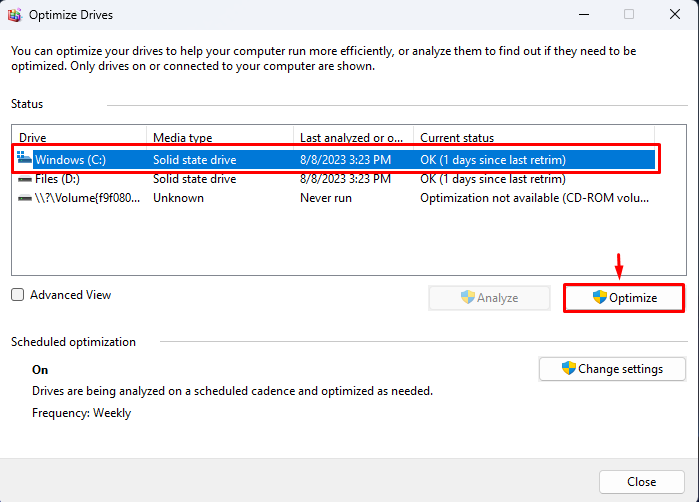
Then, choose the particular drive that needs to be defragmented and tap on the “Optimize” button to defragment it:
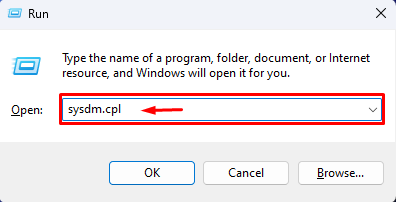
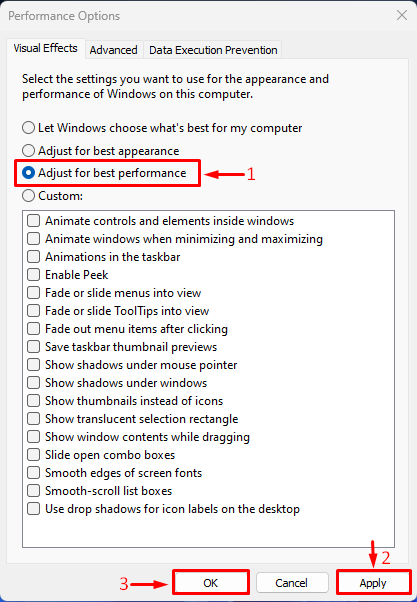
Solution 5: Adjust for Best Performance
Users can also change the system performance setting to reduce high memory usage. Type “sysdm.cpl” in the Run search box and hit the “Enter” key to open System properties:
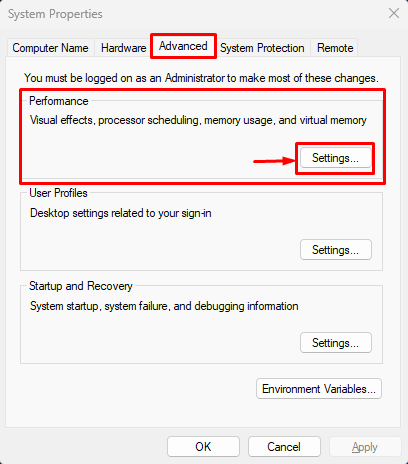
Then, navigate to the “Advanced” tab and tap on the “Settings” button in the “Performance” section:
After that, select the below-highlighted option and check mark the radio button. Finally, click on the “Apply” and “OK” keys:
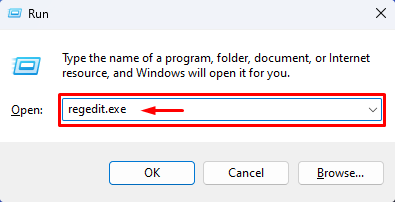
Solution 6: Set Registry
To decrease the high memory usage, users can also adjust the registry key. First, type “regedit.exe” in the Run search box and hit the “Enter” key:
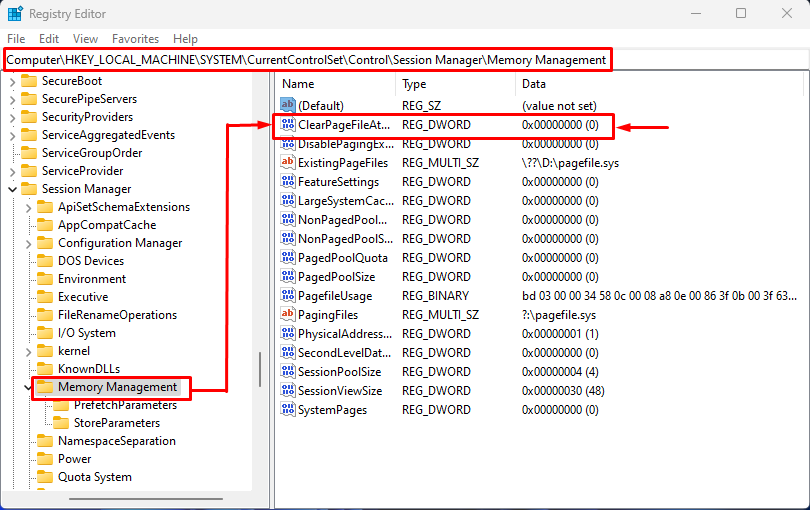
Then, redirect to the below-listed path in the Registry editor:
After that, choose the “ClearPageFileAtShutDown” option and double-click on it:
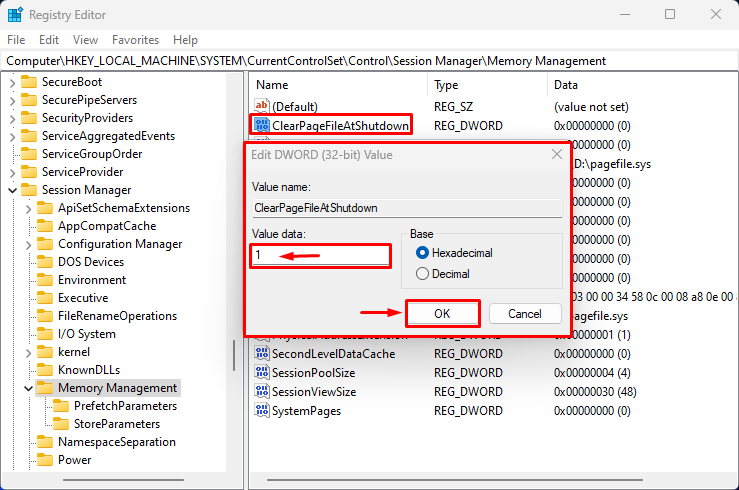
Next, set “1” in the “Value data” field and click on the “OK” button:
Solution 7: Scan Virus
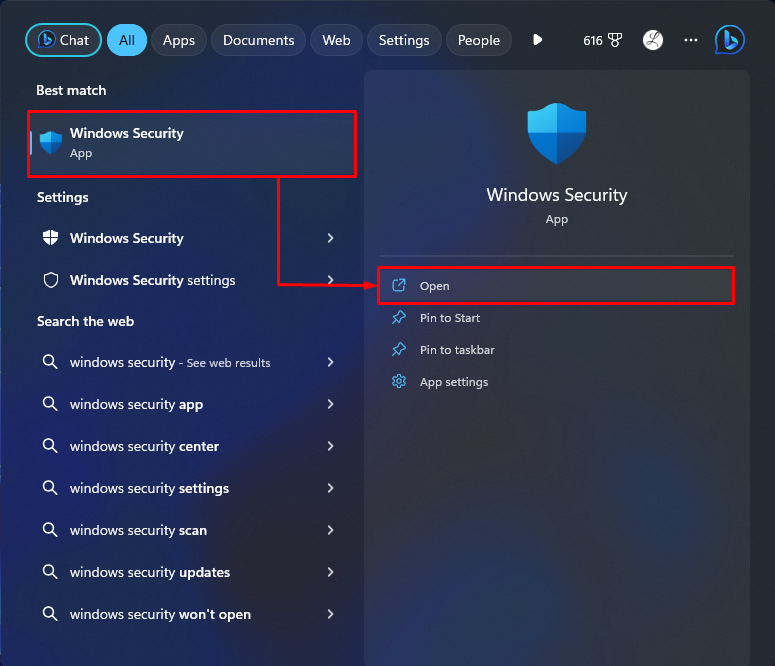
Sometimes, viruses and malware can also cause high memory usage. In this situation, it is required to scan and remove viruses immediately as these are harmful to the system. First, search for “Windows Security” in the Start menu and open it:
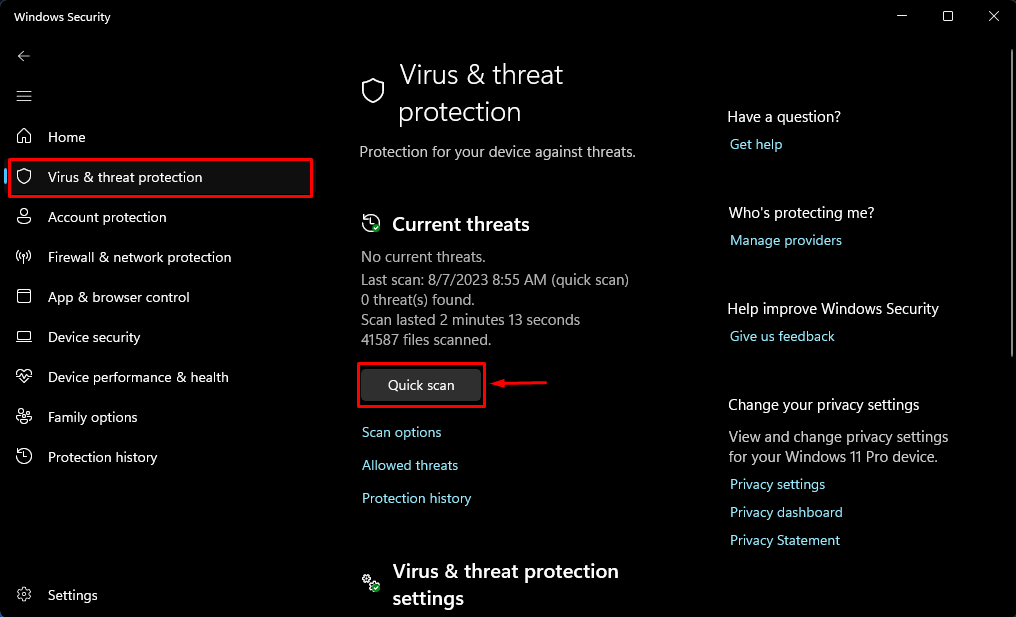
Then, tap on the “Quick scan” option in the “Virus & threat protection” window:
We have efficiently explained the method to check memory usage and all the possible solutions to reduce it in Windows 11.
Conclusion
To check the memory usage on Windows 11, open Task Manager and view the “Memory” column in the “Processes” window. To reduce memory usage, different solutions can be used, such as ending unnecessary apps or programs, disabling Startup apps, disabling SysMain service, defragging the hard drive, adjusting the system for best performance, modifying the registry key, or scanning and removing viruses. This blog has illustrated the way to check memory usage on Windows 11 and different solutions to reduce it.
Source: linuxhint.com