How to Change User Access Control Settings on Windows?
This guide will provide a process to change “UAC” settings.
How to Change User Access Control Settings on Windows?
Making changes to the “User Access Control” settings requires elevated administrator permissions. By default, the “UAC” is set to level 2, in which the user gets notified whenever any app tries to make changes on the computer. However, it can be changed to other options. To do so, follow the step-wise below-provided guide.
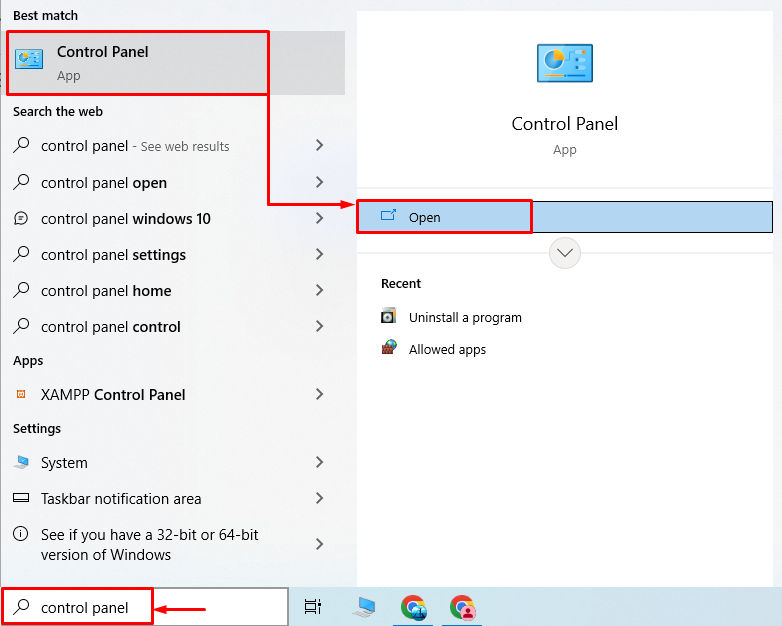
Step 1: Launch Control Panel
First, move to the Startup menu and open the “Control Panel” window:
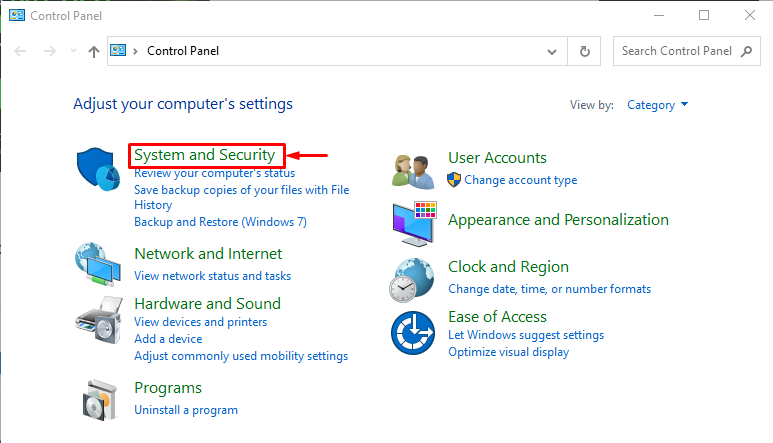
Step 2: Launch System and Security Settings
Now, click on the below-highlighted section to open the “System and Security” settings window:
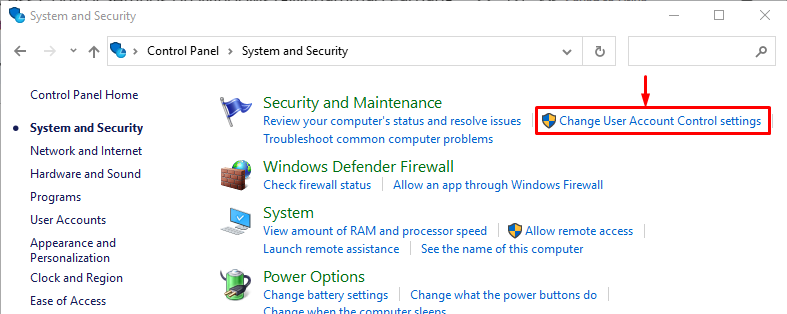
Step 3: Launch User Access Control Settings
Click on the highlighted option and launch it:
Step 4: Change User Access Control Settings
To make any changes move the slider up or down. Select the “Always notify” option to enable it or select the “Never notify” option to disable it. Set the slider to any option and hit the “OK” button to make changes:

That’s all! You have successfully learned the way to change the “UAC” settings.
Conclusion
To change the “User Access Control” settings, first, open the “Control Panel”. Then, open the “System and Security” window. After that, navigate to the “User Account Control” settings window. Select the desired option by moving the slider up or down and hit the “OK” button to save changes. This tutorial elaborated on the procedure to change the “User Access Control” settings on Windows.
Source: linuxhint.com