How to Change the Visibility Level of GitLab Project or Repository?
GitLab enables developers to have three different types of projects, such as “Public”, “Internal”, and “Private”. Developers can change the visibility mode of the GitLab project whenever they are required. The public visibility level projects are accessible to any user even if they do not have an account on your remote server. On the other hand, private projects are accessible to those who are members of your group or project.
This tutorial will provide the easiest way to change the visibility level of the GitLab project.
How to Change the Visibility Level of GitLab Project or Repository?
To modify the visibility level of the GitLab project or repository, try out the below-stated process:
-
- Move to the GitLab remote host.
- Select the preferred project.
- Access its “General” tab from underneath the “Settings” category.
- Scroll to the “Visibility, project features, permissions” section and expand it.
- Choose the desired visibility level and save changes.
Step 1: Choose GitLab’s Project
First of all, choose your desired GitLab project from the list. For instance, we have selected our “Testing1” project:

Step 2: Access Project Settings
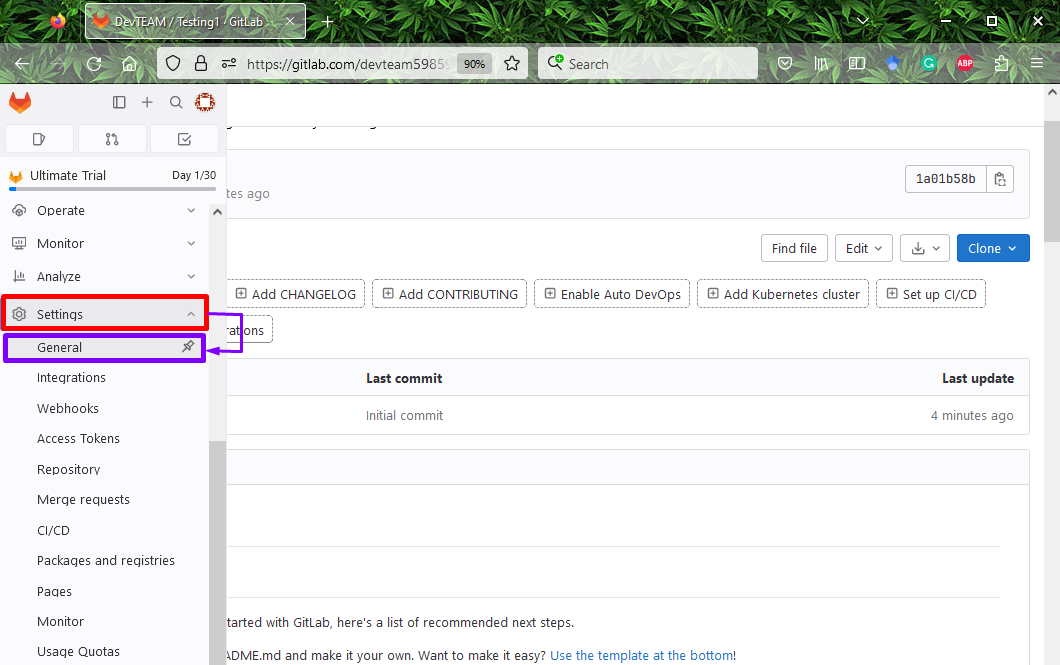
Then, click on the “Settings” category from the left-side tab and hit the “General” option:
Step 3: Expand Visibility, Project Features, and Permissions Settings
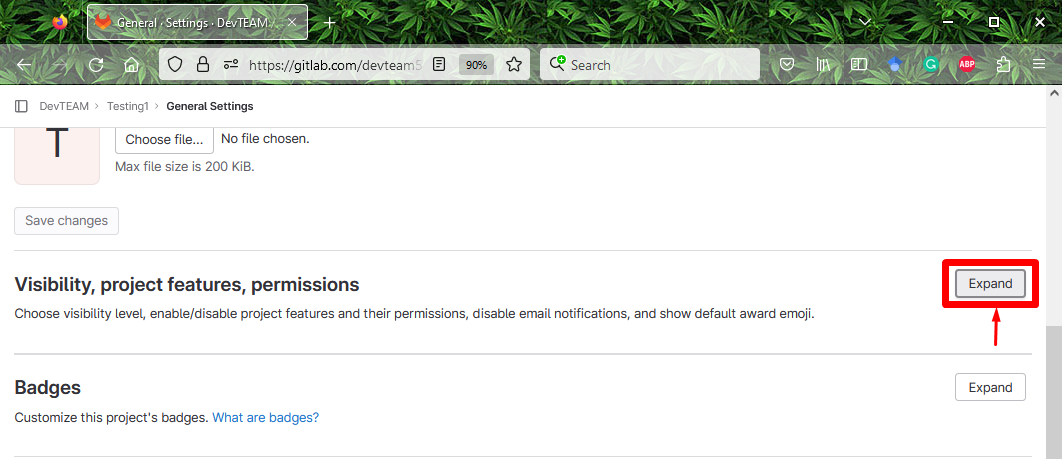
Next, locate the “Visibility, project features, permissions” section and expand it by clicking on the “Expand” button:
Step 4: Set Project Visibility
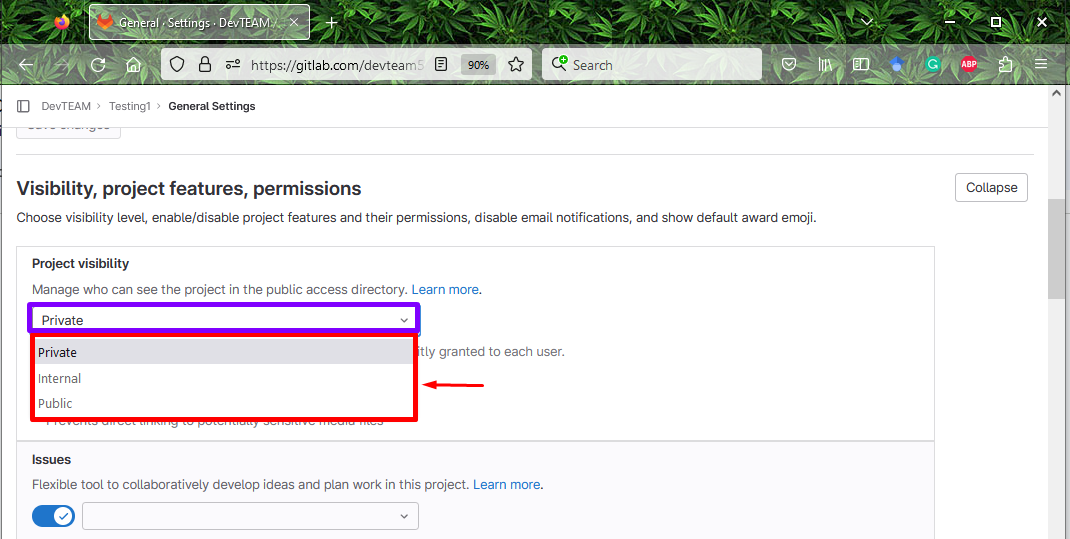
Now, choose the required visibility level from the expanded list. Here, we have selected the “Private” visibility level:
Step 5: Save Changes
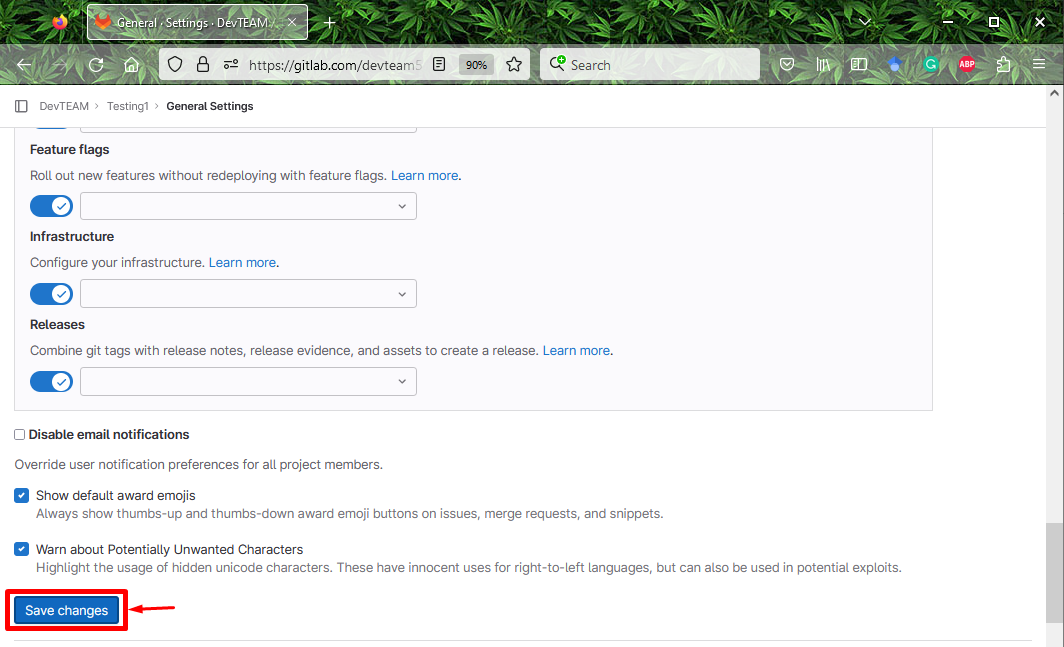
Lastly, save all the added changes by hitting the “Save changes” button:
According to the below-highlighted appeared pop-up message, we have successfully updated the visibility level of our GitLab project:
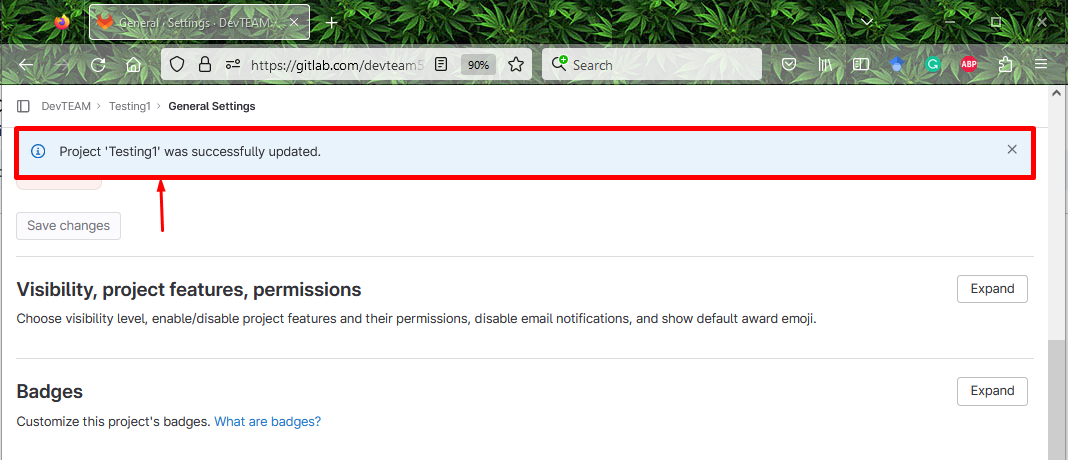
That’s all! We have described how to modify the visibility level of the GitLab project or repository.
Conclusion
To modify the visibility level of the GitLab project or repository, first, move to the GitLab remote host and select the preferred project. Then, access its “General” tab by clicking on the “Settings” category. Next, locate the “Visibility, project features, permissions” section and expand it. After that, select the desired visibility level and save the changes. In this post, we have demonstrated how to modify the visibility level of the GitLab project.
Source: linuxhint.com
