How to Change the Font Family of an HTML Element Using JavaScript
This guide illustrates the complete process to change the font family of an HTML element using JavaScript.
How to Change the Font Family of an HTML Element Using JavaScript?
To change the existing font family of the HTML element, use the style “fontFamily” property with a list of fonts separated by a comma. This property sets, modifies, or retrieves the desired font family of a particular HTML element.
Basic Syntax
In the above syntax, the “font1, font2,..fontN” values represent the list of font family names including the generic such as “sans-serif”, “serif” etc.
Let’s implement the above syntax to change the font family of the specified HTML element.
HTML Code
First, look at the stated HTML code:
<button onclick="changefont()">Click Here</button>
In the above code lines:
- The “<h2>” tag specifies a subheading of level 2 with an assigned id “heading2”.
- The “<button>” tag adds a button with an “onclick” mouse event to invoke the function “changefont()” upon button click.
JavaScript Code
Next, overview the below-given code:
function changefont(){
var elem= document.getElementById("heading2");
elem.style.fontFamily ="Times New Roman", serif;";
}
</script>
In the above code snippet:
- The function named “changefont()” first declares an “elem” variable that applies the “getElementById()” method to access the added heading using its id “heading2”.
- After that, utilize the style “fontFamily” property to modify the font family of the fetched heading.
Output
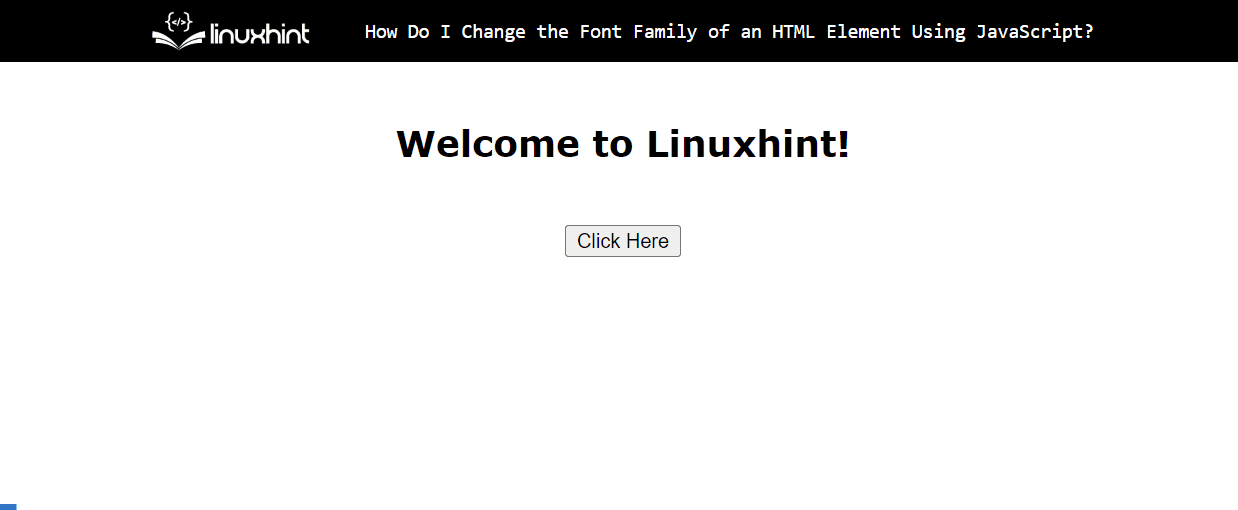
As shown in the above output, the font family of the given heading element i.e., “<h2>” changes successfully at a button click.
Conclusion
JavaScript offers the style “fontFamily” property to change the font family of an HTML element. This property allows the users to modify the existing font family of an element to the downloaded or generic font family. It makes the elements more interactive and eye-catching. This guide demonstrated the complete process to change the font family of an HTML element using JavaScript.
Source: linuxhint.com