How to Change HDMI Output to Input on Laptop
This article will show you how to change your HDMI output port to input on your laptop, which will be very useful for laptop users.
How to Change HDMI Output to Input on Laptop
As discussed above, you cannot change the HDMI output to the input directly on your laptop, but you can use some methods to make this happen. These methods details are given below.
Method 1: Using an HDMI Capture Card
The HDMI capture cards allow users to view one device display on their laptops. The HDMI capture card is a device that captures and records video and audio signals from an HDMI output. Then converts the output into a format that the computer can use.
To change the HMDI output to the input on the laptop, you must have the following equipment:
- Laptop
- HDMI Capture Card Device for Changing the Output to Input on the Laptop
- HDMI Cable for Connection
- Client Device with HDMI Port
Then use the below-given steps to change the HDMI output to the input on the laptop:
Step 1: Insert the HDMI capture card into the laptop.
Step 2: Now insert the HDMI’s one end into the HDMI port in the capture card and another end into the HDMI port on another device.
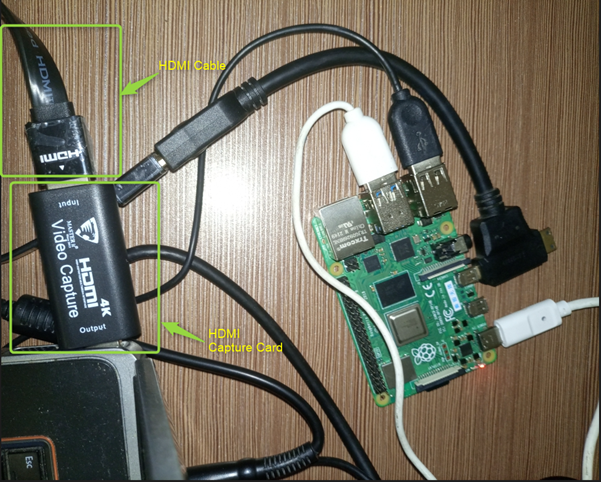
Note: In my case, I have connected the Raspberry Pi device to a laptop using the HDMI cable and capture card. The HDMI capture card is inserted into the laptop as it acts as a monitor for the Raspberry Pi display. While the HDMI port’s one end is inserted into the Raspberry Pi device and the other into the capture card device port.
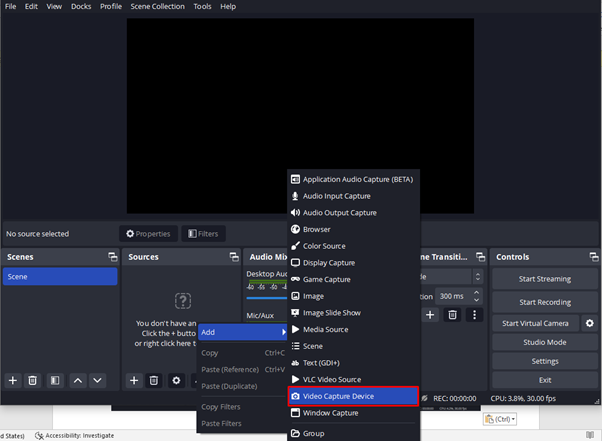
Step 3: Download and install OBS software on your laptop from here and right click on the “Sources” option and select the “Video Capture Device” from the “Add” option.
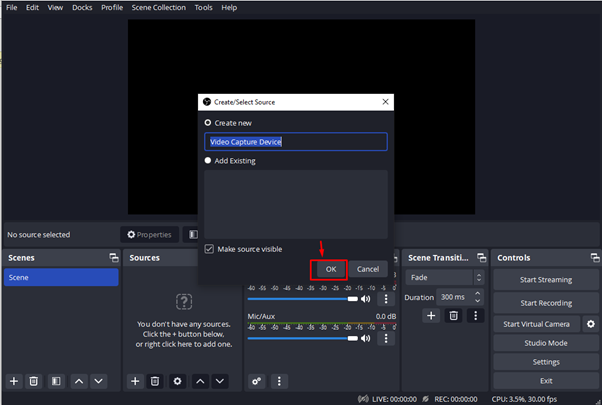
Step 4: Click “OK” to confirm adding the video capture device.
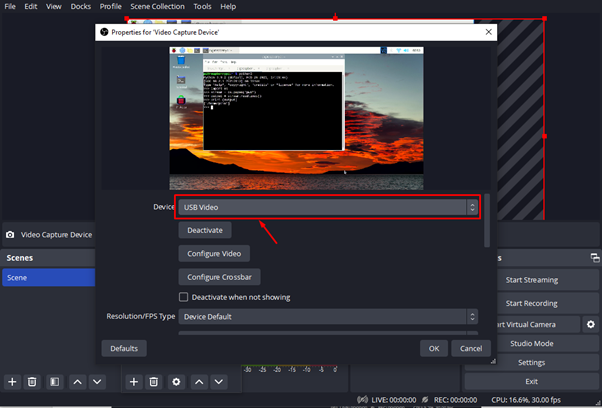
Step 5: Double-click on the “Video Capture Device” option.
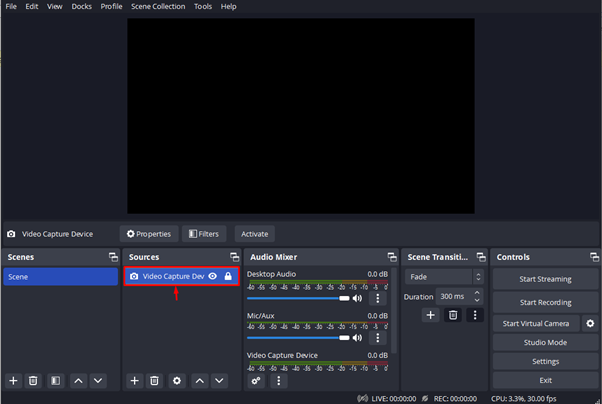
Step 6: Select the “USB Video” option to view the other system display on the OBS Studio.
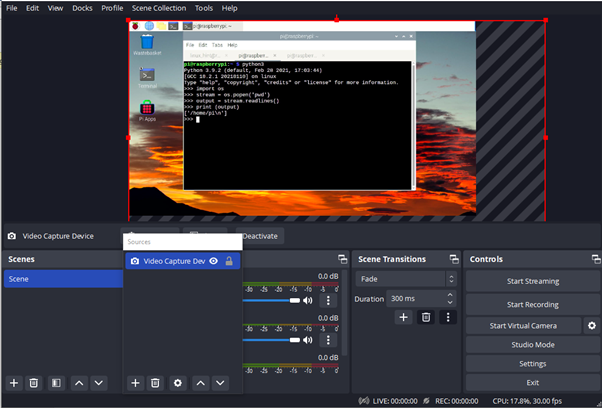
You will see the other device’s desktop display on the OBS software.
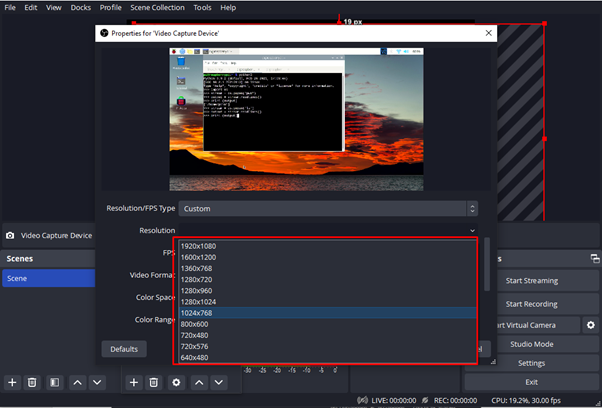
You can change the screen resolution according to your choice by selecting the “Custom” option and then choosing the resolution.
At this point, you have successfully viewed other system’s desktop over your laptop using the HDMI capture card. The same process can be done for Xbox360 or PS4.
You can purchase an HDMI capture card from Amazon using the following link.
Method 2: Without an External Source
If you don’t want to spend money purchasing a capture device to change HDMI output to the input on a laptop, then there is another solution. It only requires software to be downloaded on your laptop and allows screen sharing to display the content of another device onto your laptop. Software like Spacedesk and VNC allows you to view the display of other devices on your laptop screen that is streaming over your WiFi connection.
How to Use Spacedesk
Let me show you how you can use software like Space desk using the following steps:
Step 1: Install the Spacedesk server and client on both systems and this is a better approach since you can switch the displays between two systems according to your choice.
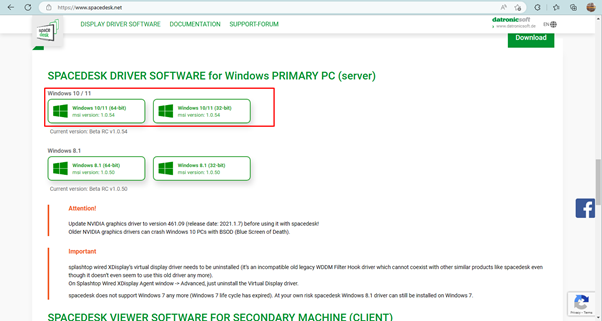
The server will run in the background, and it can be downloaded from here.
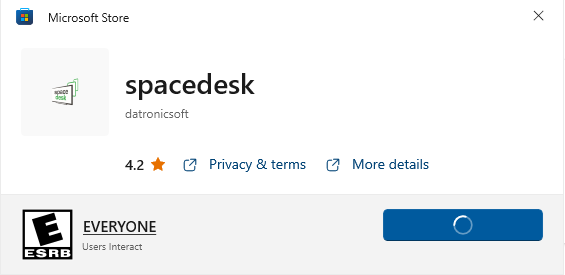
While for client, you can download and install the latest version from Microsoft Store.
Step 2: Open the client app on any system and you will be able to see the server on the application dashboard.
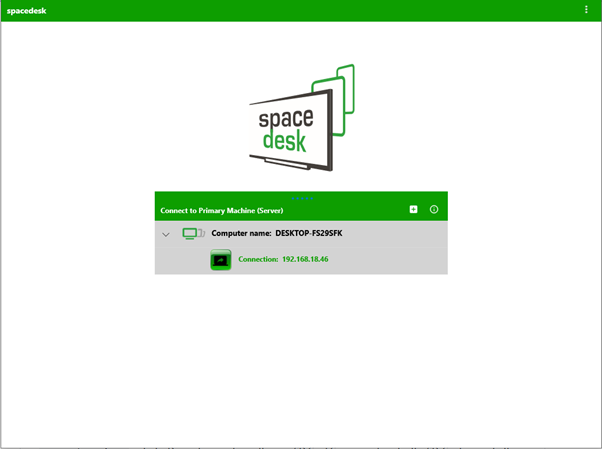
Step 3: Click on the “Connection” to view the other laptop display on your other laptop.
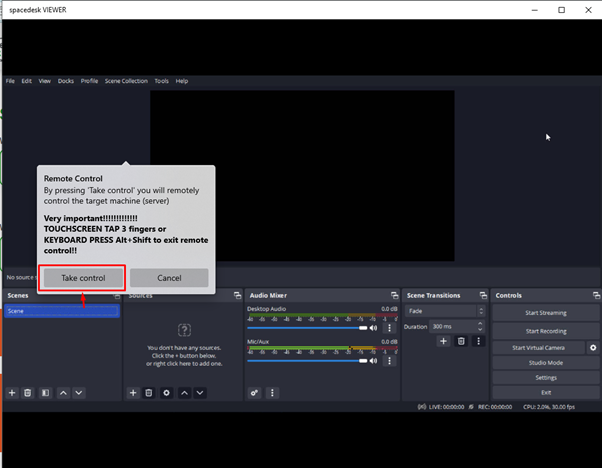
Note: In my case, I have accessed the OBS Studio Software on the client laptop from my server laptop, which is already opened in full screen mode on the server laptop.
Step 4: Click on the screen and select the “Take control” button to get full control over the client system from the server.
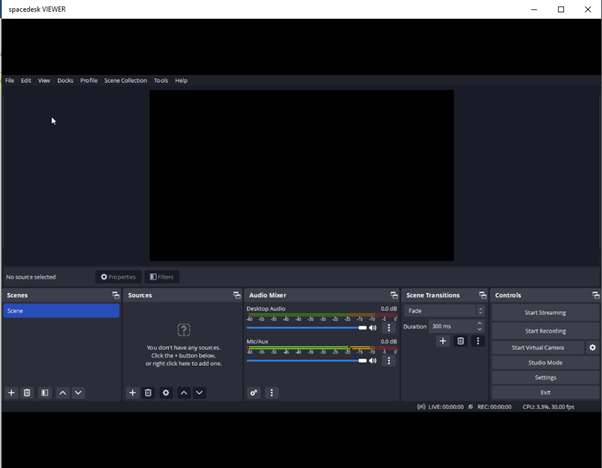
This way, you can see the one laptop/system output on your laptop.
To use VNC for displaying another system, you can follow the guide here, which shows accessing a Linux system on a laptop. The same approach will be used for displaying two windows laptops.
Method 3: Wirelessly Connect Two Devices
Users interested in viewing one device’s display on a laptop and controlling its functionalities can use the wireless option to perform this operation. For this purpose, the users must follow the below-given steps:
Note: The below steps show you connecting two laptops wirelessly and displaying one laptop display on the other.
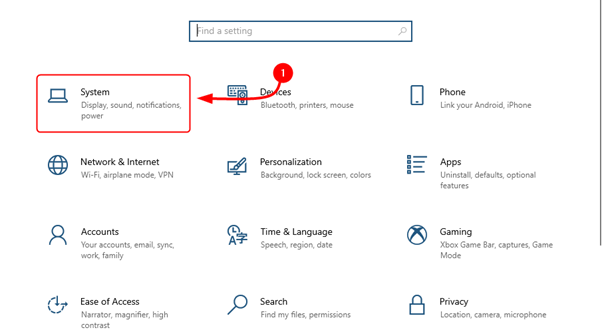
Step 1: Go to the “System” section on one laptop’s “Settings” option.
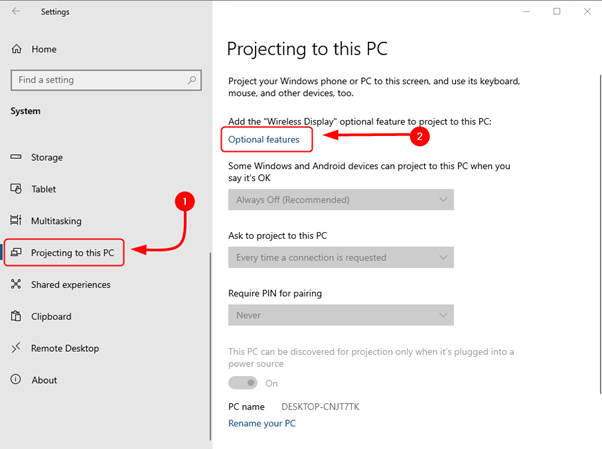
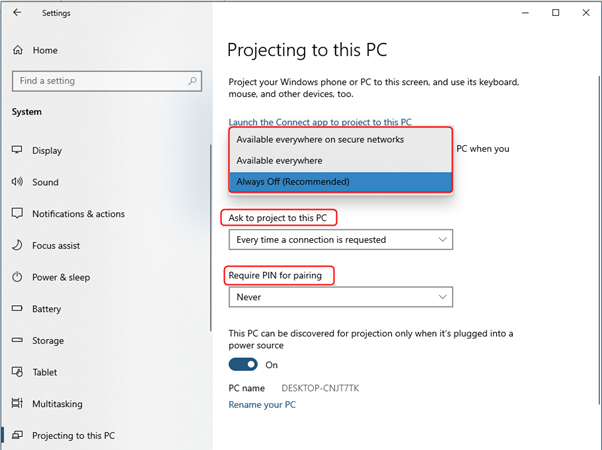
Step 2: Select “Projecting to this PC” option and select “Optional features”.
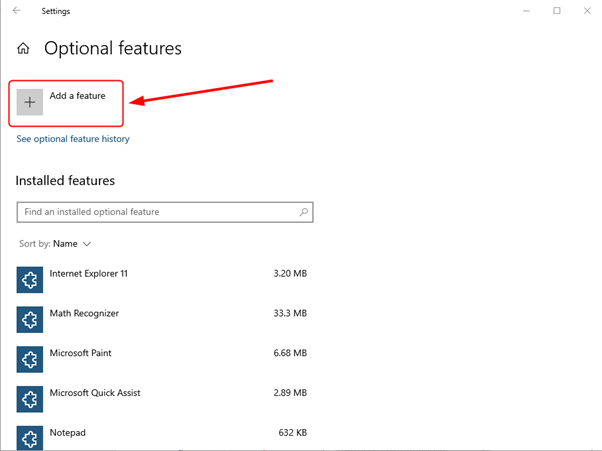
Step 3: Select “Add a feature” option.
Step 4: Search “Wireless Display” and install it on your system.
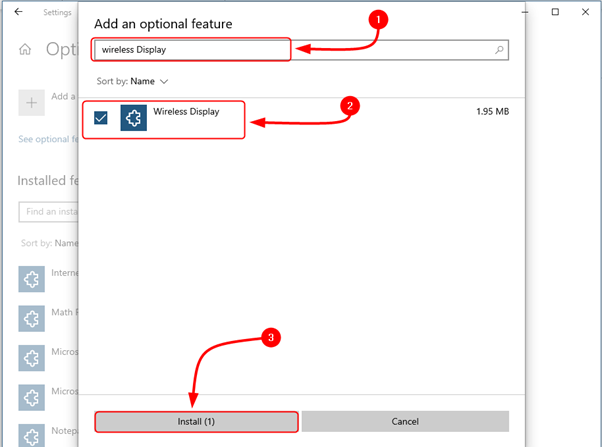
You can change the settings according to your choice.
Note: You must perform these steps for both laptops.
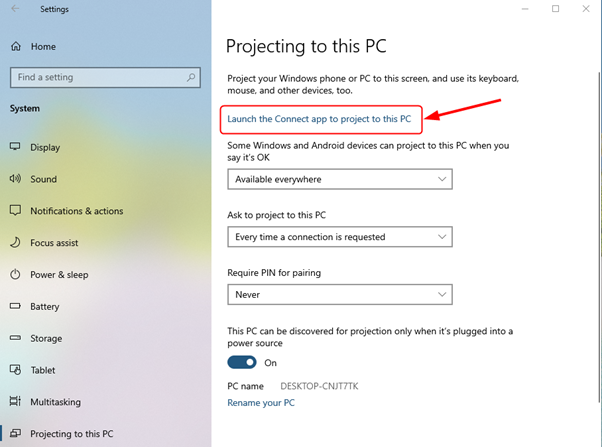
Step 5: After the installation, open the “Connect app” on your first laptop.
Step 7: Now, head toward the second laptop, launch the project window using the F8 button, and select the “Connect to a Wireless display” option.
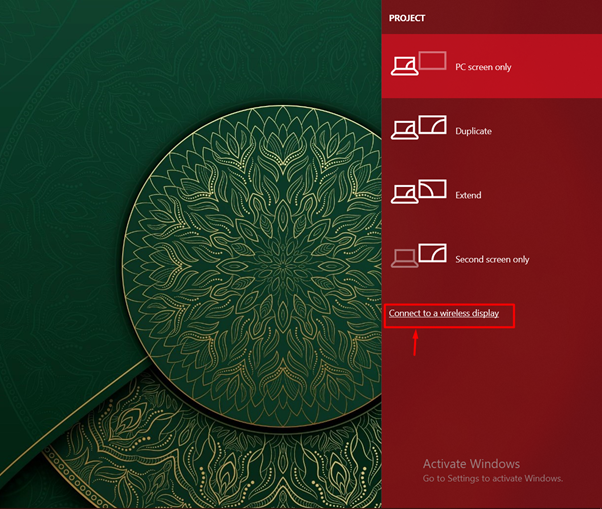
Note: The key can be different in your case. You will see the project icon on the key on your keyboard.
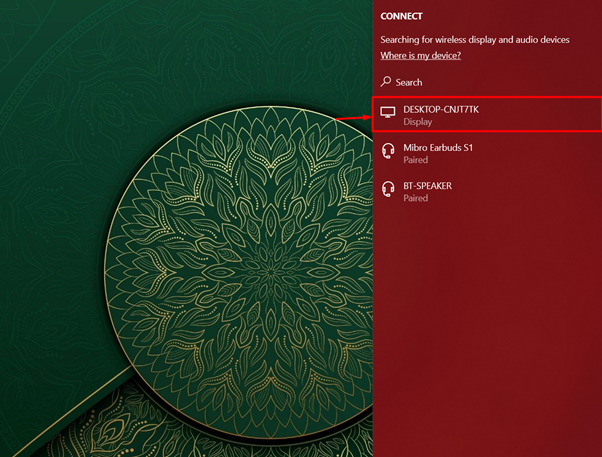
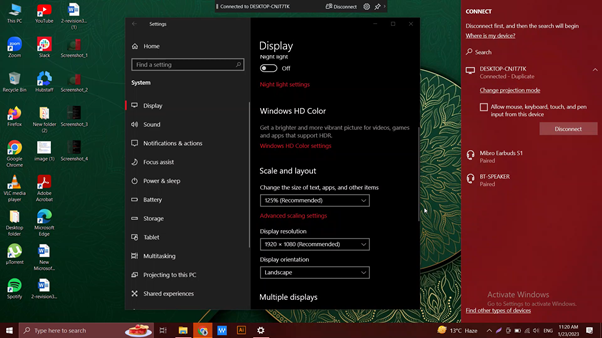
Step 6: The first laptop desktop appears in the search. Click on this option to connect the first laptop to this laptop.
Step 7: After a successful connection, you can select the “Detect” button and switch to any display you want.
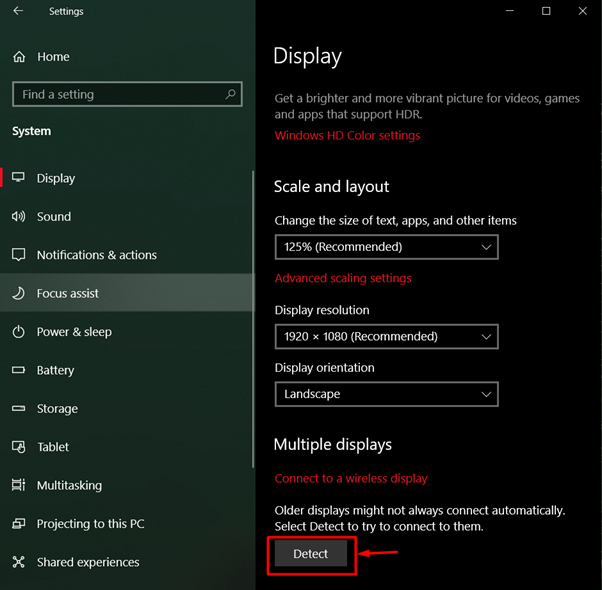
The below screenshot is the display of one laptop on another laptop. You can switch the display according to your choice from the “Detect” option. You can connect other devices through this method too.
Conclusion
The HDMI port is a handy option that allows users to share a screen between two devices. Using an HDMI port to output your laptop display is simple, but you will need to change HDMI output to input when displaying other devices’ displays onto your laptop. For this reason, you will require a solution to enable this feature. The above methods will help you change the HDMI output to the input on your laptop to display the content of another device onto your laptop screen.
Source: linuxhint.com