How to Capture Screenshots Using Snipping Tool?
The snipping tool is the Microsoft Windows utility to capture screenshots in full screen, rectangular, free form, or window form. However, most of the time, the user wants to capture the content or image, or sometimes, the user is interested in modifying the snaps and wants to highlight them. Depending on the requirement, the user can save the images in any image format.
This article will elaborate on how users can capture and save the snips using the snipping tool.
How to Capture Screenshots Using a Snipping Tool?
To capture the screenshots using the “Snipping Tool”, the user can utilize any mode to take their screenshot. For a demonstration, go to the below-listed methods:
Approach 1: Capture Screenshots Using “Snipping Tool”
To capture screenshots in the “Snipping Tool” the user has a few modes in the “Mode” tab. Below is the procedure for capturing screenshots:
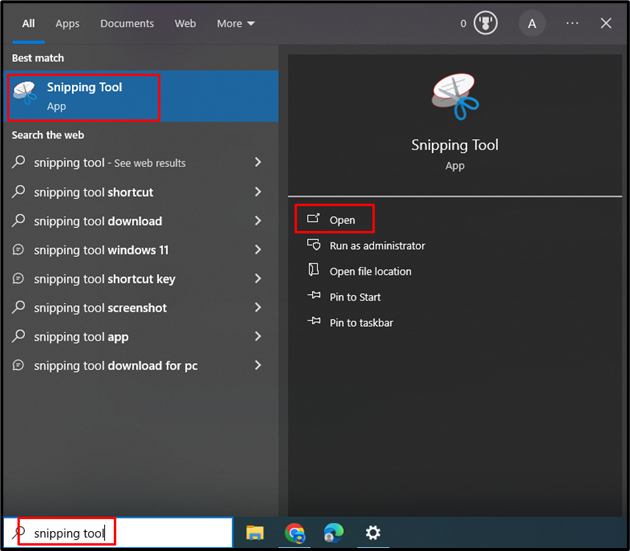
Step 1: Search For the Snip Tool in “Start” Menu
Search the “Snipping Tool” from the Windows “Start” search bar. Then, launch the tool by clicking on the “Open” button:
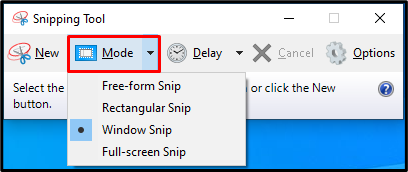
Step 2: Explore the Snipping Tool Capturing Mode
Users can capture screenshots using the “Snipping Tool” in capturing modes. To do so, go to the “Mode” option in the “Snipping Tool” dashboard menu. In the “Mode” drop-down menu, users have four options. Depending on the user’s need, click on any option to capture screenshots:
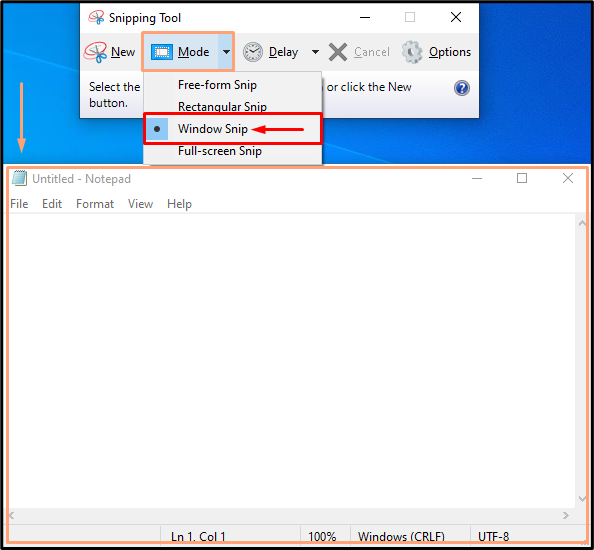
Step 3: Capture Screenshots Using Snipping Tool in “Window Snip” Mode
For demonstration, we have utilized “Window Snip” to capture screenshots. It will capture the snip of the chosen window. Here, we have taken a snip of the Notepad window:
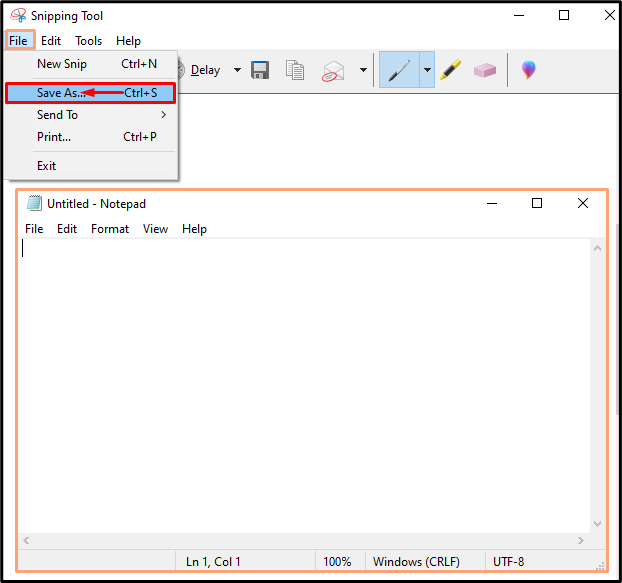
Step 4: Save the Captured Screenshots
To save the captured screenshot of the window, navigate to the “File” tab and click on the “Save As…” option. This will save the captured screenshot in JPEG, PNG, and so on format:
Note: The approach demonstrated in the above section, the user can use a similar method to capture the screenshot in the other “Mode”. Below is a demonstration of the “Mode” functionalities:
| Snipping Tool Mode | Functionality |
| Free-form Snip | To capture the screenshot using freehand |
| Rectangular Snip | Using drag, capture the screenshot in the rectangular form |
| Window Snip | To capture a screenshot of Windows, like Notepad, Google tab, or app interface. |
Approach 2: Capture Screenshots Using “Win+Shift+S” Shortcut Keys
Users can use the Windows shortcut combination key “Win+Shift+S” to capture the screenshots in Windows 10. For demonstration, follow the instructions below:
Step 1: Capturing Screenshots Using Shortcut Keys
When the user hits the shortcut keys “Win+Shift+S”, a different mode of snipping tool will appear on the Windows screen. Depending on the scenarios, a user selects the desired mode from the four capturing mode options:
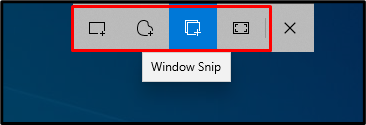
Step 2: Capture Screenshots in “Rectangular” Mode
For instance, let’s use “Rectangular” mode. First, the “+” icon will appear on the screen, drag the icon to capture the screenshot of the object in a rectangular shape. The snip will copy to the clipboard upon selection. Users can now have flexible access to paste it into your document using the “CTRL+V” command:

That’s all about capturing a screenshot using the “Snipping Tool”.
Conclusion
To take screenshots using the “Snipping Tool”, first search for the “Snipping Tool” in the “Start” field. After launching the tool, select the “Mode” to capture the screenshot. Then, save the captured screenshot in any image format. This blog has demonstrated approaches to capture screenshots using the Snipping Tool.
Source: linuxhint.com