How to Capture Screenshots on a Windows PC?
This blog is a comprehensive guide to capturing screenshots on a Windows PC:
How to Capture Screenshots on a Windows PC?
The following methods are utilized to capture screenshots on Windows:
- Using the Print Screen or PrtScn Button.
- Using Windows Snipping Tool.
- Using the Windows Xbox Gamebar.
- Using Steps Recorder.
- Using Third-Party Tools.
- Power + Volume Up Keys (For Surface Devices).
Method 1: Capture Screenshots Using Print Screen or PrtScn Button
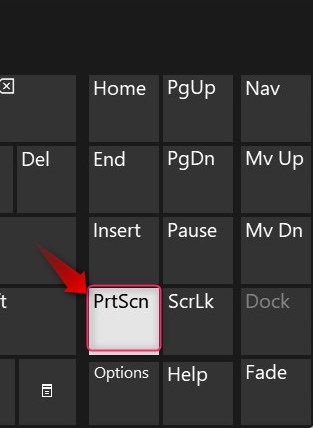
One of the most efficient and oldest methods to capture screenshots on Windows is using the Print Screen or PrtScn button. By pressing the Print Screen or PrtScn button, you can prompt the Windows OS to automatically capture the screenshot and save it on the clipboard. It can be found in or around the Numpad of your keyboard:
After that, you can use the copied screenshot by pasting it into apps like Microsoft Paint, Word, etc.
Note: The screenshots captured using the PrtScn key are temporary and will be discarded on a system reboot if not saved using another application.
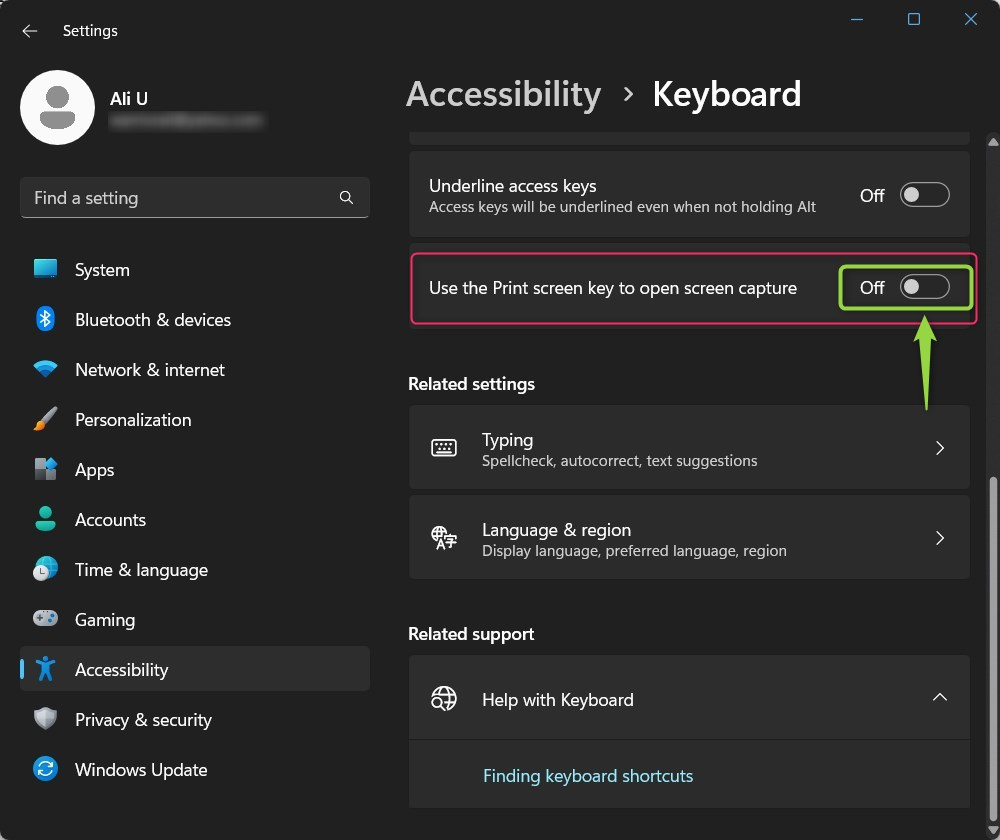
If the PrtScn key is not working, press the Windows + I keys to trigger the Windows Settings App, and from there, navigate to Accessibility ⇒ Keyboard and toggle the highlighted option:
How to Capture the Screenshot of Current Windows Using the Keyboard Shortcut in Windows?
To capture a screenshot of the current Windows using the keyboard shortcut, press the Alt + Print Screen/PrtScn keys and it will capture/place it on the clipboard from where you can paste it to other apps.
How to Automatically Save the Captured Screenshot in Windows Using the Keyboard Shortcut?
To capture a screenshot and save it automatically to the default folder (Pictures ⇒ Screenshots), press the Windows key + Print Screen/PrtScn keys. If you see the screen go dim, it indicates that the screenshot is taken and saved in the default folder.
Method 2: Capture Screenshots Using the Windows Snipping Tool
To capture screenshots on Windows, Microsoft offers a built-in utility known as the Snipping Tool that enables users to capture screenshots and record the video from their system’s display. It is a legacy tool that evolved and reached its perfection in the latest version with lots of features and improvements. To capture screenshots using the Snipping Tool on Windows, we have compiled a comprehensive guide to using the Snipping Tool.
Method 3: Capture Screenshots Using the Windows Xbox Game Bar
The Xbox Game Bar is defined as the overlay for gamers that is loaded with several widgets/tools to capture and share screenshots and clips. To capture screenshots on Windows utilizing the Xbox Game Bar, follow these steps:
Step 1: Open/Enable Xbox Gamebar
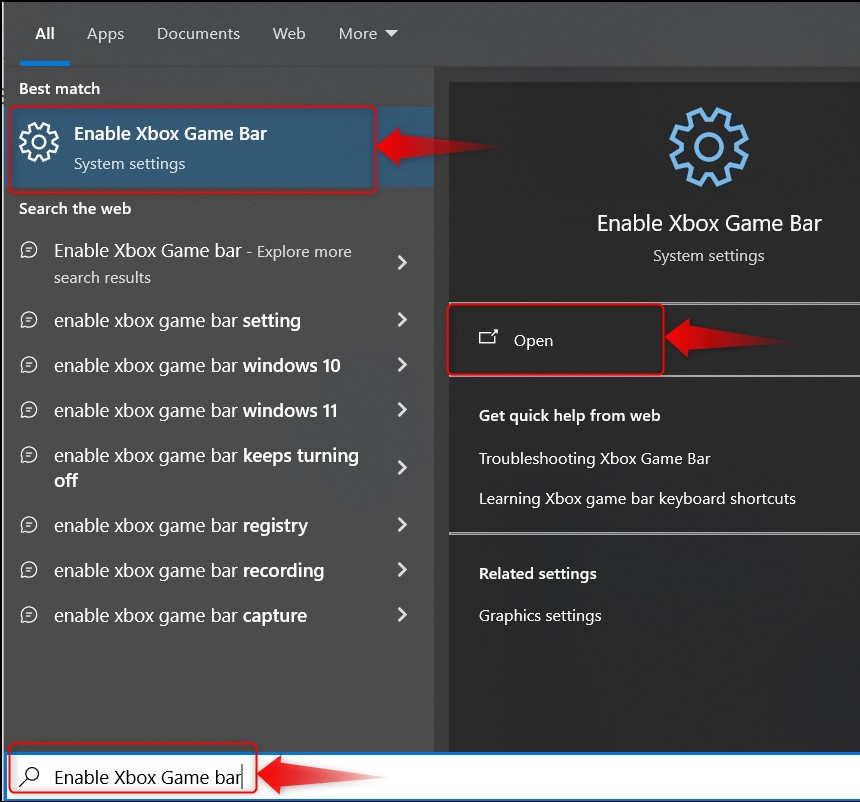
Press the Windows + G keys on your keyboard to open the Xbox Game Bar overlay and if it does not open, enable it by using the Windows Start menu by searching for “Enable Xbox Game Bar”:
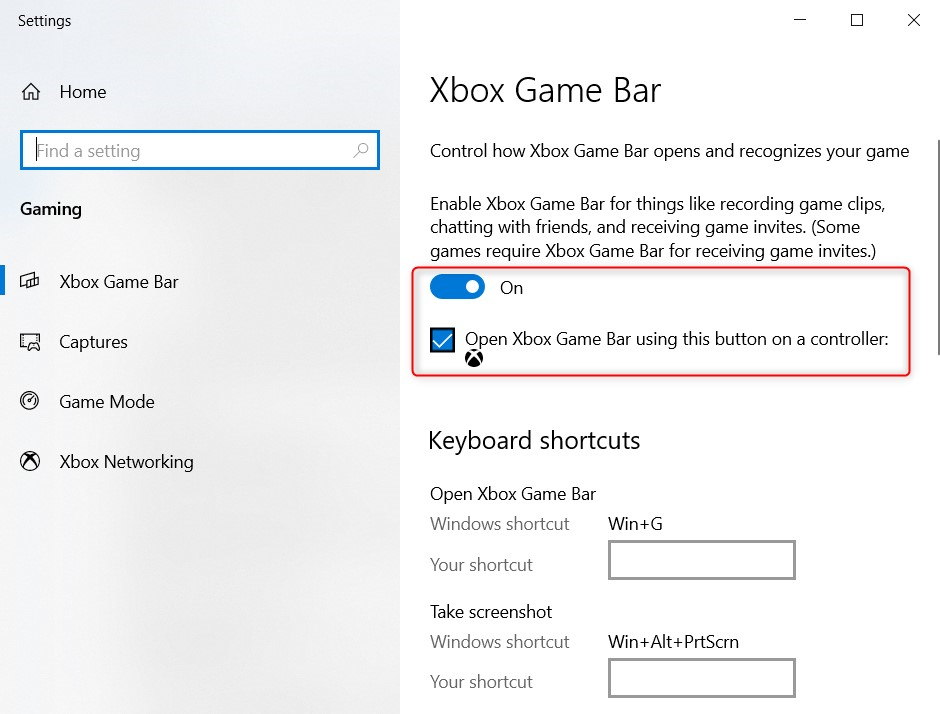
Next, toggle the Xbox Game Bar to On and, if you use an Xbox controller, check the highlighted option. In the same window, you can also customize the Hotkeys for the Xbox Game Bar:
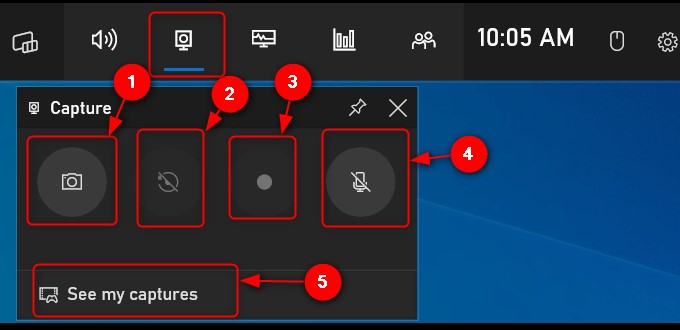
Now press the Windows + G keys again to open it and you will see the following overlay:

Step 2: Capture Screenshots and Record Video Clips
If you use the Camera button, you can:
- Capture the screenshot.
- Record the prior 30 seconds only (Windows + Alt + G).
- Start Recording (Windows + Alt + R keys) for up to 4 hours.
- Mute/unmute the microphone.
- Open the default folder for the captures:
While you’re at it, learn more about the use of Xbox Gamebar.
Method 4: Capture Screenshots Using the Steps Recorder
The Steps Recorder or Problem Steps Recorder (PSR) is a software utility included in Microsoft Windows that allows users to create a troubleshooting tutorial. It records each step that the user performs while it is open, and the Start Record button is triggered by capturing screenshots of each. We have compiled a detailed guide to use the Steps Recorder on Windows.
Method 5: Capture Screenshots Using Third-Party Tool
Since Windows has more users, it is obvious that it will have more developer community. So new tools and applications are launched daily. Here is a list of potential screenshot-capturing third-party tools or applications that offer stunningly impressive features:
- Screenpresso (A feature-rich tool that offers screen-capturing, printing, sharing, and editing at your fingertips).
- ShareX (An All-In-One Screen Capturing Open-Source Lightweight Tool).
- Ksnip (An Open Source and Better Alternative for Snipping Tool).
- Nimbus (A Screenshot Capturing Tool for Team Collaboration).
- PicPick (A Freemium Screen Screen-Capturing Tool With an Extensive Set of Features).
Method 6: Capture Screenshots on a Surface Device
To capture screenshots on a Surface Device, press and hold the Volume down key + Power button simultaneously. Additionally, you can use all methods (discussed above) to do the same on Microsoft Surface devices.
Conclusion
To capture screenshots on a Windows PC, use built-in tools like Snipping Tool, Snip and Sketch (Keyboard Shortcut), Xbox Gamebar, or third-party tools. Among all these, we would refer to using the Snipping Tool or the Screenpresso (third-party tool) to get you going. This blog has demonstrated all the methods you can use to capture screenshots on a Windows PC.
Source: linuxhint.com