How to Auto Refresh in Google Chrome?
“Web browsing has been an integral part of the internet ever since it first came out. As the users kept growing, there was a growing need for web browsers. To cater to that need and commercial purposes, different companies came out with their own web browsers.
Over the years, various new web browsers were introduced with varying degrees of acceptance and popularity. Some of the more famous web browsers introduced in the 1990s and early 2000s include “Internet Explorer”, “Firefox”, “Opera” etc.
However, since the launch of Google Chrome back in 2008, it has dominated the web browser market. The introduction can be best described by the phrase “Chrome burst onto the scene”. With its speed, unmatched efficiency, and pleasant user interface, it quickly became the most used and popular web browser in the world.
As years rolled along, Chrome got better and better, introducing new updates and utilities such as “Extensions” to enhance our browsing experience.
While browsing, however, there are times when we are at such a website where you need constant refreshing to view the new updates that have been uploaded. Examples of such websites include a website where you might be viewing stocks or a social media website such as Facebook, Instagram, or Twitter.
In such cases, it would be quite helpful if the website refreshes automatically. However, Chrome does not provide us with the option of auto-refresh by itself. But there are other ways you can auto-refresh on Chrome.
If you are in such a pickle and you want to know how you can set your website or tab to refresh automatically, you are at the right place. We will be describing the different ways you can auto-refresh in this article.”
Refresh Automatically Using a Chrome Extension
Extensions are lightweight programs that can be integrated into your Google Chrome to change the functionality of your web browser. There are thousands of extensions available on Chrome to perform various tasks that normally Chrome does not let us perform.
As the need for auto-refreshing came forward, multiple extensions also became available on the Chrome extension store. There are various extensions available right now for the purpose of auto-refresh; we will look at the 3 best ones.
Easy Auto-Refresh
Easy Auto-Refresh is a Chrome extension released back in 2011. Today, there are over a million users of Easy Auto-Refresh in the world. Any of the extensions that are added to Chrome are very easy to use. The same is the case for Easy Auto-Refresh. To know how to use Easy Auto-Refresh, follow these steps.
Search for “Easy Auto-Refresh” on Chrome.
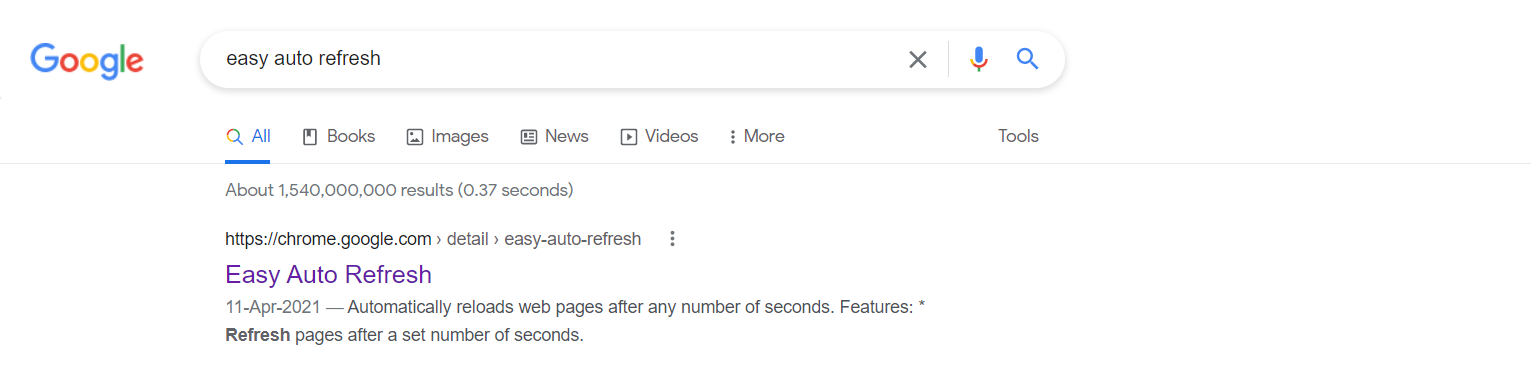
Click on the topmost link. You should be directed to this webpage.
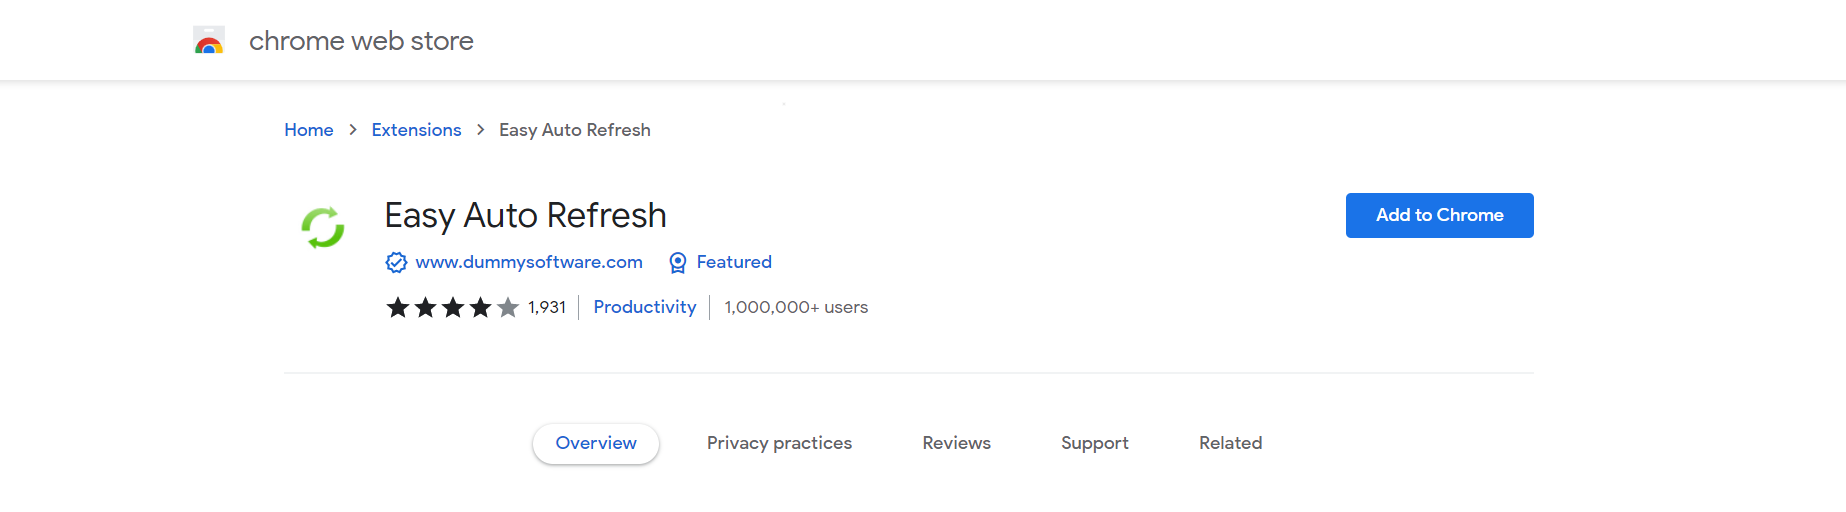
Next, click on the “Add to Chrome” option.
You should see this message pop up. Click on “Add Extension”. As soon as you click on it, a download should start that downloads and installs the extension on your Chrome.

After it is installed, you will be directed to this webpage.
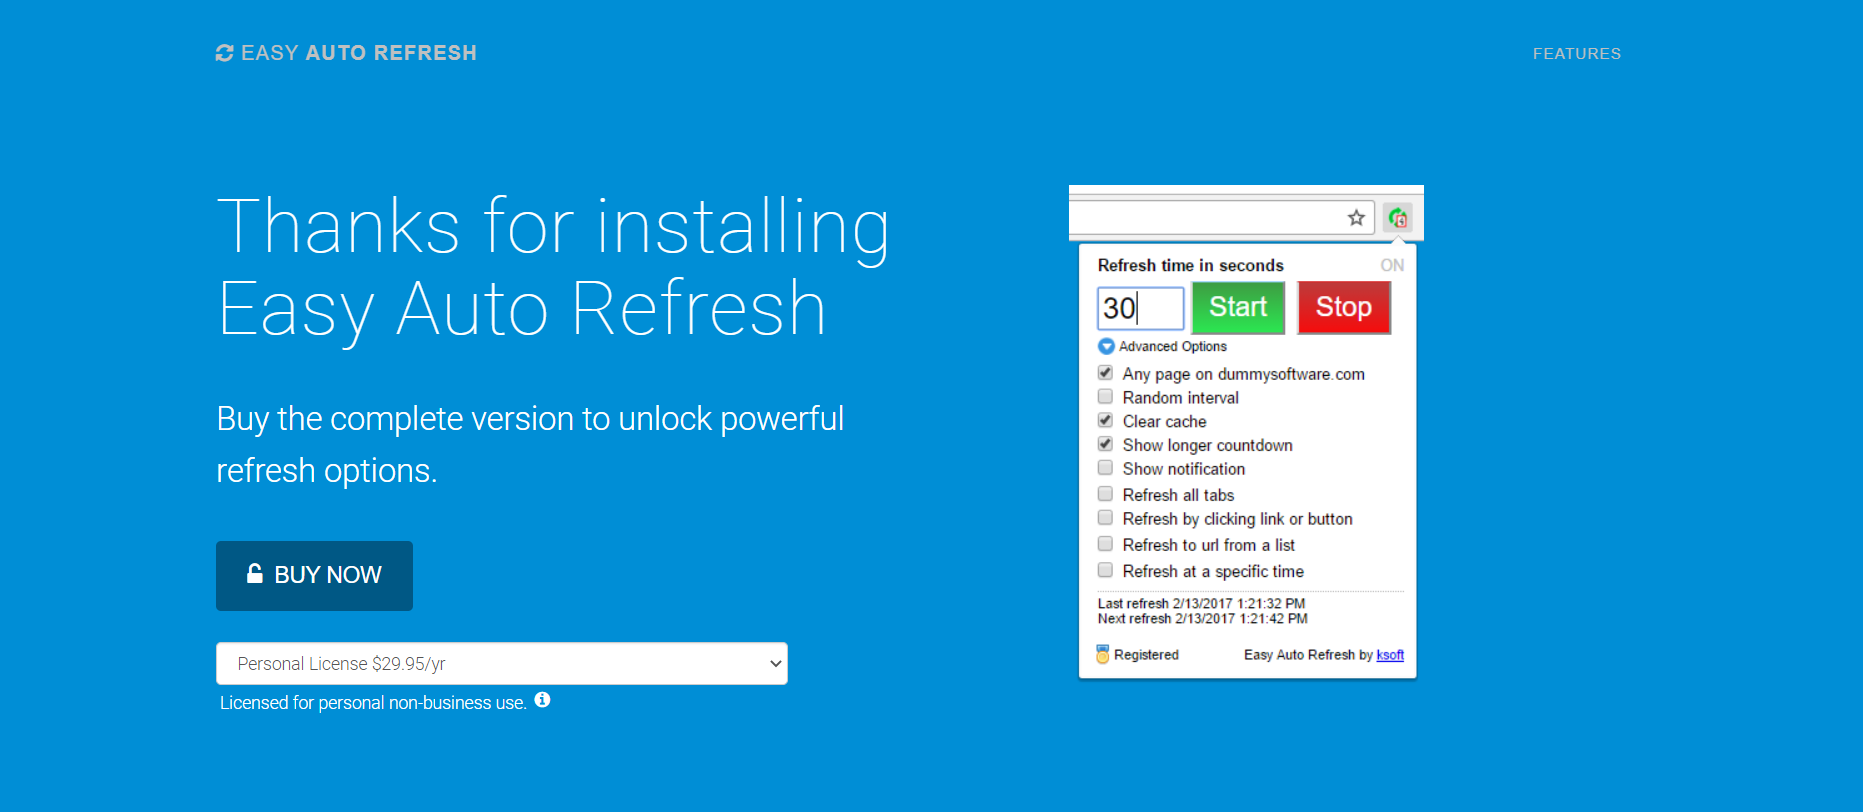
As you can see, Easy Auto-Refresh is not completely free. There are some extra features that can be added upon buying the extension. However, it should perform the basic task of auto-refreshing.
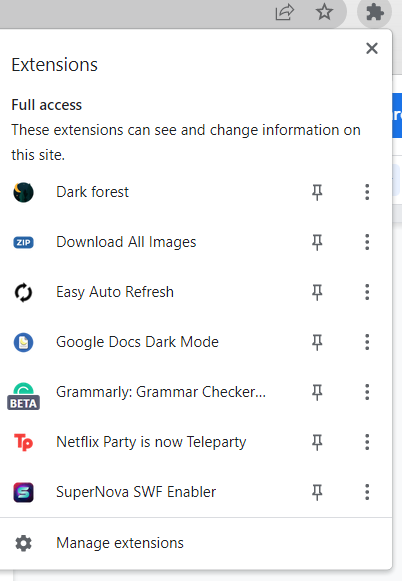
Next, click on the extension option available in Chrome. It’s right next to the bookmark option available on the URL bar. You should see the option of Easy Auto-Refresh. Click on it.
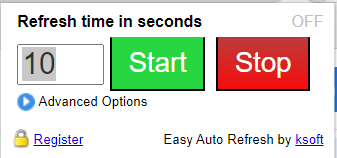
Once you click, you should see this on the top right of your window. Set the time of auto-refresh (it is 10 seconds by default). Next, click on “Start”. Your webpage should now auto-refresh after 10 seconds.
Tab Auto Refresh
Tab Auto Refresh is another extension that can be used to make your website or webpage refresh automatically after a set period. It is another popular extension with over 100 thousand users. To install and use Tab Auto Refresh, follow the above-mentioned steps till step 5. After that, follow these steps.
You should be directed to this webpage.
To use this extension, click on the extension option and then click on “Tab Auto Refresh”.
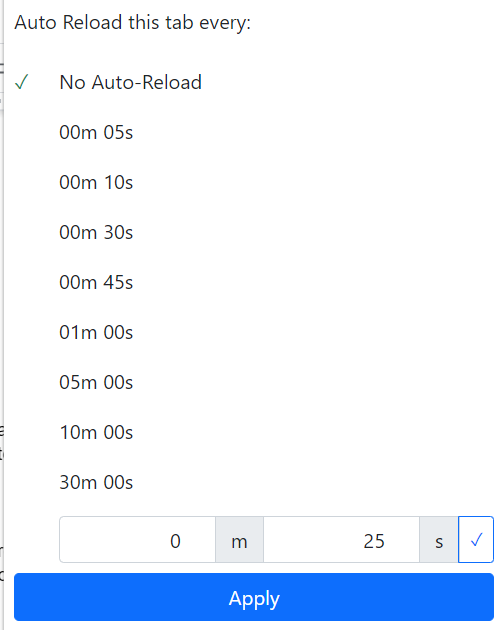
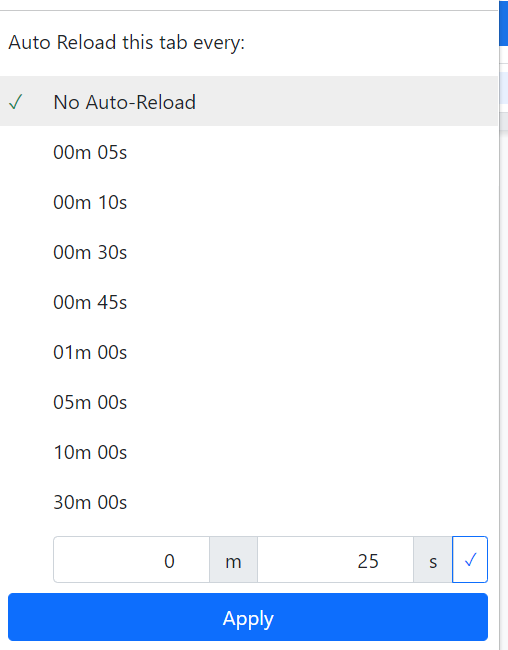
You should see this pop-up. Choose the time and then click on apply. Your page should refresh automatically now.
Auto Refresh Plus
The last extension we will be discussing is the Auto Refresh Plus extension available on Chrome. It is the upgraded version of Tab Auto Refresh. This extension has over 400 thousand users worldwide. To install and use Auto Refresh Plus, follow the steps of Easy-Auto Refresh till step 5. After that, follow these.
You should be directed to this page after the installation.
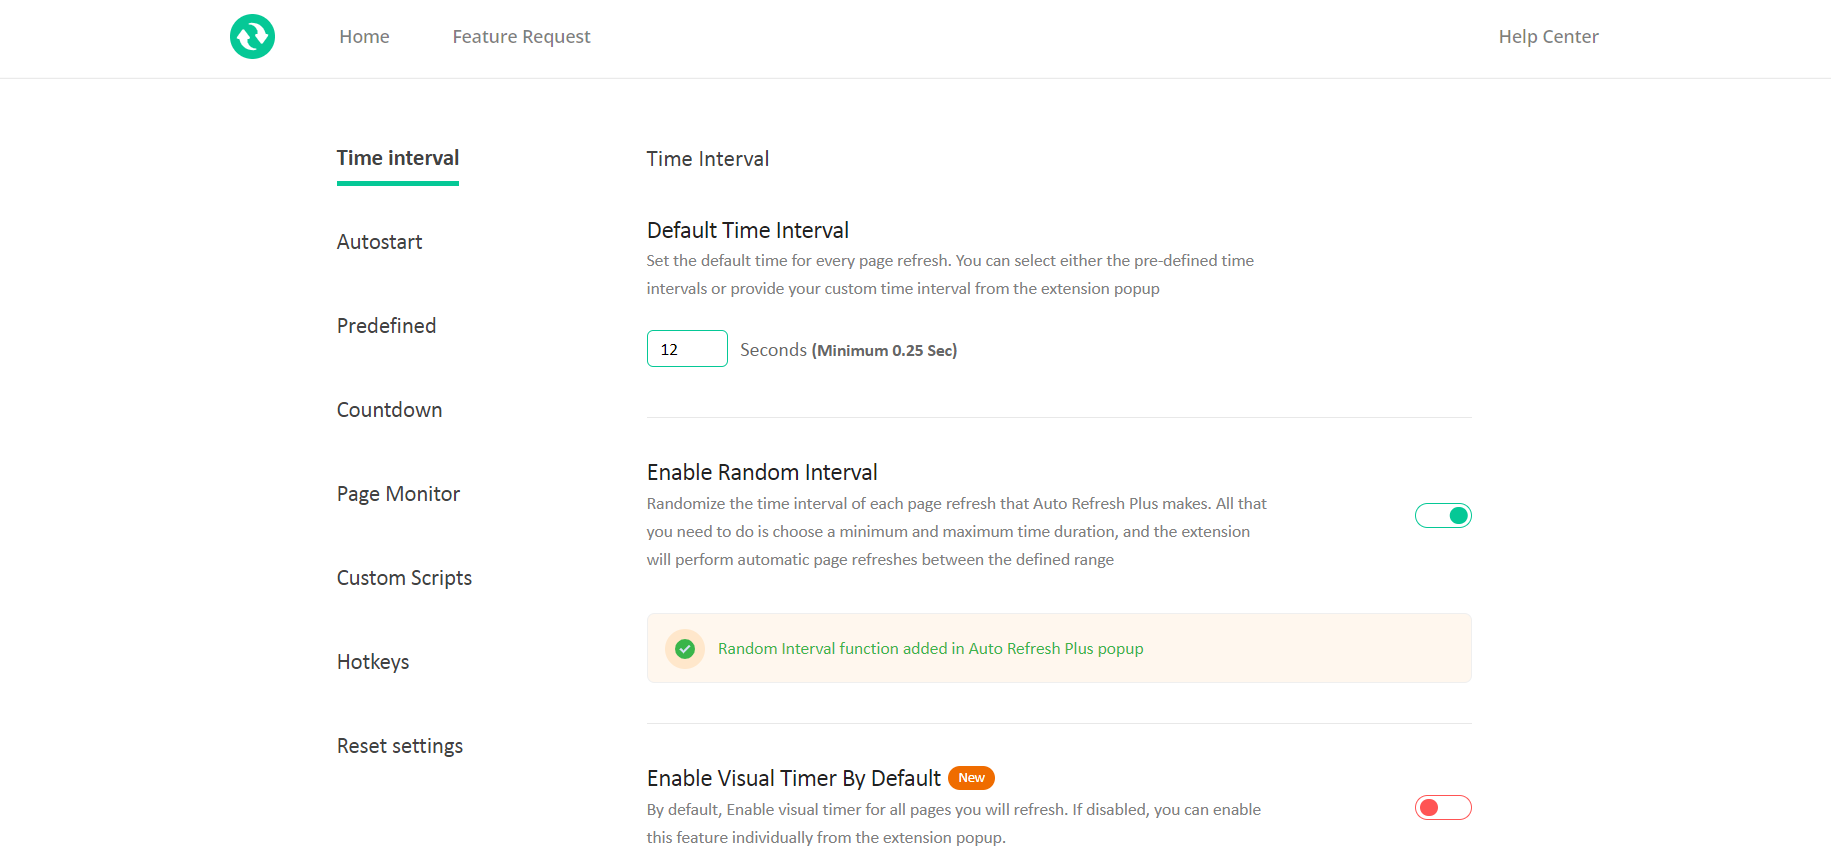
Locate the Auto Refresh Plus extension on the extension tab and then click on it.
Select the time you want your tab to reload after, and then click apply.
Voila!, you are done.
Automatically Refresh Using a Script
Programs are also called scripts. You can use tiny pieces of code to instruct your browser to automatically refresh tabs and sites. To set up auto-refresh using a script, follow these steps.
Open a tab.
Press Ctrl+Shift+I. This should open up the console on the right of your window.
In the console, paste the following code.
Timer1 = setInterval(function()
{win1.location.href="https://www.yourpage.com"},10*60*1000);
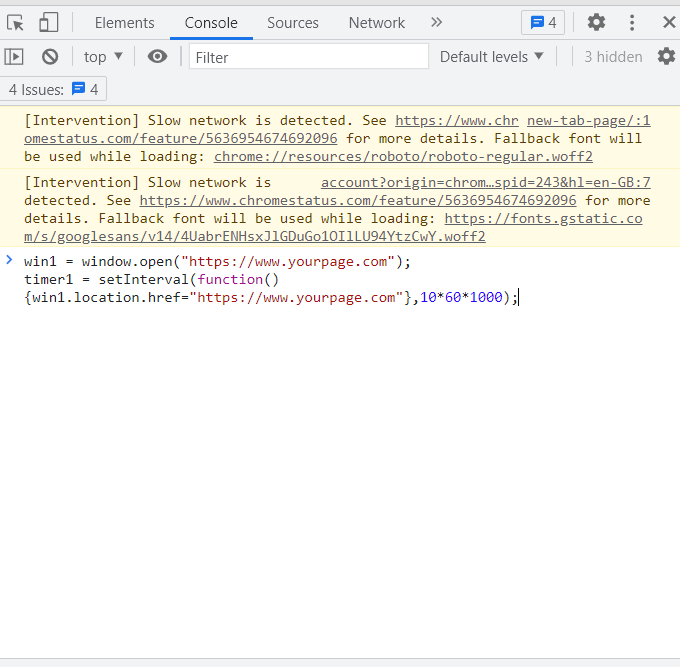
Win1 is a Javascript variable for the tab you want to refresh automatically. The script will make the tab refresh after every 10 minutes. To make this script work, you need to keep both the tabs open. To end the script, close both the tabs.
Conclusion
In this article, we looked at the different ways you can make a tab on Chrome refresh automatically after a set time. There are different extensions available for it which have been mentioned above. You can also do it by loading a script onto the Chrome console. Refreshing automatically can be helpful for certain types of websites. We hope that we were able to help you out in finding out and learning the ways you can enable auto-refresh for Chrome.
Source: linuxhint.com