How to Apply Stashes in Git
In this manual, we will discuss the procedure to apply the stashes in Git.
How to Apply Stashes in Git?
To apply stashes in Git, first, we will navigate to the Git local repository. Next, create and add the new file to the stage area. Then, commit the changes made with the commit message. After that, we will execute the “$ git stash” command to keep the changes temporarily and then utilize the “$ git stash apply” command to apply stash without removing them from the stash stack.
Now, check out the below-provided procedure to implement the above scenario!
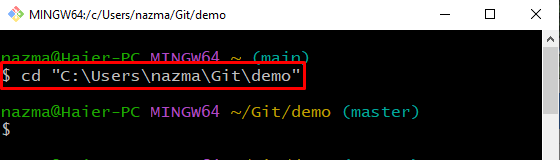
Step 1: Navigate to Git Repo
First, run the “cd” command to move to the Git local repo:
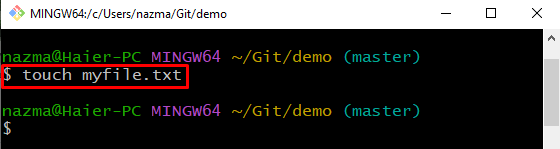
Step 2: Create File
Next, execute the Git “touch” command to create a new file in Git repo:
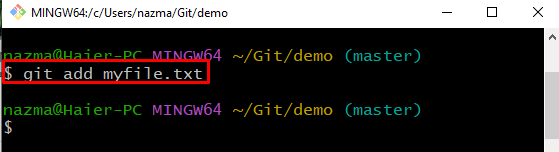
Step 3: Add File
Add the newly created file to the stage area from the working area:
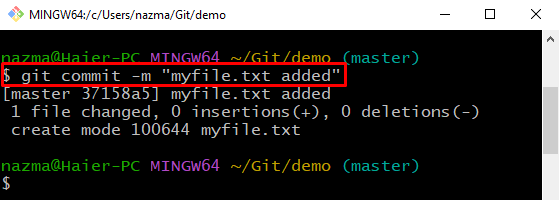
Step 4: Commit Changes
Now, made changes in the Git repository and commit a corresponding message with the provided option “-m” in the “git commit” command:
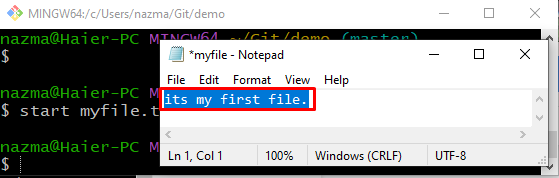
Step 5: Update File
Next, open and modify the added file using Git “start” command with the file name:
The file will be opened with the editor, add text in it and modify it:
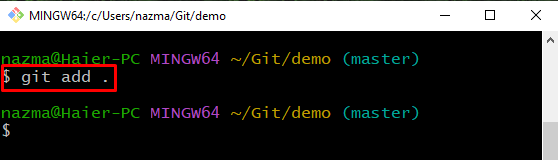
Step 6: Add Changes
Next, add all made changes to the Git repository by executing the below command:
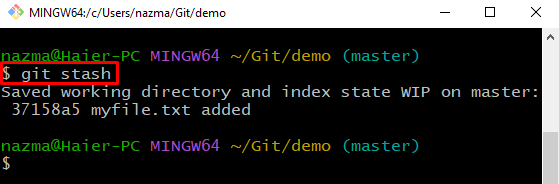
Step 7: Create Git Stash
Next, use the below-given command to keep the working directory changes temporarily:
Below output indicates that we have successfully saved the current changes for later use:
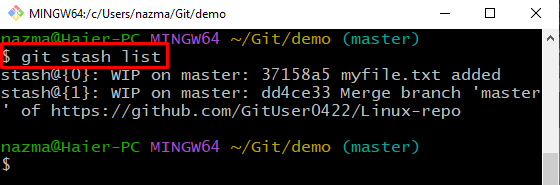
Step 8: List Git Stash
To display the recent modifications, run the following command:
According to below output, currently, we have two stashes with the index “0” and “1”:
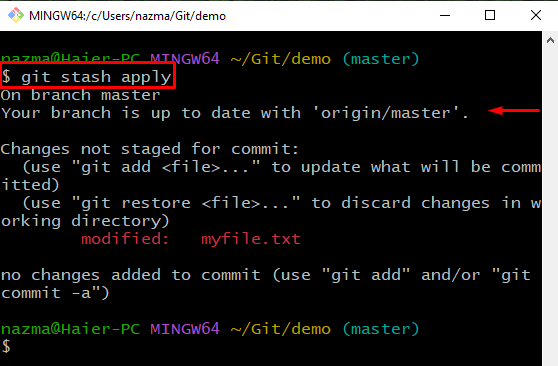
Step 9: Apply Stash
Finally, execute the “git stash apply” command to apply the latest Git stash:
It can be seen that the latest stash is applied without removing it from the stash stack which indicates that we have modified “myfile.txt”:
Let’s check out the next section to empty the stash stack.
How to Remove Stash in Git?
If you want to remove the stashes from the stack, run the below-provided command:
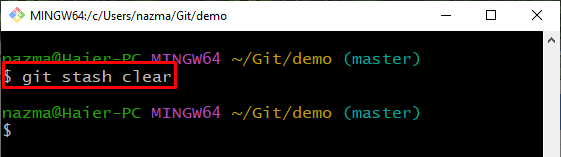
Now, to ensure the stashes removing process, list the stash stack:
Below snippet indicates that our stash stack is empty:

We have provided the easiest procedure to apply the stashes in Git.
Conclusion
To apply stashes in Git, first, navigate to Git’s local repository. Then, create and add the file to the stage area. Next, commit changes with a commit message. Open the newly created file and update it. After that, execute the “$ git add .” command to add changes and temporarily hold the working directory changes using “$ git stash”. Lastly, execute the “$ git stash apply” command to apply states without removing them from the stash stack. In this manual, we have illustrated the method to apply the stashes in Git.
Source: linuxhint.com