How to Analyze Query Performance with MongoDB Explain
The most effective strategy, the index utilized, the number of records and index keys checked, and the time taken to execute are important factors to take into account. This data is useful for pinpointing possible performance limitations and query optimization. Within this guide, we will be discussing code examples to analyze the performance of queries via the MongoDB Explain function.
Create Collection & Insert Records
The provided below code executes a JavaScript MongoDB query that adds several items to a collection called “Dummy.” Records in the collection will have numerous fields, including “_id,” “name,” “type,” and “sal” (short for salary).
The script is broken down as follows:
- It starts with the use of the ‘db.Dummy.insertMany([…])’ expression. This MongoDB command adds multiple entries to the “Dummy” collection. To add an array of records all at once, employ the ‘insertMany’ function.
- There are 10 objects in the set of records, each of which represents a distinct record that should be added to the collection. The subsequent fields are found in each record:
- The field name “_id” is the document’s special identification number. Although it is explicitly stated in this instance for every record (ranging from 1 to 10), MongoDB will create distinct “_id” entries on its own if this information isn’t given at the time of insertion.
- The “name” field represents the title of the individual or group. Names like “Ana,” “Nina,” “John,” etc. are among them.
- The “type” keyword is the designation of an individual or thing as either an “emp” (employee) or a “student.”
- The last field, “Sal” is the compensation paid to the individual or organization. 50 to 500 is the range for salaries in dollars.
In conclusion, the script generates 10 documents for the “Dummy” collection, each of which represents a person with a name, type (either employee or student), and income information. The collection may now be utilized in MongoDB for a variety of queries as well as information manipulation tasks.
{ "_id" : 1, "name" : "Ana", TYPE: "emp", sal: 500 },
{ "_id" : 2, "name" : "Nina", TYPE: "emp", sal: 100 },
{ "_id" : 3, "name" : "John", TYPE: "student", sal: 200 },
{ "_id" : 4, "name" : "Tina", TYPE: "student", sal: 150 },
{ "_id" : 5, "name" : "Tom", TYPE: "emp", sal: 300 },
{ "_id" : 6, "name" : "Jerry", TYPE: "student", sal: 500 },
{ "_id" : 7, "name" : "Paul", TYPE: "emp", sal: 250 },
{ "_id" : 8, "name" : "William", TYPE: "emp", sal: 400 },
{ "_id" : 9, "name" : "Cillian", TYPE: "emp", sal: 50 },
{ "_id" : 10, "name" : "Barbie", TYPE: "student", sal: 75 } ])
Display Records
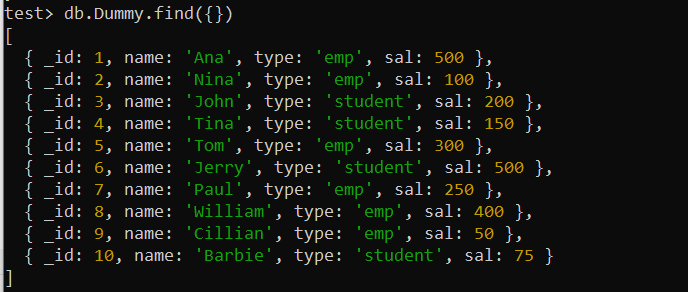
The provided script makes a MongoDB request to get all the records from the “Dummy” collection in the MongoDB repository. The ‘find()’ function is used to retrieve the ‘Dummy’ collection despite any specified query criteria, and the ‘db’ object denotes the currently active database environment. The command produces all of the records that are found in the “Dummy” collection by supplying an empty object, “,” as the parameter to “find().”
Like a SELECT * in SQL, this procedure collects all data without using any criteria or conditions. An array of records comprising the whole contents of the “Dummy” collection will be returned as the output of this inquiry, which can be analyzed or exhibited as necessary.
Example 01
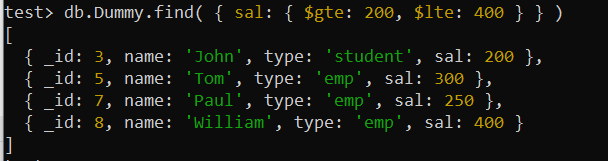
The program operates an inquiry on MongoDB’s “Dummy” collection. It looks for records where the value of the “sal” column (pay) is between 200 and 400 (inclusive). This query filters records salaries more than or equivalent to 200 and fewer than or equivalent to 400 using the ‘$gte’ and ‘$lte’ operators.
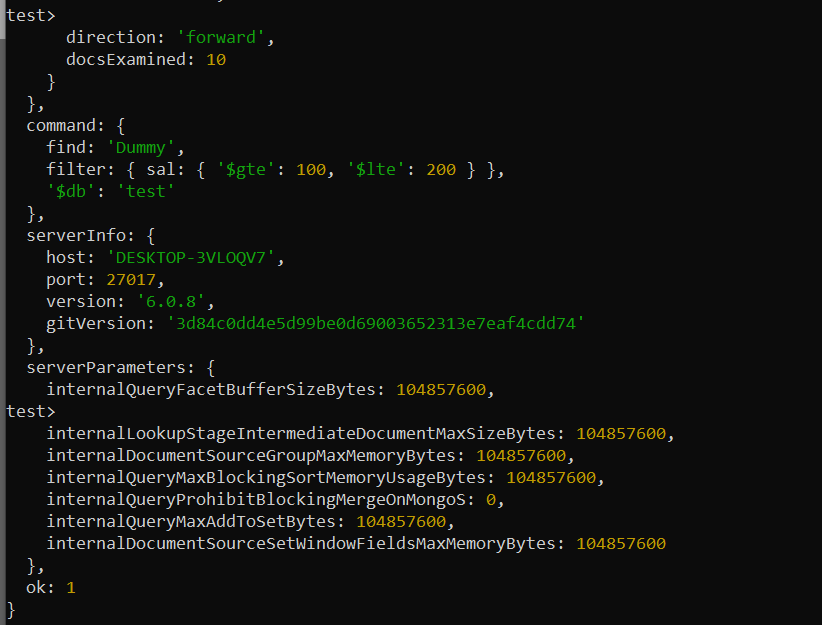
The given code operates on the “test” database’s “Dummy” collection. Records with a “sal” field value greater than or equivalent to 100 and below or equivalent to 200 are excluded from the command. The command’s processing statistics, comprising the number of records seen and the process’s duration, are obtained using the ‘explain(“executionStats”)’ function. This data aids in the evaluation of performance and optimization for the command.
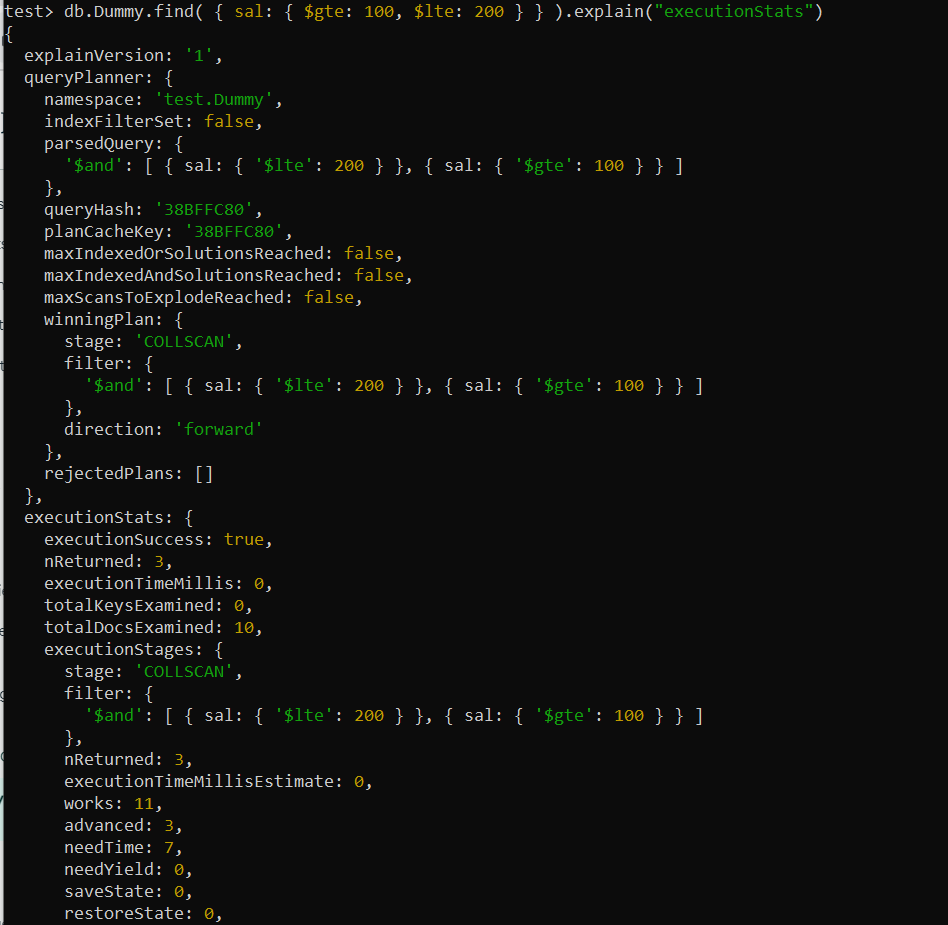
The ‘explain()’ function in MongoDB is used to offer details regarding the query processing in the final result of the specified command. Employing the ‘$gte’ and ‘$lte’ operators, the command filters the “Dummy” collection’s records depending on the “sal” column, which has a value range of 100 to 200. The “sal_1” index scanning on the “sal” column is the course of operation strategy picked by MongoDB’s command planner.
The query reviewed three keys and three records, as indicated by its operation statistics, and three records were obtained. The quick execution was shown by the processing time of 0 milliseconds. The result also includes a list of server settings and the server edition. The query used the supplied index effectively and had an excellent processing plan.
Example 02
In the following MongoDB query, an ascending sequence (represented by the number “1”) is used to establish an index on the “sal” column of the “Dummy” collection. By building a data structure that enables MongoDB to identify records more quickly depending on the indexed column, indexing is a technique for improving query speed.
The result “sal_1” verifies that the index was successfully created; “sal” stands for the indexed element and “_1” for the ascending order. This index will accelerate commands that use the “sal” column in the “Dummy” collection for browsing, arranging, or filtering.

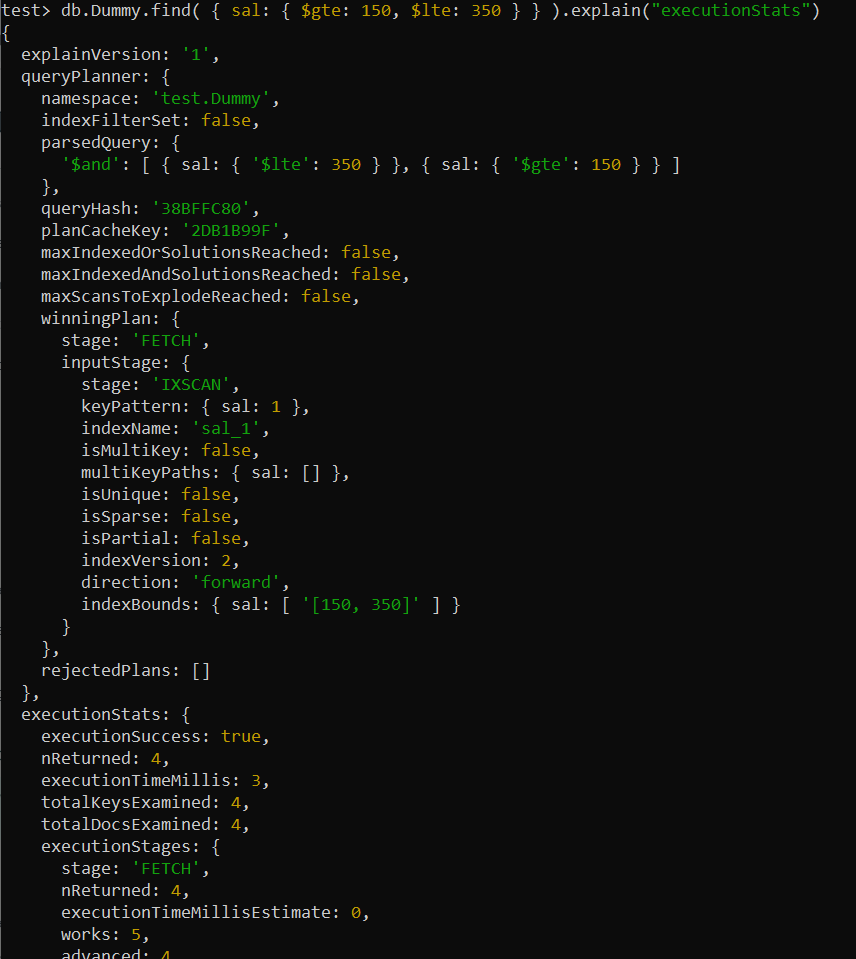
The result of the ‘explain()’ function in the following MongoDB query indicates that the command was executed effectively (‘executionSuccess: true’) and yielded four records (‘nReturned: 4’). The search utilized the ‘sal_1’ index, a one-column index on the column ‘sal’ with an upward direction (‘keyPattern: sal: 1, direction: ‘forward”). The fact that the command planner chose an integrated scan (referred to as “IXSCAN”) as the preferred strategy shows how well the index was employed to limit the records.
The command looked at an entire set of 4 keys and 4 records (‘totalKeysExamined: 4’ and ‘totalDocsExamined: 4’). Executing the command took 3 milliseconds (‘executionTimeMillis: 3’). As a whole, the query worked nicely and effectively retrieved the required pages from the index.
Conclusion
The MongoDB explain() function enables programmers to make informed decisions when creating indexes, changing queries, and enhancing database performance. To demonstrate that, we have discussed using explain() function queries in the above illustrations.
Source: linuxhint.com