How to Allocate Unsafe Buffers with Buffer.allocUnsafe() in Node.js?
Buffer is actually a specific memory location where the data is stored for a small time period before the execution phase to wait for their turn to execute. In Node.js, its functionality is modified to perform operations over binary data. There are various APIs or methods that are utilized for the creation of a Buffer and inserting data in the Buffer. The API that is specifically used to create the empty Buffer is known as “Buffer.allocUnsafe()”.
This guide illustrates the procedure of allocating the Unsafe Buffers using the Buffer.allocUnsafe() API in Node.js.
How to Allocate Unsafe Buffers with Buffer.allocUnsafe() in Node.js?
The “Buffer.allocUnsafe()” method creates a Buffer inside the range of “buffer.constants.MAX_LENGTH” and “0”. After the creation of an empty buffer with the help of the “fill()” method, the values can be assigned to the Buffer. It is called “Unsafe” because it can leak data stored in another buffer.
Syntax
The syntax for “Unsafe” Buffer is as follows:
The “size” is an integer type value showing the length of the Unsafe Buffer that is going to be created.
Return Type
The return type of this API or method is a new buffer having a size equal to the parametric value provided at the time of creation.
Example 1: Allocate Unsafe Buffers With Buffer.allocUnsafe()
In this example, the unsafe buffer with the provided length is going to be implemented using the “Buffer.allocUnsafe()” method:
console.log(unsafeBuff);
In the above code, the size of “13” is provided to the “Buffer.allocUnsafe()” method for the creation of an Unsafe Buffer having the length of “13”. This buffer is then also displayed over the console with the help of the “console.log()” method.
The output generated after the compilation for the above code looks like this:

Example 2: Convert Unsafe Buffers to Safe Buffers
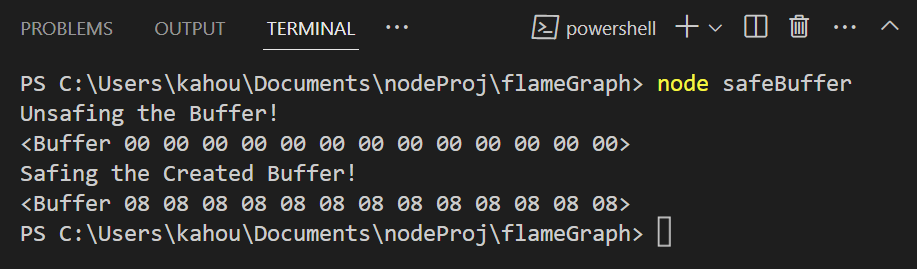
In this case, the “Unsafe Buffer” is going to be implemented then it is converted to the “Safe Buffer” by assigning it values:
console.log("Displaying Unsafe Buffer!")
console.log(unsafe);
//Empty the unsafe buffer and fill it with 11s:
unsafe.fill(8);
console.log("Safing the Created Buffer!")
console.log(unsafe);
The description of the above code block is shown below:
- First, the unsafe Buffer is created with the name “unsafe” and it has the size of “13”.
- Next, this “unsafe” buffer is displayed over the console.
- To convert the unsafe Buffer into a safe Buffer, assign values or elements to this “unsafe” named Buffer using the “fill()” method.
- In the end, display the Buffer on the console window.
The output generated after compiling code shows that in unsafe now values are assigned but Buffer is created and by assigning values it becomes safe Buffer:
That’s all about allocating the Unsafe buffer with Buffer.allocUnsafe() in Node.js.
Conclusion
To allocate Unsafe Buffers with “Buffer.allocUnsafe()” pass the length of the Buffer in an integer format inside its parenthesis and the empty Buffer with the provided length gets created. In order to convert an unsafe into a safe Buffer, assign the values to it using the “fill()” method. This guide has demonstrated the process to allocate Unsafe Buffers using Buffer.allocUnsafe().
Source: linuxhint.com