How to Adjust Windows Mouse Pointer Settings?
Microsoft has loaded Windows with some next-level customizations, and Mouse Pointer is no exception. Who would not want a customized mouse pointer to set its speed, cursor color, and size or change the mouse button functionalities? Some users are fine with the normal pointer, but others want a different one. These settings are managed via the Mouse Settings.
This post is a detailed guide on adjusting “Windows Mouse Pointer Settings”:
- How to Access Mouse Pointer Settings on Windows?
- How to Adjust Windows Mouse Pointer Settings?
- How do I Get My Mouse Pointer Back to Normal?
How to Access Mouse Pointer Settings on Windows?
The Mouse Pointer settings on Windows can be accessed via the following methods:
- Windows Settings app.
- Control Panel.
Method 1: Access Mouse Pointer Settings Via Windows Settings App
The Windows Settings app hosts a load of different configurations for the system, including the Mouse Settings. To open the Mouse Pointer Settings via the Settings app, follow these steps:
Step 1: Open Windows Settings App
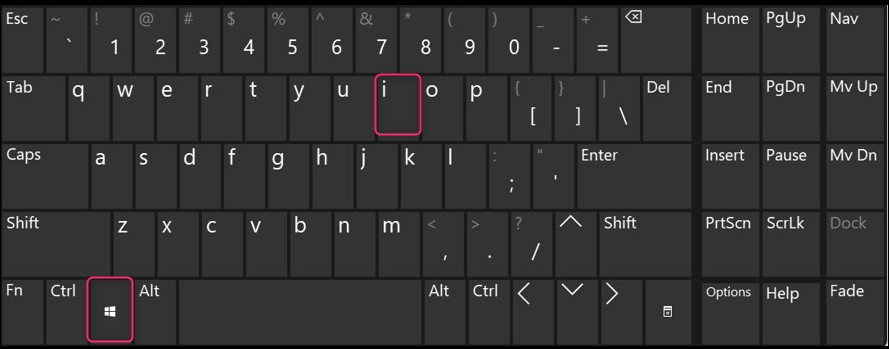
To open the Windows Settings app, use the combination of Windows + i keys:
Step 2: Navigate to Mouse Settings
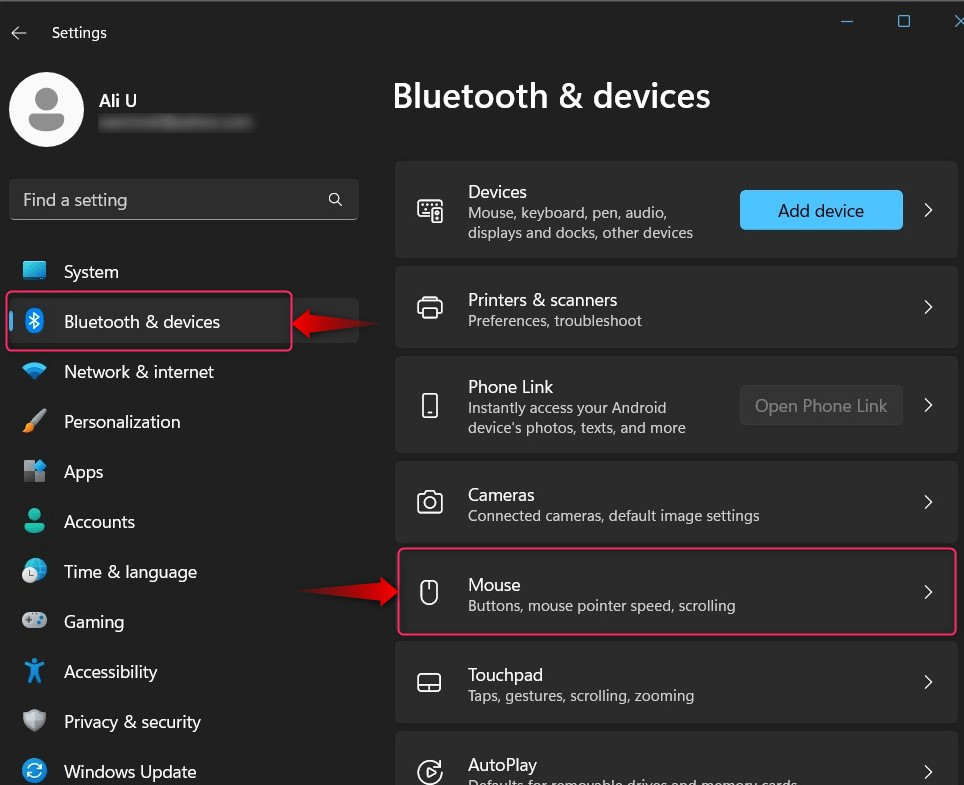
In the Windows Settings app, select Bluetooth & devices from the left pane, and then Mouse from the right pane to open Mouse settings:
Method 2: Access Mouse Pointer Settings From the Control Panel
The Control Panel is a utility that Microsoft has included in Windows OS in a bid to combine all system utilities in one place. It also hosts the Mouse settings; to access them, follow these steps:
Step 1: Open Control Panel
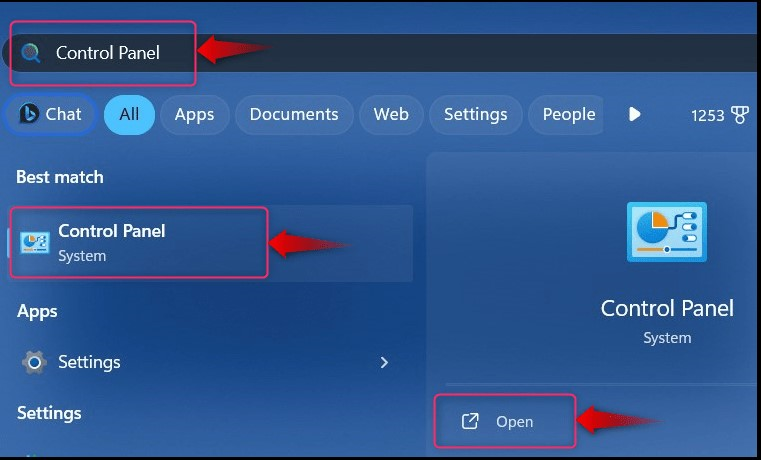
To open the Control Panel, use the Windows Start menu, search “Control Panel”, and hit the Enter key or use the Open button:
Step 2: Open Mouse Settings From the Control Panel
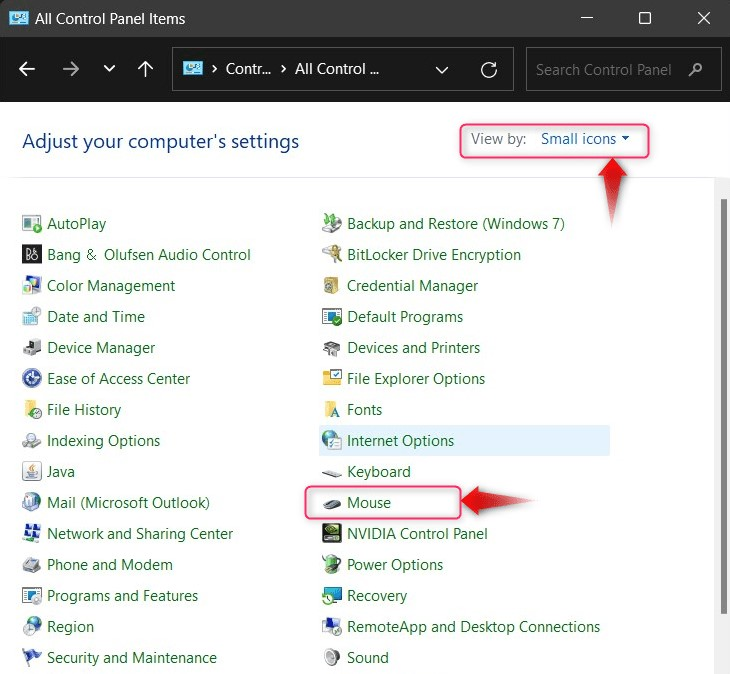
In the Control Panel, set the View by with Small or Large icons and select Mouse to open the Mouse Settings from the Control Panel:
How to Adjust Windows Mouse Pointer Settings?
The Mouse Pointer on Windows (if you have opened the Mouse settings via the Control Panel) can be adjusted in the following ways:
How to Change Mouse Button Configuration?
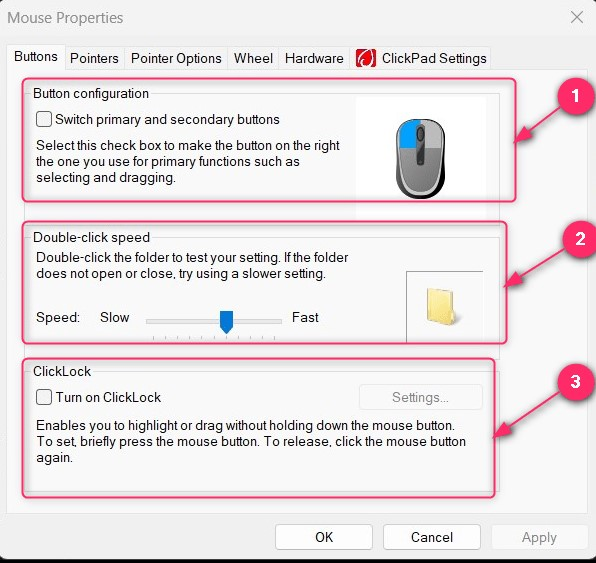
To change the Mouse Button Configuration, open Mouse Properties via the Control Panel, and select Buttons tab to configure/adjust the following:
- Button configuration to swap the primary (left-click) button to the secondary (right-click) and doing this, your mouse’s right-click will act as left-click and vice versa.
- Specify the Double-click speed to set the speed of the double-clicking. Increase it if you are a fast user of the mouse.
- ClickLock provides the aid of not holding the left mouse button while highlighting or doing drag-and-drop:
How to Change Mouse Pointers?
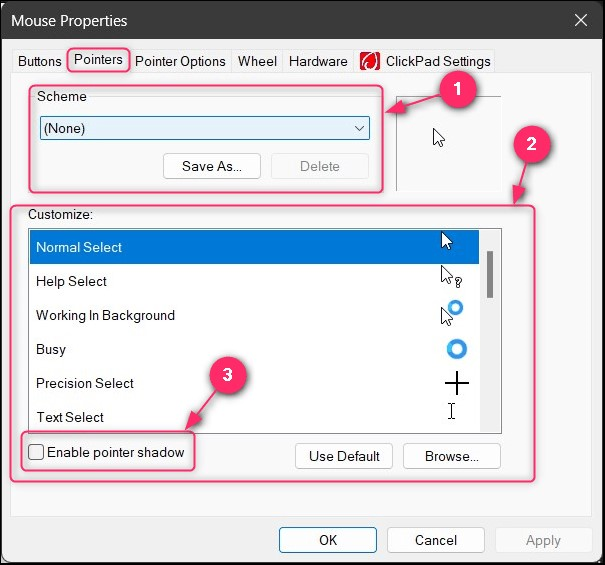
To change the Mouse Pointers, open Mouse Properties from the Control Panel, select the Pointers tab, and you can configure/change the following:
- Set Scheme to use the pre-installed set of Mouse Cursors.
- Use the Customize panel to modify the set of Mouse Cursors (Selected via the Scheme). Here, you can add more cursors to it using the Browse button.
- Marking the Enable pointer shadow will create a shadow around your mouse pointer:
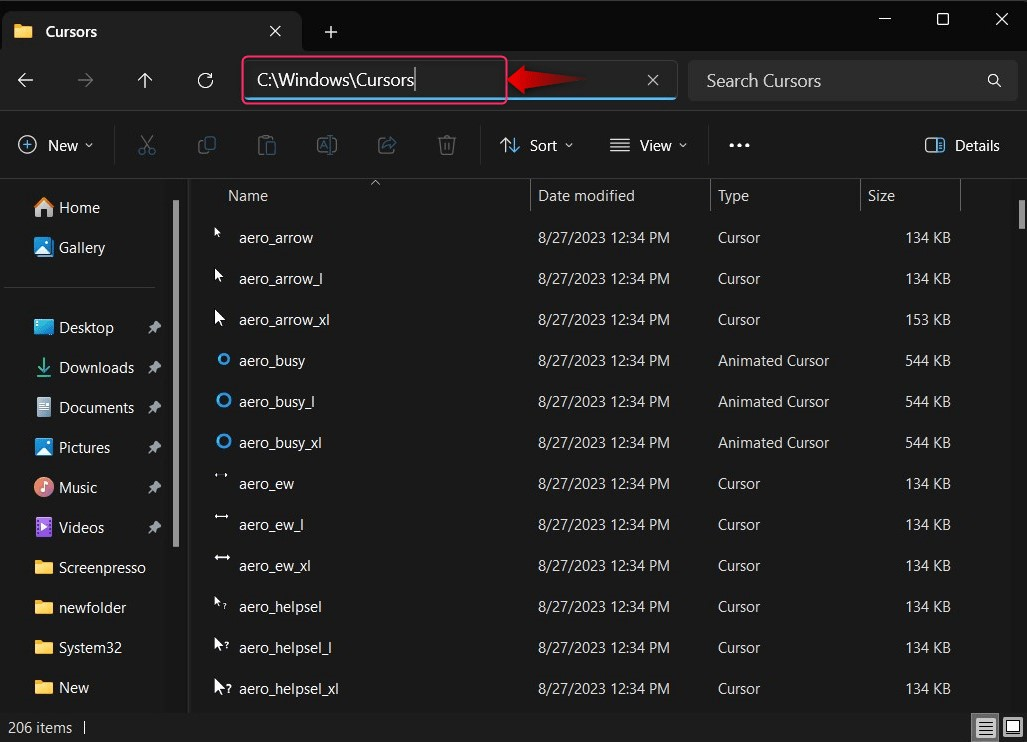
To add a Custom Mouse Pointer, download the cursor pack from the internet, and copy & paste it into the “C:\Windows\Cursors” folder:
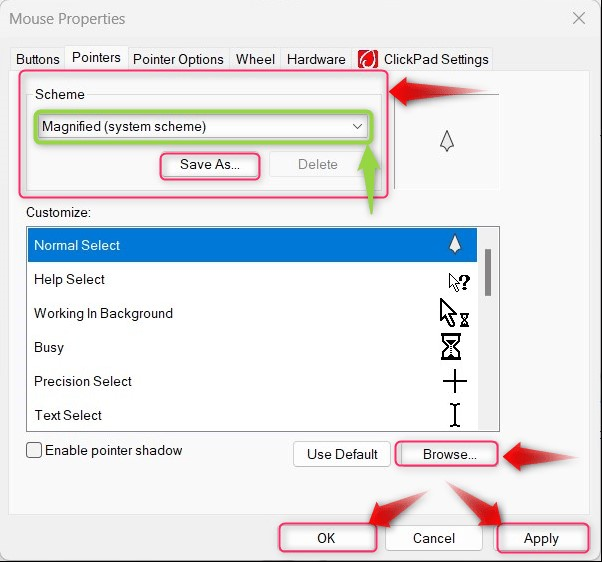
Next, select the Scheme you want to modify, use Browse to select the cursor/pointer you want to add, and hit the Save as button to save the changes to the Scheme. Finally, use the Apply button to preview and the OK button to confirm the changes:
How to Modify the Pointer on Windows?
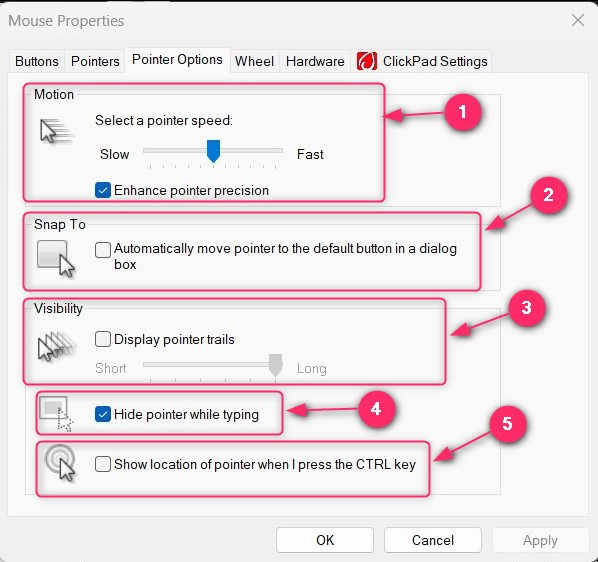
To change the Mouse Pointers, open Mouse Properties from the Control Panel, select the Pointer Options tab, and you can configure/change the following:
- Motion to increase/decrease the mouse cursor speed.
- Snap To make the pointer automatically move to the popped dialog box.
- Visibility to enable and configure the Pointer trails.
- Hide pointer while typing is a feature for users who want to hide the mouse pointer while typing.
- Show location of pointer when I press the CTRL key, which enables the users to view the pointer’s current position when the key is pressed. It is useful for users with large displays:
Pro Tip: If you have a small desk space, you should use the Mouse Acceleration Features on Windows to enable the pointer to cover more screens on the system without concern for the distance the actual mouse covers.
Pro Tip: If you want to change the cursor’s color, we have compiled a detailed guide to Change the Cursor Color on Windows.
How to Adjust Windows Mouse Pointer Settings Via the Windows Settings App?
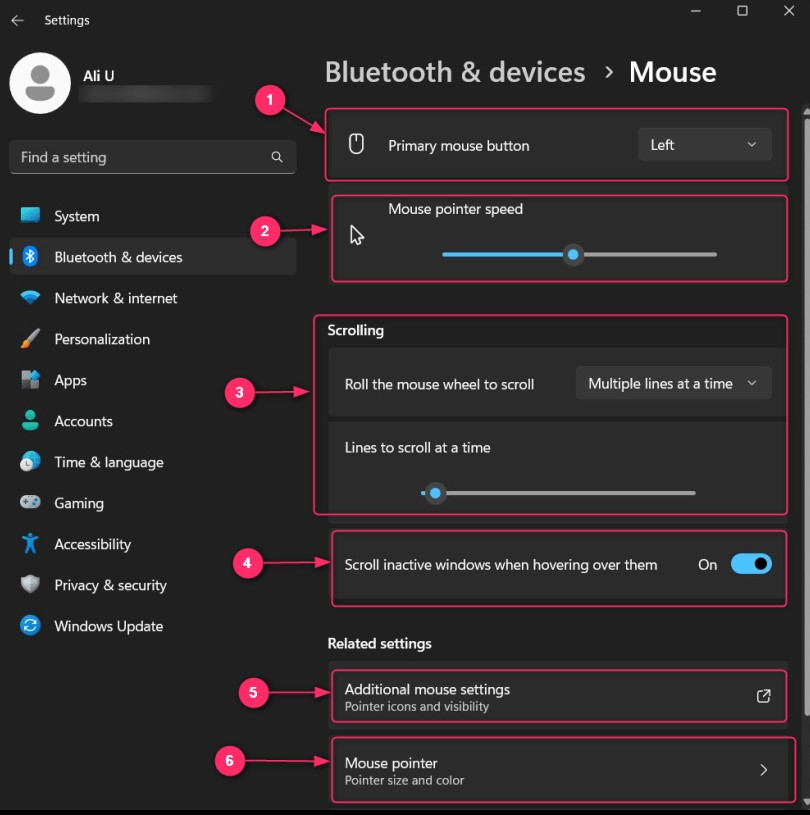
Navigate to Settings ⇒ Bluetooth & devices ⇒ Mouse and from here, you can Adjust Windows Mouse Pointer Settings as follows:
- Switch between Primary and Secondary Mouse buttons.
- Adjust the Mouse pointer speed.
- Configure Mouse Scrolling.
- Trigger to enable/disable the Scroll inactive windows when hovering over them to enable smooth scrolling across the applications (can work on multiple side-by-side apps).
- Open Additional mouse settings (opens the Mouse settings from the Control Panel).
- Use the Mouse pointer to adjust size and color of the cursor/pointer:
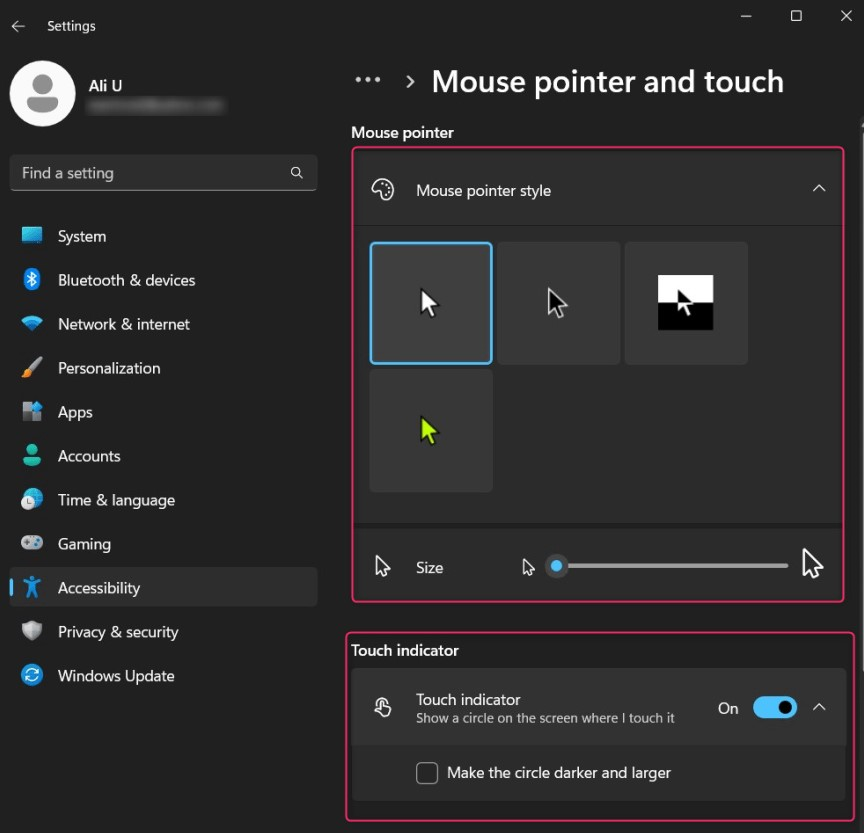
From the Mouse pointer settings in the Windows Settings app, you can adjust Mouse pointer style & Size and enabler/disable the Touch indicator that shows a circle when the mouse is clicked or the screen is touched:
How do I Get My Mouse Pointer Back to Normal?
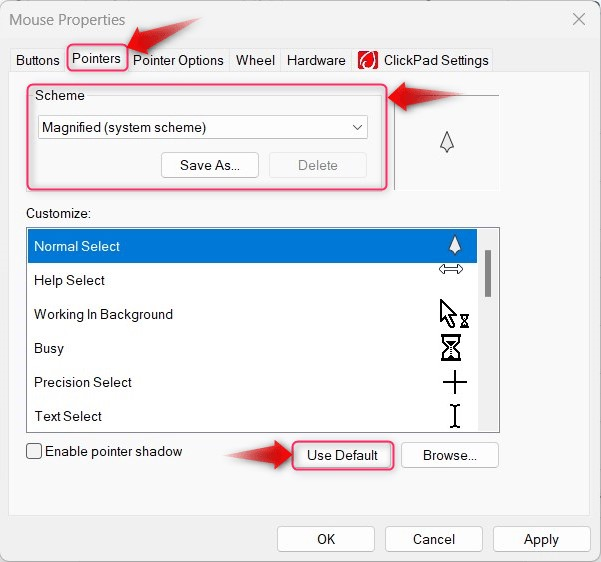
To get the Mouse Pointer back to normal or default setting, navigate to Control Panel ⇒ Mouse. From here, select the Pointers tab, select the Scheme you want to reset, choose the pointer you want to reset, and hit the Use Default button to make your Mouse Pointer back to normal:
That is all for adjusting Windows Mouse Pointer Settings.
Conclusion
To adjust Windows Mouse Pointer Settings, navigate to Mouse Settings via the Control Panel, or the Windows Settings App. The Control Panel offers more customization options, while the Settings App only provides the users with basic customization. Users can also download and paste into the “C:\Windows\Cursors” folder, which can be set up following the procedure explained above.
Source: linuxhint.com