How to Adjust the Contrast of an Image in PyTorch?
This blog will explain the method to change the image’s contrast in PyTorch.
How to Adjust/Change the Contrast of Specific Image in PyTorch?
To change the image’s contrast in PyTorch, look at the following steps:
- Upload the desired image to Google Colab
- Import the required libraries
- Read the input image
- Change the input image’s contrast
- Display the contrast-adjusted image
Step 1: Upload an Image to Google Colab
First, open Google Colab and click on the below-highlighted icons. Then, choose the specific image from the computer and upload it:

Upon doing so, the image will be uploaded to Google Colab:

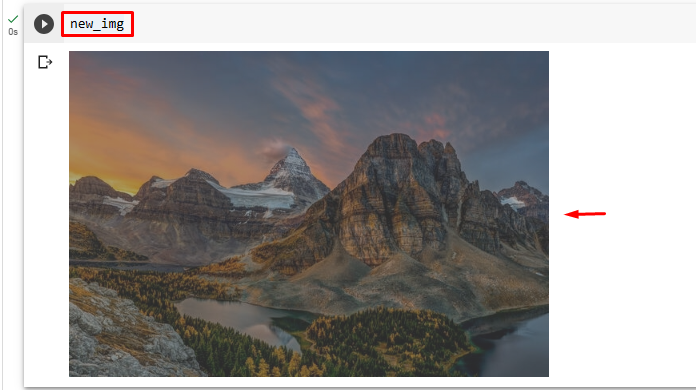
Here, we have uploaded the following image and we will adjust the contrast of this image:

Step 2: Import Necessary Library
After that, import the required libraries. For instance, we have imported the following libraries:
from PIL import Image
import torchvision.transforms.functional as F
Here:
- “import torch” imports the PyTorch library.
- “From PIL import Image” is used to open and save different image file formats.
- “import torchvision.transforms.functional as F” imports the functional module from “torchvision.transforms” that provides transformations:

Step 3: Read the Input Image
Next, read the input image from the computer. Here, we are reading the “landscape_img.jpg” and storing it in the “input_img” variable:
Step 4: Change the Input Image’s Contrast
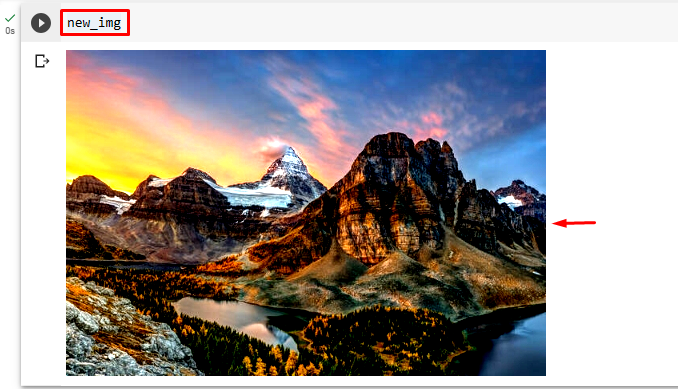
Now, change the contrast of the input image with the preferred contrast factor using the “adjust_contrast()” method. Here, we are adjusting the contrast with a contrast factor of “0.5”:
Step 5: Display the Contrast Adjusted Image
Lastly, view the contrast-adjusted image by displaying it:
The above output shows that the contrast of the input image has been successfully adjusted with the specified contrast factor i.e., “0.5”.
Similarly, users can specify any other contrast factor to adjust the contrast of the image. Now, we will adjust the same image with the “2” contrast factor to see the difference:
This will change the contrast of the image:
Note: The “0” value for the contrast factor shows a solid gray image and “1” shows the original image. A value above 1 increases the saturation of the image.
Comparison
The comparison between the original image and contrast-adjusted images can be seen below:

Note: You can access our Google Colab Notebook at this link.
We have explained the efficient method of adjusting the contrast of an image in PyTorch.
Conclusion
To adjust/change the contrast of an image in PyTorch, first, upload the desired image to Google Colab. Then, import the required libraries and read the input image. Next, use the “adjust_contrast()” method to adjust the input image’s contrast with preferred contrast factors. Lastly, view the contrast-adjusted image. This article has demonstrated the method to adjust/change the contrast of the specific image in PyTorch.
Source: linuxhint.com