How to Address the GitHub “Authentication Failed” Error from the Command Line?
In today’s era, technology has brought us so far and made things easier to manage through programming. Correspondingly, GitHub is an online remote host where developers work in a team and make various projects. Every team member is assigned specific modules, builds on their local machines, and pushes the changes to the remote host using Git Bash. While pushing the code to GitHub in a Linux operating system, you have to enter their GitHub credentials; but every time you end up with the error “Authentication Failed” even if the credentials are correct.
This blog will state the solution for the “Authentication Failed” error while pushing the code to the remote host in Linux.
How to Address the GitHub “Authentication Failed” Error from the Command Line?
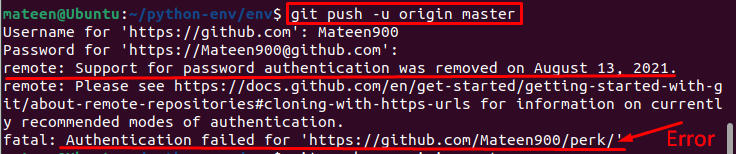
As discussed above, the error “Authentication Failed.” appeared while pushing the project changes to the remote host through Linux. This happens when you have two-factor authentication enabled in your GitHub account. Check out this error stated below:
The solution for this error is simple, you have to generate the personal token from your GitHub account and use that token instead of password. Let’s see this practically and resolve the above-mentioned error.
Step 1: Open GitHub
Open your GitHub account, navigate to your “Profile” icon, and press it for more options:
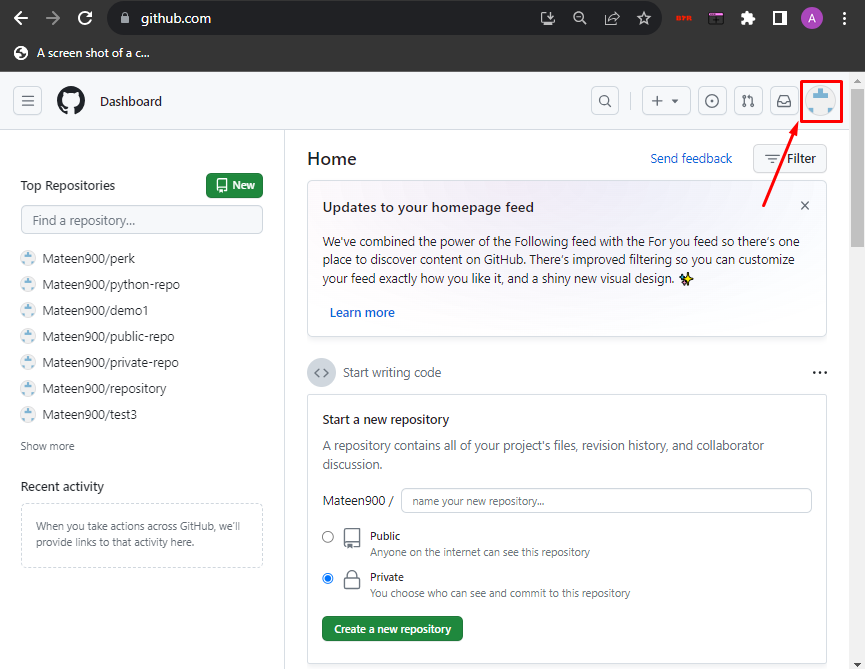
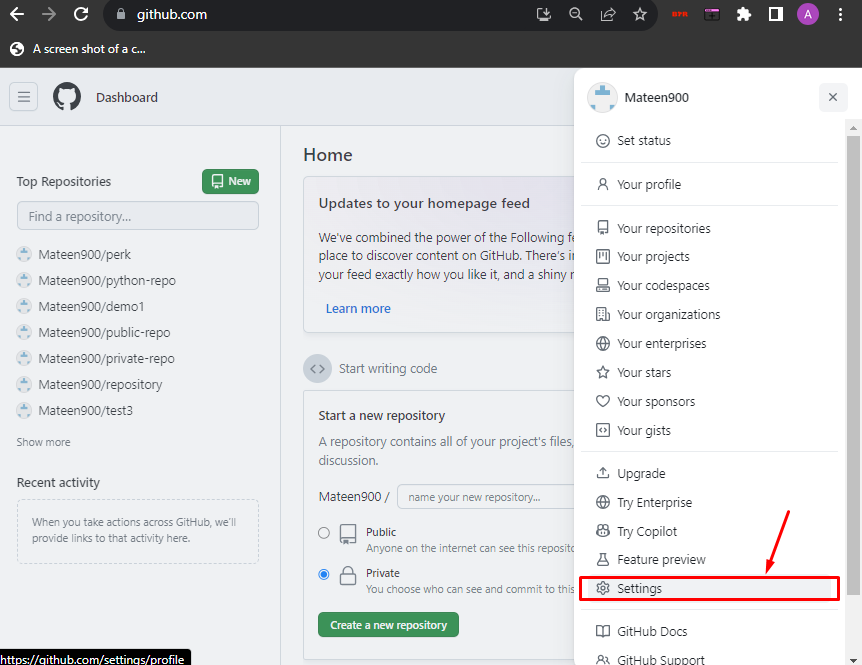
Step 2: Open Account Settings
A drop-down will appear, click on the “Settings” option to open the GitHub account settings:
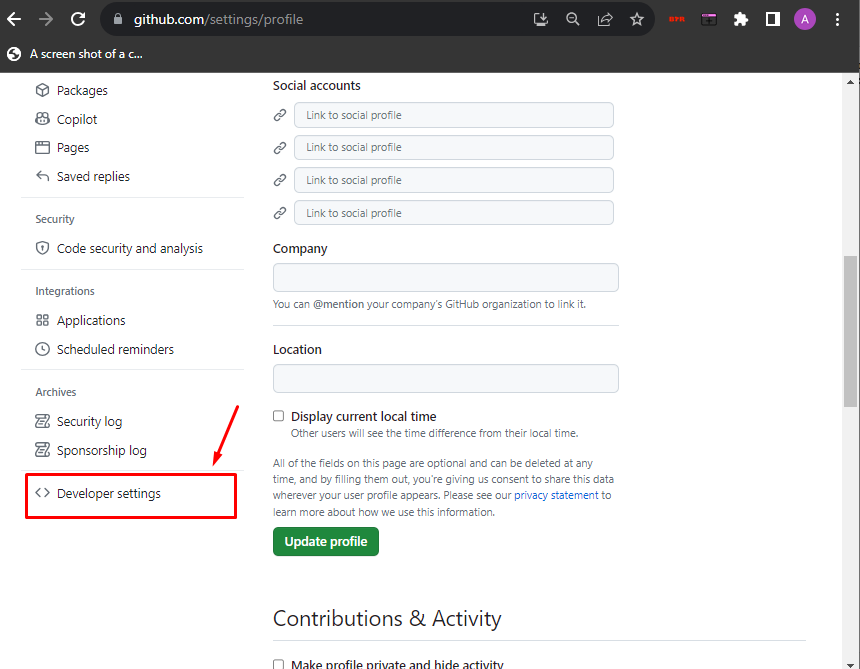
Step 3: Access Developer Settings
In the account settings, scroll down, and hit the “Developers settings” tab from the left:
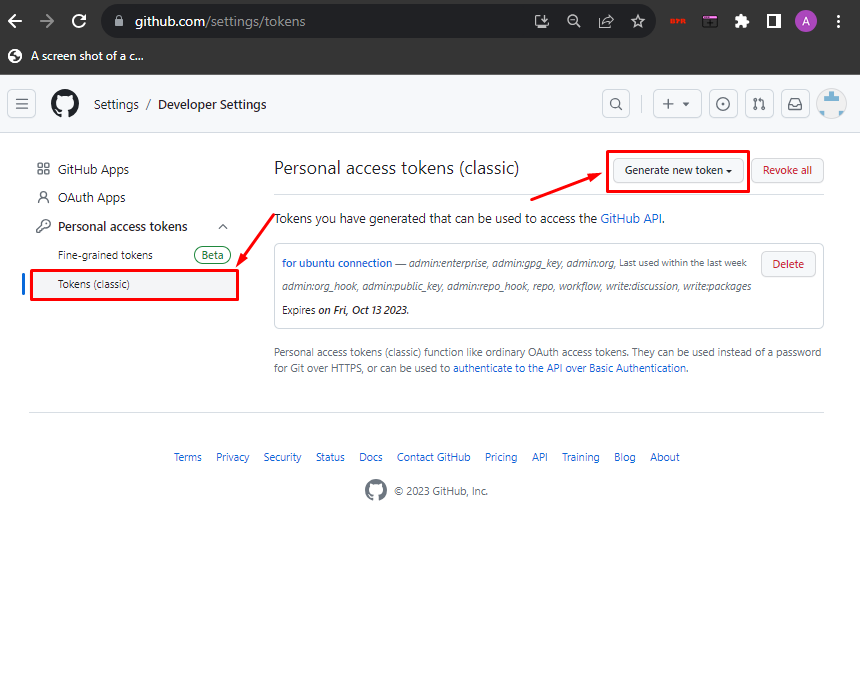
Step 4: Open Classic Token
Next, press the “Personal access tokens”, open the “Tokens(classic)” tab, and hit the “Generate new token” as guided:
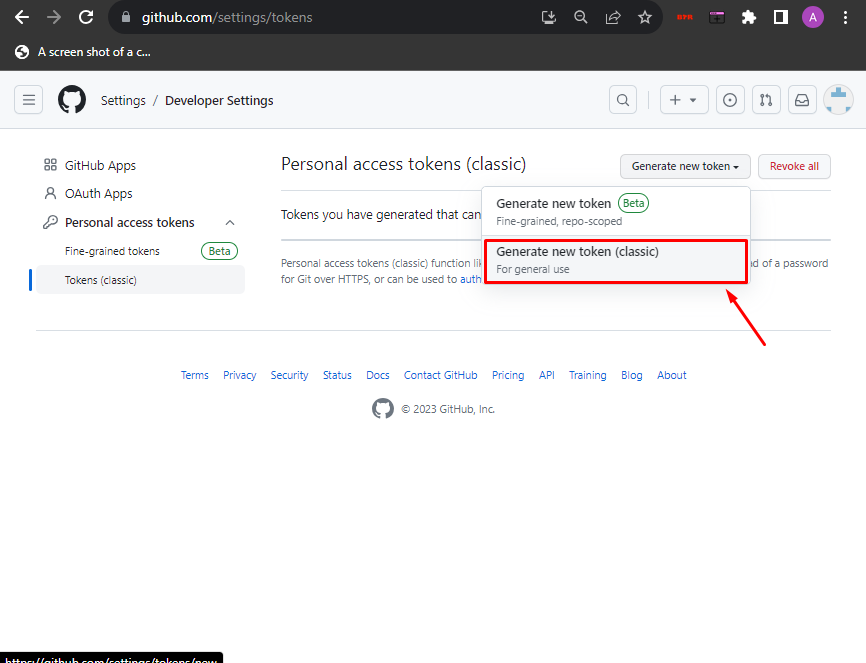
Step 5: Generate New Token
From the appeared drop-down menu, press the “Generate new token (classic)” option:
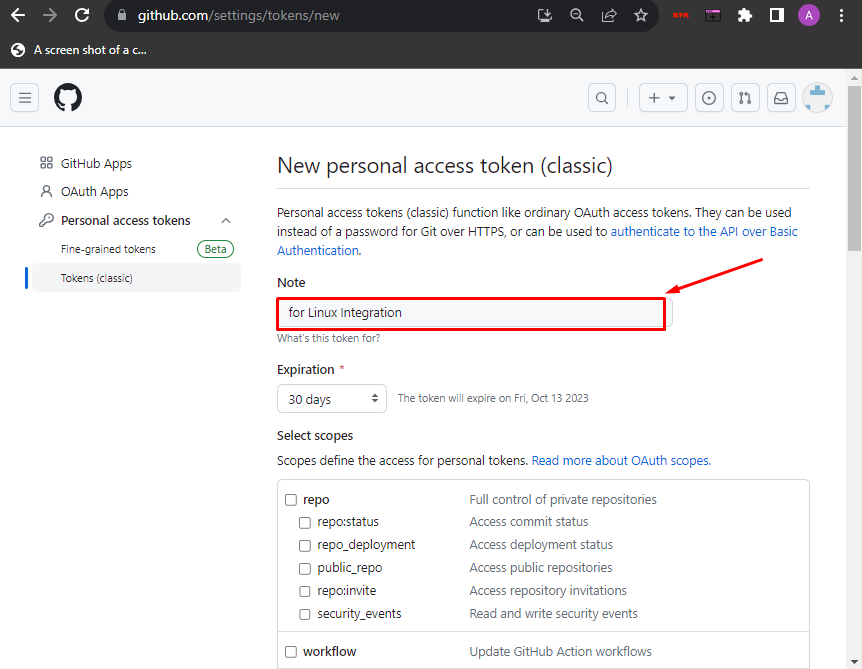
Step 6: Enter Note
After that, enter the “Note” to describe the purpose of the token:
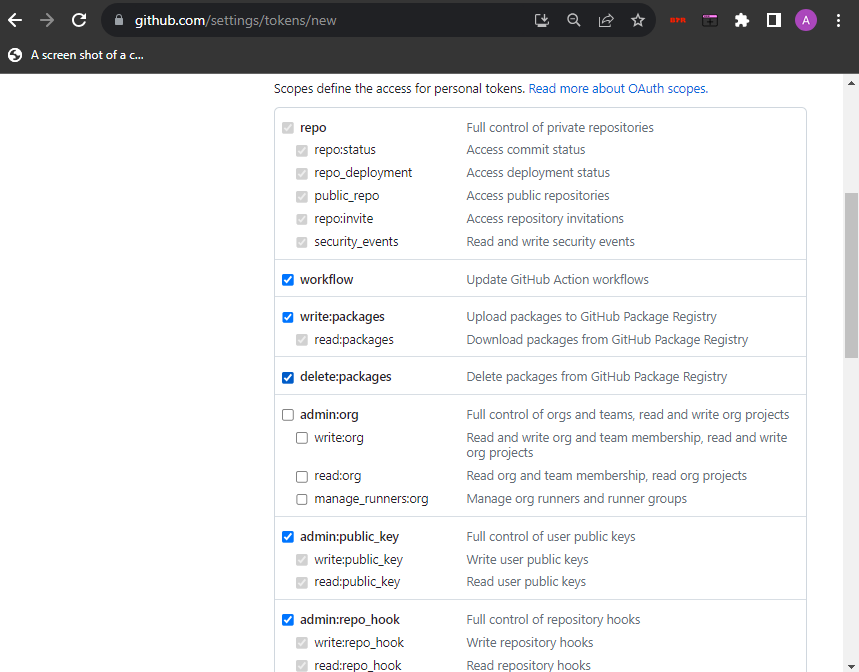
Step 7: Mark Required Privileges
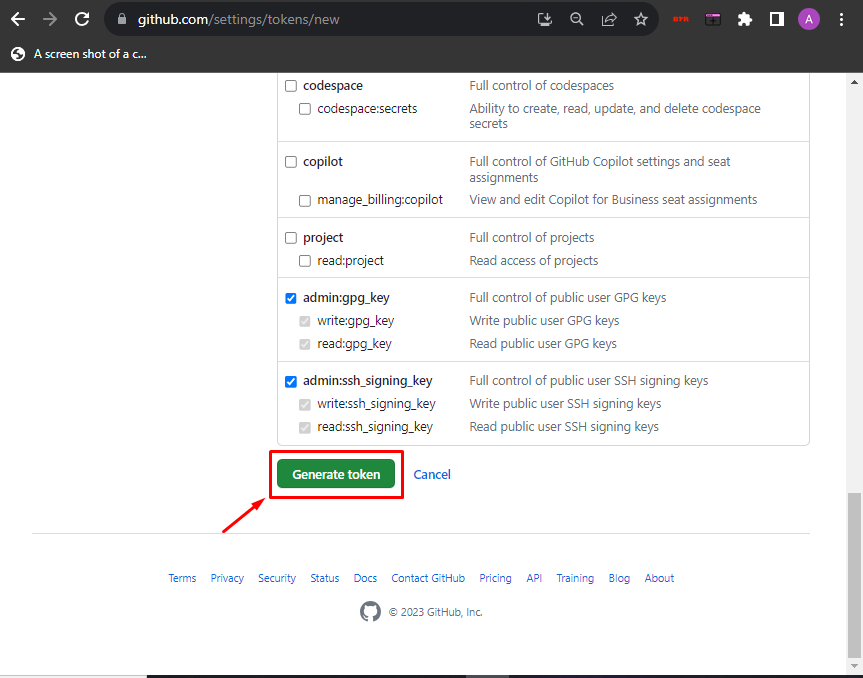
Mark the checkboxes for the required privileges and shown below:
Step 8: Generate Token
Lastly, press the “Generate token” button to generate the personal token:
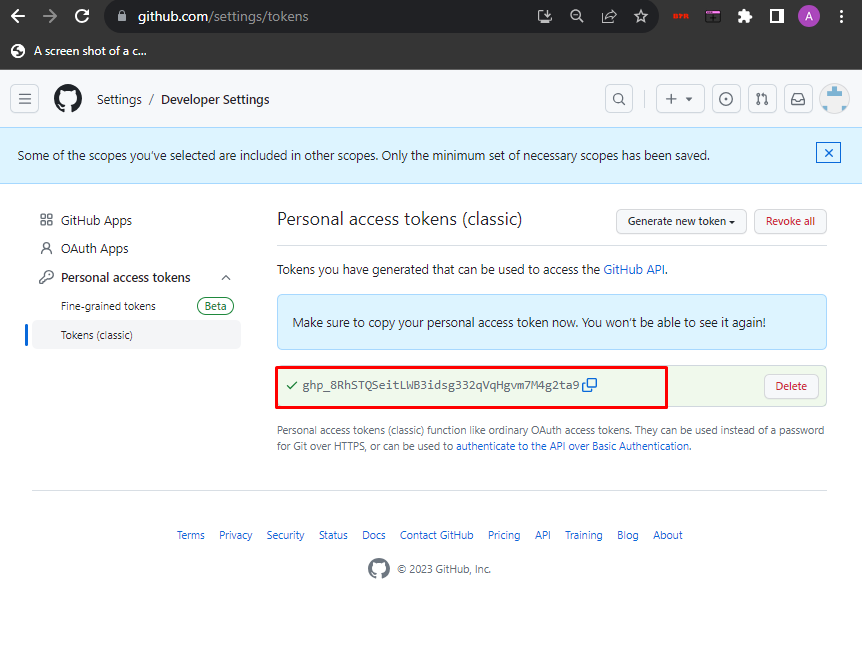
Step 9: Copy Token
Now, copy the generated token and paste it somewhere in your system as it will only appear once:
Step 10: Use Token to Push
Let’s get back to our Linux system and try to push the code using this token instead of password:
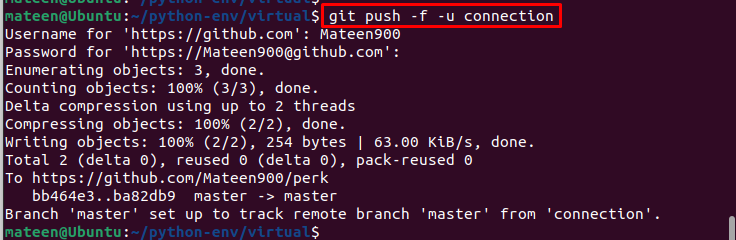
As you can see, there is no authentication error now!
Conclusion
The reason for the error “Authentication Failed” is that the 2-factor authentication is enabled in your GitHub account. For the solution, simply generate the personal token from the GitHub account and use that token instead of the password. By following this guide, the user can resolve the “Authentication Failed” error while pushing the code/changes to the remote host via the Linux system.
Source: linuxhint.com