How to Add the Trusted Sites in Google Chrome
These site security features of Google Chrome let you configure the Google Chrome to allow access to hardware/devices and other browser features to only the websites that you trust.
In this article, we will show you how to configure the permissions for the different browser features for the websites that you trust in Google Chrome.
Table of Contents:
- Adding the Current Website as Trusted Site in Google Chrome
- Managing the Trusted Site Settings for Recently Visited Websites in Google Chrome
- Available Google Chrome Trusted Site Permissions
- Reset the Trusted Site Permissions in Google Chrome
- Clear the Site Data in Google Chrome
- Allow the Trusted Sites to Use Cookies in Google Chrome
- Conclusion
- References
Adding the Current Website as Trusted Site in Google Chrome
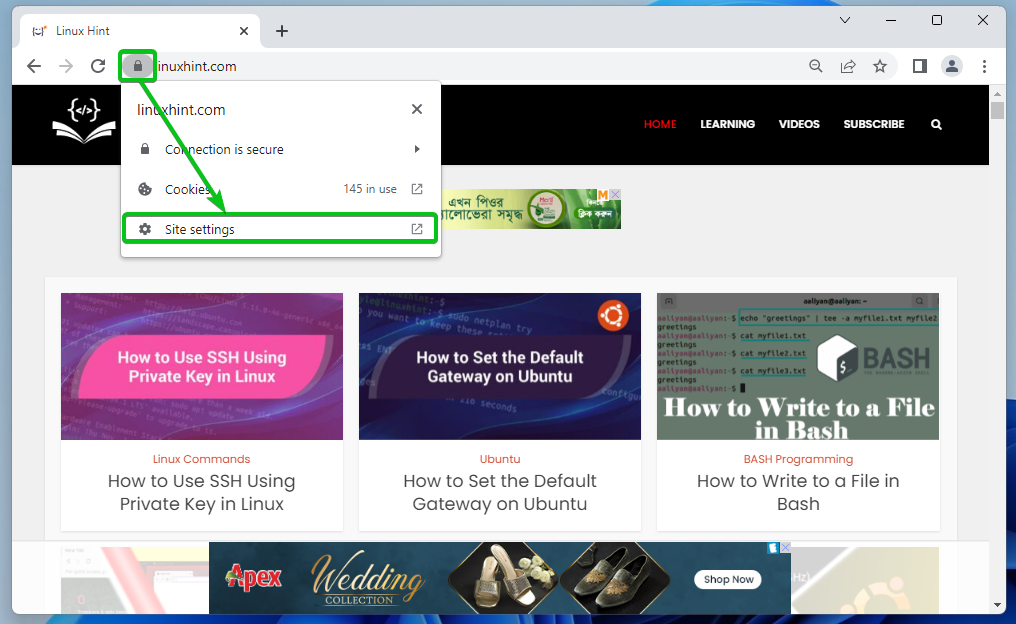
Let’s say, you’re visiting a website that you trust (i.e. https://linuxhint.com) with Google Chrome and you want to configure the permissions for the website.
To configure the site permissions for the website that you’re visiting (and trust) with Google Chrome, click on
![]()
> Site Settings.
You will see a list of permissions that you can configure for the trusted site in the Permissions section as marked in the following screenshot.
We explained all the available permissions in the Available Google Chrome Trusted Site Permissions section of this article. If you don’t know what each of the permissions does, be sure to check it.
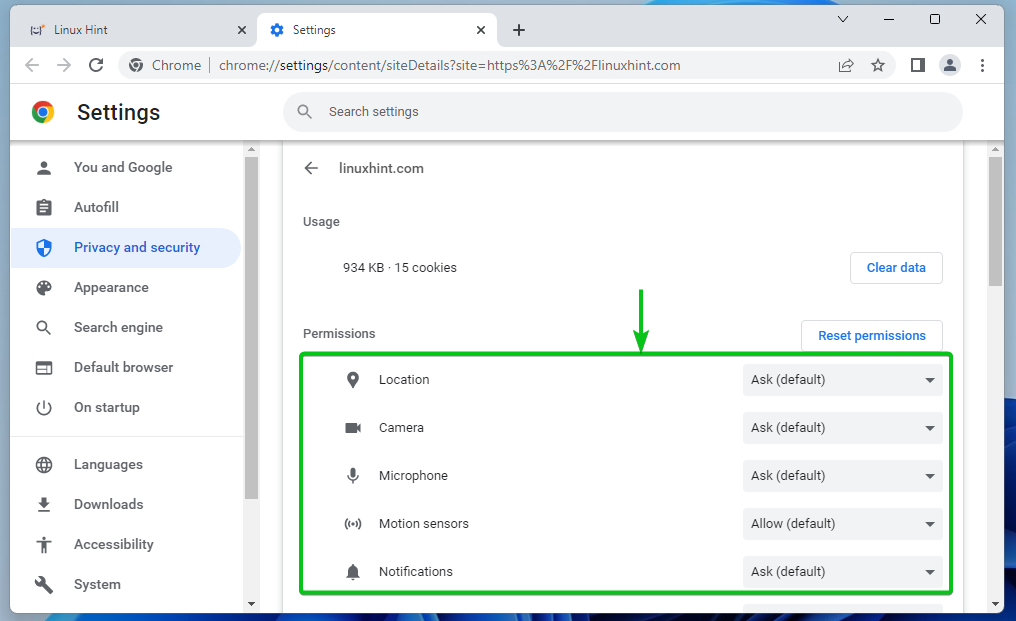
To configure a specific permission for the trusted website, click on the respective dropdown menu and select one of the relevant options. The option which is set to default by Google Chrome has the default keyword in parenthesis – (default).
Ask: Google Chrome asks whether you want to allow or block the access to the hardware/device/browser feature when the website requires access to it.
Allow: Google Chrome allows the access to the hardware/device/browser feature when the trusted website requires access to it.
Block: Google Chrome blocks the access to the hardware/device/browser feature when the website requires access to it.

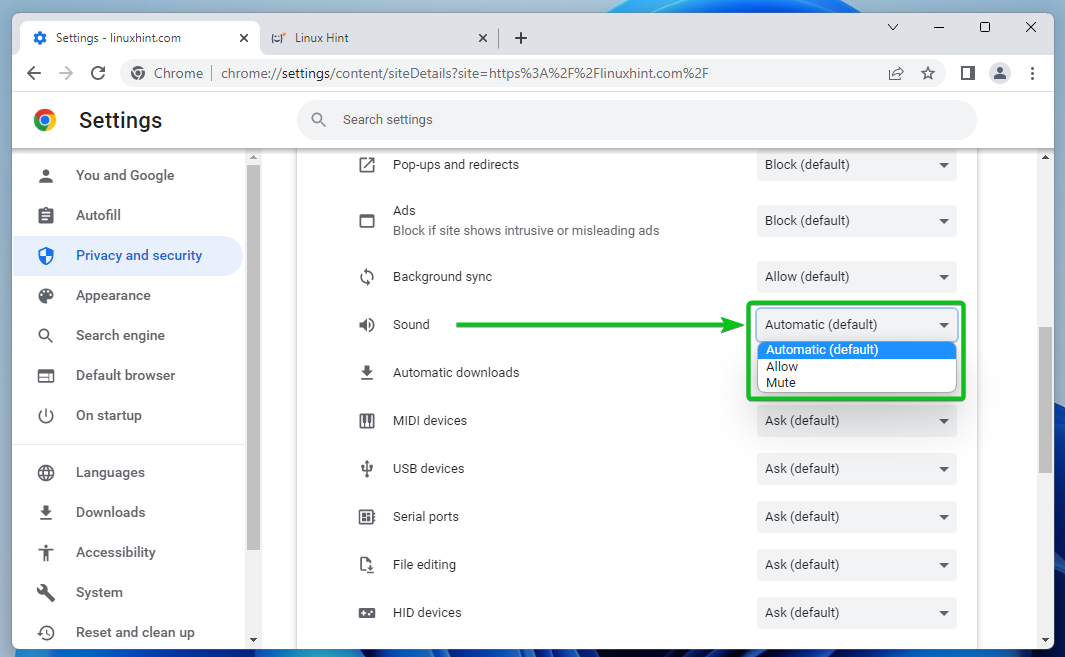
Sound permission has different options than the othes.
Automatic: Depending on the global operating system configuration, Google Chrome allows/plays or mutes the sound on the website when the video/audio is played.
Allow: Google Chrome allows/plays the sound on the website when the video/audio is played.
Mute: Google Chrome mutes the sound on the website when the video/audio is played.
Managing the Trusted Site Settings for Recently Visited Websites in Google Chrome
You can also manage the spermissions for the websites that you recently visited with Google Chrome.
To do that, click on
![]()
> Settings from the top-right corner of Google Chrome.

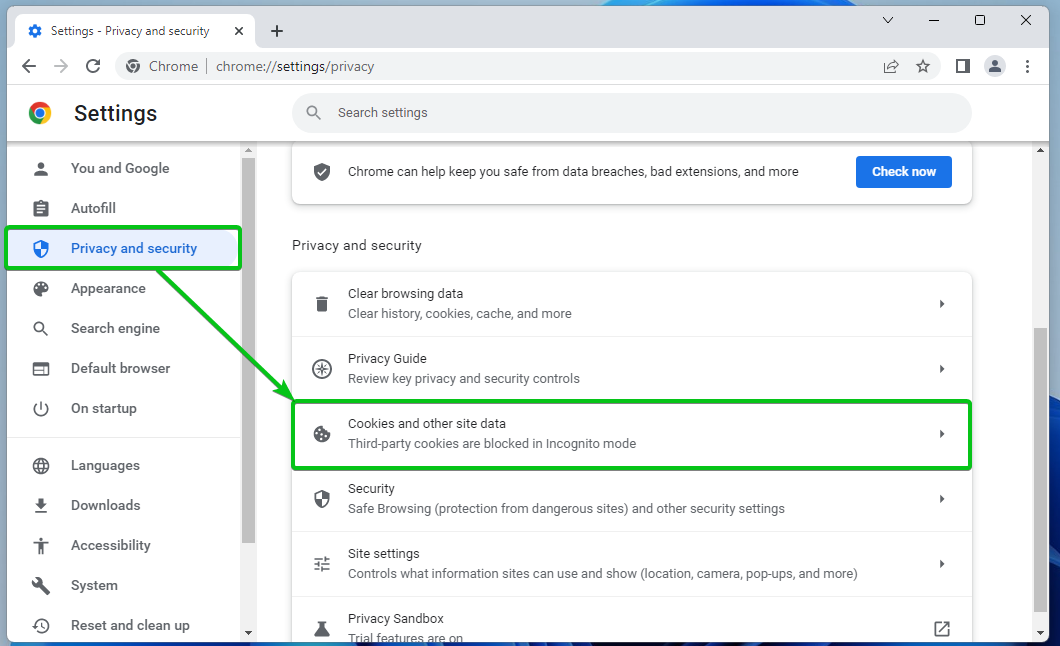
Click on Privacy and security > Site settings.
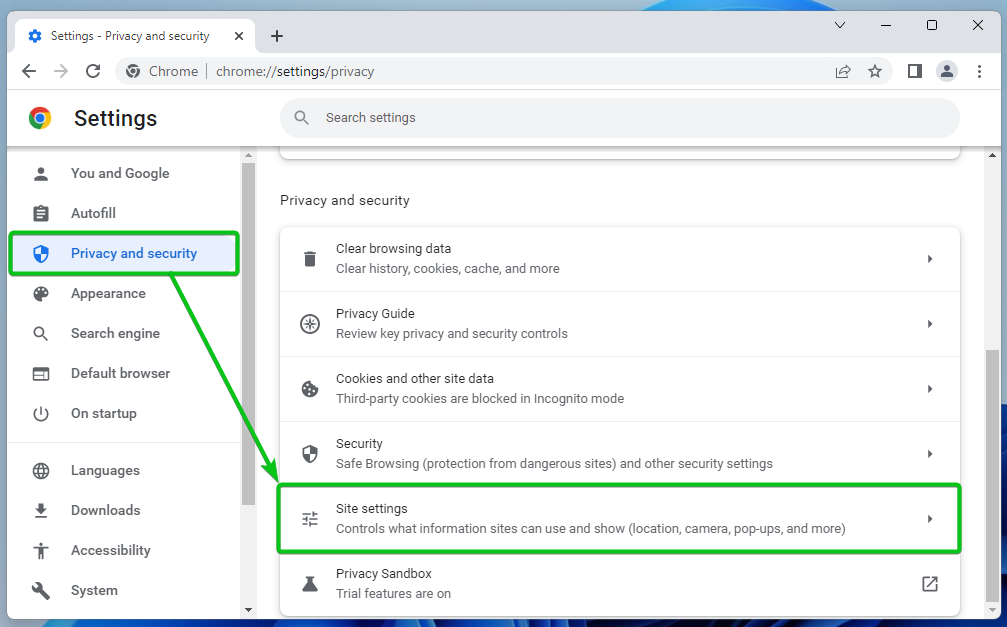
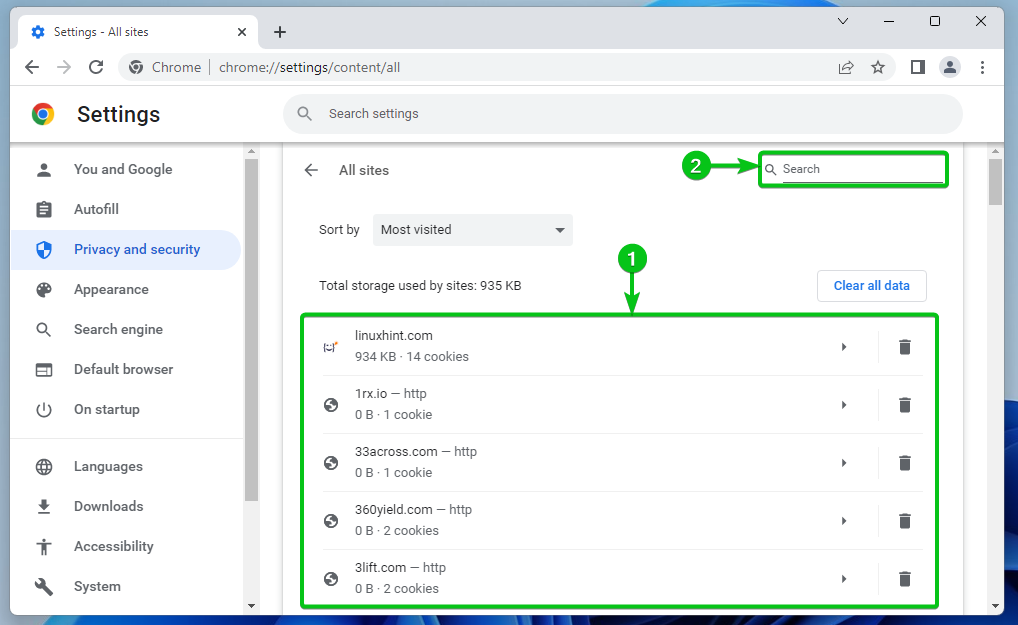
Click on View permissions and data stored across sites.

All the websites that you visited should be listed[1].
If you’re having difficulties on finding the websites that you trust, you can use the search bar to easily find thems[2].
Once you find the website that you trust, click on it.
You will see a list of permissions that you can configure for the trusted site in the Permissions section as marked in the following screenshot.
We explained all the available permissions in the Available Google Chrome Trusted Site Permissions section of this article. If you don’t know what each of the permissions does, be sure to check it.
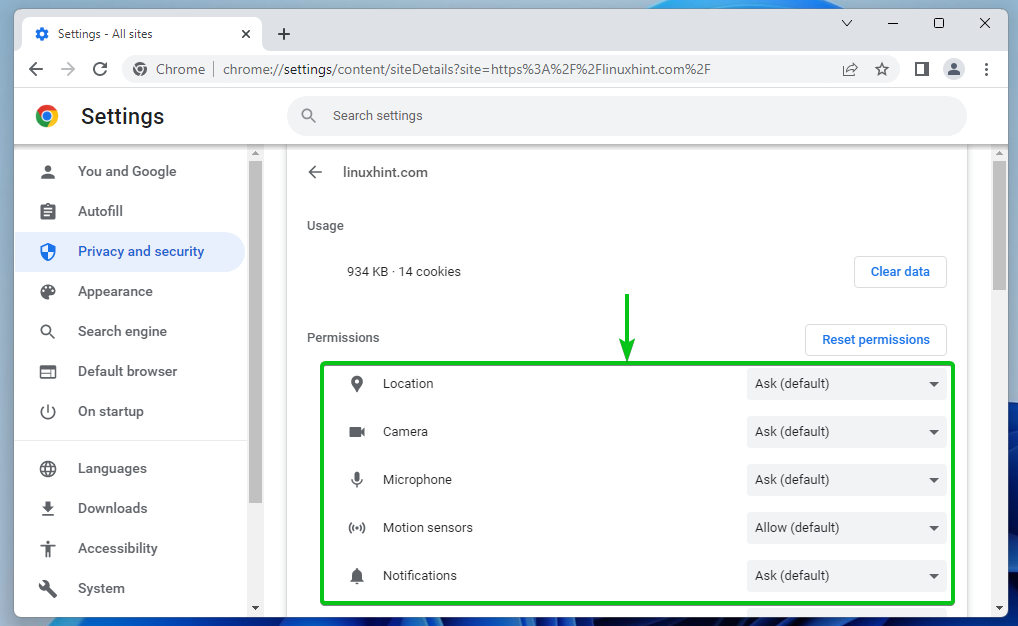
To configure a specific permission for the trusted website, click on the respective dropdown menu and select one of the relevant options. The option which is set to default by Google Chrome has the default keyword in parenthesis – (default).
Ask: Google Chrome asks whether you want to allow or block the access to the hardware/device/browser feature when the website requires access to it.
Allow: Google Chrome allows the access to the hardware/device/browser feature when the trusted website requires access to it.
Block: Google Chrome blocks the access to the hardware/device/browser feature when the website requires access to it.

Sound permission has different options than the others:
Automatic: Depending on the global operating system configuration, Google Chrome allows/plays or mutes the sound on the website when the video/audio is played.
Allow: Google Chrome allows/plays the sound on the website when the video/audio is played.
Mute: Google Chrome mutes the sound on the website when the video/audio is played.

Available Google Chrome Trusted Site Permissions
From the Permissions section, you can configure the following permissions for the Google Chrome trusted site:
Location: Configure the location access permission for the website.
Camera: Configure the camera access permission for the website.
Microphone: Configure the microphone access permission for the website.
Motion sensors: Configure the access to the motion sensor devices of your computer for the website.
Notifications: Configure the notification permission for the website depending on whether you want the website to send you notifications.
JavaScript: Allow or block the JavaScript execution permission for the website.
Images: Allow or block the images from displaying on the website.
Pop-ups and redirects: Allow or block the pop-ups and redirects for the website.
Ads: Allow or block the ads from displaying on the website.
Background sync: Allow or block a website from running some tasks (i.e. upload files, sync chat messages) in the background.
Sound: Configure the sound for the music/video that is played on the website.
Automatic downloads: Configure the automatic downloading of related files for the website to save you time.
MIDI devices: Allow or block the website access to MIDI (Musical Instrument Digital Interface) devices.
USB devices: Configure the website access to the USB devices of your computer.
Serial ports: Configure the website access to the serial ports of your computer.
File editing: Configure the website access to the files of your computer and save the changes in the filesystem directly.
HID devices: Configure the website access to the HID (Human Interface Devices) devices of your computer, i.e. keyboard, mouse, game controllers, etc.
Protected content IDs: Allow or block a protected content from being played on the website.
Clipboard: Configure the clipboard access for the website.
Payment handlers: Some websites install payment handlers to make the checkout easier. You can allow or block the payment handlers for the website from here.
Insecure content: Allow or block an insecure content on the website.
Third-party sign-in: Allow or block a third-party sign-in feature for the website.
Augmented reality: Allow or block the website access to the camera of your computer for augmented reality (AR) apps and games.
Virtual reality: Allow or block the website to use the virtual reality (VR) devices and enter the virtual reality sessions.
Your device use: Allow or block the website from detecting when you use your computer to update the availability status on chat or instant messaging apps.
Window management: Allow or block the website permissions to resize, maximize, minimize, etc. the Window management tasks.
Fonts: Allow or block the website to access the fonts which are locally installed on your computer.
For more information on available Google Chrome site permissions, check Change site permissions – Computer – Google Chrome Help.
Reset the Trusted Site Permissions in Google Chrome
To reset the permissions of the selected website to the default, click on Reset permissions.

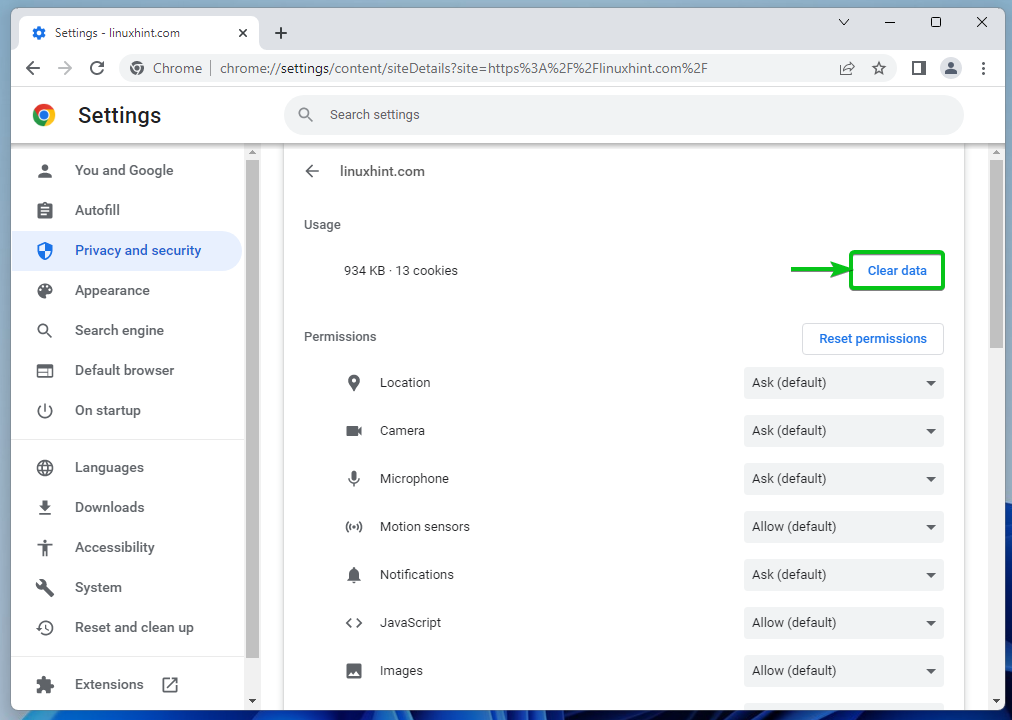
Clear the Site Data in Google Chrome
To clear the cookies data of the selected website, click on Clear data.
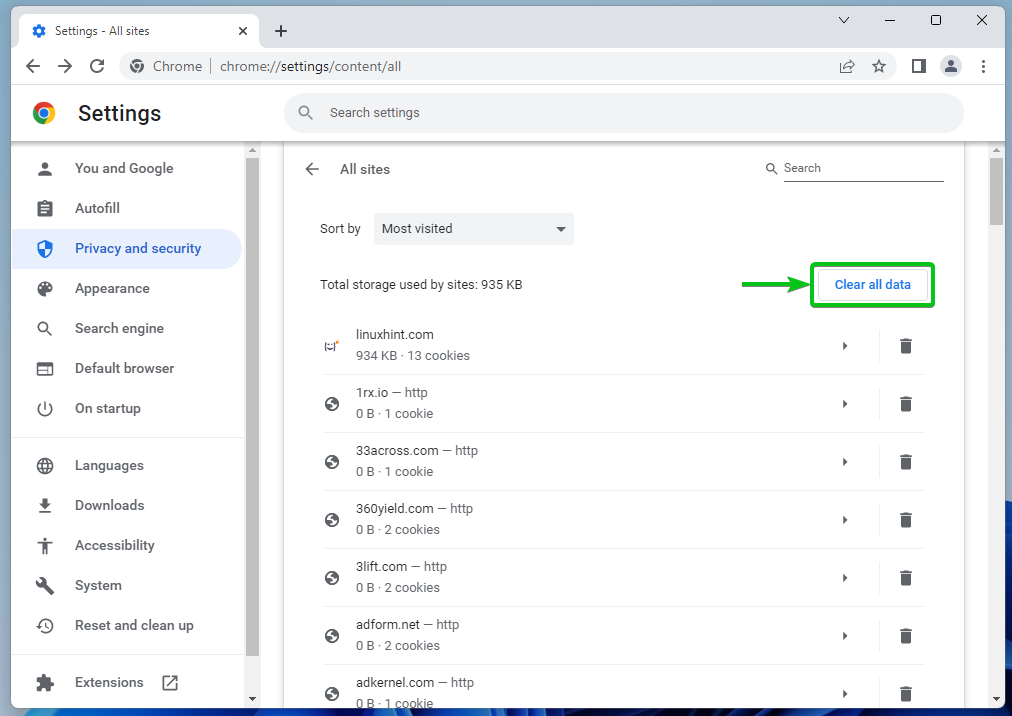
You can also clear the cookies data of all the websites that you visited.
To do that, navigate to
![]()
> Settings > Privacy and security > Site settings > View permissions and data stored across sites and click on Clear all data.
Allow the Trusted Sites to Use Cookies in Google Chrome
To allow the trusted websites to use cookies in Google Chrome, navigate to
![]()
> Settings > Privacy and security and click on Cookies and other site data.
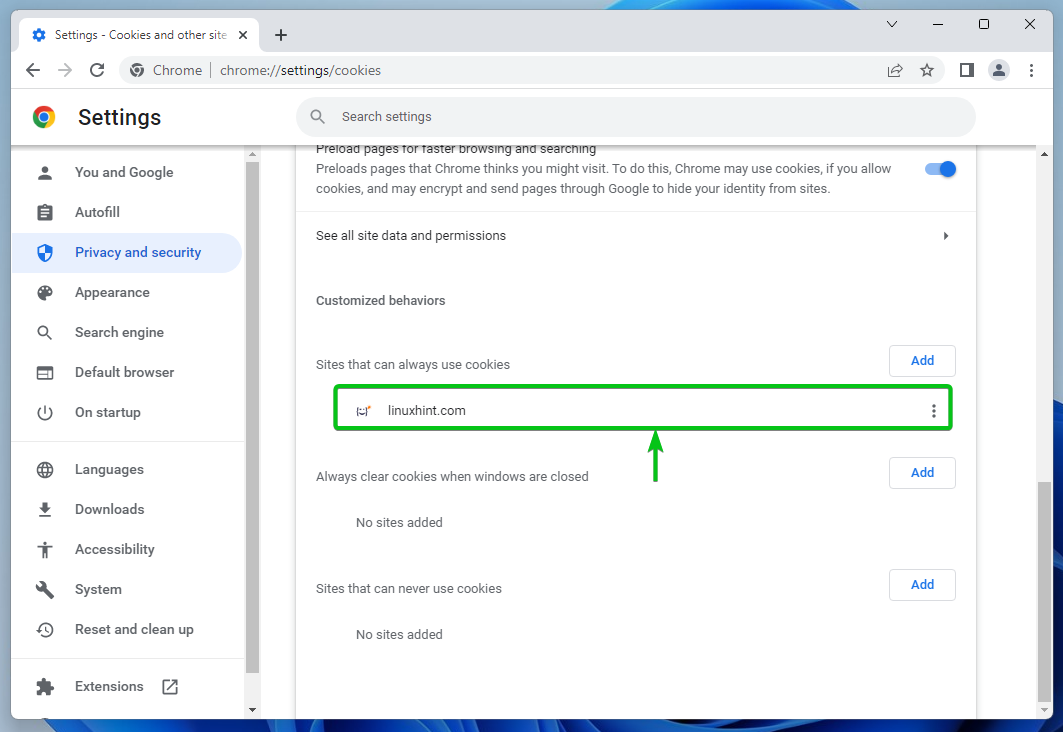
Scroll down a little and click on Add from the Sites that can always use cookies section.

Type in the domain name of the trusted website that you want to allow to use the cookies in the Site section[1].
If you want to allow the third-party cookies on this website as well, tick Including third-party cookies on this site[2].
Once you’re done, click on Add[3].

Your desired trusted website should be able to use the cookies from now on.
To change the cookie permission for the trusted website, click on
![]()
:

You will find the following cookies permission options for the trusted website:
Block: Do not allow the cookies for the website.
Clear on exit: Allow the cookies for the website but remove them when you close the website/browser.
Edit: Edit the cookies settings for the website.
Remove: Remove the website from the Sites that can always use cookies list. The default cookies permission is applied to the website afterward.

To learn more about managing the cookies on Google Chrome, read the article on How to Manage the Cookies on Google Chrome.
Conclusion
In this article, we showed you how to manage/reset the security permissions for trusted sites on Google Chrome. We also showed you how to clear the site data (i.e. cookies) for specific/all websites on Google Chrome. We showed you how to allow the trusted sites to use cookies in Google Chrome as well.
References:
Source: linuxhint.com