How to Add or Remove a Microsoft Account from Windows 11?
This post will discuss the following content:
- How to Add/Link a Microsoft Account on Windows 11?
- How to Remove/Unlink the Microsoft Account From Windows 11?
- Why is a Microsoft Account Required in Windows 11?
- Conclusion.
How to Add/Link a Microsoft Account on Windows 11?
While installing Windows 11, users must add a Microsoft Account of any domain (Gmail, Yahoo, or iCloud mail). However, this step can be bypassed, as discussed in this guide to Set Up Windows 11 Without a Microsoft Email. If you have set up Windows 11 without a Microsoft Account or have unlinked it, follow these steps to Add a Microsoft Account in Windows 11:
Step 1: Launch the Windows Settings App.
Step 2: Navigate to Your Info (From the Accounts Settings).
Step 3: Use the “Sign in with a Microsoft account instead” and Enter Your Microsoft Account Credentials.
Step 4: Set Up Windows Hello.
Step 5: Verify Your Identity.
A detailed overview of the above steps is as follows:
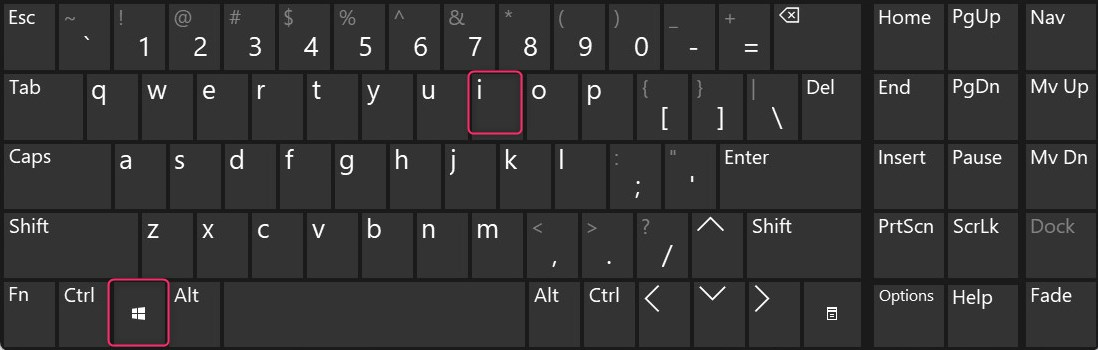
Step 1: Launch the Windows Settings App
The Windows Settings app collects various system settings that users can modify according to their taste. It also hosts the Account settings where users can add/link a Microsoft account. To trigger its launch, use the Windows + i keys:
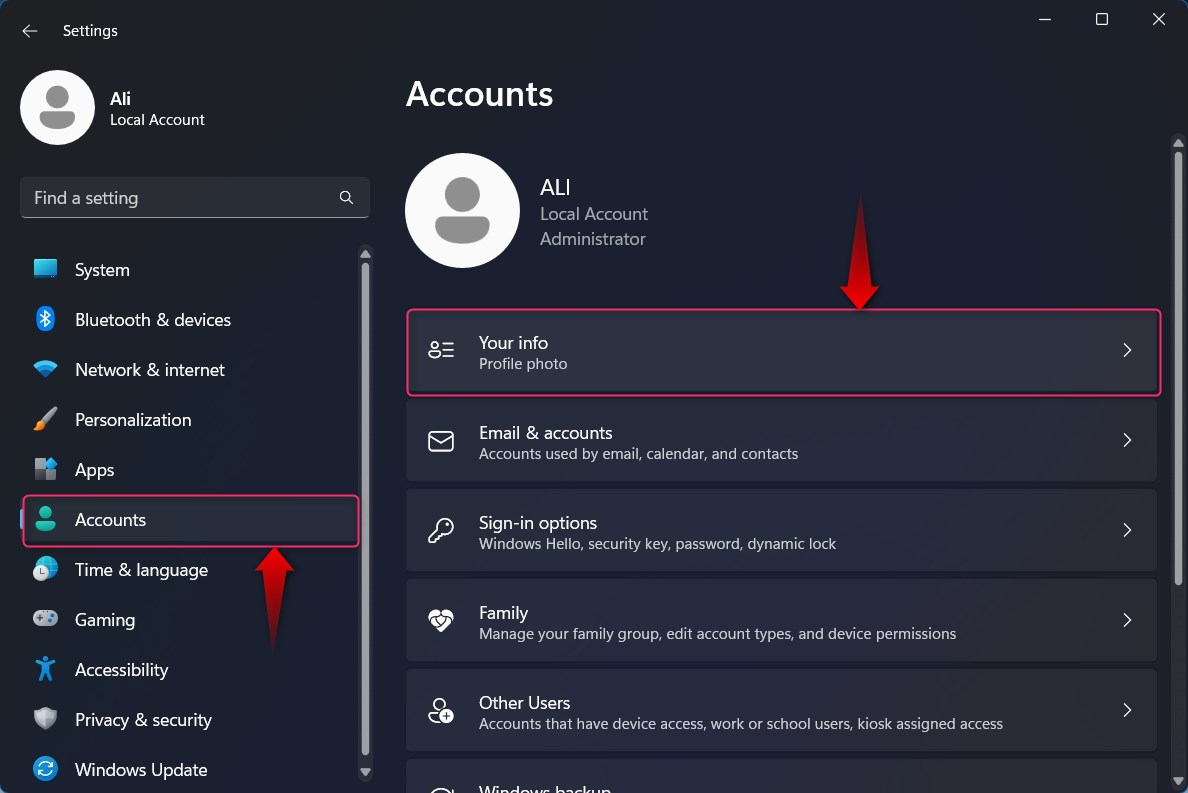
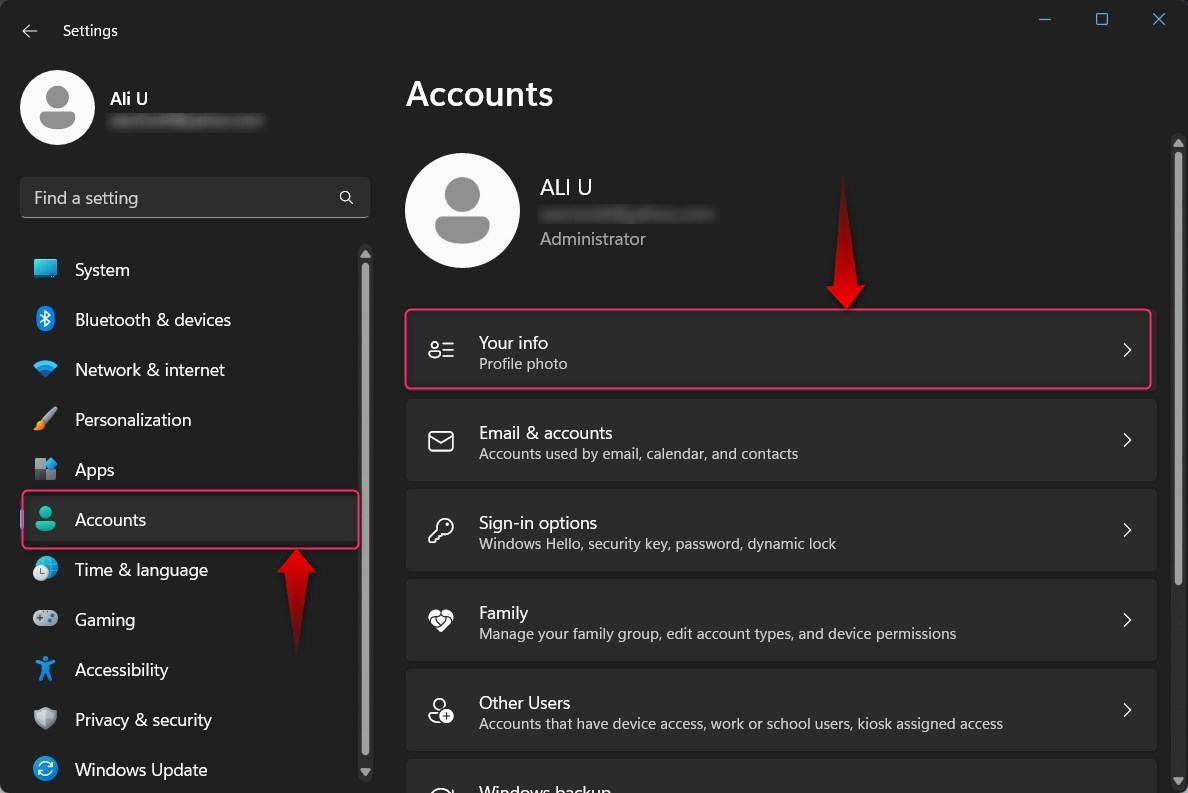
Step 2: Navigate to “Your info” Settings
In the Windows Settings app, navigate to Accounts ⇒ Your info:
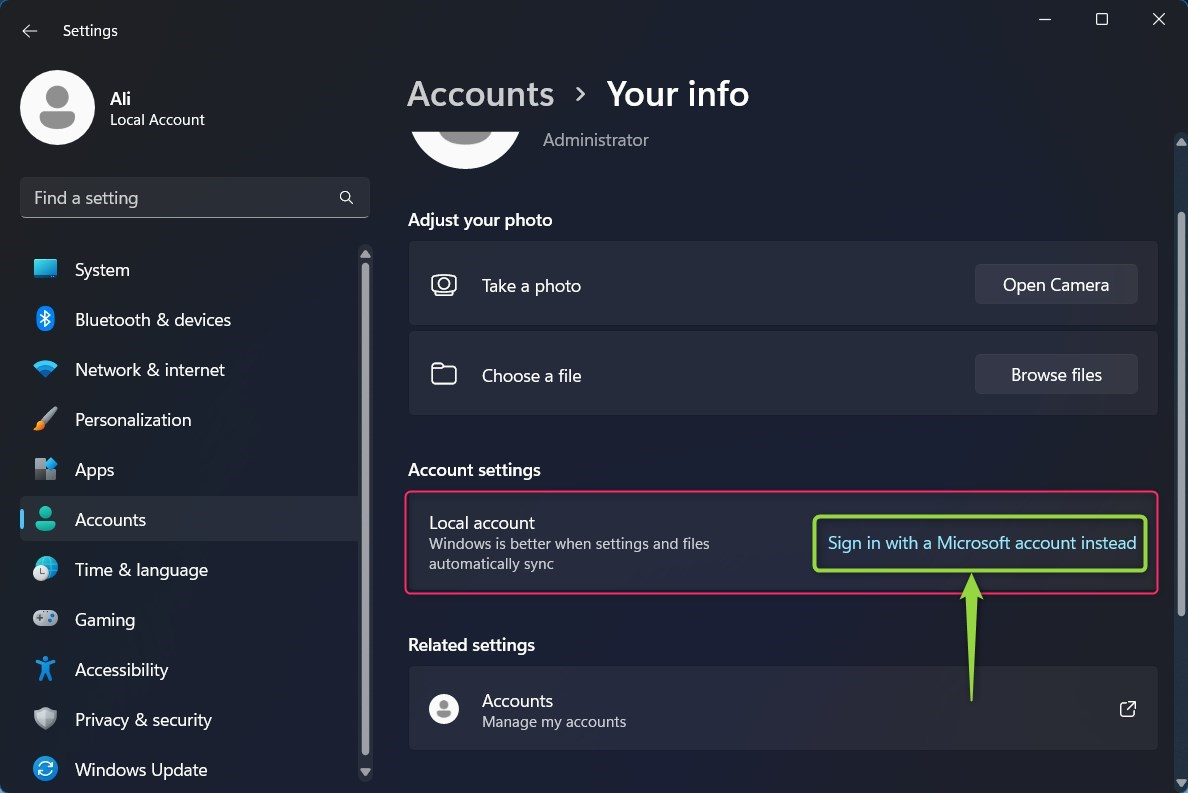
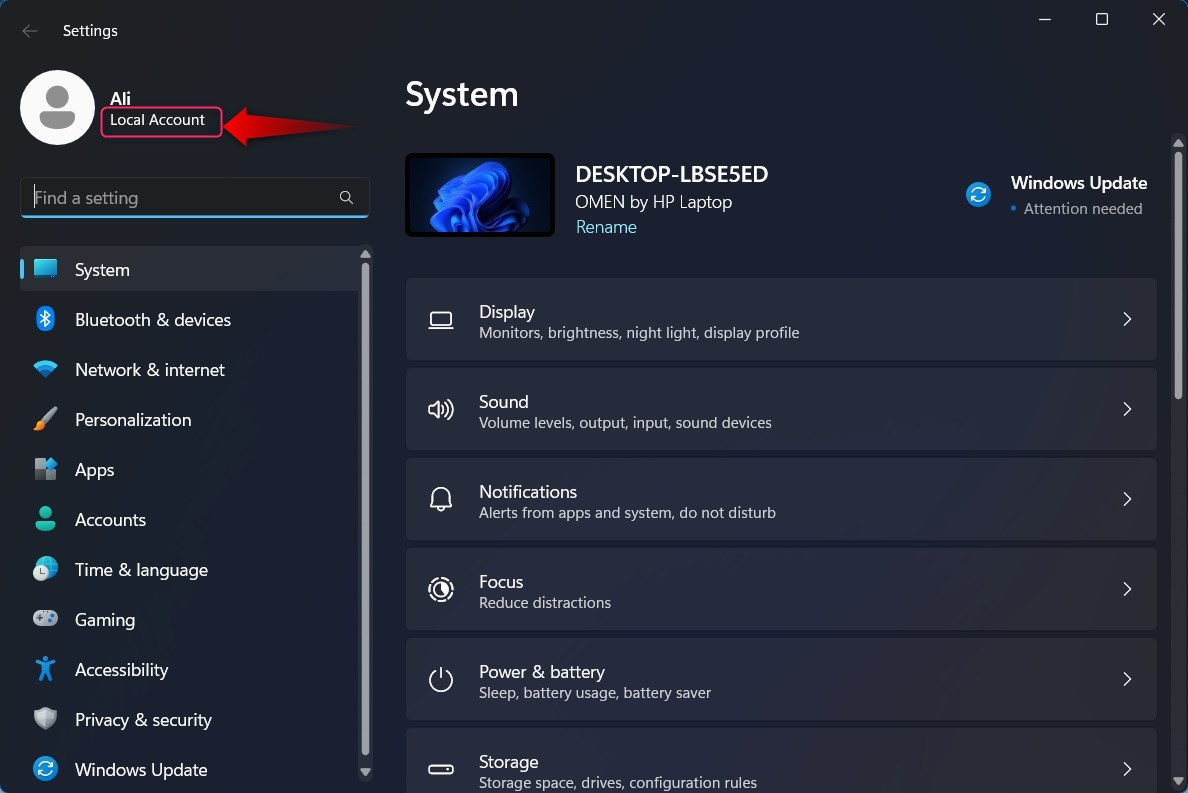
Step 3: Add a Microsoft Account in Windows 11
In the “Your info” settings, click/tap on the “Sign in with a Microsoft account instead” option next to the Local account:
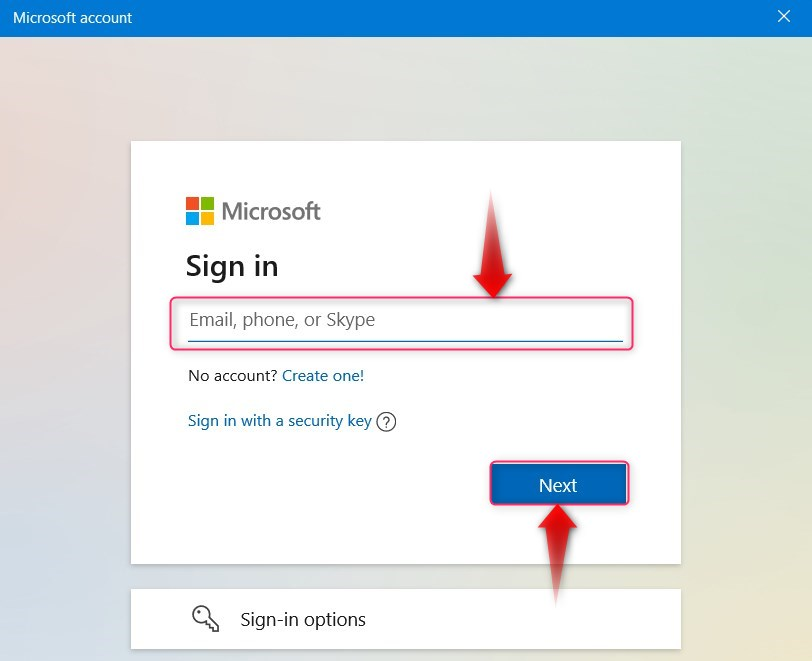
It will now prompt for an account you want to link with the device. Hit the Next button after entering (Email and password):
Next to that, users must enter the current user’s password. Use the Next button to continue:
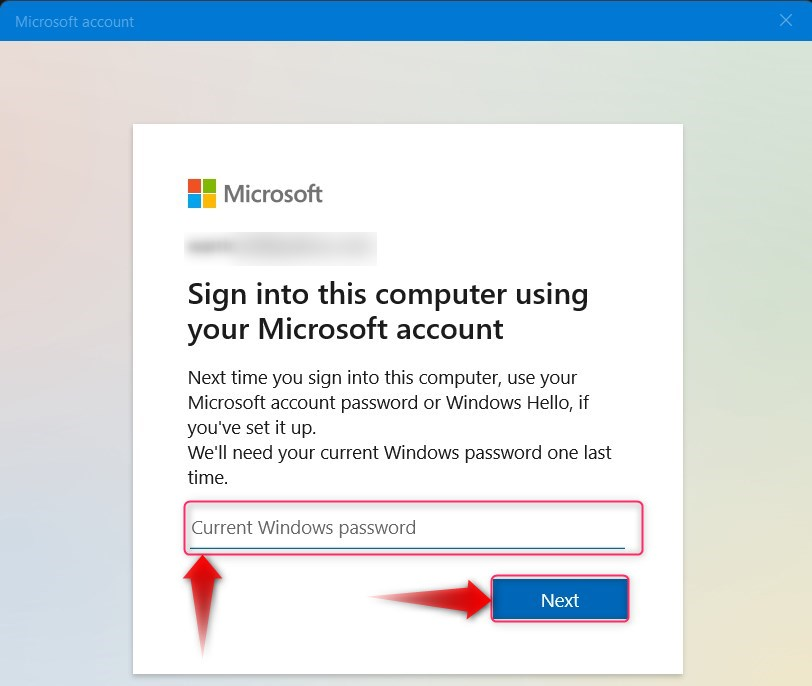
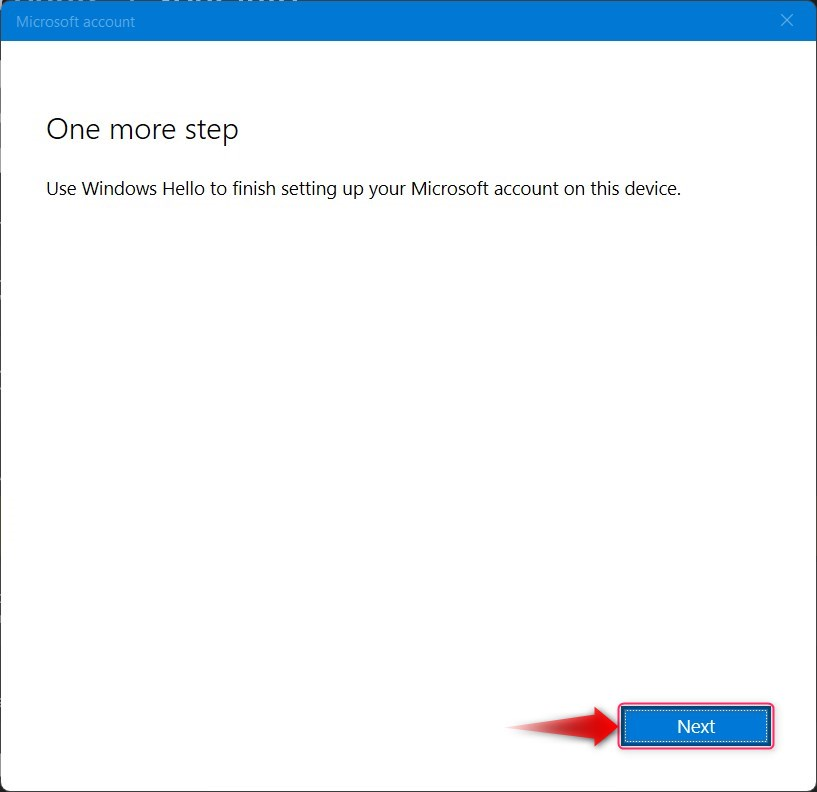
Step 4: Set Up Windows Hello
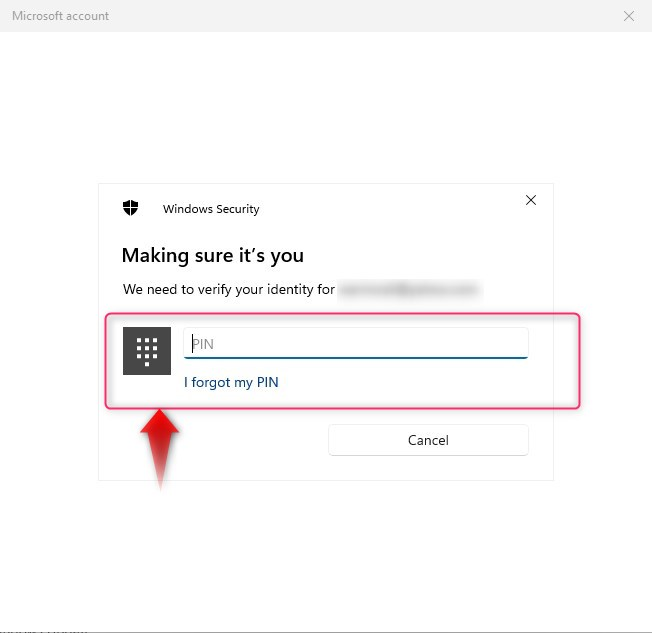
To finish adding a Microsoft Account, users must set up Windows Hello since Microsoft is moving towards passwordless entry on Windows. Use the Next button to continue and specify the Windows Hello PIN:
From here, you can use the PIN created on another device or set up a new one. In the below snippet, the PIN was already being used on another device, and the same must be entered here:
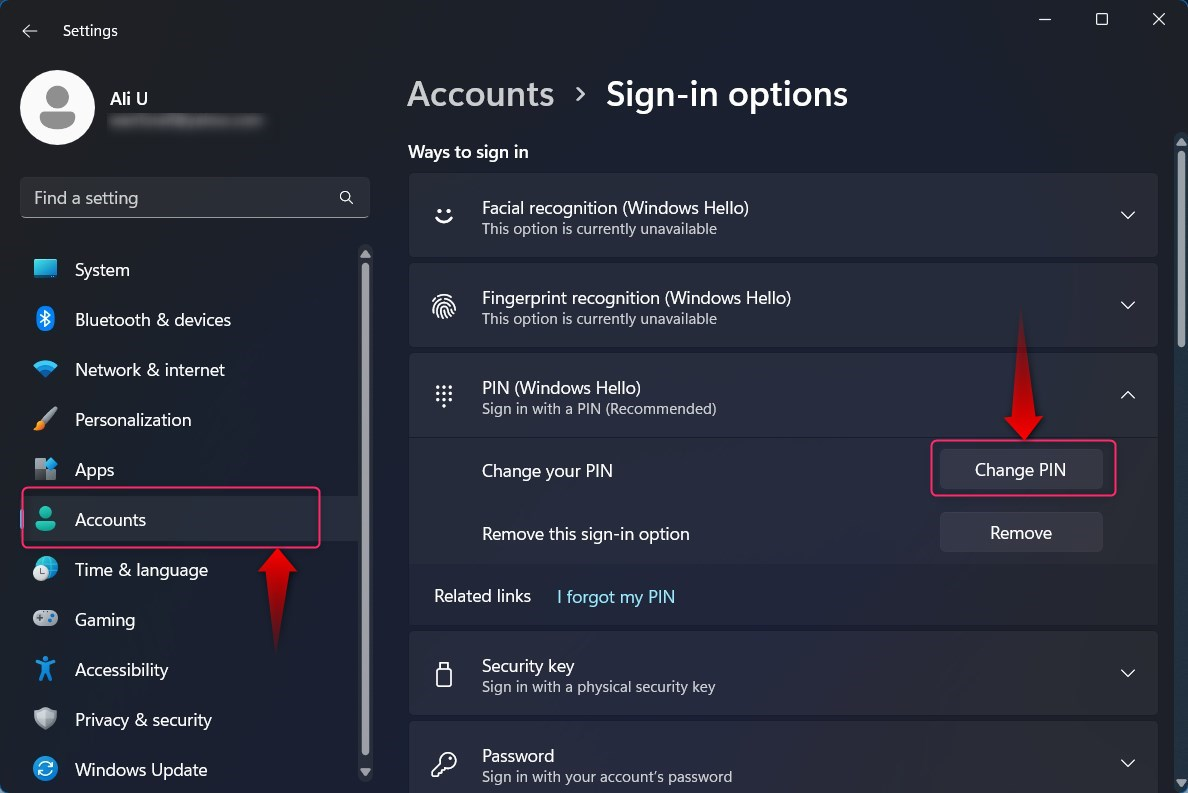
Note: You can always change the Windows Hello PIN from Settings App ⇒ Accounts ⇒ Sign-in options ⇒ PIN (Windows Hello) ⇒ Change PIN:
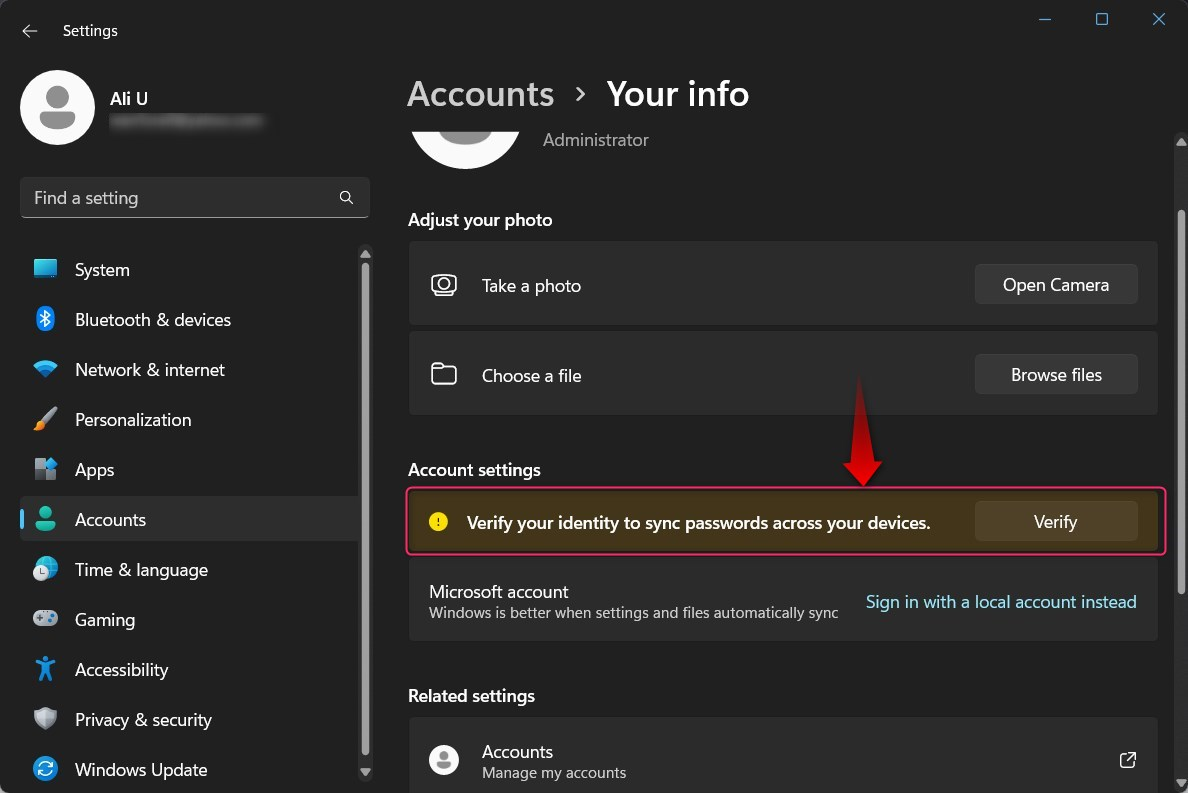
Step 5: Verify Your Identity
You have now added a Microsoft Account to your Windows 11, and now is the time for verification to sync passwords across your devices. Use the Verify option to proceed:
Next, you must identify your identity via the phone number that you added while creating the Microsoft Account:
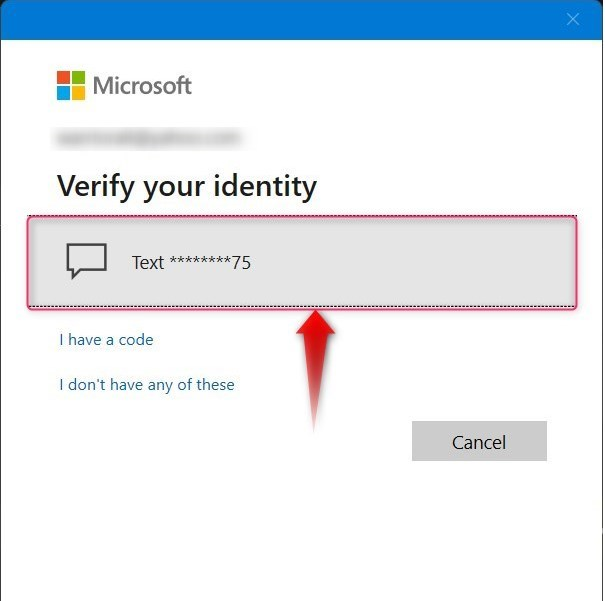
Following that, enter the code that you have received on your mobile phone and hit the Verify button to complete the verification process:
How to Remove/Unlink the Microsoft Account From Windows 11?
Because of privacy concerns, a few users may want to opt out of using the Microsoft Account in Windows 11. To do that, follow the below stated instructions:
Step 1: Launch Windows Settings App.
Step 2: Navigate to “Your info” Settings.
Step 3: Remove Microsoft Account.
Step 4: Enter the Local Account Information.
The detailed overview of the above steps is as follows:
Step 1: Launch Windows Settings App
To launch the Windows Settings app, use the Windows + i keys:

Step 2: Navigate to “Your info” Settings
In the Windows Settings app, click/tap on the Accounts from the left pane and then Your info from the right pane:
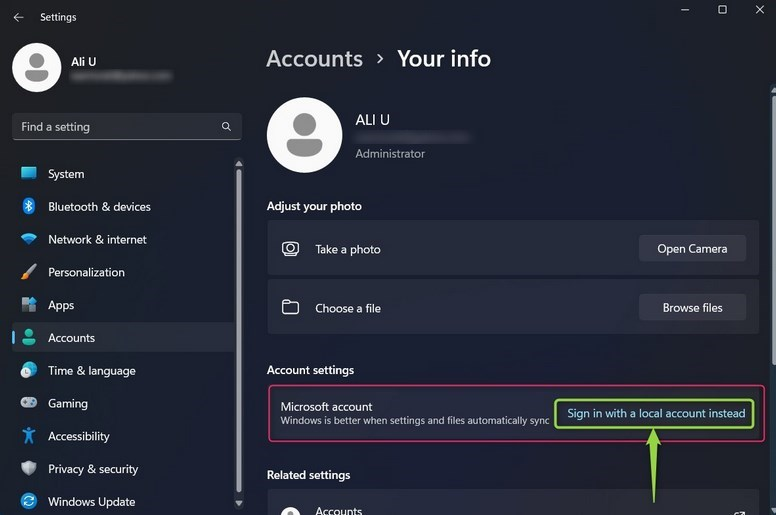
Step 3: Remove Microsoft Account
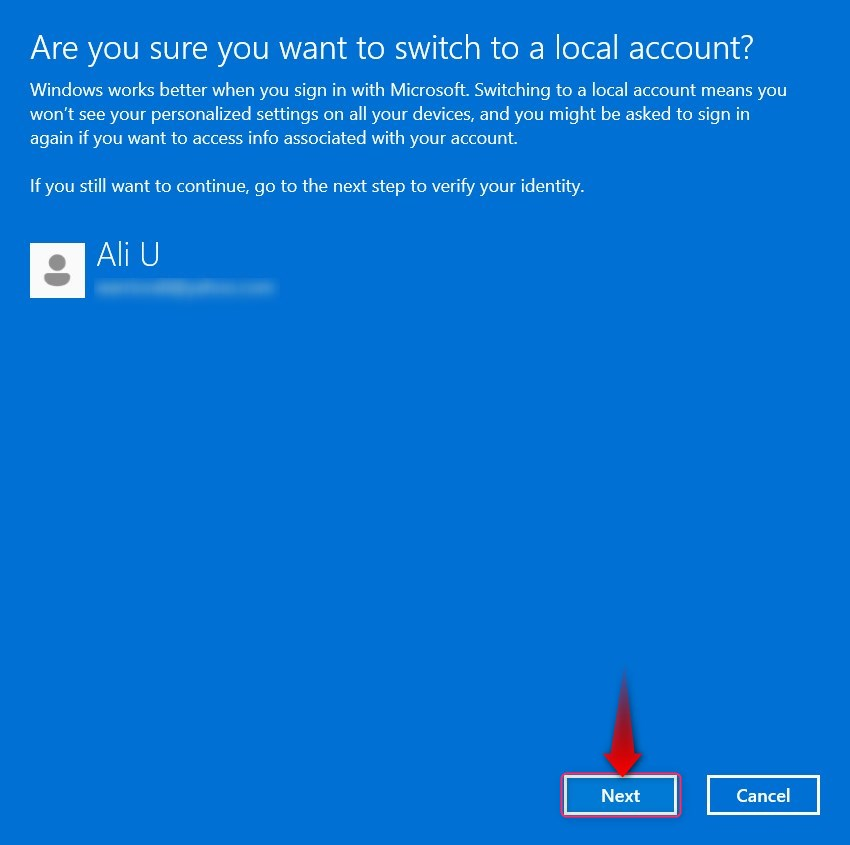
In the Your info settings, select “Sign in with a local account instead” next to the Microsoft account to remove the Microsoft Account:
Doing that will trigger the following confirmation window; use the Next button to proceed and remove the Microsoft Account:
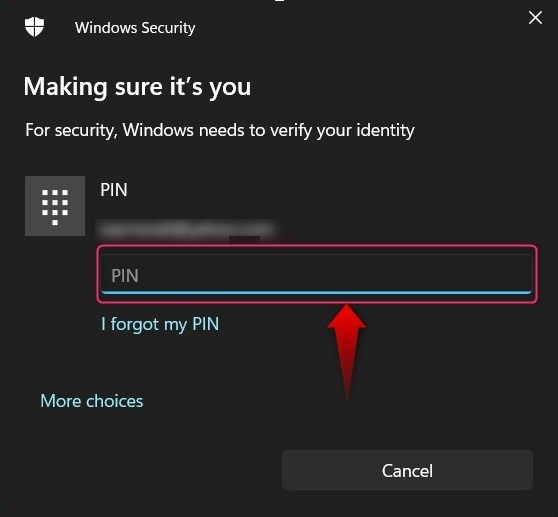
Now, users must enter the Windows Hello PIN (if it is set up) or the user account password. In this case, the Windows Hello PIN was already set up:
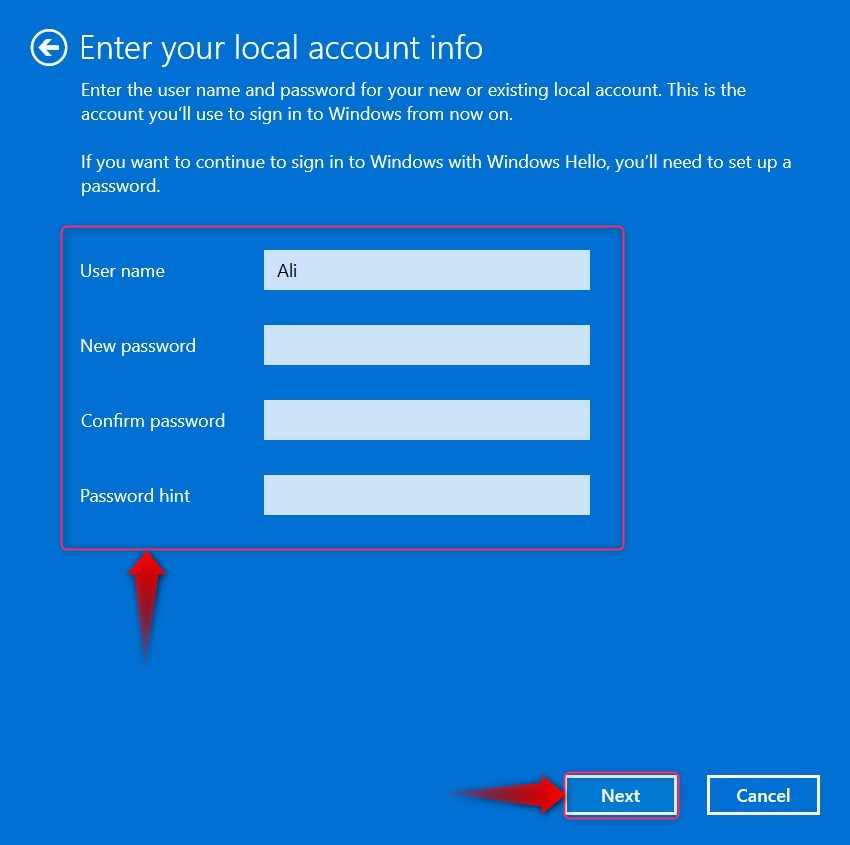
Step 4: Enter the Local Account Information
After successfully inserting the Windows Hello PIN, users must specify the credentials for the local account and use the Next button to proceed further:
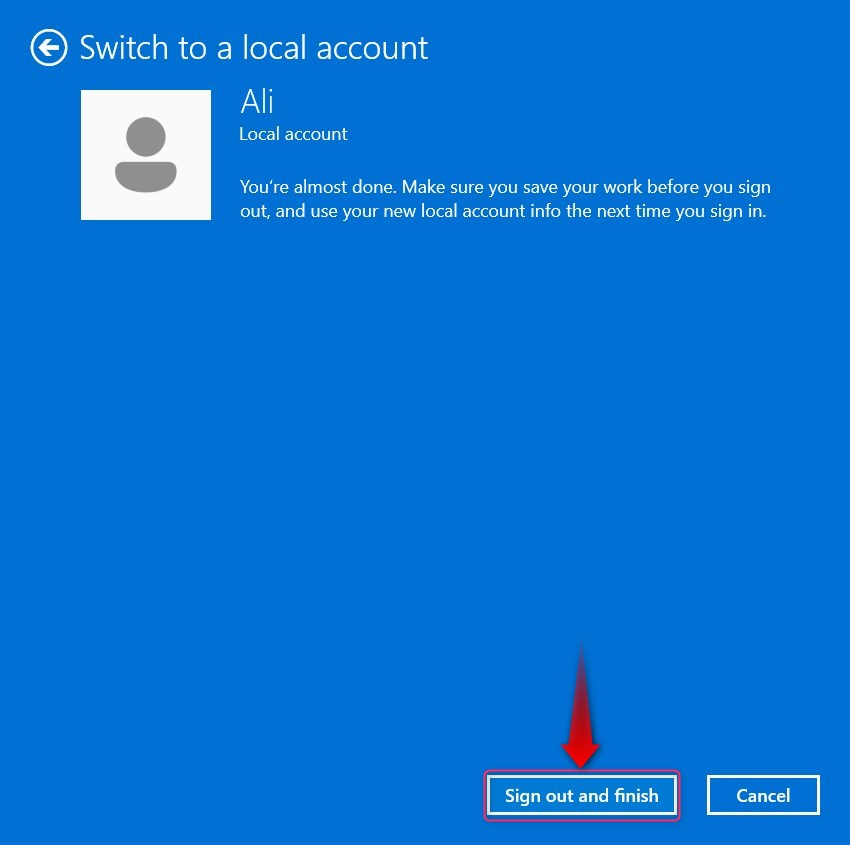
Finally, use the Sign out and finish button to complete the wizard sign-out from the current session and the Microsoft Account is now removed:
Why is a Microsoft Account Required in Windows 11?
A Microsoft Account lets you easily sync your data via OneDrive and you can also sync settings across all devices. The Microsoft Store cannot be used without a Microsoft Account. Using a Microsoft Account, you can contribute to Windows Insider Builds, where users test and review the new features. This testing results in the best build of those features available to all users.
However, some users are concerned with privacy, and from some unreliable sources, we have spotted people saying that Microsoft collects your personal information. It is false and nobody has proof, so don’t believe in those rumors and keep yourself synced using a Microsoft Account.
Conclusion
To Add/Link a Microsoft Account in Windows 11, go to Settings app ⇒ Accounts ⇒ Your info and use the “Sign in with a Microsoft account instead” and follow the instructions. To Remove/Unlink a Microsoft Account in Windows 11, go to Settings app ⇒ Accounts ⇒ Your info and use the “Sign in with a local account instead” and follow the instructions. To enjoy the perks (Syncing and Microsoft Store) of Windows 11, users must link a Microsoft Account on their systems. This guide has discussed the complete process to “Add or Remove a Microsoft Account From Windows 11”.
Source: linuxhint.com