How to Add or Check NIS Users in Linux
With the previous introductory information, it is right to conclude that NIS provides management and lookup services for the users within a network. But this is only possible once you add the user credentials to your database.
This article will provide a step-by-step guide on adding the users to your NIS system. Besides, it will also discuss how you can check the users within your system or find a specific user within the network.
Adding NIS Users to an NIS Domain
You can follow these steps to add a new user to your Linux NIS domain:
Step 1: Log in on the Master Server
You can only add the users if you have all the privileges of an administrator. Thus, begin by becoming an administrator on the master server. Notably, you can do this by creating your NIS profile during the NIS configuration.
Step 2: Create a New User
Proceed to create a new user using the useradd command. The utility creates the entries with relevant user credentials in the /etc/passwd file and the /etc/shadow profile. The following command illustrates this step and you can replace the userID with the login ID of the user you intend to add:
![]()
Step 3: Create a Password for the New User
Use the yppasswd command to create a password for the new user. The user will use this password whenever they want to log in. In the following illustration, the UserID specifies the user whose password you are creating. This step is important to ensure that the password created is lockable and useable during logins. The password created with the initial useradd command is not lockable.
![]()
Step 4: Copy the Entry into the Master Server
The next step is to copy the new user credentials into your master server’s passwd map files. Your master server’s source files should not be in a /etc file. Proceed to copy the newly created files from both the /etc/passwd and /etc/shadow files onto the passwd input file on your server.
For instance, if you add a new user named Ken, you copy the following line from the /etc/passwd to the passwd input map file:
![]()
Similarly, the following line is what you would copy from /etc/shadow to your passwd input map files:
![]()
Step 5: Delete Entries from /etc/shadow and /etc/passwd Input Files
It is vital to ensure that the Makefile correctly indicates the location of the copied password input file.
Once you copy the entries to a map source file stored in a different directory and ascertain their location, you should proceed and delete the entries in both /etc/shadow and /etc/passwd. This action is entirely for security purposes. Delete the entries using the userdel utility on your master server as indicated in the following:
![]()
Step 6: Update Your NIS Passwd Maps
Once your input files in the master server are updated, you can update the passwd maps using the following command:

The previous steps help add a new user to your NIS system. Once through, inform the new user of the initial password assigned to them. They can then login and change the password appropriately.
Finding Users in Your NIS Domain
You can also look up the users in your NIS domain. These two methods come in handy from time to time.
a. Obtaining a List of All Users in the Domain
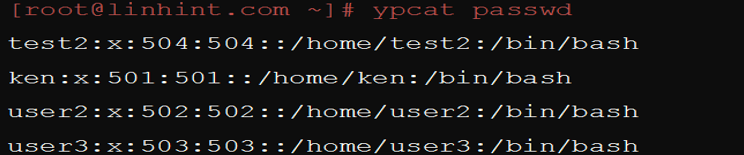
The ypcat passwd command displays a complete list of the users in your system. You can use it as in the following illustration:
b. Finding a Specific User
You can identify a specific user from your system by running the following command:
![]()
For example, you can look up the user named Ken in the NIS system by replacing the “username” in the command with Ken.
If the user named Ken is available, you will receive the following result:

But you can expect the following result in case the user does not exist:

Conclusion
The previous illustrations show how you can add the users to your NIS system. It also shows how you can search and find the users from your systems.
Sources:
-
- https://www.ibm.com/docs/en/aix/7.2?topic=y-ypmatch-command
- https://www.computernetworkingnotes.com/linux-tutorials/how-to-configure-nis-server-in-linux.html
- https://www.ibm.com/docs/en/aix/7.2?topic=maintenance-adding-new-nis-user
- https://docs.oracle.com/cd/E36784_01/html/E36831/anis2-1.html
- https://www.thegeekdiary.com/how-to-identify-nis-authenticated-users/#:~:text=To%20identify%20whether%20a%20specific,ypmatch
%20%5Busername%5D%20passwd%20command.&text=Note%3A%20It%20is
%20recommended%20and,passwd%20and%20%2Fetc%2Fshadow.
Source: linuxhint.com