How to Add a New User on Debian 11
In this article, we will discuss how you can add the new users on Debian 11. We will also discuss how to set the password for the new user and assign it with sudo privileges.
As with Linux, we have different options to do a single task. Here, we will demonstrate three different ways: two command lines and one GUI method to add a new user account on Debian.
- Adding new user using useradd command
- Adding new user using adduser command
- Adding new user through system settings
Add New User on Debian 11 Through the Command Line Method
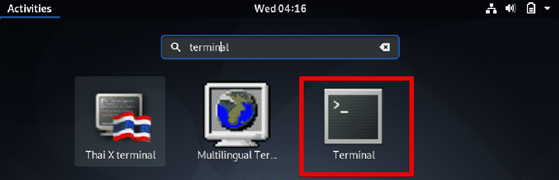
To add a new user on Debian 11 operating system through the command line, you need to open the Terminal utility. You can access the Terminal utility through the applications search bar. Click the “Activities” tab which is located at the top-left corner of the Debian 11 desktop and type terminal or shell in the search bar. Then, select the simple gnome-terminal application from the displaying search results as shown in the following:
Using the “useradd” Command
The useradd command in Linux is used to manage the user accounts. In this method, we will see how to use this command to create a new user in Debian.
To add a new user in Linux, open the Terminal and run the useradd command as follows:
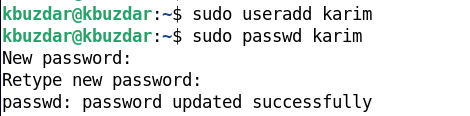
For instance, to add a user named “karim”, the command would be:
This creates the new user “karim”. After which, you can set a password for this account using the following command:
For instance, to add and set the password for the user “karim”, the command would be:
Then, set the password by typing and then retyping it to avoid any typos.
To create a new user with the home directory, use the useradd command with the -m option:
For instance, to create the user “karim” with the home directory, the command would be:
This command creates the home directory “/home/karim” for the user “karim”.

When you create a new user in Linux, the system automatically assigns a user ID (UID) to it. However, you can also create a new user with a specific user ID using the useradd command with the -u option:
For instance, to create a new user “karim” with UID “1005”, the command would be:
Using the “adduser” Command
In this method, we will use the adduser command to add a user on the Debian system.
To add a new user in Linux, open the Terminal and run the adduser command as follows:
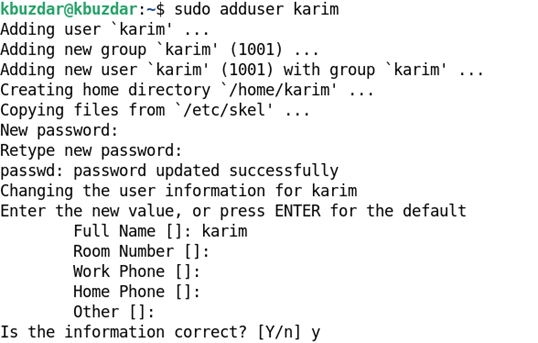
For example, to create a new user named “karim”, the command would be:
After you run the previous command, it will ask you to provide your sudo password. Provide the password and press Enter. After this, the new user is created on your Debian system. Then, you will set the password for the new user by typing and then retyping it to avoid any typos.
The message will appear on the Terminal saying that the “password updated successfully”. Now, you will be required to provide the information about the new user such as full name, phone number, etc. After you provide the information, you will be prompted to confirm. Press “y” and then press “Enter” to confirm that the provided info is correct.
Verify the User Account Creation
To verify the user account creation, use either of the following commands:
If the username exists, the command returns something like this:
![]()
Or
If the username exists, the command returns the user ID of the specified user.
![]()
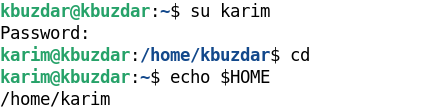
To verify if the home directory is created, switch to the new user account using the “su” command. Then, run the following command to view the home directory of the current user:
This returns the home directory for the current user.
You can also grant permission to newly created users using the command line. For instance, you create a Standard user and you want to grant it the sudo privileges. Then, using the following command, you can assign this user sudo privileges:
For instance, to assign the sudo privileges to new user “karim”, the command would be:

Now, the new user can perform the administrative tasks as well.
Adding New User on Debian 11 Through GUI
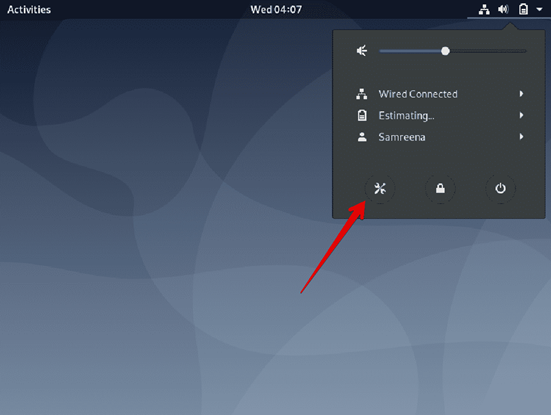
To add a new user on Debian11 through graphical method, go to the system settings. Click on the drop-down arrow in the upper-right corner of your desktop. And then, click on the settings icon from the dropdown menu as follows:
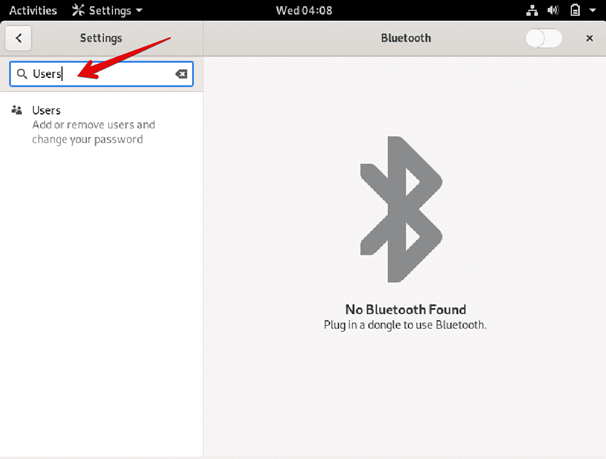
Now, in the Settings utility, you type the keyword users in the search bar. When you see the user’s icon in the search result, click it to open the User settings.
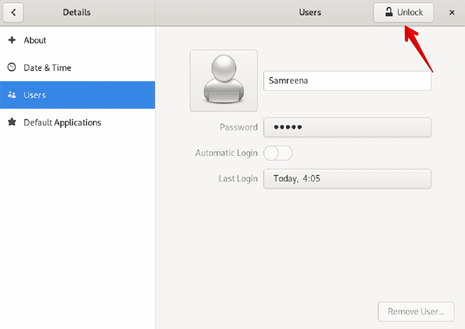
Click on the Unlock button in order to change the users’ settings.
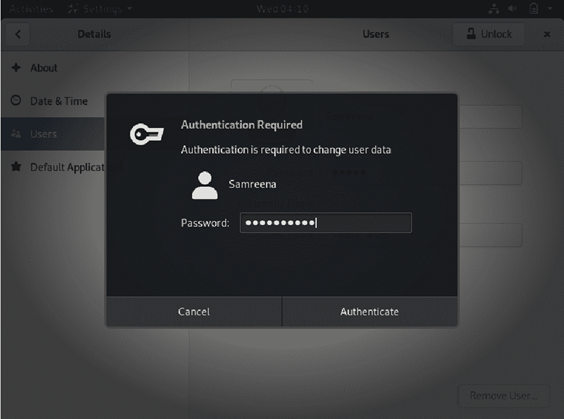
Provide the current user login password and click on “Authenticate” as follows:
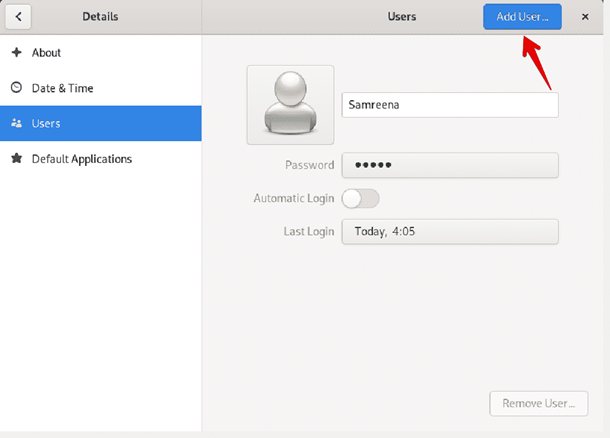
Now, the following window is displayed. Click on the “Add User” button as follows:
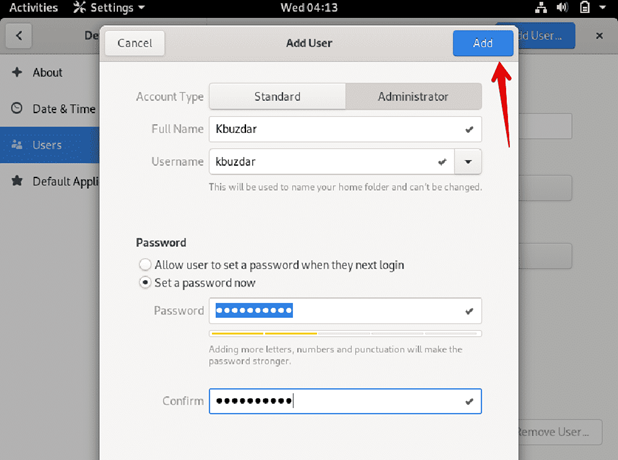
The following dialog appears for you to provide the information for the new user such as account type, Full Name, User name, and password if you want to set it now. Type the user information. Once done, click on the “Add” button.
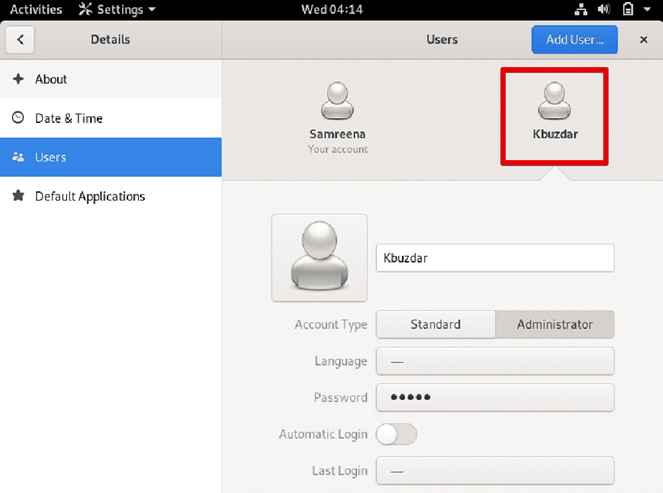
In the following window, you can see that the new user named “Kbuzdar” is created successfully.
Conclusion
While working on any Linux distribution, you should have the basic knowledge about the user management. In this article, you learned how to create a new user on Debian 11 using both ways: the command line method and the GUI. In addition, you also learned how to verify the user creation and assign the user administrator privileges. We hope that you like this article.
Source: linuxhint.com