How Do I Disable Radio Button Using JavaScript
This write-up illustrates the procedure to “disable” the radio button using JavaScript.
How Do I Disable Radio Button Using JavaScript?
The JavaScript “disabled” property can be used to disable/enable the HTML radio button. This property works on two parameters “true” and “false” to perform this functionality. The “true” value disables the radio button while the “false” button makes the radio button enabled. Once it is disabled, it looks grey by default in browsers.
This section uses the “true” value with the “disabled” property to disable the target radio button.
Let’s start with the first example.
Example 1: Use the “disabled” Property to Disable the Radio Button
In this example, the “disabled” property is used to disable the given radio button directly.
HTML Code
First, have a look at the stated code:
<button onclick="Disable()">Disable the Radio Button</button>
In the above code lines:
- The “<input>” tag with the type “radio” creates a radio button having the id “myRadio”.
- The “<br>” tags add the line breaks.
- The “<button>” tag includes a button with an “onclick” mouse event to execute the “Disable()” function when this event is fired.
JavaScript Code
Now, proceed with the below-stated code:
function Disable() {
document.getElementById("myRadio").disabled = true;
}
</script>
In the above code snippet, the “Disable()” function first utilizes the “getElementById()” method to access the added radio button using its “id” and then applies the “disabled” property having the value as “true” to disable it.
Output
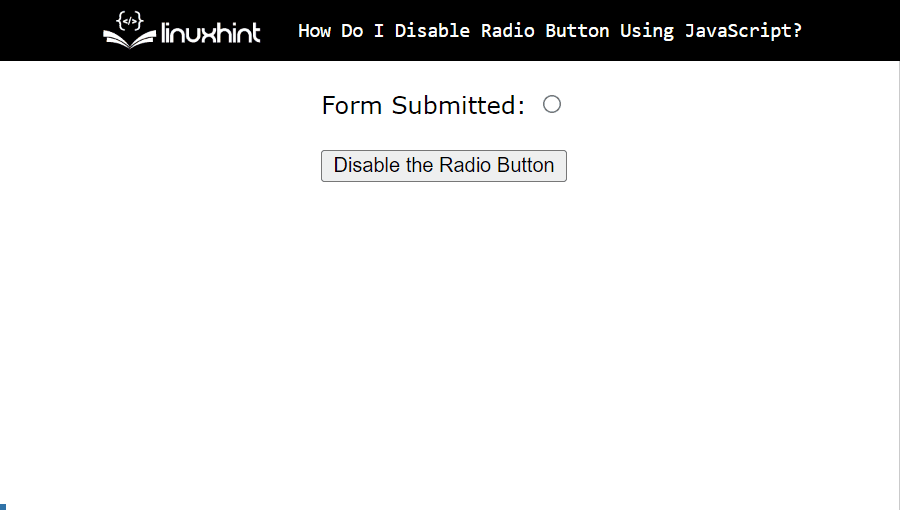
The output implies that the given radio button disables upon button click.
Example 2: Use the “disabled” Property and Checkbox to Disable the Radio Button
In the second example, a checkbox and the “disabled” property are utilized to disable the given radio button upon unchecking the given checkbox.
HTML Code
Overview of the below-given code:
Uncheck this checkbox:
<p><b>Languages</b></p>
<label><input type="radio" id="first" > HTML</label>
<label><input type="radio" id="second"> CSS</label>
<label><input type="radio" id="third"> JavaScript</label><br>
<p id="demo"></p>
According to the above code:
- The “<h3>” tag specifies a subheading.
- The “<input>” tag with the type “checkbox” adds a checkbox having the id “myCheck” and the “onchange()” event to invoke the “Disable()” function when it is triggered.
- The “<p>” tag defines a paragraph statement.
- The “<label>” tags specify the name of the added radio buttons using the “” element with the type “radio”.
- The “<p>” tag adds an empty paragraph with an assigned id “demo”.
JavaScript Code
Now, go through the following code:
function Disable(){
var t = document.getElementById("myCheck").checked;
if (t == false) {
document.getElementById("first").disabled = true;
document.getElementById("second").disabled = true;
document.getElementById("third").disabled = true;
document.getElementById("demo").innerHTML="All radio buttons have been disabled";
}
}
</script>
In the above code lines:
- The “Disable()” function accesses the created checkbox using its “id” and marks it “checked” with the help of the “checked” property.
- Next, the “if” statement specifies a condition that if the given checkbox value equals “false” i.e., unchecked, all the accessed radio buttons will be “disabled” due to the applied “disabled” property.
- Lastly, the fetched empty paragraph via the “getElementById()” method is appended with the stated statement.
Output

Here, the outcome disables all the radio buttons by unchecking the given checkbox.
Conclusion
To disable the radio button, use the JavaScript built-in “disabled” property by specifying its value to “true”. The user can disable the single/multiple radio button directly or with the help of an additional element i.e., a checkbox. This property can also be used in different scenarios to disable the radio button. This write-up illustrated the procedure to disable the radio button using JavaScript in detail.
Source: linuxhint.com