How Do I Create a New Database User in MySQL?
This write-up will provide the method for creating a new database user in MySQL.
How to Create/Make a New MySQL Database User?
Check out the below-given instructions to create a new database user in MySQL:
- Connect with the MySQL server through the default user “root” by providing its password.
- Run the “CREATE USER ‘<username>’@’localhost’ IDENTIFIED BY ‘password’;” command.
- Grant permissions using the “GRANT ALL PRIVILEGES ON *.* TO ‘<USERNAME>’@’localhost’ WITH GRANT OPTION;” command.
- Then, flush privileges.
- Display all database users list for verification.
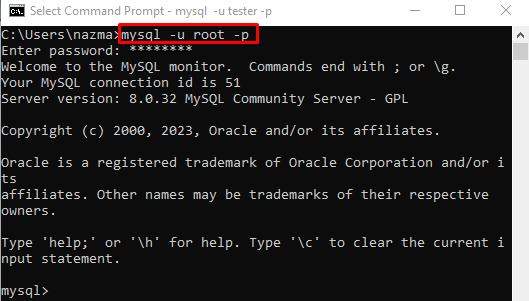
Step 1: Access MySQL Databases
Initially, launch the Windows terminal and then connect to the MySQL server through the provided command:
Here:
- “-u” represents the username.
- “root” is our database username.
- “-p” option indicates the user password.
When the above-stated command is executed, you have to specify the password:
Step 2: Create New User
Now, use the provided command to make a new user in the MySQL database:
In the above command:
- “CREATE USER” query is used for creating/making a new user.
- “tester” is our new username, and “‘@’localhost” indicates creating a user locally.
- “IDENTIFIED BY” option is utilized for specifying the password for a particular user.
From the given output, the “Query OK,……” indicates that the new user has been created successfully:

Step 3: Grant Privileges
Next, grant the privileges to the newly created user by running the “GRANT ALL PRIVILEGES” query:
Here:
- “GRANT ALL PRIVILEGES” grants all types of permissions to the user.
- “ON *.*” denotes that the grant permissions are applied to the database and tables that can be accessed.
- “tester’@’localhost’ WITH GRANT OPTION” shows that all privileges are assigned to provided username when a particular username is connected through the local host:

Step 4: Activate Privileges
Then, run the “FLUSH PRIVILEGES” command to activate all newly granted permission to the user before they access them:

Step 5: Verify New User
To ensure that the new database user is created or not, run the “SELECT” command:
As you can see, the newly created database user exists in the database list:

Step 6: Connect With MySQL Server With New User
Now, access the MySQL server with the new user by specifying the corresponding credentials:

That was all about creating a new database user in MySQL.
Conclusion
To create a new database user in MySQL, first, connect with the MySQL server through the default user “root” by providing its password. Then, use the “CREATE USER ‘<username>’@’localhost’ IDENTIFIED BY ‘password’;” command. After that, grant privileges through the “GRANT ALL PRIVILEGES ON *.* TO ‘<USERNAME>’@’localhost’ WITH GRANT OPTION;” command. Lastly, activate all added privileges by utilizing the “FLUSH PRIVILEGES” command. For verification, list all database users. This write-up provided the procedure to create a new database user in MySQL.
Source: linuxhint.com